Editor’s note: This article was last updated 16 November 2022 to reflect changes made since Firebase v9.

Google Docs is Google’s browser-based word processor that allows you to create, edit, download, share, and access documents online from any computer with internet connection.
In this tutorial, we’ll build a version of Google Docs using HTML, CSS, and JavaScript without a framework. To achieve this, we’ll use Firebase Cloud Firestore, a flexible, easy-to-use database for mobile, web, and server development.
Before we begin, if you’d like to take a peek at the full code for this tutorial, you can find it in the GitHub repo. Let’s get started!
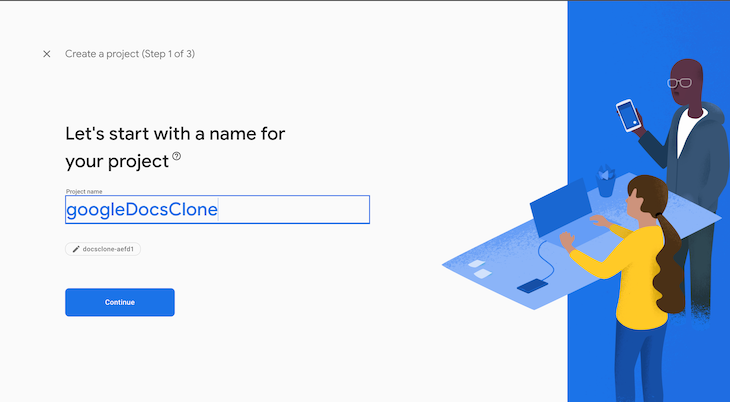
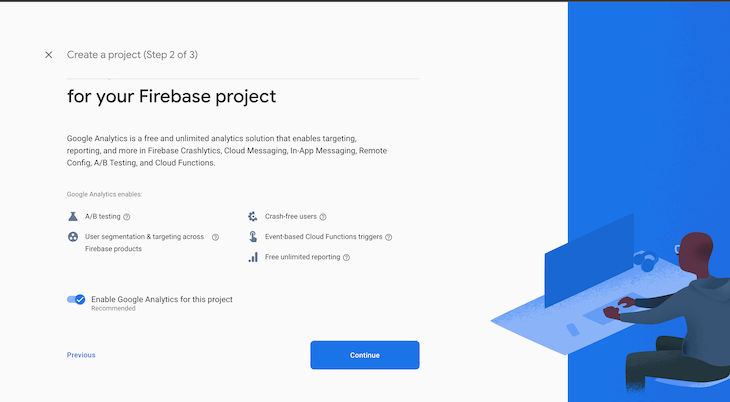
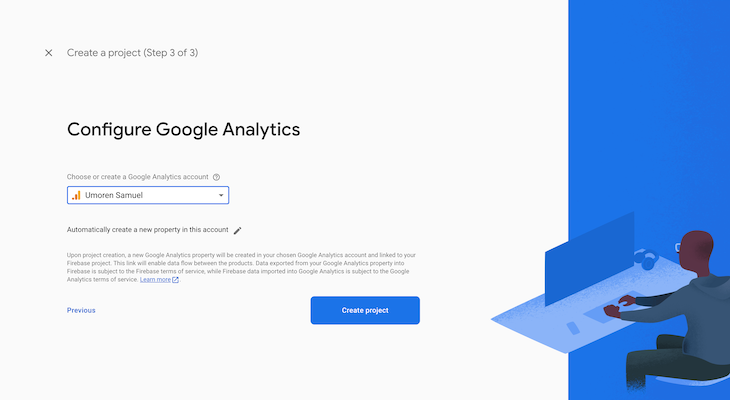
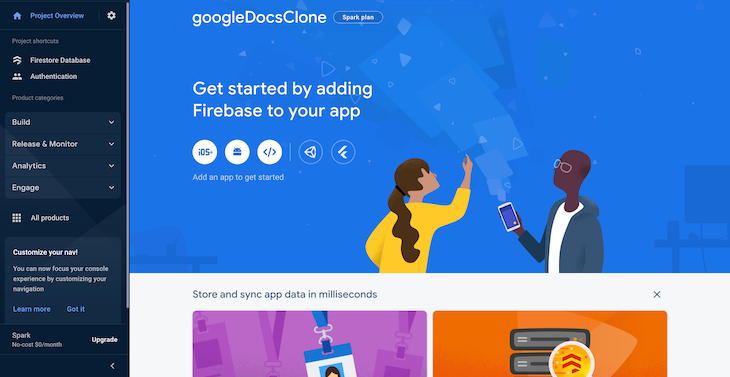
addDoc() functionFirst, let’s look at how to structure a Cloud Firestore Database. First, we’ll create a new Firebase project and configure Google Analytics:
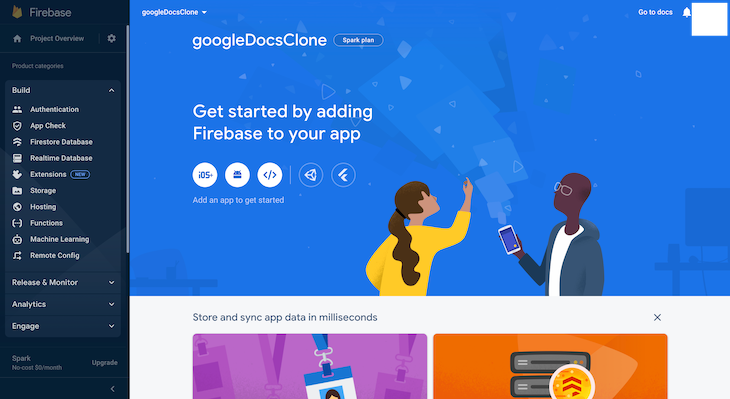
You’ll be redirected to the project console. On the left sidebar, click on Firestore Database:
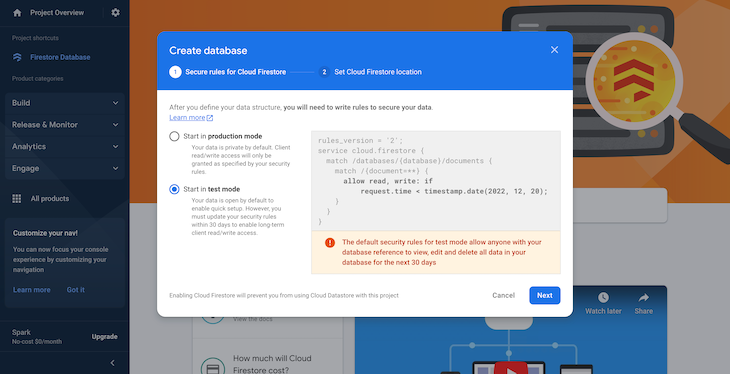
You’ll be redirected to the Firestore page. Click on the Create database button and select test mode in the popup. Click on the Next button:
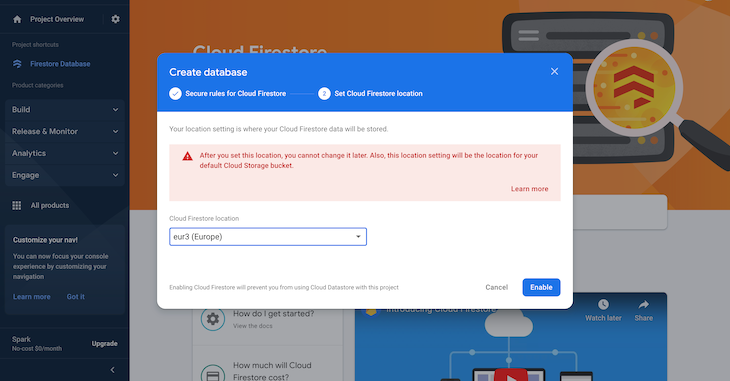
Select a Cloud Firestore location and click Next:
Click on the Enable button. You should see a page like the one below:
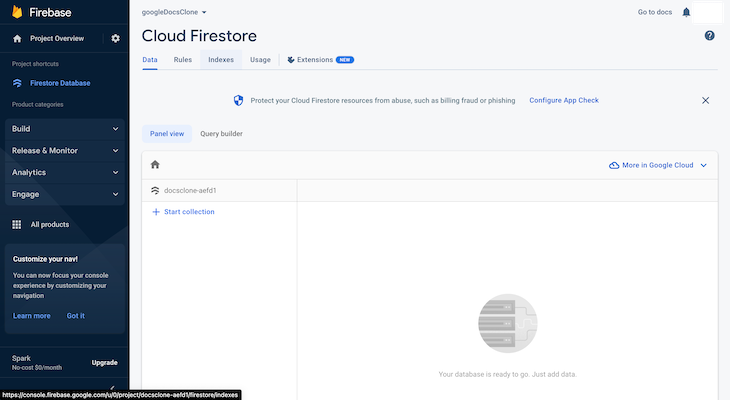
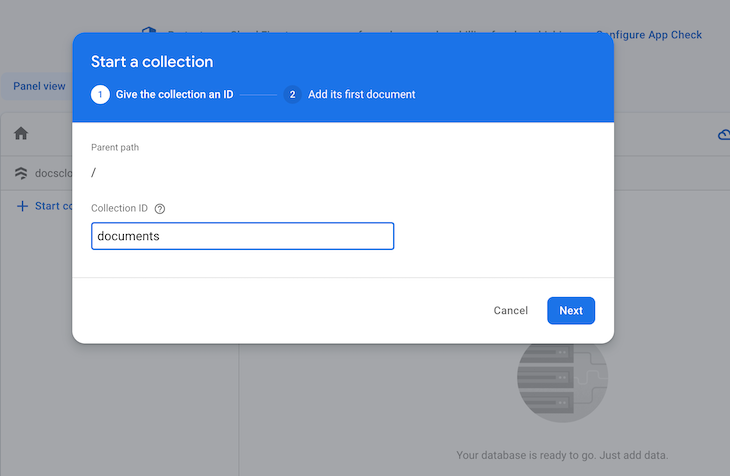
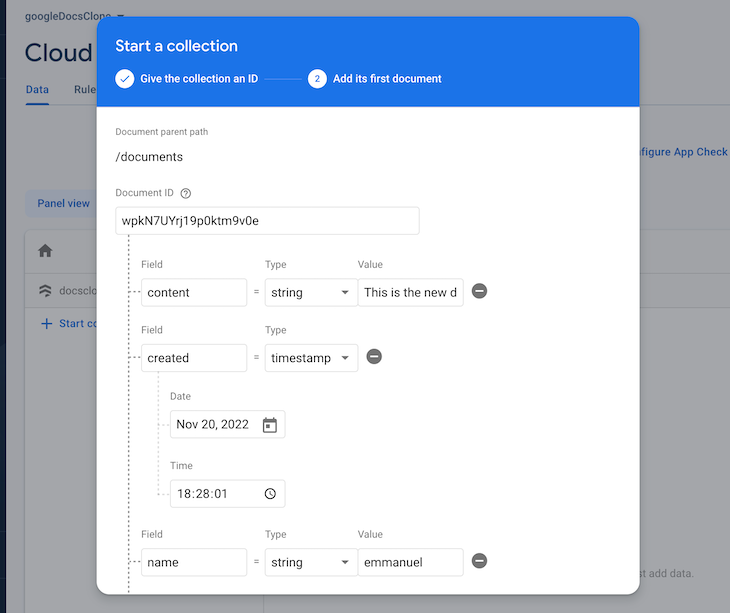
Click on the Start collection action. Create a collection with the following fields and dummy content:
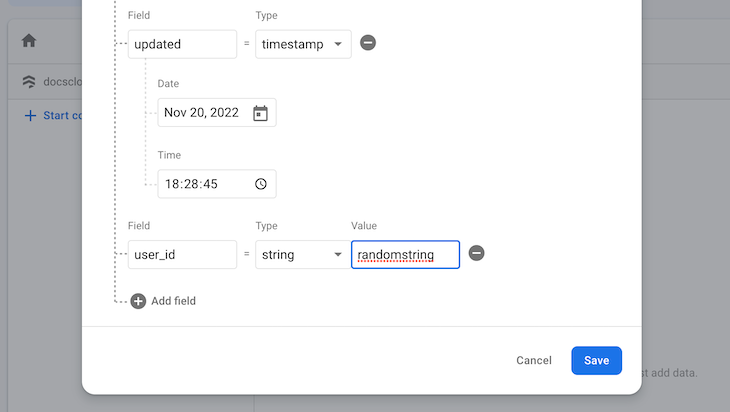
Click on the Save button:
We just performed Firestore data modeling. We created a top-level collection called Docs, which contains all the user’s documents. Next, we’ll add the unique identifier of the doc. It won’t be a random identifier, but a generated ID that is retrieved from an authenticated user, which will come in handy when we implement Google authentication in our project.
We also created a sub-collection called documents that contains the documents for an authenticated user. Lastly, we’ll add a unique identifier for the document. Under this section, we have fields like:
name: The name of the usercontent: The contents of the documentcreated: Timestamp of when the document was createdupdated: Timestamp of when the document was last updatedNow that we’ve structured our Cloud Firestore database, let’s take things a step further and enable Firebase Google Authentication in our Firebase project.
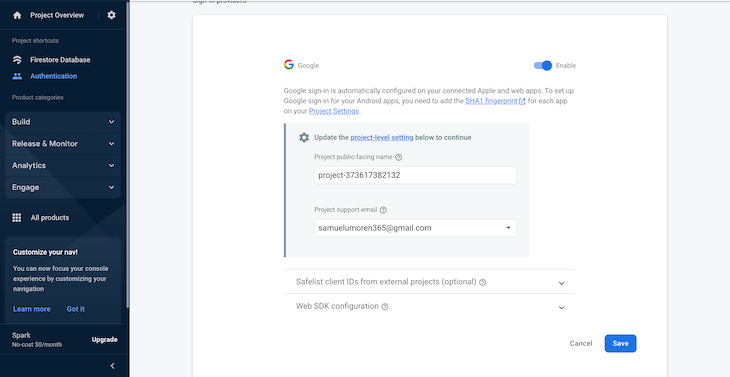
To achieve this, you can go to the Authentication tab on the dashboard’s sidebar and click on the Sign-in method tab. Next, select the Google button. A popup dialog will appear. Click on the Enable button and click Save to save the changes:

Go to your project folder and create files for signup.html, signup.css, firebase.js, and code.auth.js. First, let’s add Firebase to our project. Go to the Firebase Google console and copy the project config.
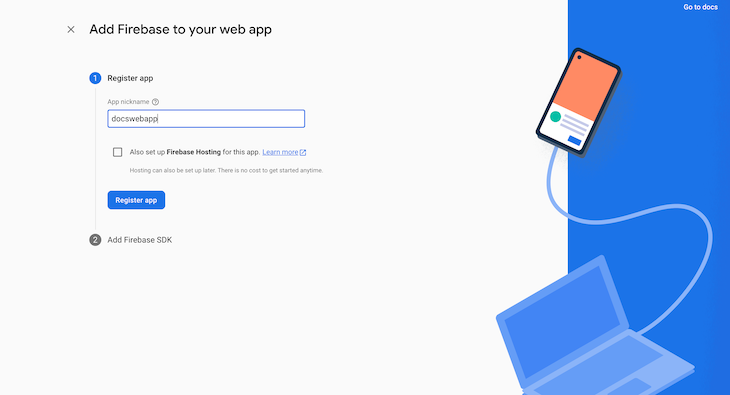
Head back to the Firebase project homepage in the console:
Register the app as follows:
Copy your credentials:
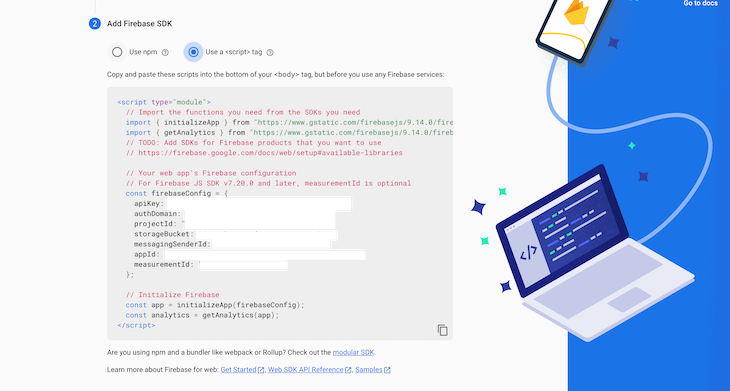
Paste the credentials inside your firebase.js file like in the code below:
import { initializeApp } from 'https://www.gstatic.com/firebasejs/9.14.0/firebase-app.js'
const firebaseConfig = {
        apiKey: 'project key',
        authDomain: 'project.firebaseapp.com',
        databaseURL: 'https://project.firebaseio.com',
        projectId: 'project',
        storageBucket: 'project.appspot.com',
        messagingSenderId: 'projectSenderId',
        appId: 'ProjectId'
};
initializeApp(firebaseConfig);
export default firebaseConfig;
Inside the signup.html file, add the following code:
<div class="google">
<button class="btn-google" id="sign-in">
<img src="image/Google.png" width="24" alt="" />
<span>Sign up with Google</span>
</button>
</div>
In the code above, we have a div with a google class and a button with a btn-google class. We also have a sign-up ID. The div is the container that wrapped the auth button. Now, let’s implement the Google auth function. Inside the auth.js file, copy and paste the code below:
import { signInWithPopup, GoogleAuthProvider, getAuth } from '<https://www.gstatic.com/firebasejs/9.14.0/firebase-auth.js>'

const signInGoogleButton = document.getElementById('sign-in');

// Google auth login
export function authenticateWithGoogle() {
        // eslint-disable-next-line no-undef
        const provider = new GoogleAuthProvider();
        const auth = getAuth();
        // eslint-disable-next-line no-undef

        signInWithPopup(auth, provider)
                .then(function (result) {
                        window.location.href = '../index.html';
                        console.log('working', result)
                })
                .catch(function (error) {
                        const errorCode = error.code;
                        const errorMessage = error.message;
                        const email = error.email;
                        const credential = error.credential;
                        console.log(errorCode, errorMessage, email, credential);
                });
}

signInGoogleButton.addEventListener('click', authenticateWithGoogle);
In the code above, we created a function called Google authentication(). When a user clicks on the Google sign-up button on the project webpage, the function triggers the Firebase Google popup. If the sign-up is successful, the developer console will log the user in and close the popup.
Now that we’ve implemented our Google sign-up, let’s move on to the next task.
We’ll create a basic text editor that allows us to type and edit words. Let’s start by creating an editor.html file and writing the code below:
<div class="edit-content"> <p class="loading" id="loading">Saving document....</p> <div class="editor" contenteditable="true" id="editor"></div> </div>
In the code above, we create a div, bind a contenteditable attribute, and set the value to true. The contenteditable attribute turns any container into an editable text field. Looking at our webpage, we can see that the div has turned into an editable text field. Next, we’ll implement text formatting features like italics, bold, text align, etc.
boldThe first text format we’ll implement is bold:
<a href="javascript:void(0)" onclick="format('bold')">
  <span class="fa fa-bold fa-fw"></span>
</a>
The code above is a built-in JavaScript function that takes an appropriate value and formats it when the function is called.
italicThe italic function italicizes text. Whenever text is highlighted, the function is fired:
<a href="javascript:void(0)" onclick="format('italic')">
<span class="fa fa-italic fa-fw"></span>
</a>
The unorderedlist function adds bullet points to a text, while the orderedlist function adds numbers to a text:
<a href="javascript:void(0)" onclick="format('insertunorderedlist')">
  <span class="fa fa-list fa-fw"></span>
</a>
<a href="javascript:void(0)" onclick="format('insertOrderedList')">
  <span class="fa fa-list-ol fa-fw"></span>
</a>
Justify Left, Justify Full, Justify Center, and Justify RightFrom the name of the function, we can tell that the Justify Left function aligns text to the left. By default, all text is aligned to the left, so we might not notice the changes.
The Justify Full function justifies a text, Justify Center centers text in the center, and Justify Right justifies a text to the right, respectively:
<a href="javascript:void(0)" onclick="format('justifyLeft')">
  <span class="fa fa-align-left fa-fw"></span>
</a>

<a href="javascript:void(0)" onclick="format('justifyFull')">
  <span class="fa fa-align-justify fa-fw"></span>
</a>

<a href="javascript:void(0)" onclick="format('justifyCenter')">
<span class="fa fa-align-center fa-fw"></span>
</a>

<a href="javascript:void(0)" onclick="format('justifyRight')">
  <span class="fa fa-align-right fa-fw"></span>
</a>
underlineThe underline function underlines a text when the function is fired:
<a href="javascript:void(0)" onclick="format('underline')">
  <span class="fa fa-underline fa-fw"></span>
</a>
The Change Font size is a select drop-down that displays different font sizes and takes the value of the selected size. It applies this to the highlighted text. The Select Font function is a select drop-down that shows different fonts. It takes the selected font value and applies it to the highlighted text:
<input class="color-apply" type="color" onchange="chooseColor()"
id="myColor"/>
<select id="input-font" class="input" onchange="changeFont (this);">
    <option value="Arial">Arial</option>
    <option value="Helvetica">Helvetica</option>
    <option value="Times New Roman">Times New Roman</option>
    <option value="Sans serif">Sans serif</option>
    <option value="Courier New">Courier New</option>
    <option value="Verdana">Verdana</option>
    <option value="Georgia">Georgia</option>
    <option value="Palatino">Palatino</option>
    <option value="Garamond">Garamond</option>
    <option value="Comic Sans MS">Comic Sans MS</option>
    <option value="Arial Black">Arial Black</option>
    <option value="Tahoma">Tahoma</option>
    <option value="Comic Sans MS">Comic Sans MS</option>
</select>
<select id="fontSize" onclick="changeSize()">
    <option value="1">1</option>
    <option value="2">2</option>
    <option value="3">3</option>
    <option value="4">4</option>
    <option value="5">5</option>
    <option value="6">6</option>
    <option value="7">7</option>
    <option value="8">8</option>
</select>
With the setup above, we should have something that looks like the following:
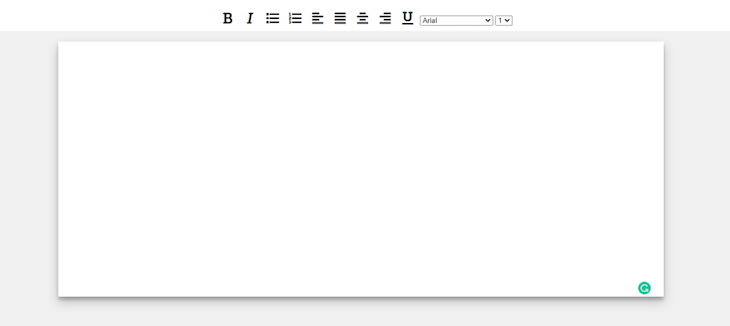
In the image above, we can see the editor field and the toolbar that have the different text formatting options.
At this point, if we type and implement the different text formats on the text, we’ll notice that nothing happens. The reason is that we haven’t yet implemented either the JavaScript built-in function or the helper function that gets the document and the command, applying the command to the document.
Create a main.js file and write the code below:
function format(command, value) {
  document.execCommand(command, false, value);
}
The Format function runs each time a text format is clicked. The function takes in two arguments, a command and a value. The command is the name of the text format that was fired, and the value is the text that was highlighted.
The document.execCommand only returns true if it is invoked as part of a user interaction.
function changeFont() {
  const Font = document.getElementById('input-font').value;
  document.execCommand('fontName', false, Font);
}

function changeSize() {
  const size = document.getElementById('fontSize').value;
  document.execCommand('fontSize', false, size);
}
The first helper function is the changeFont function, which runs when the changeFont format is fired. It takes the selected font and applies it to the highlighted text.
The second function is the changeSize function. It works the same way as the changeFont function, instead changing the font size of the highlighted text.
If we type any text and apply any of the formatting options, we should see the formatting applied to the text that was highlighted.
Now, we have implemented the text editor and some text formatting. Next, we‘ll look at saving the document to the Firebase Cloud Firestore Database that we structured.
Let’s implement saving a document to Firestore when a user creates a document. You’ll recall that when creating the editable div with the contenteditable attribute, we gave it an id attribute. We‘ll listen to the editable div and get the value as the user is creating a document using the id attribute.
First, we’ll check if the user is authorized or not. If the user is authorized, we get the id of the user and assign it to a variable inside the the main.js folder:
let userId = '';
let userName = '';
firebase.auth().onAuthStateChanged(function(user) {
  if (user) {
    userId = user.uid;
    userName = user.displayName;
    init();
  } else {
    console.log(user + '' + 'logged out');
  }
});

function init(){
  const token = localStorage.getItem('token');
  if(!token){
    const docId = firebase.firestore().collection('docs')
                                      .doc(userId)
                                      .collection('documents')
                                      .doc().id;
      localStorage.setItem('token', docId);
    }else{
        delay(function(){
          getSingleDocDetails(token);
        }, 1000 );
    }
}
The firebase.auth().onAuthStateChanged function is a Firebase function that checks if the user is logged in or not. If the user exists, we get a user.id and assign the id to a variable called userId that we created above.
The init() function checks if there is a document id stored inside localStorage. If there is not, it creates a doc id from Firestore and sets it inside localStorage. If there is, it calls the getSingleDocDetails() function. We’ll look at the getSingleDocDetails() function later on.
To get and save user documents, inside the the main.js folder, write the code below:
const editor = document.getElementById('editor');
let dos = '';

editor.addEventListener('input', e => {
  dos = e.target.innerHTML;
  delay(function(){
    addDoc(word);
  }, 1000 );
});

var delay = (function(){
  var timer = 0;
  return function(callback, ms){
    clearTimeout (timer);
    timer = setTimeout(callback, ms);
  };
})();
We created a variable called editor. We assign the value to be the div with the contenteditable attribute using the id attribute we assigned.
document.getElementById searches for an HTML tag with the id name that was passed to it.
Next, we listened to the div to find out when the user has started typing by calling an event listener editor.addEventListener(input, (e)).
The .addEventListener(input, (e)) event listens to any change made inside the editable filed. Once the change is made, we targeted the div innerHtml and passed the value as a parameter to a function.
Keep in mind that we used .innerHTML and not .value because we are working with a div. We also called the delay() function, which stops the addDoc() function so that it waits until a user finishes typing before saving the data to Cloud Firestore.
addDoc() functionfunction addDoc(word) {
const docId = localStorage.getItem('token');
firebase
.firestore()
.collection('docs').doc(userId)
.collection('documents').doc(docId).set({
name: userName,
createdAt: new Date(),
updated: new Date(),
content: word,
})
.then(() => {
loading.style.display = 'none';
})
.catch(function(error) {
console.error('Error writing document: ', error);
});
}
Inside the addDoc() function, we first get the ID that we created from the local storage. Next, we call the Firebase query function .set() and pass the currently logged-in user’s ID as an argument at the first .doc() method, as well as the docId that was created as an argument at the second .doc().
We set the name of the document as the userName of the currently logged-in user, which is then created as a new Date() object. Then, it’s updated as the new Date object. Lastly, the content is updated as the document that was created by the user.
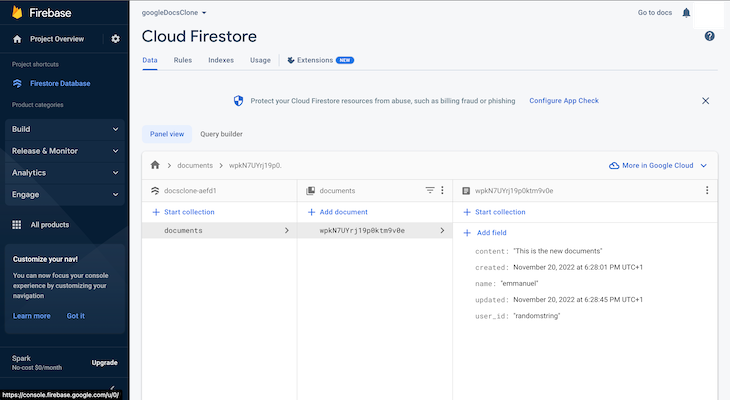
If we check the Firestore database, we’ll see the document saved. Next, we’ll see how we can retrieve our data from Cloud Firestore.
Before fetching the user’s document, we’ll implement the dashboard page with the code below:
<nav class="navbar">
      <div class="nav-col-logo">
        <a href="#"><i class="fa fa-book"></i> GDocs</a>
      </div>
      <div class="nav-col-input">
        <form id="searchForm">
          <input type="search" placeholder="Search" id="search" />
        </form>
      </div>
      <div class="nav-col-img">
        <a href="#"><i class="fa fa-user"></i></a>
      </div>
    </nav>
    <div class="documents">
      <div class="section group">
        <div class="col span_1_of_3"><h4>Today</h4></div>
        <div class="col span_1_of_3"><h4>Owned by anyone</h4></div>
        <div class="col span_1_of_3"><h4>Last opened</h4></div>
      </div>
      <div id="documents"></div>
    </div>
    <div class="creat-new-doc">
      <button class="btn-color" type="button" id="createNewDoc">
        +
      </button>
    </div>
If the code above has been implemented, we should have something like the image below in our webpage:
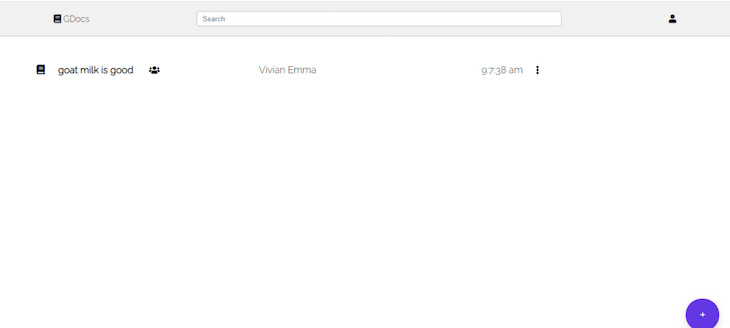
In the image above, we can see the button with a blue background. The button takes the user to the editor page where they can create a new document. The default data above shows how the document layout will be displayed after we fetch the document that was created by a user and save it to Cloud Firebase.
To get the actual data, start with the code below:
let holdDoc = [];
function getDocuments(id) {
        const q = query(collection(firestore, 'docs', id, 'documents'));
        const unsubscribe = onSnapshot(q, (querySnapshot) => {
                querySnapshot.forEach((doc) => {
                        let dcus = doc.data();
                        dcus.id = doc.id;
                        holdDoc.push(dcus);
                        showDoc();
                });
        });
}
We created a function called getDocument(); inside, we queried Firestore using a collection reference. Next, we loop that through the object we got and push it to an empty array we created, as well as the doc ID. Then, we call the showDoc() function that displays the actual data. Now, let’s display the actual data as follows:
const docBook = document.getElementById('documents');
function showDoc() {
  docBook.innerHTML = null;
  for (let i = 0; i < holdDoc.length; i++){
    let date = new Date( holdDoc[i].updated.toMillis());
    let hour = date.getHours();
    let sec = date.getSeconds();
    let minutes = date.getMinutes();
    var ampm = hour >= 12 ? 'pm' : 'am';
    hour = hour % 12;
    hour = hour ? hour : 12;
    var strTime = hour + ':' + minutes + ':' + sec + ' ' + ampm;
    let subString = holdDoc[i].content.replace(/^(.{14}[^\\s]*).*/, '$1');
    docBook.innerHTML += `
      <div class="section group">
        <div class="col span_1_of_3">
          <p><a id="${holdDoc[i].id}" onclick="onclick="localStorage.setItem('token', id); window.location.href = '../editor.html'">
            <i class="fa fa-book"></i>
              ${subString}
            <i class="fa fa-users"></i>
          </a></p>
        </div>
        <div class="col span_1_of_3">
          <p>${holdDoc[i].name}</p>
        </div>
        <div class="col span_1_of_3">
          <div class="dropdown">
            <p> ${strTime}
              <i class="fa fa-ellipsis-v dropbtn"
                onclick="myFunction()" >
              </i>
            </p>
            <div id="myDropdown" class="dropdown-content">
              <a href="#" target="_blank" >Delete Doc</a>
              <a href="#">Open in New Tab</a>
            </div>
          </div>
        </div>
      </div>
       `;
  }
}
We first get the ID of the div where we want to display the document. After that, we called the showDoc() function. Inside the showDoc() function, we first loop through the object we got, and then we append it to the variable that we created. If we load the webpage, we can see the data being displayed.
Looking at the showDoc() function we wrote, we can see that we passed the ID of the document inside a function as a parameter. Then we called the function outside. Inside the function, we get the id and store it inside localStorage. Then, we can navigate the user to the editor page.
Inside the editor.js page, write the code below:
function getSingleDocDetails(docId){
  firebase
    .firestore()
    .collection('docs')
    .doc(userId)
    .collection('documents')
    .doc(docId)
    .get()
    .then((doc) => {
      if (doc.exists) {
        editor.innerHTML += doc.data().content;
      } else {
        console.log('No such document!');
      }
    }).catch(function(error) {
      console.log('Error getting document:', error);
    });
}
Inside the editor page, we define an init() function that checks if there is an id stored in the localStorage. If there is, it calls the getSingleDocDetails() function and fetches the document from cloud Firestore, displaying it for the user to continue. If the user make any changes, it will update the document.
Let’s look at how we can implement online and offline editing. We still want to be able to save the user’s document if the user goes offline, and be able to sync it to Firebase if your user comes back online without interrupting the user. To achieve this, write the code below:
function updateOnlineStatus() {
  }
updateOnlineStatus();
In the code above, we first created a function called updateOnlineStatus() and called the function outside the scope. Now, we’ll copy the method that gets the users’ document and pastes it inside the function, just like the code below:
function updateOnlineStatus() {
  editor.addEventListener('input', e => {
      dos = e.target.innerHTML;
      delay(function(){
        addDoc(dos);
      }, 1000 );
    });
  }
After that, we’ll listen to the browser to track when the user is online and offline. Write the code below:
editor.addEventListener('input', e => {
      dos = e.target.innerHTML;
      delay(function(){
        addDoc(dos);
      }, 1000 );
   if (navigator.onLine === true) {
      const word =  localStorage.getItem('document');
      addDoc(word);
      localStorage.removeItem('document');

      return;
    } else {
      localStorage.setItem('document', dos);

      return;
    }

});
We used an if statement to check if the navigator.online === true. navigator.online is a property that returns a true or false value. The true value returns when a user is online, and the false value returns when a user is offline.
We set the condition to check if the user is online while editing or creating a document. If the user is online, we get the document from local storage and send it to Cloud Firestore. But, if the user is offline, we continue to save the document to local storage.
In this article, we learned how to create a basic text editor. We learned how to structure a cloud Firestore database, how to use the Firebase .set() method, and how to integrate online and offline editing. I hope you enjoyed this article, and be sure to leave a comment if you have any questions.
As web frontends get increasingly complex, resource-greedy features demand more and more from the browser. If you’re interested in monitoring and tracking client-side CPU usage, memory usage, and more for all of your users in production, try LogRocket.

LogRocket lets you replay user sessions, eliminating guesswork around why bugs happen by showing exactly what users experienced. It captures console logs, errors, network requests, and pixel-perfect DOM recordings — compatible with all frameworks.
LogRocket's Galileo AI watches sessions for you, instantly identifying and explaining user struggles with automated monitoring of your entire product experience.
Modernize how you debug web and mobile apps — start monitoring for free.
Debugging code is always a tedious task. But the more you understand your errors, the easier it is to fix them.
LogRocket allows you to understand these errors in new and unique ways. Our frontend monitoring solution tracks user engagement with your JavaScript frontends to give you the ability to see exactly what the user did that led to an error.

LogRocket records console logs, page load times, stack traces, slow network requests/responses with headers + bodies, browser metadata, and custom logs. Understanding the impact of your JavaScript code will never be easier!
Hey there, want to help make our blog better?
Join LogRocket’s Content Advisory Board. You’ll help inform the type of content we create and get access to exclusive meetups, social accreditation, and swag.
Sign up now
<selectedcontent> element improves dropdowns

Learn how to implement an advanced caching layer in a Node.js app using Valkey, a high-performance, Redis-compatible in-memory datastore.

Learn how to properly handle rejected promises in TypeScript using Angular, with tips for retry logic, typed results, and avoiding unhandled exceptions.

AI’s not just following orders anymore. If you’re building the frontend, here’s how to design interfaces that actually understand your agent’s smarts.


10 Replies to "Build a Google Doc clone with HTML, CSS, and JavaScript"
Hello Vivian!
To use firebase firestore do we need a blaze (pay as you go) account?? Some time ago I couln’t deploy my app because firebase says that I can only deploy if I change my free plan to blaze.
P.D. I don’t change to blaze because I don’t have a credit/debit card
You don’t need to be on Blaze plan to make use of firebase unless you are working with cloud functions or some other feature that requires a change in plan.
Great write-up!!!
Thank you for the info!!!
Where is your CSS file?
It’s there on my Repository
Nice job 🙂 but I would like to see the full code.. Do you have a link where I can find it?
Great example!!! Thanks a lot…
Any tips of Firebase data model for sharing documents with different users fr viewing, editing?
can u please tell me the linking of all these codes . And also where to put the code “getting actual data ” code and others afterward.
Sadly I would not recommend this as a tutorial for newbies. Some of the code in the article is out of sync with what is on github, and the Firebase instructions are a bit incomplete. When I cloned the repository and tried to run it locally there were runtime errors that needed debugging – I think they were about having to call initializeApp before calling getAuth. But if you are a fairly experienced programmer it’s a pretty decent demo of using Firebase and building a text editor. For a guide to emulating the document and folder framework, I recommend the google drive clone youtube video by Web Dev Simplified.