Editor’s note: This article was last updated by Oyinkansola Awosan on 5 March 2024 to feature common pitfalls that occur when using localStorage in React, such as the “localStorage is not defined” error, as well as how to clear localStorage in React.

localStorage is one of the two mechanisms of a browser’s web storage. It allows users to save data as key-value pairs in the browser for later use.
Unlike the sessionStorage mechanism, which persists data in the browser storage as long as the current browser tab is running, localStorage does not clear data when the browser closes. This makes it ideal for persisting data not bound to the current browser tab.
Developers often implement localStorage when adding a dark mode feature to an application, persisting a to-do item, or persisting a user’s form input values, among many other use cases.
In this guide, we’ll cover how to use localStorage to persist a user’s form input in the browser storage using React Hooks. We’ll also cover how to create a custom React Hook to share similar logic between multiple components.
localStorage with React Hooks prerequisitesTo follow this guide, ensure you have a basic understanding of React and React Hooks. Also, ensure you have Node.js installed on your computer.
localStorage project setupWorking with a fresh React application, let’s head over to the computer terminal and run the following command to create a new React project:
npx create-react-app localstorage-react-hook
Once the project folder is generated, open it with a code editor and start the development server by running the npm start command.
The project should launch in the browser at http://localhost:3000/.
As mentioned earlier, we will use localStorage to persist a user’s form input in the browser storage.
Like every React application, our focus is on the src folder. So, let’s delete all the files inside the src and create an index.js file inside src to avoid a frontend break.
Then, add the following code to index.js:
import React from "react";
import ReactDOM from "react-dom";

import App from "./components/App";
// styles
import "./app.css";

ReactDOM.render(
  <React.StrictMode>
    <App />
  </React.StrictMode>,
  document.getElementById("root")
);
Notice that we imported a CSS file to add styling to the app. So, let’s create an app.css folder in the src folder. Copy the styles from the localstorage-react-hook-project and add them to the app.css file.
Next, create a components folder in the src folder to hold the component files. Then, add an App.js file and a Form1.js file. The App.js file is the root and parent component while Form1.js will hold the form inputs.
Add the following code in the components/App.js file:
import Form1 from "./Form1";

const App = () => {
  return (
    <div className="container">
      <h1>localStorage with React hooks</h1>
      <Form1 />
    </div>
  );
};
export default App;
And finally, add this code to the components/Form1.js file:
import { useState } from "react";

const Form1 = () => {
  const [name, setName] = useState("");

  return (
    <form>
      <input
        type="text"
        value={name}
        onChange={(e) => setName(e.target.value)}
        placeholder="Full name"
        aria-label="fullname"
      />
      <input type="submit" value="Submit"></input>
    </form>
  );
};

export default Form1;
After saving the files, test the project and you should see this rendering:
The code above is the simplest implementation of the form inputs in React. By using the useState React Hook to control the component, we keep the input state up to date on every keystroke, as seen above.
But, once we trigger a page refresh, the input data clears, which is expected. To persist the input data so it’s available on a page reload or on subsequent revisits, we must save the data in localStorage.
localStoragelocalStorage gives us access to a browser’s Storage object. The Storage object has methods available to save, read, and remove data, among many other actions.
To see a list of the Storage methods, open the browser console and type localStorage. After pressing enter, the methods become available on the Storage object’s prototype.
setItem() methodTo store the form input data in the browser storage, we must invoke the setItem() storage method by using the following syntax:
localStorage.setItem("key", "value")
The browser storage only accepts data-type strings. So, for values of different data types like the object or array, we must convert it to a JSON string using JSON.stringify().
useEffect Hook to perform side effectsWe can also use the useEffect React Hook to perform side effects, such as storing data in the browser storage. This makes this Hook a perfect place to call the setItem method.
Open the components/Form1.js file and add the following code above the return statement:
useEffect(() => {
  // storing input name
  localStorage.setItem("name", JSON.stringify(name));
}, [name]);
Make sure to import the useEffect from React like so:
import { useState, useEffect } from "react";
Here, we’ve assigned a key, "name", and a dynamic value from the state variable, which is name. The initial value of the name state variable defaults to an empty string:
const [name, setName] = useState("");
Using JSON.stringify in the setItem is optional when saving string data to the storage:
localStorage.setItem("name", JSON.stringify(name));
However, JSON.stringify is required if the value is a different data type, like an object or array. Now, save the file and test the project; we should see the following render:
On every keystroke, the input value is saved in the local storage because the useEffect Hook holding the setItem storage method runs on the first component render and after every state change.
However, on a page reload, the value in the storage returns to an empty string. This is happening because we’ve assigned a default empty string to the state variable, name. Hence, React uses the empty value on the initial render.
Now, instead of assigning an empty string, we must get the updated state value at every point from the storage and assign it as the default state value.
localStorageOn an initial page load, instead of assigning an empty string to the name state variable, we must assign a function that accesses the local storage, retrieves the saved value, and uses that value as the default.
getItem() methodUpdate the useState Hook in the components/Form1.js file:
const [name, setName] = useState(() => {
  // getting stored value
  const saved = localStorage.getItem("name");
  const initialValue = JSON.parse(saved);
  return initialValue || "";
});
Here, we use the getItem() storage method to retrieve data from the local storage. The JSON.parse() used in the code deserializes the returned JSON string from the storage. Both JSON.stringify and JSON.parse are optional when working with string values, as seen in our case. However, other data types, like objects and arrays, require them.
Save the file and test the project. The input data should be available in the form field on a page reload or a later page visit:

Sometimes we might want to render and persist more form inputs — such as a text input and a checkbox input — in a different component. While we could easily copy the logic from the one we’ve already created and use it in the new component, it’s not always practical, especially if we decide to create more of these inputs.
Instead, React allows us to extract and share similar logic between components using custom Hooks. In this section, we will learn how to create a custom Hook to persist form inputs in multiple components.
Let’s start by creating another form. In the src/components folder, create a new file called Form2.js and add the following code:
import { useState } from "react";

const Form2 = () => {
  const [name, setName] = useState("");
  const [checked, setChecked] = useState(false);

  return (
    <form>
      <input
        type="text"
        value={name}
        onChange={(e) => setName(e.target.value)}
        placeholder="Full name"
        aria-label="fullname"
      />
      <label>
        <input
          type="checkbox"
          checked={checked}
          onChange={(e) => setChecked(e.target.checked)}
        />{" "}
        Not a robot?
      </label>
      <input type="submit" value="Submit"></input>
    </form>
  );
};

export default Form2;
Then, import and use the component in the components/App.js file:
// ...
import Form2 from "./Form2";

const App = () => {
  return (
    <div className="container">
      {/* ... */}
      <Form2 />
    </div>
  );
};
export default App;
Save the files and view the form in the frontend:
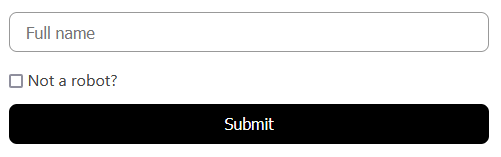
Interacting with this form does not persist the state value in localStorage because we don’t have the logic yet. So, let’s define a single logic to manage all our form inputs.
localStorage logicTo begin extracting the localStorage logic, create a file called useLocalStorage.js in the src folder and add the following code:
import { useState, useEffect } from "react";

function getStorageValue(key, defaultValue) {
  // getting stored value
  const saved = localStorage.getItem(key);
  const initial = JSON.parse(saved);
  return initial || defaultValue;
}

export const useLocalStorage = (key, defaultValue) => {
  const [value, setValue] = useState(() => {
    return getStorageValue(key, defaultValue);
  });

  useEffect(() => {
    // storing input name
    localStorage.setItem(key, JSON.stringify(value));
  }, [key, value]);

  return [value, setValue];
};
Taking a closer look at the code above, we’ve only extracted the storage logic from the components/Form1.js file. We haven’t done anything special.
By creating a custom Hook called useLocalStorage, we maintain all the storage logic we have in the Form1 component. Note that you can name your custom Hook anything, but ensure you start with use.
The useLocalStorage Hook expects two arguments: the key and the defaultValue. This means we expect to pass these values when calling the Hook in our different components.
useLocalStorage custom HookIn the components/Form1.js file, replace the logic above the return statement with the custom Hook so you have the following:
import { useLocalStorage } from "../useLocalStorage";

const Form1 = () => {
  const [name, setName] = useLocalStorage("name", "");

  return (
    <form>
      {/* ... */}
    </form>
  );
};

export default Form1;
After importing the custom Hook, we can use it and pass along the unique key and the default value, which, in this case, is an empty string.
If we do the same for the Form2 component in the components/Form2js file, we should have the following:
import { useLocalStorage } from "../useLocalStorage";

const Form2 = () => {
  const [name, setName] = useLocalStorage("name2", "");
  const [checked, setChecked] = useLocalStorage("checked", false);

  return (
    <form>
      {/* ... */}
    </form>
  );
};

export default Form2;
Save all the files and test the project. We should be able to persist all the form inputs in localStorage:
Good job!
localStorage for an SSR applicationWhen working with a framework like Next.js that executes code on the server side, using localStorage produces an error stating, “window is not defined.”
localStorage, as used in our code, is a built-in property of the window object, window.localStorage. In our code, we ignored window while accessing localStorage because it’s a global object; we can choose to include the window object because it’s optional.
Now, this window object is not available on the server side but rather the client side/browser, which prompts the error. To fix the error on the server side, check whether the window object is defined. This way, our code only runs on the environment where the window is available.
Open the src/useLocalStorage.js file and update the getStorageValue() function so you have the following:
function getStorageValue(key, defaultValue) {
  // getting stored value
  if (typeof window !== "undefined") {
    const saved = localStorage.getItem(key);
    const initial = saved !== null ? JSON.parse(saved) : defaultValue;
    return initial;
  }
}
Don’t forget that we’ve also used the localStorage inside the useEffect Hook in the useLocalStorage.js file. But in this case, the localStorage is safe because the useEffect Hook only runs on the client side, where we have access to the window object.
Test the project to ensure everything still works as expected.
localStorage is not definedThe “localStorage is not defined” error in React occurs because localStorage is a browser-specific Web Storage API. The error mainly comes up when you use a browser-specific functionality in an environment where it is undefined. This can happen, for example, if your code runs on the server side where localStorage is not defined. Here are some steps to fix it:
localStorage availability: You can do this by wrapping your code in a conditional (if/else) statement or by checking the if window.localStorage is definedlocalStorage API, leading to this error if your code relies on it without proper checks. As a result, fallback alternatives like cookies and server-side storage should be consideredlocalStorage in React effectivelyClearing localStorage removes key-value pairs stored by your application, so it is important to only do this when you are sure. To clear the local storage in React, there are two main ways to go about it:
localStorage.clear() method: This is the simplest and fastest way to clear localStorage, as everything stored in that domain will be cleared out. Please note that this method leaves nothing behind. It is quite straightforward and can be used by running the code: localStorage.clear();.removeItem() method: This method deletes or removes a specified key from the domain storage. It gives you more control over what gets deleted. This method is also straightforward and requires you to pass the name of the key to be deleted. Here is the syntax: localStorage.removeItem(key)localStorage and React HookslocalStorage?Custom hooks are not a typical first option for localStorage. However, they have their use cases and advantages.
In this example, we delve into how to create a custom hook for localStorage using useEffect and useState:
import { useState, useEffect } from 'react';

export default function useLS(key, defaultValue) {
  const [value, setValue] = useState(() => {
    const storedValue = localStorage.getItem(key);
    if (storedValue) {
      return JSON.parse(storedValue);
    }
    return defaultValue;
  });

  useEffect(() => {
    if (value === undefined) return;
    localStorage.setItem(key, JSON.stringify(value));
  }, [value, key]);

  return [value, setValue];
}

export default useLS;
The code above is a custom hook called useLS that allows storing and retrieving data from the browser’s local storage using React’s useState and useEffect Hooks. It takes in two arguments: key and defaultValue. The useState Hook retrieves data from localStorage, parses the data and returns defaultValue if the value is null.
The useLS returns the current value stored in localStorage for a given key and a function to update the value.
localStorage in React?Fetching data from localStorage can be done using the .getItem(key) method. This method retrieves the value attached to the key that is passed into the method. Here is the syntax: localStorage.getItem(your key)
sessionStorage and localStorage in React?Below is a table detailing the differences between sessionStorage and localStorage:
sessionStorage |
localStorage |
|---|---|
It is session-based. As such, sessionStorage data is cleared when the page session ends |
The localStorage data does not expire or get cleared without doing it manually |
| It is typically used for temporary data that does not need to be stored or persisted across sessions | It is typically used for data that needs to be stored and accessible across sessions |
sessionStorage has a smaller storage capacity |
localStorage has a larger storage capacity |
sessionStorage is accessible only within the current window |
Accessible across the entire domain |
We’ve covered how to use localStorage to persist data in a browser using React Hooks. We’ve also learned how to create a custom Hook to extract component logic into reusable functions.
If you enjoyed this guide, share it around the web. And, if you have any questions or contributions, please share them in the comment section.
Find the entire source code for the project here.
Install LogRocket via npm or script tag. LogRocket.init() must be called client-side, not
server-side
$ npm i --save logrocket

// Code:

import LogRocket from 'logrocket';
LogRocket.init('app/id');
// Add to your HTML:

<script src="https://cdn.lr-ingest.com/LogRocket.min.js"></script>
<script>window.LogRocket && window.LogRocket.init('app/id');</script>

Discover how React Fiber works under the hood. Learn how React builds the DOM, handles concurrent rendering, and works alongside React 19 features and the new React Compiler.

Learn how to use Skybridge, an open-source React framework, to build and deploy cross-platform AI apps and interactive UI widgets for ChatGPT, Claude, and MCP clients from a single codebase.

Learn how to set up Meilisearch, index documents, and build keyword, semantic, and hybrid search with AI-powered retrieval.

Compare pnpm and npm across security defaults, disk usage, dependency strictness, and workspace policy to decide which package manager fits your project.
Would you be interested in joining LogRocket's developer community?
Join LogRocket’s Content Advisory Board. You’ll help inform the type of content we create and get access to exclusive meetups, social accreditation, and swag.
Sign up now

