Editor’s note: This React Hooks tutorial was last updated by Nelson Michael in January 2025 to add hooks that have been released since the original publication date, including useImperativeHandle, useFormStatus, and useOptimistic.

React Hooks revolutionized the way we write React components by introducing a simple yet powerful API for managing state and side effects in functional components. However, with a massive community and countless use cases, it’s easy to get overwhelmed when trying to adopt best practices or troubleshoot common challenges.
In this tutorial, we’ll outline some best practices when working with React Hooks and highlight some use cases with examples, from simple to advanced scenarios. To help demonstrate how to solve common React Hooks questions, I built an accompanying web app for live interaction with some of the examples from this article.
This React Hooks cheat sheet includes a lot of code snippets and assumes some Hooks fluency. If you’re completely new to Hooks, you may want to start with our React Hooks API reference guide.
useStateuseState lets you use local state within a function component. You pass the initial state to this function and it returns a variable with the current state value (not necessarily the initial state) and another function to update this value.
Check out this React useState video tutorial:
Declaring a state variable is as simple as calling useState with some initial state value, like so: useState(initialStateValue):
const DeclareStateVar = () => {
  const [count] = useState(100)
  return <div> State variable is {count}</div>
}
Updating a state variable is as simple as invoking the updater function returned by the useState invocation: const [stateValue, updaterFn] = useState(initialStateValue);:
Note how the age state variable is being updated.
Here’s the code responsible for the screencast above:
const UpdateStateVar = () => {
  const [age, setAge] = useState(19)
  const handleClick = () => setAge(age + 1)

  return (
    <div>
      Today I am {age} Years of Age
      <div>
        <button onClick={handleClick}>Get older! </button>
      </div>
    </div>
  )
}
useState Hook not update immediately?If you find that useState/setState are not updating immediately, the answer is simple: they’re just queues.
React useState and setState don’t make changes directly to the state object; they create queues to optimize performance, which is why the changes don’t update immediately.
Multiple state variables may be used and updated from within a functional component, as shown below:
Here’s the code responsible for the screencast above:
const MultipleStateVars = () => {
  const [age, setAge] = useState(19)
  const [siblingsNum, setSiblingsNum] =
    useState(10)

  const handleAge = () => setAge(age + 1)
  const handleSiblingsNum = () =>
      setSiblingsNum(siblingsNum + 1)


  return (
    <div>
      <p>Today I am {age} Years of Age</p>
      <p>I have {siblingsNum} siblings</p>

      <div>
        <button onClick={handleAge}>
          Get older!
        </button>
        <button onClick={handleSiblingsNum}>
            More siblings!
        </button>
      </div>
    </div>
  )
}
As opposed to strings and numbers, you could also use an object as the initial value passed to useState.
Note that you have to pass the entire object to the useState updater function because the object is replaced, not merged:
// 🐢 setState (object merge) vs useState (object replace)
// assume initial state is {name: "Ohans"}

setState({ age: 'unknown' })
// new state object will be
// {name: "Ohans", age: "unknown"}

useStateUpdater({ age: 'unknown' })
// new state object will be
// {age: "unknown"} - initial object is replaced

Multiple state objects are updated via a state object variable.
Here’s the code for the screencast above:
const StateObject = () => {
  const [state, setState] = useState({ age: 19, siblingsNum: 4 })
  const handleClick = val =>
    setState({
      ...state,
      [val]: state[val] + 1
    })
  const { age, siblingsNum } = state

  return (
    <div>
      <p>Today I am {age} Years of Age</p>
      <p>I have {siblingsNum} siblings</p>

      <div>
        <button onClick={handleClick.bind(null, 'age')}>Get older!</button>
        <button onClick={handleClick.bind(null, 'siblingsNum')}>
          More siblings!
        </button>
      </div>
    </div>
  )
}
As opposed to just passing an initial state value, state could also be initialized from a function, as shown below:
const StateFromFn = () => {
  const [token] = useState(() => {
    let token = window.localStorage.getItem("my-token");
    return token || "default#-token#"
  })

  return <div>Token is {token}</div>
}
setStateThe updater function returned from invoking useState can also take a function similar to the good ol’ setState:
const [value, updateValue] = useState(0)
// both forms of invoking "updateValue" below are valid 👇
updateValue(1);
updateValue(previousValue => previousValue + 1);
This is ideal when the state update depends on some previous value of state:
A counter with functional setState updates.
Here’s the code for the screencast above:
const CounterFnSetState = () => {
  const [count, setCount] = useState(0);
  return (
    <>
      <p>Count value is: {count}</p>
      <button onClick={() => setCount(0)}>Reset</button>
      <button
        onClick={() => setCount(prevCount => prevCount + 1)}>
        Plus (+)
      </button>
      <button
        onClick={() => setCount(prevCount => prevCount - 1)}>
       Minus (-)
      </button>
    </>
  );
}
Here’s a live, editable useState cheat sheet if you want to dive deeper on your own.
useEffectWith useEffect, you invoke side effects from within functional components, which is an important concept to understand in the React Hooks era.
useEffect for basic side effects
Watch the title of the document update.
Here’s the code responsible for the screencast above:
const BasicEffect = () => {
  const [age, setAge] = useState(0)
  const handleClick = () => setAge(age + 1)

  useEffect(() => {
    document.title = 'You are ' + age + ' years old!'
  })

  return <div>
    <p> Look at the title of the current tab in your browser </p>
    <button onClick={handleClick}>Update Title!! </button>
  </div>
}
useEffect HookIt’s pretty common to clean up an effect after some time. This is possible by returning a function from within the effect function passed to useEffect. Below is an example with addEventListener:
const EffectCleanup = () => {
  useEffect(() => {
    const clicked = () => console.log('window clicked')
    window.addEventListener('click', clicked)

    // return a clean-up function
    return () => {
      window.removeEventListener('click', clicked)
    }
  }, [])

  return <div>
    When you click the window you'll
    find a message logged to the console
  </div>
}
useEffect Hooks in a single componentMultiple useEffect calls can happen within a functional component, as shown below:
const MultipleEffects = () => {
  // 🍟
  useEffect(() => {
    const clicked = () => console.log('window clicked')
    window.addEventListener('click', clicked)

    return () => {
      window.removeEventListener('click', clicked)
    }
  }, [])

  // 🍟 another useEffect hook
  useEffect(() => {
    console.log("another useEffect call");
  })

  return <div>
    Check your console logs
  </div>
}
Note thatuseEffect calls can be skipped — i.e., not invoked on every render. This is done by passing a second array argument to the effect function.
const ArrayDepMount = () => {
  const [randomNumber, setRandomNumber] = useState(0)
  const [effectLogs, setEffectLogs] = useState([])

  useEffect(
    () => {
      setEffectLogs(prevEffectLogs => [...prevEffectLogs, 'effect fn has been invoked'])
    },
    []
  )

  return (
    <div>
      <h1>{randomNumber}</h1>
      <button
        onClick={() => {
          setRandomNumber(Math.random())
        }}
      >
        Generate random number!
      </button>
      <div>
        {effectLogs.map((effect, index) => (
          <div key={index}>{'🍔'.repeat(index) + effect}</div>
        ))}
      </div>
    </div>
  )
}
In the example above, useEffect is passed an array of one value: [randomNumber].
Thus, the effect function will be called on mount and whenever a new random number is generated.
Here’s the Generate random number button being clicked and the effect function being rerun upon generating a new random number:

In this example, useEffect is passed an empty array, []. Therefore, the effect function will be called only on mount:
const ArrayDepMount = () => {
  const [randomNumber, setRandomNumber] = useState(0)
  const [effectLogs, setEffectLogs] = useState([])

  useEffect(
    () => {
      setEffectLogs(prevEffectLogs => [...prevEffectLogs, 'effect fn has been invoked'])
    },
    []
  )

  return (
    <div>
      <h1>{randomNumber}</h1>
      <button
        onClick={() => {
          setRandomNumber(Math.random())
        }}
      >
        Generate random number!
      </button>
      <div>
        {effectLogs.map((effect, index) => (
          <div key={index}>{'🍔'.repeat(index) + effect}</div>
        ))}
      </div>
    </div>
  )
}
Here’s the button being clicked and the effect function not being invoked:

Without an array dependency, the effect function will be run after every single render.
useEffect(() => {
console.log(“This will be logged after every render!”)
})
Here’s a live, editable useEffect cheat sheet if you’d like to explore further.
useContextuseContext saves you the stress of having to rely on a Context consumer. React Context has a simpler API when compared to MyContext.Consumer and the render props API it exposes.
Context is React’s way of handling shared data between multiple components.
The following example highlights the difference between consuming a context object value via useContext or Context.Consumer:
// example Context object
const ThemeContext = React.createContext("dark");

// usage with context Consumer
function Button() {
  return <ThemeContext.Consumer>
        {theme => <button className={theme}> Amazing button </button>}
  </ThemeContext.Consumer>
}


// usage with useContext hook
import {useContext} from 'react';

function ButtonHooks() {
 const theme = useContext(ThemeContext)
 return <button className={theme}>Amazing button</button>
}
Here’s a live example with useContext:

And here’s the code responsible for the example above:
const ThemeContext = React.createContext('light');

const Display = () => {
 const theme = useContext(ThemeContext);
 return <div
        style={{
        background: theme === 'dark' ? 'black' : 'papayawhip',
        color: theme === 'dark' ? 'white' : 'palevioletred',
        width: '100%',
        minHeight: '200px'
        }}
    >
        {'The theme here is ' + theme}
    </div>
}
Here’s a live, editable React Context cheat sheet if you’d like to tinker around yourself.
useLayoutEffectuseLayoutEffect has the very same signature as useEffect. We’ll discuss the difference between useLayoutEffect and useEffect below:
useLayoutEffect(() => {
//do something
}, [arrayDependency])
useLayoutEffect vs. useEffectHere’s the same example for useEffect built with useLayoutEffect:
And here’s the code:
const ArrayDep = () => {
    const [randomNumber, setRandomNumber] = useState(0)
    const [effectLogs, setEffectLogs] = useState([])

    useLayoutEffect(
      () => {
        setEffectLogs(prevEffectLogs => [...prevEffectLogs, 'effect fn has been invoked'])
      },
      [randomNumber]
    )

    return (
      <div>
        <h1>{randomNumber}</h1>
        <button
          onClick={() => {
            setRandomNumber(Math.random())
          }}
        >
          Generate random number!
        </button>
        <div>
          {effectLogs.map((effect, index) => (
            <div key={index}>{'🍔'.repeat(index) + effect}</div>
          ))}
        </div>
      </div>
    )
  }
What’s the difference between useEffect and useLayoutEffect?
The function passed to useEffect fires after layout and paint — i.e. after the render has been committed to the screen. This is OK for most side effects that shouldn’t block the browser from updating the screen.
However, there are cases where you may not want the behavior useEffect provides; for example, if you need to make a visual change to the DOM as a side effect, useEffect isn’t the best choice.
To prevent the user from seeing flickers of changes, you can use useLayoutEffect. The function passed to useLayoutEffect will be run before the browser updates the screen.
Here’s a live, editable useLayoutEffect cheat sheet.
useReduceruseReducer may be used as an alternative to useState. It’s ideal for complex state logic where there’s a dependency on previous state values or a lot of state sub-values.
Depending on your use case, you may find useReducer quite testable.
useReducer basic usageAs opposed to calling useState, call useReducer with a reducer and initialState, as shown below. The useReducer call returns the state property and a dispatch function:
Increase/decrease bar size by managing state with useReducer.
Here’s the code responsible for the above screencast:
const initialState = { width: 15 };

const reducer = (state, action) => {
  switch (action) {
    case 'plus':
      return { width: state.width + 15 }
    case 'minus':
      return { width: Math.max(state.width - 15, 2) }
    default:
      throw new Error("what's going on?" )
  }
}

const Bar = () => {
  const [state, dispatch] = useReducer(reducer, initialState)
  return <>
    <div style={{ background: 'teal', height: '30px', width: state.width }}></div>
    <div style={{marginTop: '3rem'}}>
        <button onClick={() => dispatch('plus')}>Increase bar size</button>
        <button onClick={() => dispatch('minus')}>Decrease bar size</button>
    </div>
    </>
}

ReactDOM.render(<Bar />)
useReducer takes a third function parameter. You may initialize state from this function, and whatever’s returned from this function is returned as the state object. This function will be called with initialState — the second parameter:

Same increase/decrease bar size, with state initialized lazily.
Here’s the code for the example above:
const initializeState = () => ({
  width: 100
})

// ✅ note how the value returned from the fn above overrides initialState below:
const initialState = { width: 15 }
const reducer = (state, action) => {
  switch (action) {
    case 'plus':
      return { width: state.width + 15 }
    case 'minus':
      return { width: Math.max(state.width - 15, 2) }
    default:
      throw new Error("what's going on?" )
  }
}

const Bar = () => {
  const [state, dispatch] = useReducer(reducer, initialState, initializeState)
  return <>
    <div style={{ background: 'teal', height: '30px', width: state.width }}></div>
    <div style={{marginTop: '3rem'}}>
        <button onClick={() => dispatch('plus')}>Increase bar size</button>
        <button onClick={() => dispatch('minus')}>Decrease bar size</button>
    </div>
    </>
}

ReactDOM.render(Bar)
this.setStateuseReducer uses a reducer that isn’t as strict as Redux’s. For example, the second parameter passed to the reducer, action, doesn’t need to have a type property.
This allows for interesting manipulations, such as renaming the second parameter and doing the following:
const initialState = { width: 15 };

const reducer = (state, newState) => ({
  ...state,
  width: newState.width
})

const Bar = () => {
  const [state, setState] = useReducer(reducer, initialState)
  return <>
    <div style={{ background: 'teal', height: '30px', width: state.width }}></div>
    <div style={{marginTop: '3rem'}}>
        <button onClick={() => setState({width: 100})}>Increase bar size</button>
        <button onClick={() => setState({width: 3})}>Decrease bar size</button>
    </div>
    </>
}

ReactDOM.render(Bar)
The results remain the same with a setState-like API imitated.
Here’s an editable useReducer cheat sheet. And here’s a comprehensive guide to the hook if you’re looking for more information.
useCallbackuseCallback returns a memoized callback. Wrapping a component with React.Memo() signals the intent to reuse code. This does not automatically extend to functions passed as parameters.
React saves a reference to the function when wrapped with useCallback. Pass this reference as a property to new components to reduce rendering time.
useCallback exampleThe following example will form the basis of the explanations and code snippets that follow:

Here’s the code:
const App = () => {
    const [age, setAge] = useState(99)
    const handleClick = () => setAge(age + 1)
    const someValue = "someValue"
    const doSomething = () => {
      return someValue
    }

    return (
      <div>
        <Age age={age} handleClick={handleClick}/>
        <Instructions doSomething={doSomething} />
      </div>
    )
}

const Age = ({ age, handleClick }) => {
  return (
    <div>
      <div style={{ border: '2px', background: "papayawhip", padding: "1rem" }}>
        Today I am {age} Years of Age
      </div>
      <pre> - click the button below 👇 </pre>
      <button onClick={handleClick}>Get older! </button>
    </div>
  )
}

const Instructions = React.memo((props) => {
  return (
    <div style={{ background: 'black', color: 'yellow', padding: "1rem" }}>
      <p>Follow the instructions above as closely as possible</p>
    </div>
  )
})

ReactDOM.render (
  <App />
)
In the example above, the parent component, <Age />, is updated (and re-rendered) whenever the Get older button is clicked.
Consequently, the <Instructions /> child component is also re-rendered because the doSomething prop is passed a new callback with a new reference.
Note that even though the Instructions child component uses React.memo to optimize performance, it is still re-rendered.
How can this be fixed to prevent <Instructions /> from re-rendering needlessly?
useCallback with referenced functionconst App = () => {
const [age, setAge] = useState(99)
const handleClick = () => setAge(age + 1)
const someValue = "someValue"
const doSomething = useCallback(() => {
return someValue
}, [someValue])
return (
<div>
<Age age={age} handleClick={handleClick} />
<Instructions doSomething={doSomething} />
</div>
)
}
const Age = ({ age, handleClick }) => {
return (
<div>
<div style={{ border: '2px', background: "papayawhip", padding: "1rem" }}>
Today I am {age} Years of Age
</div>
<pre> - click the button below 👇 </pre>
<button onClick={handleClick}>Get older! </button>
</div>
)
}
const Instructions = React.memo((props) => {
return (
<div style={{ background: 'black', color: 'yellow', padding: "1rem" }}>
<p>Follow the instructions above as closely as possible</p>
</div>
)
})
ReactDOM.render(<App />)
useCallback with inline functionuseCallback also works with an inline function as well. Here’s the same solution with an inline useCallback call:
const App = () => {
  const [age, setAge] = useState(99)
  const handleClick = () => setAge(age + 1)
  const someValue = "someValue"

  return (
    <div>
      <Age age={age} handleClick={handleClick} />
      <Instructions doSomething={useCallback(() => {
        return someValue
      }, [someValue])} />
    </div>
  )
}

const Age = ({ age, handleClick }) => {
  return (
    <div>
      <div style={{ border: '2px', background: "papayawhip", padding: "1rem" }}>
        Today I am {age} Years of Age
      </div>
      <pre> - click the button below 👇 </pre>
      <button onClick={handleClick}>Get older! </button>
    </div>
  )
}

const Instructions = memo((props) => {
  return (
    <div style={{ background: 'black', color: 'yellow', padding: "1rem" }}>
      <p>Follow the instructions above as closely as possible</p>
    </div>
  )
})

render(<App />)
Here’s a live, editable useCallback cheat sheet.
useMemoThe useMemo function returns a memoized value. useMemo is different from useCallback in that it internalizes return values instead of entire functions. Rather than passing a handle to the same function, React skips the function and returns the previous result, until the parameters change.
This allows you to avoid repeatedly performing potentially costly operations until necessary. Use this method with care, as any changing variables defined in the function do not affect the behavior of useMemo. If you’re performing timestamp additions, for example, this method does not care that the time changes, only that the function parameters differ.
useMemo exampleThe following example will form the basis of the explanations and code snippets that follow:
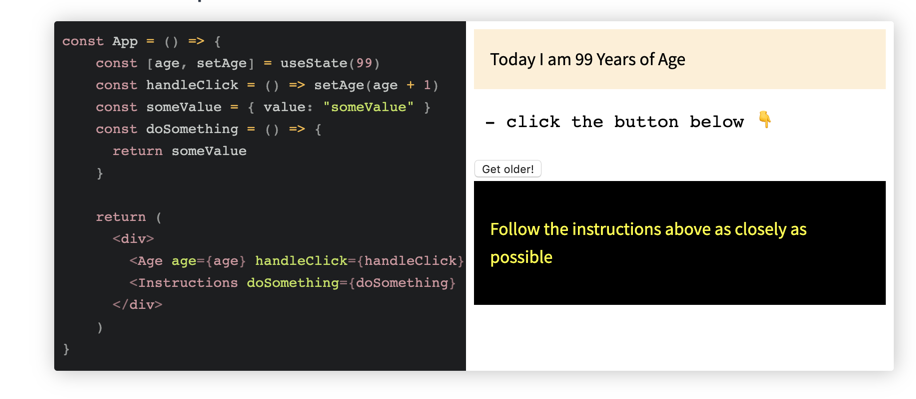
Here’s the code responsible for the screenshot above:
const App = () => {
    const [age, setAge] = useState(99)
    const handleClick = () => setAge(age + 1)
    const someValue = { value: "someValue" }
    const doSomething = () => {
      return someValue
    }

    return (
      <div>
        <Age age={age} handleClick={handleClick}/>
        <Instructions doSomething={doSomething} />
      </div>
    )
}

const Age = ({ age, handleClick }) => {
  return (
    <div>
      <div style={{ border: '2px', background: "papayawhip", padding: "1rem" }}>
        Today I am {age} Years of Age
      </div>
      <pre> - click the button below 👇 </pre>
      <button onClick={handleClick}>Get older! </button>
    </div>
  )
}

const Instructions = React.memo((props) => {
  return (
    <div style={{ background: 'black', color: 'yellow', padding: "1rem" }}>
      <p>Follow the instructions above as closely as possible</p>
    </div>
  )
})

ReactDOM.render (
  <App />
)
The example above is similar to the one for useCallback. The only difference here is that someValue is an object, not a string. Owing to this, the Instructions component still re-renders despite the use of React.memo.
Why? Objects are compared by reference and the reference to someValue changes whenever <App /> re-renders.
Any solutions?
The object someValue may be memoized using useMemo. This prevents unnecessary re-rendering:
const App = () => {
    const [age, setAge] = useState(99)
    const handleClick = () => setAge(age + 1)
    const someValue = useMemo(() => ({ value: "someValue" }))
    const doSomething = () => {
      return someValue
    }

    return (
      <div>
        <Age age={age} handleClick={handleClick}/>
        <Instructions doSomething={doSomething} />
      </div>
    )
}

const Age = ({ age, handleClick }) => {
  return (
    <div>
      <div style={{ border: '2px', background: "papayawhip", padding: "1rem" }}>
        Today I am {age} Years of Age
      </div>
      <pre> - click the button below 👇 </pre>
      <button onClick={handleClick}>Get older! </button>
    </div>
  )
}

const Instructions = React.memo((props) => {
  return (
    <div style={{ background: 'black', color: 'yellow', padding: "1rem" }}>
      <p>Follow the instructions above as closely as possible</p>
    </div>
  )
})

ReactDOM.render (<App />)
Here’s a live, editable useMemo demo.
useRefuseRef returns a “ref” object. Values are accessed from the .current property of the returned object. The .current property could be initialized to an initial value — useRef(initialValue), for example. The object is persisted for the entire lifetime of the component.
Learn more in this comprehensive useRefs guide or check out our useRefs video tutorial:
Consider the sample application below:
Accessing the DOM via useRef.
Here’s the code responsible for the screencast above:
const AccessDOM = () => {
  const textAreaEl = useRef(null);
  const handleBtnClick = () => {
    textAreaEl.current.value =
    "The is the story of your life. You are an human being, and you're on a website about React Hooks";
    textAreaEl.current.focus();
  };
  return (
    <section style={{ textAlign: "center" }}>
      <div>
        <button onClick={handleBtnClick}>Focus and Populate Text Field</button>
      </div>
      <label
        htmlFor="story"
        style={{
          display: "block",
          background: "olive",
          margin: "1em",
          padding: "1em"
        }}
      >
        The input box below will be focused and populated with some text
        (imperatively) upon clicking the button above.
      </label>
      <textarea ref={textAreaEl} id="story" rows="5" cols="33" />
    </section>
  );
};
Other than just holding DOM refs, the “ref” object can hold any value. Consider a similar application below, where the ref object holds a string value:

Here’s the code:
const HoldStringVal = () => {
    const textAreaEl = useRef(null);
    const stringVal = useRef("This is a string saved via the ref object --- ")
    const handleBtnClick = () => {
      textAreaEl.current.value =
      stringVal.current + "The is the story of your life. You are an human being, and you're on a website about React Hooks";
      textAreaEl.current.focus();
    };
    return (
      <section style={{ textAlign: "center" }}>
        <div>
          <button onClick={handleBtnClick}>Focus and Populate Text Field</button>
        </div>
        <label
          htmlFor="story"
          style={{
            display: "block",
            background: "olive",
            margin: "1em",
            padding: "1em"
          }}
        >
          Prepare to see text from the ref object here. Click button above.
        </label>
        <textarea ref={textAreaEl} id="story" rows="5" cols="33" />
      </section>
    );
  };
You could do the same as storing the return value from a setInterval for cleanup:
function TimerWithRefID() {
  const setIntervalRef = useRef();

  useEffect(() => {
    const intervalID = setInterval(() => {
      // something to be done every 100ms
    }, 100);

    // this is where the interval ID is saved in the ref object
    setIntervalRef.current = intervalID;
    return () => {
      clearInterval(setIntervalRef.current);
    };
  });
}
Working on a near-real-world example can help bring your knowledge of Hooks to life. You can fetch data via Hooks for more Hooks practice, though React Suspense is the current recommended method for handling asynchronous operations.
Below is an example of fetching data with a loading indicator:
The code appears below:
const fetchData = () => {
  const stringifyData = data => JSON.stringify(data, null, 2)
  const initialData = stringifyData({ data: null })
  const loadingData = stringifyData({ data: 'loading...' })
  const [data, setData] = useState(initialData)

  const [gender, setGender] = useState('female')
  const [loading, setLoading] = useState(false)

  useEffect(
    () => {
      const fetchData = () => {
        setLoading(true)
        const uri = 'https://randomuser.me/api/?gender=' + gender
        fetch(uri)
          .then(res => res.json())
          .then(({ results }) => {
            setLoading(false)
            const { name, gender, dob } = results[0]
            const dataVal = stringifyData({
              ...name,
              gender,
              age: dob.age
            })
            setData(dataVal)
          })
      }

      fetchData()
    },
    [gender]
  )

  return (
    <>
      <button
        onClick={() => setGender('male')}
        style={{ outline: gender === 'male' ? '1px solid' : 0 }}
      >
        Fetch Male User
      </button>
      <button
        onClick={() => setGender('female')}
        style={{ outline: gender === 'female' ? '1px solid' : 0 }}
      >
        Fetch Female User
      </button>

      <section>
        {loading ? <pre>{loadingData}</pre> : <pre>{data}</pre>}
      </section>
    </>
  )
}
Here’s a live, editable useRef cheat sheet.
useTransitionThe key to understanding the useTransition Hook is that it prioritizes state change. By default, any state change in React is given a high priority. However, when you transition a state change (maybe because of heavy computation), you’re telling React to give that state change a lower priority, meaning all other state changes would run and render on the screen before the transitioned state change would run.
Marking a state as transition is as simple as passing a synchronous function with the state you want to transition into the startTransition function returned by the useTransition Hook:
import { useTransition } from 'react';

const App =()=>{
  const [timeUpdate, setTimeUpdate] = useState(2)
  const [isPending, startTransition] = useTransition()

  startTransition(()=>{
      // handle state change in here
    })

  }
The isPending flag returns true or false indicating whether or not there is a pending transition, and we use the startTransition function to mark a state change as a transition.
useTransition and regular state updateState updates placed inside the useTransition Hook are given a low priority, while regular state updates are given a higher priority. So think of useTransition as a React Hook that lets you update the state without blocking the UI.
Let’s take a look at an example.
I have created a CodeSandbox that makes two state updates:
textInput state upon user inputlistItems state with the currently entered user inputReact has a mechanism called “batching” that allows it to combine multiple state changes into a single update to the component’s state.
When you call setState in a React component, React does not immediately update the component’s state. Instead, it schedules a state update to be processed later. If you call setState multiple times within the same event loop, React will batch these updates together into a single update before applying them to the component’s state and triggering a re-render.
That’s why, in this example, our setTextInput state doesn’t trigger a re-render until after we’re done looping and updating the setListItems state then a render is triggered. This makes our application act a bit sluggish.
Now, let’s look at the same example but this time, we’ll transition the state change that has heavy computation.
As we can see in this CodeSandbox, there’s a significant improvement in our application. In this example, we’re telling react to give setListItems state update a lower priority seeing as it requires a heavy computation. This means that setTextInput state would trigger a re-render upon state change and not have to be batched with the setListItem state change.
N.B., if a state update causes a component to suspend, that state update should be wrapped in a transition
useDeferredValueThe useDeferredValue Hook was a new addition to React 18, and it offers developers a powerful new tool for optimizing their applications. This hook allows you to defer the rendering of a value until a future point in time, which can be incredibly useful in situations where you want to avoid unnecessary rendering.
Here’s the sample syntax code:
import { useDeferredValue } from 'react'

const App =()=>{
const [valueToDefer, setValueToDefer] = useState("")
const deferredValue = useDeferredValue(valueToDefer)

return (
  <p>{deferredValue}</p>
  )
}
All we have to do is pass the value we want to defer into the useDeferredValue Hook.
One of the most common use cases for the useDeferredValue Hook is when you have a large number of updates occurring at once. For example, imagine you have a search bar in your application that updates in real time as the user types. If the user is a fast typer, this could result in dozens, or even hundreds, of updates occurring in rapid succession. Without any optimization, this could cause your application to slow down.
By using the useDeferredValue Hook, you can avoid this problem by deferring the rendering of the search results until the user stops typing. This is similar to how debouncing works; it can dramatically improve performance.
Let’s demonstrate this use case with an example:
const Search =()=> {
  const [searchQuery, setSearchQuery] = useState('');
  const [searchResults, setSearchResults] = useState([]);

  const deferredSearchQuery = useDeferredValue(searchQuery);

  useEffect(() => {
    // Fetch search results using deferredSearchQuery
    // Update setSearchResults with the new results
  }, [deferredSearchQuery]);

  const handleSearchInputChange = (event) => {
    setSearchQuery(event.target.value);
  };

  return (
    <div>
      <input type="text" value={searchQuery} onChange={handleSearchInputChange} />
      <ul>
        {searchResults.map((result) => (
          <li key={result.id}>{result.title}</li>
        ))}
      </ul>
    </div>
  );
}
Here, we’re using the useDeferredValue Hook to defer the rendering of the search results until after the user stops typing in the search bar. This helps to reduce unnecessary re-renders and improve performance.
useIduseId is a React Hook that is used to generate unique IDs. This can be valuable in a number of scenarios, such as generating unique IDs for accessibility attributes.
Here’s the sample syntax code:
import { useId } from 'react'

const App =()=>{
const id = useId()

return (
  <input type="text" id={id} />
  )
}
Now, let’s look at a use case. Here’s an example of a scenario using the useId Hook with a TextField component:
const TextField =()=>{
  return(
      <>
        <label htmlFor="name" />
        <input type="text" id="name"/>
      </>
  )
}
We’ll use the TextField component a couple of times in our App component below:
const App=()=>{
  return (
    <div className="inputs">
      <TextField />
      <TextField />
    </div>
  )
}
To link a label element to an input field, we use the id and htmlFor attribute. This will cause the browser to associate a particular label element with a particular input field. If we were working with plain HTML, this wouldn’t be necessary — instead, we could simply duplicate the elements and change the attributes.
However, in our example above, we created a reusable TextField component and we’re using this component twice in our App component. Since the attributes on the element in the TextField are static, every time we render the component, the attributes remain the same.
We can fix this by using the useId Hook. Let’s modify the TextField component, like so:
const TextField =()=>{
const id = useId();
  return(
      <>
        <label htmlFor={id} />
        <input type="text" id={id}/>
      </>
  )
}
Now, every time we call the TextInput component, a unique ID will be associated with the elements that are rendered.
useImperativeHandleWhen building reusable components, you sometimes need to expose certain functionality to parent components. The traditional way of doing this with refs can expose too much of your component’s internal workings. That’s where useImperativeHandle comes in — this hook lets you customize exactly what gets exposed to parent components when they use a ref.
Think of it like building a remote control for your TV. Sure, your TV has tons of internal circuits and components, but you only want to expose a few specific buttons on the remote. useImperativeHandle lets you build that custom remote control interface for your components.
Let’s look at a practical example with a video player component:
const VideoPlayer = forwardRef((props, ref) => {
  const videoRef = useRef();

  useImperativeHandle(ref, () => ({
    // Only expose the methods we want parents to use
    play() {
      videoRef.current.play();
    },
    pause() {
      videoRef.current.pause();
    },
    setPlaybackRate(rate) {
      videoRef.current.playbackRate = rate;
    },
    // Notice we're not exposing things like volume, currentTime, or the video element itself
  }));

  return (
    <div className="video-wrapper">
      <video
        ref={videoRef}
        src={props.src}
        width="100%"
        controls
      />
      {/* We could have internal controls here that use videoRef directly */}
    </div>
  );
});

// Using the component:
const App = () => {
  const playerRef = useRef();

  return (
    <div>
      <VideoPlayer
        ref={playerRef}
        src="/awesome-video.mp4"
      />
      <div className="custom-controls">
        <button onClick={() => playerRef.current.play()}>
          Play
        </button>
        <button onClick={() => playerRef.current.setPlaybackRate(2)}>
          2x Speed
        </button>
      </div>
    </div>
  );
};
Instead of exposing the entire video element, we’re only exposing the methods we want the parent to access. This gives us better encapsulation and a cleaner API. Think of it like creating a custom remote control — you only add the buttons that make sense for your users!
useFormStatusForms in React recently got a lot more interesting with the useFormStatus Hook. It’s like having a backstage pass to what’s happening with your form submissions. While libraries like react-hook-form have done a great job handling form validation and state management, they don’t have direct access to React’s internal form submission pipeline. That’s where useFormStatus comes in — it’s built directly into React and gives you real-time insights into form submissions happening through React’s native form actions.
So, want to show a spinner while the form is submitting? useFormStatus’s got you covered! For a deep dive into useFormStatus, check out our comprehensive article.
The key difference between react-hook-form is that useFormStatus is specifically designed to work with React’s server actions and the new forms paradigm. While react-hook-form excels at client-side form management (validation, field arrays, form state), useFormStatus is more focused on the submission process itself and integrates seamlessly with React’s server components and actions.
Here’s what makes useFormStatus special:
Here’s a practical example:
import { useFormStatus } from 'react-dom';

const Form = () => {
  const { pending } = useFormStatus();

  async function handleSubmit(formData) {
    await submitToServer(formData);
  }

  return (
    <form action={handleSubmit}>
      <input name="email" type="email" />
      <button disabled={pending}>
        {pending ? 'Submitting...' : 'Submit'}
      </button>
    </form>
  );
};
The neat thing here is how useFormStatus handles all the loading state automatically. Your button just knows when the form is submitting!
useOptimisticThe useOptimistic Hook provides a powerful solution for implementing optimistic updates in React applications. Optimistic updates allow you to temporarily update the UI immediately in response to a user action, before the server response arrives, creating a more responsive user experience.
This pattern is particularly valuable in applications where network requests might take some time, but you can reasonably predict the server’s response. Common use cases include social media interactions (likes, follows), to-do lists, or any interactive features where immediate feedback enhances the user experience.
Here’s how the Hook works: you provide your current state and a function that describes how to update that state optimistically. The Hook returns both the optimistic state (which might be temporarily ahead of the real state) and a function to trigger optimistic updates.
For a comprehensive exploration of optimistic UI patterns, check out our detailed guide on implementing optimistic updates. Here’s a practical example:
const TodoList = () => {
  const [todos, setTodos] = useState(['Buy milk', 'Walk dog']);
  const [optimisticTodos, addOptimisticTodo] = useOptimistic(
    todos,
    (state, newTodo) => [...state, newTodo]
  );

  const addTodo = async (newTodo) => {
    // Immediately update the UI
    addOptimisticTodo(newTodo);

    try {
      // Perform the actual server request
      const response = await saveTodoToServer(newTodo);
      // Update the real state with the server response
      setTodos(prev => [...prev, response.todo]);
    } catch (error) {
      // Handle the error case appropriately
      console.error('Failed to save todo:', error);
      // You might want to show an error notification here
      toast.error('Failed to add todo. Please try again.');
    }
  };

  return (
    <div className="todo-list">
      <ul>
        {optimisticTodos.map((todo, index) => (
          <li key={index} className="todo-item">
            {todo}
          </li>
        ))}
      </ul>
      <button
        onClick={() => addTodo('New todo ' + Date.now())}
        className="add-button"
      >
        Add Todo
      </button>
    </div>
  );
};
The key benefits of using useOptimistic include:
Remember that while optimistic updates can significantly improve the perceived performance of your application, they should be used judiciously. Consider the likelihood of the operation succeeding and the impact of failure on the user experience when deciding whether to implement optimistic updates.
React Hooks give a lot of power to functional components. I hope this cheat sheet proves useful in your day-to-day use of React Hooks:
Cheers!
Install LogRocket via npm or script tag. LogRocket.init() must be called client-side, not
server-side
$ npm i --save logrocket

// Code:

import LogRocket from 'logrocket';
LogRocket.init('app/id');
// Add to your HTML:

<script src="https://cdn.lr-ingest.com/LogRocket.min.js"></script>
<script>window.LogRocket && window.LogRocket.init('app/id');</script>

Learn how to set up Meilisearch, index documents, and build keyword, semantic, and hybrid search with AI-powered retrieval.

Compare pnpm and npm across security defaults, disk usage, dependency strictness, and workspace policy to decide which package manager fits your project.

I migrated 20 production-style components from Tailwind to StyleX. Here’s what the data showed about LOC, CSS bundle size, build time, and type safety.

A guide for using JWT authentication to prevent basic security issues while understanding the shortcomings of JWTs.
Would you be interested in joining LogRocket's developer community?
Join LogRocket’s Content Advisory Board. You’ll help inform the type of content we create and get access to exclusive meetups, social accreditation, and swag.
Sign up now

