Fetching data in React applications has traditionally required useEffect and state management, often leading to boilerplate code and UI flickering. With the introduction of React Suspense, handling asynchronous operations like data fetching has become more efficient and declarative.

React Suspense allows components to pause rendering until a specific condition, such as data availability, is met. In React v18+, it fully integrates with concurrent rendering, simplifying async tasks like data fetching, code splitting, and lazy loading without manual state management.
In this article, we’ll explore how to use Suspense for data fetching, how it works under the hood, and why it’s an important tool for modern React development.
React Suspense is a built-in feature in React for handling asynchronous operations. It enables components to temporarily suspend rendering while waiting for asynchronous data and display a fallback UI, such as a loading spinner, until the data becomes available.
It is important to note that React Suspense is neither a data-fetching library like react-async, nor a state management tool like Redux. It simply allows developers to declaratively render a fallback UI while a component waits for an asynchronous operation, such as a network request, to complete.
As we’ll see later, React Suspense helps synchronize loading states across multiple components, enhancing the user experience by ensuring a seamless transition while waiting for asynchronous data. It accomplishes this in a non-intrusive way, allowing developers to integrate it without requiring a complete rewrite of existing applications.
In this tutorial, we will use the DummyJSON API as a sample endpoint for our application.
Editor’s note: This article was updated by Popoola Temitope in April 2025 to cover React 18 and 19 updates to Suspense, explore how Suspense integrates with Next.js server components, and include a discussion on lazy loading components using React lazy().
Let’s look at the code below that fetches the to-do list from an endpoint and displays it on the user interface:
import { useEffect, useState } from "react";
function App() {
  const [todos, setTodos] = useState([]);
  useEffect(() => {
    fetch("https://dummyjson.com/todos?limit=300")
      .then((res) => res.json())
      .then((data) => {
        setTodos(data.todos);
      })
  }, []);
  return (
    <div>
      <h1>To-Do List</h1>
      <ul>
        {todos.map((todo) => (
          <li key={todo.id}>
            {todo.todo} {todo.completed ? "✅" : "❌"}
          </li>
        ))}
      </ul>
    </div>
  );
}
export default App;
The code above is one of the common ways to fetch asynchronous data. However, its limitation is that users have to wait while the to-do list loads without any indication that data is being fetched.
With React Suspense, we can easily display an alternative UI while the main asynchronous component or data is loading. The syntax below illustrates how to use React Suspense:
import React, { Suspense } from 'react'

// ...

<Suspense fallback={<preloading/>}>
  <Todo-list />
</Suspense>
In the syntax above, we import Suspense from React and wrap the asynchronous component inside the <Suspense> component. This tells React that while the asynchronous component is loading, it should render the component specified in the fallback attribute.
Another important thing to note is that the fallback property passed to React Suspense determines what is rendered while waiting for the network call to complete. This could be a spinner, a skeleton loader, or even nothing. React will display the specified fallback value until the network request is complete.
In React 18, Suspense became a stable part of concurrent rendering, enabling features like streaming server-side rendering, selective hydration, and integration with frameworks such as Next.js and Remix. However, it relied on the fetch-on-render pattern, where components fetch data during rendering. This often led to network waterfalls, as nested components waited for their parents to load, degrading performance.
React 19 addresses these limitations by adding native support for data fetching with Suspense, reducing reliance on external libraries. It also improves error handling, enhances server component support, and streamlines asynchronous loading for more efficient rendering and a smoother user experience.
Whenever a React component needs data from an API, it typically fetches it by making a network request to the API endpoint. This is where different data fetching approaches come into play.
Let’s explore three common methods used in React.
Using the fetch-on-render approach, the network request is triggered within the component itself after it has mounted. This approach is called fetch-on-render because the request is not initiated until the component has rendered:
import { useState, useEffect } from "react";
const UserComponent = () => {
  const [userDetails, setUserDetails] = useState(null);
  useEffect(() => {
    fetch("https://dummyjson.com/users/1")
      .then((response) => response.json())
      .then((data) => setUserDetails(data))
  }, []);
  if (!userDetails) return <p>Fetching user details...</p>;
  return (
    <div className="app">
      <div>
        <h4>Welcome, {userDetails.firstName}</h4>
        <p>{userDetails.email}</p>
      </div>
    </div>
  );
};
export default UserComponent;
A major drawback of this approach is the network waterfall problem. This occurs when multiple components independently make their own asynchronous fetch requests. If this component renders another component with a similar request, the nested structure causes sequential API calls, leading to performance issues due to delayed data fetching.
The fetch-then-render approach allows us to make an asynchronous request before the component is rendered or mounted. This approach helps ensure that asynchronous data is fetched completely before rendering the component.
The code below shows how to implement fetch-then-render in a React application:
import { useState, useEffect } from "react";
const UserComponent = () => {
  const [userDetails, setUserDetails] = useState(null);
  const fetchData =()=>{
    fetch("https://dummyjson.com/users/1")
    .then((response) => response.json())
    .then((data) => setUserDetails(data))
  }
  useEffect(() => {
    fetchData()
  }, []);
  if (!userDetails) return <p>Fetching user details...</p>;
  return (
    <div className="app">
      <div>
        <h4>Welcome, {userDetails.firstName}</h4>
        <p>{userDetails.email}</p>
      </div>
    </div>
  );
};
export default UserComponent;
In this example, fetchData() retrieves API data when the component mounts. A major drawback of this approach is that multiple API requests can increase rendering time, as the component must wait for all requests to complete before rendering. This can lead to slower page loads and reduced responsiveness.
Traditional data-fetching patterns aren’t always performant and often struggle with handling asynchronous calls efficiently. React Suspense addresses this by enabling render-as-you-fetch, where rendering begins immediately after a network request is triggered.
Unlike the fetch-then-render pattern, which waits for a response before rendering, render-as-you-fetch progressively updates the UI as data is retrieved. Let’s look at some code:
import { Suspense } from "react";
const fetchData = () => {
  let data;
  let promise = fetch("https://dummyjson.com/users/1")
    .then((response) => response.json())
    .then((json) => (data = json));
  return {
    read() {
      if (!data) {
        throw promise;
      }
      return data;
    },
  };
};
const userData = fetchData();
const UserComponent = () => (
  <Suspense fallback={<p>Fetching user details...</p>}>
    <UserWelcome />
  </Suspense>
);
const UserWelcome = () => {
  const userDetails = userData.read();
  return (
    <div className="app">
      <div>
        <h4>Welcome, {userDetails.firstName}</h4>
        <p>{userDetails.email}</p>
      </div>
    </div>
  );
};
export default UserComponent;
When UserComponent mounts, it tries to render UserWelcome, which calls userData.read(). If the data isn’t available, read() throws a promise that React Suspense catches, prompting React to render the fallback UI. Once the data resolves, React re-renders UserWelcome with the fetched details.
While client-side data fetching has existed in React for years, the introduction of React Suspense is a valuable addition to data-fetching techniques. From a user’s perspective, React Suspense significantly enhances the experience by providing subtle loaders that not only offer immediate UI feedback but also improve the Cumulative Layout Shift (CLS) score substantially.
From a developer’s perspective, the Suspense pattern promotes a more reactive approach rather than a purely declarative one. It eliminates the need to manually handle errors and loading states for each asynchronous call within the application.
The React Suspense API is gaining popularity because it enables more reactive and maintainable code, leading to better UX and improved performance.
React Query and React Suspense can work together to improve data fetching and UI responsiveness. While React Query provides powerful features like caching, automatic retries, and background refetching, React Suspense helps manage loading states in a more declarative way.
Let’s install React Query as a dependency in our React application using the command below:
npm i @tanstack/react-query
In our main component, we’ll import useQuery, QueryClient, and QueryClientProvider from @tanstack/react-query and use them to fetch data from an API with React Suspense enabled, as shown in the code below:
import { useQuery, QueryClient, QueryClientProvider } from '@tanstack/react-query';
import { Suspense } from 'react';
const queryClient = new QueryClient({
  defaultOptions: {
    queries: {
      suspense: true, // Enables Suspense for queries
    },
  },
});
const fetchUser = async () => {
  const res = await fetch('https://dummyjson.com/users/1');
  if (!res.ok) throw new Error('Network response was not ok');
  return res.json();
};
function UserComponent() {
  const { data } = useQuery({ queryFn: fetchUser });
  return (
    <div>
      <h2>{data.firstName} {data.lastName}</h2>
      <p>Email: {data.email}</p>
      <p>Age: {data.age}</p>
    </div>
  );
}
export default function App() {
  return (
    <QueryClientProvider client={queryClient}>
        <Suspense fallback={<div>Loading user data...</div>}>
          <UserComponent />
        </Suspense>
    </QueryClientProvider>
  );
}
lazy()React provides React lazy()as a built-in feature for dynamically loading components only when needed, enhancing performance by reducing the initial bundle size. When combined with React Suspense, React lazy() ensures that components load smoothly, with a fallback UI displayed until they are ready to render.
To demonstrate how to use React Suspense with React lazy(), let’s create a UserDetails component that fetches user information from an API endpoint. Start by creating a new file named UserWelcome.js and add the following code to it:
const fetchData = () => {
    let data;
    let promise = fetch("https://dummyjson.com/users/1")
      .then((response) => response.json())
      .then((json) => (data = json));
    return {
      read() {
        if (!data) {
          throw promise;
        }
        return data;
      },
    };
  };
  const userData = fetchData();
  const UserWelcome = () => {
    const userDetails = userData.read();
    return (
      <div className="app">
        <div>
          <h4>Welcome, {userDetails.firstName}</h4>
          <p>{userDetails.email}</p>
        </div>
      </div>
    );
  };
  export default UserWelcome;
Instead of loading the UserWelcome component upfront, we can lazy load it using React lazy(), ensuring it is fetched only when needed. To manage the component’s loading state when using React lazy(), we can wrap it with React Suspense, as used in the code below:
import { Suspense, lazy } from "react";
const UserWelcome = lazy(() => import("./UserWelcome"));
const UserComponent = () => (
  <Suspense fallback={<p>Fetching user details...</p>}>
    <UserWelcome />
  </Suspense>
);
export default UserComponent;
Using React lazy() with React Suspense helps optimize the initial page load time and enhances the user experience.
Using React Suspense and the render-as-you-fetch approach, we will build a simple app that fetches user information and a to-do list from an API and renders them in our React application.
To get started, let’s create a UserDetails component that fetches user data from the https://dummyjson.com/users/1 endpoint and renders the user details in the component UI. To do this, inside the src folder, create a file named UserDetails.js and add the following code to it:
import React, { useEffect, useState } from "react";
export default function UserDetails() {
  const [user, setUser] = useState(null);
  useEffect(() => {
    fetch("https://dummyjson.com/users/1")
      .then((res) => res.json())
      .then((data) => setUser(data));
  }, []);
  if (!user) return null;
  return (
    <>
    <div className="mb-3">
      <p><strong>User:</strong> {user.firstName} {user.lastName}</p>
      <p><strong>Email:</strong> {user.email}</p>
    </div>
     <h5 className="mb-5">Here is your todo list for today.</h5>
     </>
  );
}
Next, let’s create a Todos component that fetches the to-do list from the https://dummyjson.com/todos endpoint and displays the records in the component’s UI, just as we did for the UserDetails component.
To do this, create a new file named Todos.js and add the following code to it:
import React, { useEffect, useState } from "react";

export default function Todos() {
  const [todos, setTodos] = useState([]);
  useEffect(() => {
    fetch("https://dummyjson.com/todos?limit=10")
      .then((res) => res.json())
      .then((data) => setTodos(data.todos));
  }, []);
  if (todos.length === 0) return null;
  return (
    <div>
      <h4 className="mb-2">Todos:</h4>
      <ul className="list-group">
        {todos.map((todo) => (
          <li key={todo.id} className="list-group-item d-flex justify-content-between align-items-center">
            {todo.todo}
            <span>{todo.completed ? "✅" : "❌"}</span>
          </li>
        ))}
      </ul>
    </div>
  );
}
Now that all our React components are in place, let’s explore how to manage the rendering order using React Suspense with lazy(). To optimize component loading time with React lazy() and handle loading states using React Suspense for a better user experience, open the App.js file and add the following code:
import React, { Suspense, lazy } from "react";
const UserDetails = lazy(() => import("./UserDetails"));
const Todos = lazy(() => import("./Todos"));
export default function App() {
  return (
    <div className="d-flex justify-content-center align-items-center vh-100" style={{ backgroundColor: "#dbeeff",display:"flex" }}>
      <div className="card shadow-lg p-4 rounded-4 text-center" style={{ maxWidth: "500px", width: "100%", background: "#fff",margin:"100px" }}>
        <h2 className="mb-3">Simple Todo</h2>
        <Suspense fallback={<p>Loading user details...</p>}>
          <UserDetails />
        </Suspense>
        <Suspense fallback={<p>Loading Todos...</p>}>
          <Todos />
        </Suspense>
      </div>
    </div>
  );
}
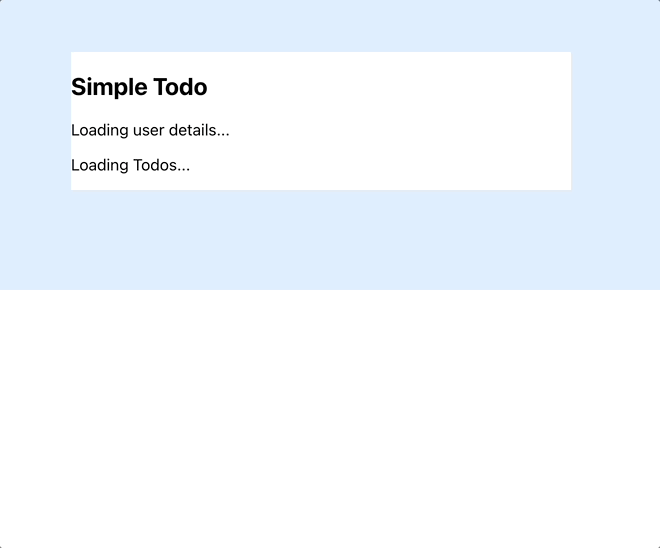
Imagine if the Todos component retrieves its data first. You start going through the list, only for the UserDetails component to load a little later. The newly rendered content would push the existing to-do list down in an awkward way, potentially disorienting your users:
If you want the To-dos component to render only after the UserDetails component has finished rendering, you can nest the React Suspense component around the Todos component like this:
<Suspense fallback={<p>Loading user details...</p>}>
  <UserDetails />
  <Suspense fallback={<p>Loading Todos...</p>}>
    <Todos />
  </Suspense>
</Suspense>
This will cause React to render the components in the order they appear in your code, regardless of which one gets its data first:
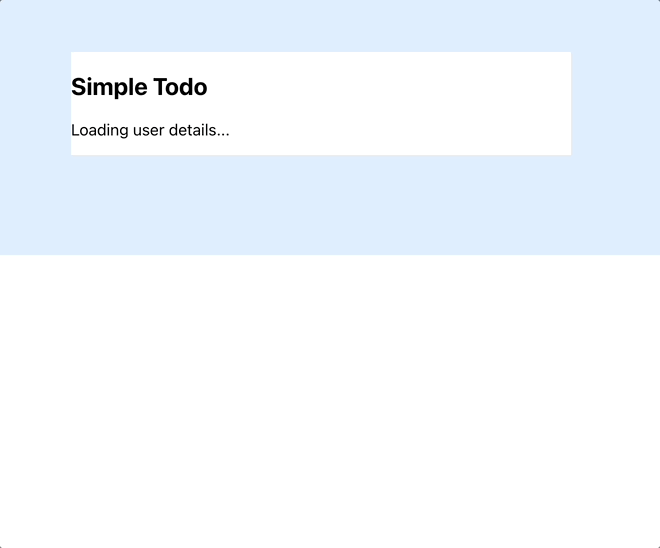
You can see how easy it is to organize your application’s loading states, compared to manually managing isLoading variables. A top-down loading approach is much more efficient.
Error boundaries are React components that catch JavaScript errors in their child component tree, log the errors, and display a fallback UI instead of crashing the whole application. They help improve user experience by gracefully handling unexpected errors.
We can enhance error handling in our application by integrating error boundaries with React Suspense. While Suspense is primarily used for handling asynchronous operations, it does not inherently catch errors. Instead, we use error boundaries to handle errors that occur within the Suspense tree, ensuring that failures do not break the rest of the application.
In a typical React Suspense pattern, we often work with async operations that return Promises. If a Promise rejects, the Suspense boundary alone does not handle the error. This is where an error boundary is needed—to gracefully manage failed Promise states and display a fallback UI when necessary.
React only supports error boundaries in class components, so we need to create one by creating a new file named ErrorBoundary.js inside the src folder and then add the code below:
class ErrorBoundary extends React.Component {
 constructor(props) {
 super(props);
 this.state = { hasError: false };
 }

 static defaultProps = {
 fallback: <h1>Something went wrong.</h1>,
 };

 static getDerivedStateFromError(error) {
 return { hasError: true };
 }

 componentDidCatch(error, errorInfo) {
 console.log(error, errorInfo);
 }

 render() {
 if (this.state.hasError) {
 return this.props.fallback;
 }

 return this.props.children;
 }
}
Next, let’s import the ErrorBoundary component and wrap our React Suspense inside it to handle Promise failures that may occur when loading asynchronous components. To do that, update your main component with the following code:
import React, { Suspense, lazy } from "react";
import ErrorBoundary from "./ErrorBoundary";
const UserDetails = lazy(() => import("./UserDetails"));

export default function App() {
  return (
        <ErrorBoundary fallback={<p>An error occurred while fetching user details...</p>}>
        <Suspense fallback={<p>Loading user details...</p>}>
          <UserDetails />
        </Suspense>
        </ErrorBoundary>
  );
}
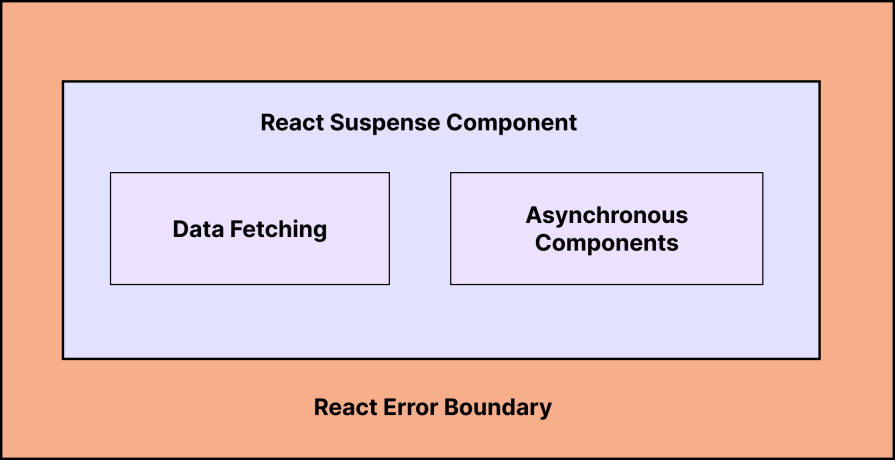
By wrapping React Suspense inside the ErrorBoundary component, our application can effectively catch errors that occur during asynchronous operations, preventing crashes and ensuring a smoother user experience:
 Conclusion
In this article, we explored the React Suspense component and various data-fetching approaches in React. We also built a simple app that uses React Suspense for data fetching.
The newly updated React documentation is a great resource for learning about data fetching from a server-side perspective. However, for client-heavy interactions, you can always apply the fetching patterns we discussed above.
Install LogRocket via npm or script tag. LogRocket.init() must be called client-side, not
server-side
$ npm i --save logrocket

// Code:

import LogRocket from 'logrocket';
LogRocket.init('app/id');
// Add to your HTML:

<script src="https://cdn.lr-ingest.com/LogRocket.min.js"></script>
<script>window.LogRocket && window.LogRocket.init('app/id');</script>

Learn how to build smooth staggered animations in CSS using modern features like sibling-index(), complete with practical examples, fallbacks, and accessibility tips.

Compare the top AI development tools and models of July 2026. View updated rankings, feature breakdowns, and find the best fit for you.

Learn how to detect unused and ghost dependencies in JavaScript projects using Knip, a project-level linter that keeps your dependency graph accurate.

Learn how Storybook MCP enables AI agents to understand your component library, generate accurate UI, and validate code using documentation, stories, and automated tests.
Would you be interested in joining LogRocket's developer community?
Join LogRocket’s Content Advisory Board. You’ll help inform the type of content we create and get access to exclusive meetups, social accreditation, and swag.
Sign up now

