Editor’s Note: This post was reviewed for accuracy on 7 March 2023. For additional information on web workers, check out the MDN documentation and our post on using the React useReducer Hook with web workers.

Web workers are a means for web browsers to run scripts in the background without interfering with the UI. If set up correctly, a web worker can send and receive messages from the JavaScript or TypeScript code where it was set up. In this article, we’ll learn about web workers and how to use them in a project with React and TypeScript by building a paginated data table.
We’ll determine the length, filter, slice, and map through long arrays without affecting the performance or UX of our web applications. Essentially, we’ll learn how to boost a web application’s performance using web workers, which offer us a multi-thread capability to handle long processes in the background.
To follow along, you can clone the source code:

Jump ahead:
App.ts and Generate typescount web worker in TypeScriptgetData web worker with TypeScriptpagination in TypeScript
pagination component
A web worker is a JavaScript process that runs in the background of a webpage. By default, JavaScript is single-threaded. Consequently, JavaScript only has one thread or execution path, the main thread, which synchronously executes all of the JavaScript code on a webpage.
Web workers, on the other hand, are a browser feature that allow you to execute multiple JavaScript threads in parallel without interfering with the DOM.
Unlike the main thread, web workers cannot access and manipulate the DOM, but they can perform I/O using XMLHttpRequest or Fetch. Instead of the main thread having to execute all of the JavaScript code, we can create a web worker to handle any long-running computations, ensuring that the main thread is not overwhelmed.
To create a worker object, you can use the worker() constructor. Keep in mind that web workers run in a global context, which is different from the window object.
In JavaScript, web workers enable developers to achieve multi-threading, or true concurrency. Concurrent systems are implemented using different concurrent models that specify how threads should interact to complete a task. An important aspect of concurrent models is whether the threads share state or are isolated.
JavaScript supports two concurrent models, the actor model and shared memory. Both of these concurrent models have pros and cons, use workers differently, and are often grouped under the term “off main thread” architecture.
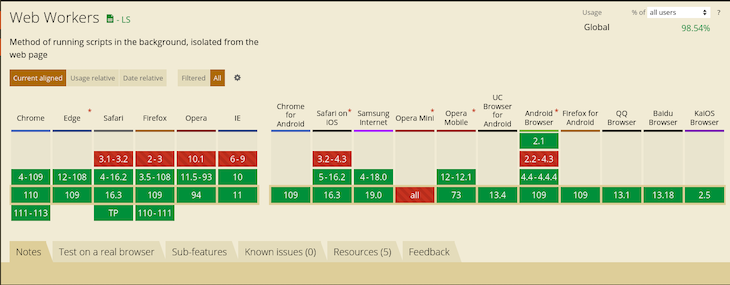
As of 2023, web workers are fully supported by all major browsers, as seen in the graphic below:
Be mindful that you really only need to use web workers if your site needs to perform heavy lifting.
To set up our project, we’ll create a new folder to contain our code; I’ll name mine app. Open the new folder in the code editor of your choice, then run the following code in your terminal to set up a React and TypeScript project:
npx create-react-app ./ --template TypeScript
With the project set up, we’ll create three folders inside src:
components: Stores Loader.tsx, Pagination.tsx, and Table.tsxdata: Stores the index.ts filelongProcess: Stores count.ts, enums.ts, and getData.ts:Our folder and file structure should look similar to the following:
app
├── README.md
├── node_modules
├── package.json
├── tsconfig.json
├── .gitignore
├── public
│   ├── favicon.ico
│   ├── index.html
│   ├── logo192.png
│   ├── logo512.png
│   ├── manifest.json
│   └── robots.txt
└── src
    ├──components
    │   ├── Loader.tsx
    │   ├── Pagination.tsx
    │   └── Table.tsx
    |
    ├──data
    │   └── index.ts
    |
    ├──longProcesses
    │   ├── count.ts
    │   ├── enums.ts
    │   └── getData.ts
    ├── App.css
    ├── App.js
    ├── App.test.js
    ├── index.css
    ├── index.js
    ├── logo.svg
    ├── serviceWorker.js
    └── setupTests.js
To start your development server, run npm start or yarn start in the terminal.
In data/index.ts, we’ll add a long array, which contains 5,000 objects that look similar to the following:
    {
      "albumId": 1,
      "id": 2,
      "title": "reprehenderit est deserunt velit ipsam",
      "url": "https://via.placeholder.com/600/771796",
      "thumbnailUrl": "https://via.placeholder.com/150/771796"
    },
Enums define a set of named constants, or variables that don’t change. An enum is a special class in TypeScript that represents a group of unchangeable variables, like an object with a freeze method called on it. Enums ensure that you always use the proper variable names in your code, preventing errors that might occur when a variable is misspelled. To learn more about extending enums in TypeScript, check out our guide.
To ensure we’re calling the correct variables, we have to create and export processList and ProfileEnum in longProcesses/enums.ts, enums that would be used in files:
// longProcesses/enums.ts

export enum processList {
 count = "count",
 getData = "getData",
}

export enum ProfileEnum {
 albumId = "Album Id",
 id = "ID",
 title = "Title",
 url = "Url",
 thumbnailUrl = "Thumbnail",
}
App.ts and Generate typesOne of the most important features of TypeScript is its ability to check for types. We can define types for any variable, parameter, object, or array, ensuring that we always use the right data type.
App.ts is the entry point for our app. Here, we’ll define four types, LengthCountType, ProfileType, ProfileListType, and GetDataType. We’ll also create a functional component that returns a jsx with two section components nested in a div, as shown in the code below:
// App.ts

type LengthCountType = {
  loading: boolean;
  value: number;
};

export type ProfileType = {
  albumId: number | string;
  id: number | string;
  title: string;
  url: string;
  thumbnailUrl: string;
};

export type ProfileListType = {
  loading: boolean;
  list: unknown & Array<ProfileType>;
  page: number;
};

export type GetDataType = {
  action: string;
  period: "initial" | "next" | "prev" | "pageNumber";
  thePageNumber: number;
};

export const listPageSize = 50;

const App = () => {
    return (
        <main className="main-container">
            <section className="count"></section>
            <section className="table-container"></section>
        </main>
    )
}
Determining the length of a long array blocks the single thread used by a web application. However, with a web worker, we can successfully check for the length of a long array without blocking the thread. We’ll add the code for this in longProcesses/count.ts:
// longProcesses/count.ts

/* eslint-disable no-restricted-globals */
import { profiles } from "../data";
import { processList } from "./enums";

self.onmessage = (e: MessageEvent<string>) => {
  if (e.data === processList.count) {
    const findLength = profiles.length;

    self.postMessage(findLength);
  }
};

export {};
First, we disable the error that says we’ve used self incorrectly. Next, we import the array and the processList enum. Then, we listen to the onmessage event, which is fired when a message has been posted to the worker file.
Check if the data passed is equivalent to the count enum. If it is, we’ll get the length of the data and post it back to the originating file in the DOM. Finally, to prevent TypeScript from throwing an error, export an empty object.
Loader componentThe Loader component will indicate when the process is being processed in the background. In components/Loader.ts, add the following code:
// components/Loader.ts

import React from "react";

type Props = {
 color?: "black" | "white";
 size?: number;
 display?: "inline-block" | "block";
};

const Loader = ({
 color = "black",
 size = 20,
 display = "inline-block",
}: Props) => {
 return (
   <div
     style={{
       border: `4px solid ${color}`,
       width: `${size}px`,
       height: `${size}px`,
       borderRightColor: "transparent",
       borderRadius: "50%",
       display,
       margin: display === "block" ? "50px auto" : "none",
     }}
     className="loader"
   ></div>
 );
};

export default Loader;
Let’s break it down. The Loader accepts three props, color, size, and display. It returns a single div with the styles. It also has a loader class that has been styled in index.css to cause a spinning motion:
// index.css

.loader {
 animation: spinner 1s linear forwards infinite;
}

@keyframes spinner {
 from {
   transform: rotate(0deg);
 }

 to {
   transform: rotate(360deg);
 }
}
count web worker in TypeScriptThe count web worker determines the length of the long array we have. To use the count worker, open App.ts and import the useMemo, useEffect, and useState Hooks from React and the processList enum:
// App.ts

import React, { useEffect, useMemo, useRef, useState } from "react";
import { processList } from "./longProcesses/enums";
Inside the component, we’ll initialize a new web worker with the count.ts worker file we already created:
// App.ts

// const App = () => {

  const counter: Worker = useMemo(
    () => new Worker(new URL("./longProcesses/count.ts", import.meta.url)),
    []
  );
Next, we’ll create a state that will store the length of the array locally for us:
// App.ts

  const [lengthCount, setLengthCount] = useState<LengthCountType>({
    loading: true,
    value: 0,
  });
We’ll use the initialized counter to post a message to the count worker inside the useEffect Hook:
// App.ts

  useEffect(() => {
    if (window.Worker) {
      counter.postMessage(processList.count);
    }
  }, [counter]);
Then, we’ll create a set of the appropriate values to the lengthCount state:
  useEffect(() => {
    if (window.Worker) {
      counter.onmessage = (e: MessageEvent<string>) => {
        setLengthCount((prev) => ({
          ...prev,
          loading: false,
          value: Number(e.data) && Number(e.data),
        }));
      };
    }
  }, [counter]);
Finally, we’ll use the lengthCount state to render a loader and the length of the array on the UI:
// App.ts

    <section className="count">
        Total count of Profiles is{" "}
        <b>{lengthCount.loading ? <Loader size={14} /> : lengthCount.value}</b>
      </section>
In the counter variable, we wrap the worker instance with useMemo, preventing unnecessary re-initialization on re-renders. Inside the function, we use the new Worker method and pass in a new instance of a generated URL that contains the path to the count worker file.
The lengthCount state holds the loading and value state of the counter. The first useEffect runs the count worker on the first re-render. Essentially, it checks if the user’s browser supports web workers before posting a message to the count worker file.
The second useEffect receives a response from the count worker and sets the received response to the lengthCount state.
In the markup, we display a loader when the process is still running, as well as the value when completed.
Getting data from a long array like the one we have can cause a lag in the user’s devices, resulting in a bad UX; we can prevent that with a web worker.
To get started, we’ll add the following code to longProcesses/getData.ts:
// getData.ts

/* eslint-disable no-restricted-globals */
import { GetDataType, listPageSize, ProfileListType } from "../App";
import { profiles } from "../data";
import { processList } from "./enums";

self.onmessage = (e: MessageEvent<string>) => {
  const data = JSON.parse(e.data) as GetDataType;

  if (data.action !== processList.getData) {
    return;
  }
  if (data.period === "initial") {
    const items = profiles.filter((item, index) => index < listPageSize);

    const response = {
      loading: false,
      list: items,
      page: data.thePageNumber,
    } as ProfileListType;

    self.postMessage(JSON.stringify(response));
  }
}

export {};
First, we import the defined types in App.ts, the list of data, and processList. Then, we parse the returned data in the event and set it as GetDataType. We check if the type of action is invalid and if the period of the action is initiated; if so, we’ll get the first 50 items in our list using the JavaScript filter method, create a response object, and then post it as a string.
The table will display the list of items on the UI. In components/Table.tsx, add the following code:
import React from "react";
import { ProfileType } from "../App";
import { ProfileEnum } from "../longProcesses/enums";

type Props = {
  list: Array<ProfileType>;
};

const Table = ({ list }: Props) => {
  return (
    <div className="table">
      <table>
        <thead>
          <tr>
            <th>#</th>
            <th>{ProfileEnum.id}</th>
            <th>{ProfileEnum.title}</th>
            <th>{ProfileEnum.albumId}</th>
            <th>{ProfileEnum.thumbnailUrl}</th>
          </tr>
        </thead>
        <tbody>
          {list.length > 0 &&
            list.map((item, index: number) => {
              return (
                <tr key={item?.id}>
                  <td>{index + 1}</td>
                  <td>{item?.id}</td>
                  <td>{item?.title}</td>
                  <td>{item?.albumId}</td>
                  <td>
                    <img
                      src={item?.thumbnailUrl}
                      alt={item?.title}
                      width={50}
                      height={50}
                      loading="lazy"
                    />
                  </td>
                </tr>
              );
            })}
        </tbody>
      </table>
    </div>
  );
};

export default Table;
First, we import ProfileType and ProfileEnum, then we define a PropType for our Table component. Next, we create a div that returns a table:
table: Returns a thead and tbodythead: Returns a tr that contains five thtbody: Contains a map that returns a trtr: Returns five tdTo boost performance, we used lazy loading to generate the images using the loading="lazy" attribute.
getData web worker with TypeScriptUsing the getData web worker is similar to how we used the count worker. First, we’ll initialize a new worker with the code below:
// App.ts

const getData: Worker = useMemo(
    () => new Worker(new URL("./longProcesses/getData.ts", import.meta.url)),
    []
  );
Next, we’ll define the local state to handle the profileList state:
// App.ts

  const [profileList, setProfileList] = useState<ProfileListType>({
    loading: true,
    list: [],
    page: 1,
  });
Then, we’ll create a useEffect where we use getData at the initial render:
// App.ts

  useEffect(() => {
    if (window.Worker) {
      const request = {
        action: processList.getData,
        period: "initial",
        thePageNumber: profileList.page,
      } as GetDataType;

      getData.postMessage(JSON.stringify(request));
    }
    // eslint-disable-next-line react-hooks/exhaustive-deps
  }, []);
We’ll create another useEffect that will handle receiving the response from the getData web worker file:
// App.ts

  useEffect(() => {
    if (window.Worker) {
      getData.onmessage = (e: MessageEvent<string>) => {
        const response = JSON.parse(e.data) as unknown as ProfileListType;

        setProfileList((prev) => ({
          ...prev,
          loading: response.loading,
          list: response.list,
          page: response.page,
        }));
      };
    }
  }, [getData]);
Finally, we’ll display the data using the Table component we created:
    <section className="table-container">
        {profileList.loading ? (
          <Loader size={40} display="block" />
        ) : (
          <>
            <Table list={profileList.list} />
          </>
        )}
      </section>
In the getData variable, useMemo wraps the worker instance to prevent unnecessary re-initialization on re-renders. Inside the function, we use the new Worker method and pass in a new instance of a generated URL, which contains the path to the getData worker file. The profileList state holds the loading, list, and page state of the getData worker locally in our app.
On the first re-render, the first useEffect runs getData. It checks if the user’s browser has support for web workers; it also houses a request object that is stringified before being sent to the getData worker file. The request object contains an action, period, and thePageNumber key-value pairs. The second useEffect receives a response from getData and sets the received response to the profileList state.
In the markup, we display a loader when the process is still running and render a table when it is completed. Keep in mind that the classes passed to the elements are used to style them.
When a user selects either the next and prev buttons or a page number, the pagination component will navigate to a certain page.
To implement a worker for this functionality, we’ll modify the getData worker inside longProcesses/getData.ts and add the following code to it:
// longProcesses/getData.ts

  if (
    data.period === "pageNumber" ||
    data.period === "next" ||
    data.period === "prev"
  ) {
    const items = profiles.slice(
      (data.thePageNumber - 1) * listPageSize,
      data.thePageNumber * listPageSize
    );
    const response = {
      loading: false,
      list: items,
      page: data.thePageNumber,
    } as ProfileListType;

    self.postMessage(JSON.stringify(response));
  }
From the file that posted a message to the getData worker, we’ll get a data object containing a period key. Before slicing the page using the page number and the list page size, we check if this key is equal to pageNumber, next, or prev. Then, create a response object and post the response as a stringified message.
pagination component from ReactTo create a pagination component, we’ll add the following code to components/Pagination, creating pagination component.tsx:
// Pagination.tsx

import React from "react";

type Props = {
  page: number;
  pages: number;
  pageClick: (page: number) => void;
  prevHandler: () => void;
  nextHandler: () => void;
};

const Pagination = ({
  page,
  pages,
  pageClick,
  prevHandler,
  nextHandler,
}: Props) => {
  return (
    <div className="pagination-container">
      <button className="prev" onClick={prevHandler} disabled={page === 1}>
        Prev
      </button>
      <ul className="pages-container">
        {[...Array(Math.ceil(pages)).keys()].map((x, i) => {
          return (
            <li
              key={i}
              className={page - 1 === i ? "active page-item" : "page-item"}
              onClick={() => {
                pageClick(x + 1);
              }}
            >
              {x + 1}
            </li>
          );
        })}
      </ul>
      <button className="next" onClick={nextHandler} disabled={page === pages}>
        Next
      </button>
    </div>
  );
};

export default Pagination;
First, we define the props type, which contains page and pages and must accept a number. pageClick, prevHandler, and nextHandler must accept a function. In the jsx, we return a div with a class. Inside the div, we return three elements, button, ul, and a second button.
The first button contains a class and an onclick event listener that runs the prevHandler function. When the current page is the first page, it is disabled. The ul contains a class and returns an array of numbers using the pages value.
We use a map function to loop through the new array and return an li element. Each li contains a key, a class that changes when the li is active. It also contains an onClick event handler that runs the pageClick function.
If TypeScript complains about converting a number to an array, add the following key-pair to the compilerOption object in your tsconfig.json file:
// tsconfig.json
    "downlevelIteration": true /** This fixes error when converting numbers to array of numbers*/,
The last button is the next button, which accepts a class and an onClick event handler that runs the nextHandler function. When the current page is the last page, it is disabled.
The page handlers are the functions we pass to the pagination component when using it. The first function we’ll create is handlePageNumber, which will be called when a user clicks a page:
  const handlePageNumber = (userSelectedPage: number) => {
    if (window.Worker) {
      const request = {
        action: processList.getData,
        period: "pageNumber",
        thePageNumber: userSelectedPage,
      } as GetDataType;

      getData.postMessage(JSON.stringify(request));
    }
  };
The second function, prevHandler, will be called when the prev button is clicked:
  const prevHandler = (userSelectedPage: number) => {
    if (profileList.page === 1) {
      return;
    }

    if (window.Worker) {
      const request = {
        action: processList.getData,
        period: "prev",
        thePageNumber: userSelectedPage - 1,
      } as GetDataType;

      getData.postMessage(JSON.stringify(request));
    }
  };
Our last function is nextHandler, which will be called when the next button is clicked:
  const nextHandler = (userSelectedPage: number, thePageLength: number) => {
    if (userSelectedPage < thePageLength) {
      if (window.Worker) {
        const request = {
          action: processList.getData,
          period: "next",
          thePageNumber: userSelectedPage + 1,
        } as GetDataType;

        getData.postMessage(JSON.stringify(request));
      }
    }
  };
handlePageNumber accepts the userSelectedPage as a param. We then check if the browser supports web workers. If so, we create a request object that contains the action, period, and thePageNumber. We post the request as a stringified message to the getData web worker.
Our next function, prevHandler accepts the userSelectedPage as a param. We check if the current page is the first page and do nothing. Then, we create a request object. However, we’ll send a decremented thePageNumber key.
Finally, nextHandler is like the first two functions, however, it accepts two props instead. First, we check if the userSelectedPage is less than the value of thePageLength variable we defined above. In addition, the thePageNumber key is incremented.
pagination componentTo use the pagination component, we need to import it into component/App.ts:
// App.ts

import Pagination from "./components/Pagination";
Next, we’ll add the following markup below the Table component:
// App.ts

  <Pagination
    page={profileList.page}
    pages={lengthCount.value / listPageSize}
    pageClick={(pageNumber) => {
      handlePageNumber(pageNumber);
    }}
    prevHandler={() => prevHandler(profileList.page)}
    nextHandler={() =>
      nextHandler(profileList.page, lengthCount.value / listPageSize)
    }
  />
First, we pass profileList.page to the page, lengthCount.value / listPageSize to the pages, and the handlePageNumber function to the pageClick prop. Finally, we pass the prevHandler and the nextHandler to their appropriate props.
To style the web workers, I’ll use the code below. However, you can use any style of your choice:
// index.css

body {
  margin: 0;
  font-family: -apple-system, BlinkMacSystemFont, "Segoe UI", "Roboto", "Oxygen",
    "Ubuntu", "Cantarell", "Fira Sans", "Droid Sans", "Helvetica Neue",
    sans-serif;
  -webkit-font-smoothing: antialiased;
  -moz-osx-font-smoothing: grayscale;
  padding-bottom: 4rem;
}

.loader {
  animation: spinner 1s linear forwards infinite;
}

@keyframes spinner {
  from {
    transform: rotate(0deg);
  }

  to {
    transform: rotate(360deg);
  }
}

.main-container {
  display: flex;
  flex-direction: column;
  align-items: center;
  padding-top: 2rem;
}

.count {
  padding: 2rem 0 3rem;
  font-size: 2rem;
  text-align: center;
}

.table-container {
  width: 95%;
  padding: 0 0.5rem;
  max-width: 700px;
}

table,
td,
th {
  border: 1px solid black;
  padding: 0.2rem;
}

table {
  border-collapse: collapse;
  width: 100%;
  min-height: 700px;
}

th {
  white-space: nowrap;
}

td {
  text-align: left;
  vertical-align: top;
}

td:first-child {
  font-weight: 300;
}

.pagination-container {
  display: flex;
  align-items: center;
  justify-content: center;
  margin: auto;
  gap: 1rem;
  width: 100%;
  max-width: 500px;
}

.pages-container {
  display: flex;
  list-style: none;
  gap: 0.5rem;
  overflow-x: scroll;
  padding-bottom: 0.5rem;
}

.pages-container > * {
  background-color: rgb(49, 150, 238);
  padding: 0.3rem;
  min-width: 40px;
  text-align: center;
  cursor: pointer;
  border: none;
  border-radius: 8px;
}

.page-item.active {
  background-color: blue;
  color: white;
}

.prev,
.next {
  padding: 0.6rem;
  text-align: center;
  cursor: pointer;
}
Using web workers with TypeScript and React has become much easier; we can now handle operations and heavy tasks in the background while boosting performance and improving the UX.
Thanks for reading! I hope you enjoyed this article, and be sure to leave a comment if you have any questions. Happy coding!
Install LogRocket via npm or script tag. LogRocket.init() must be called client-side, not
server-side
$ npm i --save logrocket

// Code:

import LogRocket from 'logrocket';
LogRocket.init('app/id');
// Add to your HTML:

<script src="https://cdn.lr-ingest.com/LogRocket.min.js"></script>
<script>window.LogRocket && window.LogRocket.init('app/id');</script>
Hey there, want to help make our blog better?
Join LogRocket’s Content Advisory Board. You’ll help inform the type of content we create and get access to exclusive meetups, social accreditation, and swag.
Sign up now
Set up real-time video streaming in Next.js using HLS.js and alternatives, exploring integration, adaptive streaming, and token-based authentication.

Not sure if low-code is right for your next project? This guide breaks down when to use it, when to avoid it, and how to make the right call.

Compare Firebase Studio, Lovable, and Replit for AI-powered app building. Find the best tool for your project needs.

Discover how to use Gemini CLI, Google’s new open-source AI agent that brings Gemini directly to your terminal.


7 Replies to "Web workers, React, and TypeScript"
Amazing. Thanks for this information
Hi I couldn’t make it work, and the only difference I have is that I started the project with Vite xD is it something that could affect, or should i try to re-start the project using create-react-app? thanks
Hello Lenz,
I can see that you are having difficulty using the article on vite.
Try using it with create react app.
For anyone else wondering. If you’re using Vite, you can import the workers like this:
import CountWorker from “./longProcess/count?worker”
then use it in your useMemo hook:
const counter: Worker = useMemo(() => new CountWorker(), []);
Have you found any way to get new Worker(new URL(“./longProcesses/count.ts”, import.meta.url)) working when testing with Jest, (via create-react-app?) Jest throws “SyntaxError: Cannot use ‘import.meta’ outside a module” no matter what I do, and I haven’t found a good solution online.
At no point in this guide do you define `import.meta.url` or explain what it is. Also, how does making a browser call directly to a `.ts` even file work?
I am getting following error.
SecurityError: Failed to construct ‘Worker’: Script at ‘file:///D:/artica-repos/stoke/stoke-webapp/libs/dashboard/src/lib/components/charts/views/TableView/utils/tableDataWorker.ts’ cannot be accessed from origin ‘http://localhost:4200’.