Editor’s note: This guide to building rich text editors in React was last updated on 1 December 2022 by Shalitha Suranga to reflect updates to React. This update added sections about the benefits of react-draft-wysiwyg, more information on Draft.js and react-draft-wysiwyg, and a section on using the UseEffect Hook. To learn more about React Hooks check out our React Hooks reference guide and cheat sheet.

Frontend developers typically use plaintext inputs or textarea elements for capturing small-sized text segments, such as a username, address, or city. In some scenarios, they need to let users enter styled, formatted text with multi-media items in web applications. However, plaintext inputs can’t satisfy these requirements, so developers tend to use the rich text editors concept.
Rich text editors have become integral in the way we interact with web applications especially when it comes to content generation. Web-based rich text editors are usually WYSIWYG HTML editors that offer a live preview of the styled and formatted text segments. Rich text editors enable you to control the appearance of the text and provide a powerful way for content creators to create and publish HTML anywhere.
In this article, we will be using Draft.js and react-draft-wysiwyg to build a rich text editor and display the text we created using the editor.
Jump ahead:
EditorStateEditorState
Draft.js is a rich text editor framework for React that provides APIs for developers to build their own rich text editor implementations. It offers a pre-developed React component for generating and presenting rich text. Draft.js lets developers build rich text editors for a wide range of use cases by offering a declarative API that supports features starting from simple text formatting to embedding media items such as hyperlinks, images, mentions, and more.
Draft.js doesn’t offer pre-built toolbar elements. It offers atomic rich text editor building blocks as a framework, so we have to use a Draft.js-based wrapper library or build one from scratch if we need to create a rich text editor with a toolbar.
The react-draft-wysiwyg library is a WYSIWYG (What You See Is What You Get) editor built using React and Draft.js libraries. It comes with many customizable built-in features that you expect from a modern HTML editor component, such as text styling buttons, keyboard shortcuts support, embedding media items, emoji support, and more.
The react-draft-wysiwyg library offers a rich text editor component that comes with all the general WYSIWYG features and several advanced features, including mentions and hashtags support. You can mount the pre-built editor into your app and have all the features you need!
This library doesn’t limit developers’ feature scopes by offering a rigid feature set. It lets developers customize the toolbar and features via various component props. You can even add custom toolbar items easily!
The react-draft-wysiwyg library also comes with a simple API, self-explanatory component props, and well-written documentation. This allows you to set up a rich text editor for your React app in record time. Also, you can use Draft.js core APIs and some popular Draft.js community libraries within the rich text editor component.
This tutorial assumes that you have a working knowledge of React. In addition, make sure you have Node.js, Yarn, or npm installed on your machine. We will be using Create React App to bootstrap our project.
Let’s create our project in a directory of your choice. Any of the commands highlighted below can be typed in the command line to complete your project.
npx: npx create-react-app draft-js-example
npm (npm init <initializer> is available in npm v6+): npm init react-app draft-js-example
Yarn (yarn create is available in v0.25+): yarn create react-app draft-js-example
These will generate a new React project with the following directory structure:
draft-js-example-|
      |__node_mudles/
      |__public/
      |__src/
      |__.gitignore
      |__pacakge.json
      |__README.md
      |__yarn.lock
Navigate to the root of your project folder and run it:
cd draft-js-example

npm start
# --- or ---
yarn start
This will run the app in development mode, and you can view it in the browser using http://localhost:3000/:
The following commands install Draft.js and react-draft-wysiwyg packages into your React project:
npm install install draft-js react-draft-wysiwyg
# --- or ---
yarn add draft-js react-draft-wysiwyg
To get underway, we will need to make some edits to the src/App.js file. We will import the editor component and styles from react-draft-wysiwyg and EditorState from draft-js.
The editor uses the default Draft.js editor without any styling. The Draft.js editor is built as a controlled ContentEditable component that is based on React’s controlled input API. EditorState provides a snapshot of the EditorState. This includes the undo/redo history, contents, and cursor.
Let’s add some code to display a rich text editor. Add the following code to your App.js file:
import React, { useState } from 'react';
import { EditorState } from 'draft-js';
import { Editor } from 'react-draft-wysiwyg';

import 'react-draft-wysiwyg/dist/react-draft-wysiwyg.css';
import './App.css';

function App() {
  const [editorState, setEditorState] = useState(
    () => EditorState.createEmpty(),
  );

  return (
    <div className="App">
      <header className="App-header">
        Rich Text Editor Example
      </header>

      <Editor
        editorState={editorState}
        onEditorStateChange={setEditorState}
      />
    </div>
  )
}

export default App;
We will start with an empty state created using the createEmpty method of EditorState. The editor takes EditorState as a prop. You will notice after saving the changes and updates are displayed, the view doesn’t look great:
A few changes will be required for the App.css file. Replace its contents with the following:
.App-header {
  background-color: #282c34;
  min-height: 5vh;
  display: flex;
  flex-direction: column;
  align-items: center;
  justify-content: center;
  font-size: calc(10px + 2vmin);
  color: white;
  margin-bottom: 5vh;
  text-align: center;
  padding: 12px;
 }
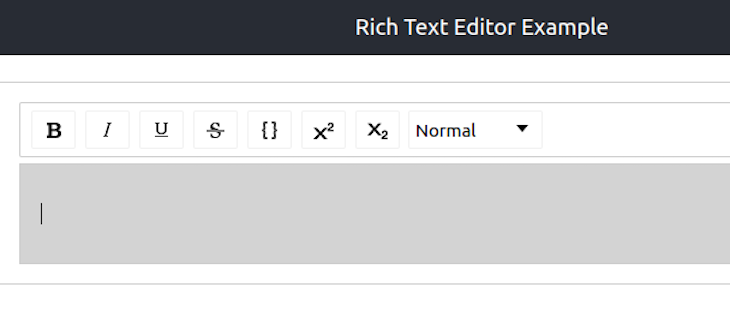
Now, the editor is well-positioned on the browser view. Type some text and change the styling by clicking toolbar icons or pressing keyboard shortcuts such as Control + B for bold text:
If you look at the editor we rendered above, it is quite difficult to tell where one should enter text. The different sections of the editor can be made more apparent using style props. The props can either be the class applied for a particular section or an object containing the styles:
wrapperClassName="wrapper-class"editorClassName="editor-class"toolbarClassName="toolbar-class"wrapperStyle={<wrapperStyleObject>}editorStyle={<editorStyleObject>}toolbarStyle={<toolbarStyleObject>}Add the className props to the Editor component and the relevant styles to App.css as follows to style the editor:
App.js:<Editor
editorState={editorState}
onEditorStateChange={setEditorState}
wrapperClassName="wrapper-class"
editorClassName="editor-class"
toolbarClassName="toolbar-class"
/>
App.css:.wrapper-class {
padding: 1rem;
border: 1px solid #ccc;
}
.editor-class {
background-color:lightgray;
padding: 1rem;
border: 1px solid #ccc;
}
.toolbar-class {
border: 1px solid #ccc;
}
Now, the rich text editor should look something like this:
Note: You may notice a warning that says “
Can’t call setState on a component” in the development mode. React shows this warning message because of an issue in the react-draft-wysiwyg. Hopefully, library maintainers will release a fix for this issue soon. For now, you can disable the React Strict Mode for this tutorial as follows:
import React from 'react';
import ReactDOM from 'react-dom/client';
import './index.css';
import App from './App';
const root = ReactDOM.createRoot(document.getElementById('root'));
root.render(<App />);
See more details about this issue on GitHub.
EditorStateThe editor can either be a controlled or uncontrolled component. A controlled editor is achieved using EditorState, the top-level state object for the editor.
While an uncontrolled editor can be created using EditorState orRawDraftContentState, a flow type that denotes the expected structure of the raw format of the contents. If we want to create a controlled editor, we will pass it the following props:
editorState: Prop to update editor state in a controlled wayonEditorStateChange: A function called when there is a change in editor state that takes an object argument of type EditorStateAfter adding these, to our editor component, it will look like this:
function App() {
const [editorState, setEditorState] = useState(
() => EditorState.createEmpty(),
);
return (
<div className="App">
<header className="App-header">
Rich Text Editor Example
</header>
<Editor
  editorState={editorState}
  onEditorStateChange={setEditorState}
  wrapperClassName="wrapper-class"
  editorClassName="editor-class"
  toolbarClassName="toolbar-class"
/>
</div>
)
}
EditorState can also be used for creating an uncontrolled editor by passing defaultEditorState. This is an object of type EditorState to initialize editor state with once it has been created:
function App() {
  const [editorState, setEditorState] = useState(
    () => EditorState.createEmpty(),
  );


  return (
    <div className="App">
      <header className="App-header">
        Rich Text Editor Example
      </header>
      <Editor
        defaultEditorState={editorState}
        onEditorStateChange={setEditorState}
        wrapperClassName="wrapper-class"
        editorClassName="editor-class"
        toolbarClassName="toolbar-class"
      />
    </div>
  )
}
The other way for achieving an uncontrolled editor is to use RawDraftContentState. The uncontrolled editor takes the following props:
defaultContentState: Object of type RawDraftContentState to initialize editor state with once it has been createdonContentStateChange: A function called when there is a change in editor state that takes an object argument of type RawDraftContentStateAn uncontrolled editor implemented using RawDraftContentState would look like this:
import React, { useState } from 'react';
import { ContentState, convertToRaw } from 'draft-js';
import { Editor } from 'react-draft-wysiwyg';
import 'react-draft-wysiwyg/dist/react-draft-wysiwyg.css';
import './App.css';

function App() {
  const _contentState = ContentState.createFromText('Sample content state');
  const raw = convertToRaw(_contentState);  // RawDraftContentState JSON
  const [contentState, setContentState] = useState(raw); // ContentState JSON


  return (
    <div className="App">
      <header className="App-header">
        Rich Text Editor Example
      </header>
      <Editor
        defaultContentState={contentState}
        onContentStateChange={setContentState}
        wrapperClassName="wrapper-class"
        editorClassName="editor-class"
        toolbarClassName="toolbar-class"
      />
    </div>
  )
}

export default App;
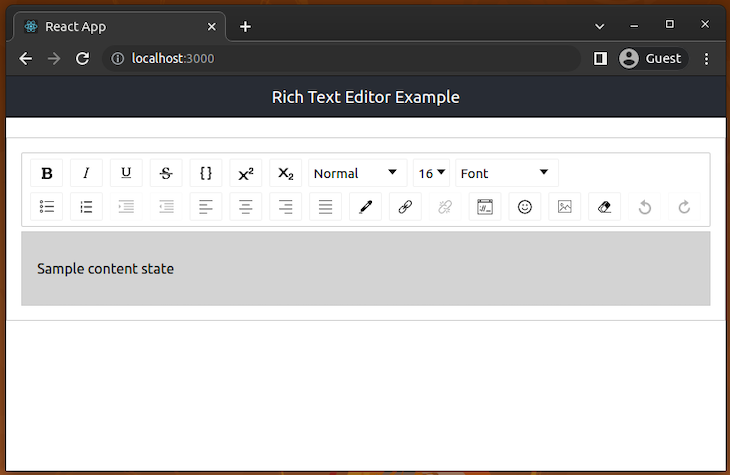
When rendered, this will display the rich text editor like this with pre-loaded text:
As a user interacting with a rich text editor, you will undoubtedly need to save the text or edit the saved text. This means that you should be able to convert the ContentState to raw JavaScript and vice versa — or ContentState to HTML and vice versa. Draft.js provides three functions that enable you to do this:
ContentFromRaw: Converts raw state (RawDraftContentState) to ContentState. You can use this function to load raw JSON structure saved in a database to a rich text editor instanceContentToRaw: Converts ContentState to raw state. You can use this function to convert the current rich text editor state to a raw JSON structure for storing in a databaseContentFromHTML: Converts an HTML fragment to an object with two keys, one of which holds an array of ContentBlock objects and another holding a reference to the entityMap. This object can then be used to construct content state from an HTML documentFor our particular use case, we want to convert the editor state to HTML for storage and display. We can do this using libraries such as draftjs-to-html or draft-convert. We will use draft-convert because it has more features than draftjs-to-html.
Run the following command in your terminal to install it:
npm install draft-convert
# --- or ---
yarn add draft-convert
Let’s use the draft-convert package to generate HTML from the editor state!
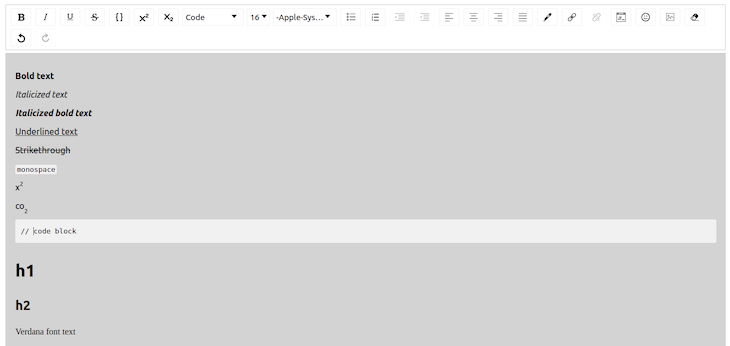
EditorStateOur rich text editor is ready to create some rich text, but it’s not ready to save or preview the content that we have entered. You can play around with the editor and the different toolbar options to see how you can create rich text. The following is an example of different things I was able to do with the editor at this stage:
The next step is to convert this rich text into HTML. We will use convertToHTML function from draft-convert to convert it, but first, we need to get the current content entered in the editor.
EditorState provides a method getCurrentContent which returns the current ContentState of the editor, which we can then convert to HTML.
The way we handle changes in EditorState will have to change a bit. A handler will be called that will update the EditorState, and the component stores the converted HTML in a JavaScript variable.
useEffect HookLet’s add a component that will take the editor content, convert it to HTML, and print raw HTML strings on the browser console:
import React, { useState, useEffect } from 'react';
import { EditorState } from 'draft-js';
import { Editor } from 'react-draft-wysiwyg';
import { convertToHTML } from 'draft-convert';

import 'react-draft-wysiwyg/dist/react-draft-wysiwyg.css';
import './App.css';

function App() {
  const [editorState, setEditorState] = useState(
    () => EditorState.createEmpty(),
  );
  const [convertedContent, setConvertedContent] = useState(null);

  useEffect(() => {
    let html = convertToHTML(editorState.getCurrentContent());
    setConvertedContent(html);
  }, [editorState]);

  console.log(convertedContent);

  return (
    <div className="App">
      <header className="App-header">
        Rich Text Editor Example
      </header>
      <Editor
        editorState={editorState}
        onEditorStateChange={setEditorState}
        wrapperClassName="wrapper-class"
        editorClassName="editor-class"
        toolbarClassName="toolbar-class"
      />
    </div>
  )
}

export default App;
Please note that some of the editor formats may not be supported by
draft-convertand may cause errors.
The above code uses the useEffect Hook with the [editorState] dependency array to update convertedContent state value. Once you run the above code and enter some text with styles, you can see the raw HTML content of the current editor state on your browser console as follows:
Now that the text entered in the editor is converted before rendering the JSX structure, we can display it. We will create a div that will show the entered text.
So, to display the text, we will use dangerouslySetInnerHTML. You may ask yourself, why dangerously? By setting HTML from code, you expose yourself to cross-site scripting (XSS) attacks. The name is a subtle reminder of the dangers involved when doing this.
You have to ensure that your HTML is properly structured and sanitized before adding it to your page. An easy way to do this is by using the dompurify library.
Install this package using the following command:
npm install dompurify
# --- or ---
yarn add dompurify
dangerouslySetInnerHTML receives an object with a __html key (two underscores). This key will hold the sanitized HTML. We can now add the methods to sanitize the HTML and element to hold it. Add import DOMPurify from 'dompurify';.
Next, use the following function implementation instead of the existing console.log statement:
function createMarkup(html) {
  return {
    __html: DOMPurify.sanitize(html)
  }
}
Now, render the sanitized HTML in a div as follows:
<div className="App">
  <header className="App-header">
    Rich Text Editor Example
  </header>
  <Editor
    editorState={editorState}
    onEditorStateChange={setEditorState}
    wrapperClassName="wrapper-class"
    editorClassName="editor-class"
    toolbarClassName="toolbar-class"
  />
  <div
    className="preview"
    dangerouslySetInnerHTML={createMarkup(convertedContent)}>
  </div>
</div>
The createMarkup function receives an HTML string as an argument and returns an object with the sanitized HTML. This method is called by dangerouslySetInnerHTML with the content that was converted to HTML.
HTML containerFinally, add some styles for the HTML container:
.preview {
  padding: 1rem;
  margin-top: 1rem;
}
Now, we can input text in the editor and see it displayed below the rich text editor the same way we formatted it:
That’s it! We are done. We have built a rich text editor that enables us to format text in various ways. The final code for the App.js file should be:
import React, { useState, useEffect } from 'react';
import { EditorState } from 'draft-js';
import { Editor } from 'react-draft-wysiwyg';
import { convertToHTML } from 'draft-convert';
import DOMPurify from 'dompurify';

import 'react-draft-wysiwyg/dist/react-draft-wysiwyg.css';
import './App.css';

function App() {
  const [editorState, setEditorState] = useState(
    () => EditorState.createEmpty(),
  );
  const [convertedContent, setConvertedContent] = useState(null);

  useEffect(() => {
    let html = convertToHTML(editorState.getCurrentContent());
    setConvertedContent(html);
  }, [editorState]);

  function createMarkup(html) {
    return {
      __html: DOMPurify.sanitize(html)
    }
  }

  return (
    <div className="App">
      <header className="App-header">
        Rich Text Editor Example
      </header>
      <Editor
        editorState={editorState}
        onEditorStateChange={setEditorState}
        wrapperClassName="wrapper-class"
        editorClassName="editor-class"
        toolbarClassName="toolbar-class"
      />
      <div
        className="preview"
        dangerouslySetInnerHTML={createMarkup(convertedContent)}>
      </div>
    </div>
  )
}

export default App;
This library renders general WYSIWYG features by default when you use the Editor component without customizations. For example, by default, you got a toolbar with features that you expect in a rich text editor, such as text styling and adding embedded items. The react-draft-wysiwyg library is so flexible and fully featured that it offers props to customize the toolbar, behavior, and enable additional features.
For example, you can create a minimal toolbar with the toolbar prop as follows:
<Editor
  editorState={editorState}
  onEditorStateChange={setEditorState}
  wrapperClassName="wrapper-class"
  editorClassName="editor-class"
  toolbarClassName="toolbar-class"
  toolbar={{
    options: ['inline', 'blockType']
  }}
/>
Look at the following preview:
Also, you can enable hashtags and mentions support with the following props:
hashtag={{
  separator: ' ',
  trigger: '#',
}}
mention={{
  separator: ' ',
  trigger: '@',
  suggestions: [
    { text: 'JavaScript', value: 'javascript', url: 'js' },
    { text: 'Golang', value: 'golang', url: 'go' },
  ],
}}
The above props enable the following features:
You can see all supported features in the official library documentation.
In this article, we looked at creating a rich text editor that already has a toolbar with several options for entering and displaying text. We barely scratched the surface of the experiences that can be created with react-draft-wysiwyg.
You can find additional options and features in the react-draft-wysiwyg documentation and explore how you can build a more feature-rich editor. If you wish to challenge yourself more, you can add functionality to save the text to a database, retrieve it, and update it. The code for this article can be found on GitHub. I can’t wait to see what you build.
Install LogRocket via npm or script tag. LogRocket.init() must be called client-side, not
server-side
$ npm i --save logrocket

// Code:

import LogRocket from 'logrocket';
LogRocket.init('app/id');
// Add to your HTML:

<script src="https://cdn.lr-ingest.com/LogRocket.min.js"></script>
<script>window.LogRocket && window.LogRocket.init('app/id');</script>

Explore 15 essential MCP servers for web developers to enhance AI workflows with tools, data, and automation.

Learn how contrast-color() automatically picks accessible text colors using native CSS, without JavaScript.

Learn how to build a harness-style AI workflow using Claude Code with specialized Dev, QE, and Ops subagents, gated handoffs, MCP telemetry, and LEARNING.md.

Learn how to build smooth staggered animations in CSS using modern features like sibling-index(), complete with practical examples, fallbacks, and accessibility tips.
Would you be interested in joining LogRocket's developer community?
Join LogRocket’s Content Advisory Board. You’ll help inform the type of content we create and get access to exclusive meetups, social accreditation, and swag.
Sign up now

