Editor’s note: This article was last updated on 15 June 2023 to include information about the Firebase Realtime Database, and when to use it instead of the Firebase Firestore.

Firebase is one of the leading solutions for building serverless appications. It offers developers a way to easily develop scalable, high-quality apps without worrying about the cost of setting up and maintaining servers over a long term. Firebase also offers easy integration with Google services like Google Analytics and the Firebase document database, Firestore.
In this article, we’ll build a REST API with Firebase Cloud Functions, TypeScript, and Firestore. You’ll also need some knowledge of Express.js to build our demo app. However, you don’t need to be a pro in any of the aforementioned technologies to follow along. Our demo app will be a journal API that will be able to accept new entries, and retrieve, update, and delete existing entries.
Jump ahead:
The Replay is a weekly newsletter for dev and engineering leaders.
Delivered once a week, it's your curated guide to the most important conversations around frontend dev, emerging AI tools, and the state of modern software.
To get started with our app, you’ll need to have Node.js installed on your computer. If you already have it installed, running the following command on your terminal should return your current Node.js version:
node --version
To follow this tutorial without any warnings, you’ll need to install the same version of Node.js we’ll use in the Firebase cloud. We’ll be using version 12 in our app. The Node.js installation comes with npm, which we’ll use to install the Firebase CLI. Let’s run the following command on our terminal to do that:
npm install -g firebase-tools
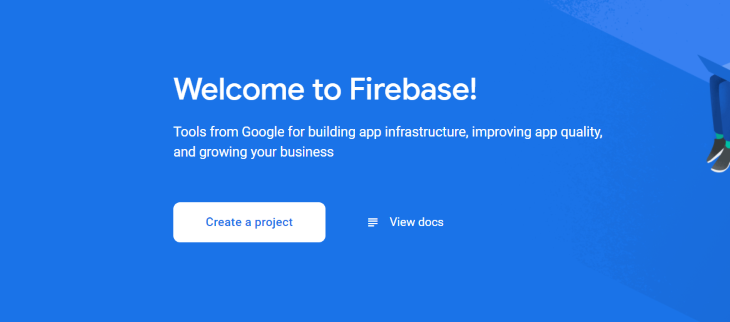
With Node.js and the Firebase CLI installed, you can then navigate to the Firebase console on your browser. You’ll be required to sign in to your Google account. After a successful signin, you should see a Create a project button that looks like this:
You’ll also be given the option to choose a project name and ID. I’ll use “journal-rest-api” for mine. Because the ID is a unique identifier for your project, you’ll need to pick a different project ID. With that done, you can successfully create your Firebase project.
By default, your new account should be on the Spark Free Billing plan. However, to be able to use Firebase functions, you’ll need to upgrade your billing plan to the Blaze Pay as you go. We don’t have to worry about money for this demo, but Firebase nevertheless requires that you upgrade your billing plan to be able to use the Cloud Functions.
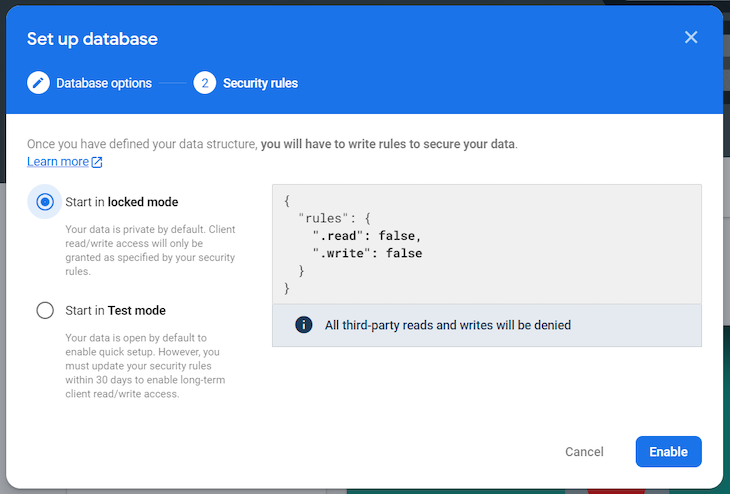
With our billing plan upgraded, let’s create a Firestore database for our app. Navigate to the Cloud Firestore option on the left pane, then click on the Create database button. You should see a modal that looks like this:
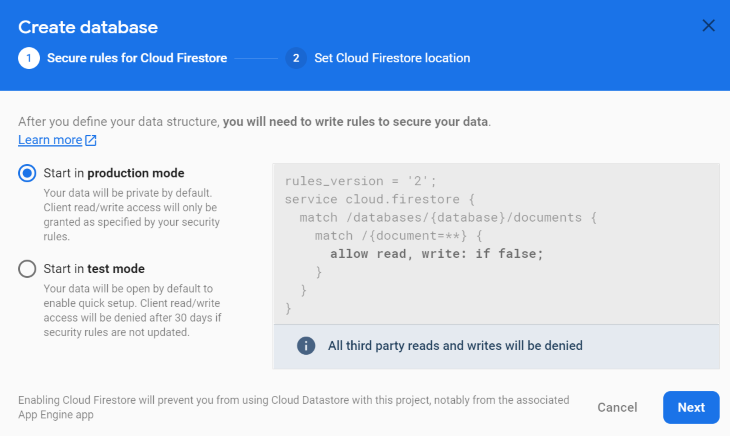
We’ll use the Start in production mode option for this demo. With our database created, we can now write and deploy our first Cloud Function.
To write our fist Cloud Function, we’ll first sign in to our Firebase account using this:
firebase login
This should take you to an authentication page on your browser. After successful authentication, create a project directory on your computer and, inside it, run the following command to initialize Firebase functions:
firebase init functions
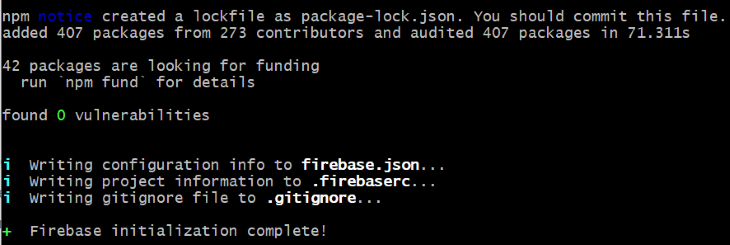
You can go with the default options for your setup. Select the Use an existing project option, then chose the project you just created on Firebase. When asked What language would you like to use to write Cloud Functions?, Select TypeScript. Finally, accept the option to install the npm dependencies. If everything goes well, you should see a success message that looks like this:
The project structure for our new app will look like this:
├── .firebaserc
├── .gitignore
├── .firebase.json
└── functions
    ├── package.json
    ├── tsconfig.json
    ├── .gitignore
    └── src
        ├── index.ts
Notice that the package.json file is inside the functions directory. This means that when running our npm commands, we would need to navigate to the functions directory on our terminal. When you open the ./functions/src/index.ts file, you should see this:
import * as functions from 'firebase-functions';
// // Start writing Firebase Functions
// // https://firebase.google.com/docs/functions/typescript
//
// export const helloWorld = functions.https.onRequest((request, response) => {
//   functions.logger.info("Hello logs!", {structuredData: true});
//   response.send("Hello from Firebase!");
// });
Uncommenting the helloworld function should give us this:
import * as functions from 'firebase-functions';

export const helloWorld = functions.https.onRequest((request, response) => {
  functions.logger.info("Hello logs!", {structuredData: true});
  response.send("Hello from Firebase!");
});
To deploy the default helloworld function, navigate to the functions directory on your terminal and run the following command:
npm run deploy
If the deployment is successful, you should receive a response that looks like this:
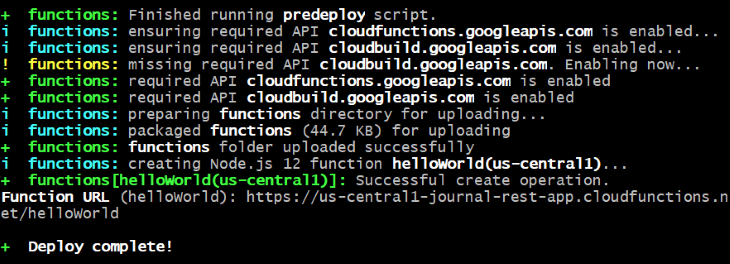
With that done, when we navigate to the Functions section of our Firebase console, we should see our deployed helloWorld function and its URL. Navigating to the displayed URL on our browser should return the response Hello from Firebase!
If our goal is to make simple API calls and database queries, what we’ve done so far should be enough. However, because we want to build a more robust REST API with middleware and multiple routes, we’ll need a Node.js framework like Express. To install Express.js, let’s run the following code on our terminal — remember, we’re still in the functions directory:
npm i -s express
With Express installed, we can initialize it in our app by replacing the code in the ./index.ts file with the following:
import * as functions from 'firebase-functions';
import * as express from 'express';

const app = express();
app.get('/', (req, res) => res.status(200).send('Hey there!'));
exports.app = functions.https.onRequest(app);
Next, let’s redeploy our app by running npm run deploy on our terminal. When prompted with a warning about the deletion of our initial helloWorld function, select yes:
The following functions are found in your project but do not exist in your local
 source code:
   helloWorld(us-central1)
...
Would you like to proceed with deletion? Selecting no will continue the rest of the deployments. (y/N)
Now, when you revisit the functions page on your Firebase console, you should see a new function named app and its request URL beside it. Navigating to that URL should return the response "Hey there!" as instructed on line five of our ./index.ts file:
app.get('/', (req, res) => res.status(200).send("Hey there!"));
In order to access our Firestore database and admin tools from our app, we’ll need to create a service account. To do so, click on the gear icon next to Project Overview in the left pane:
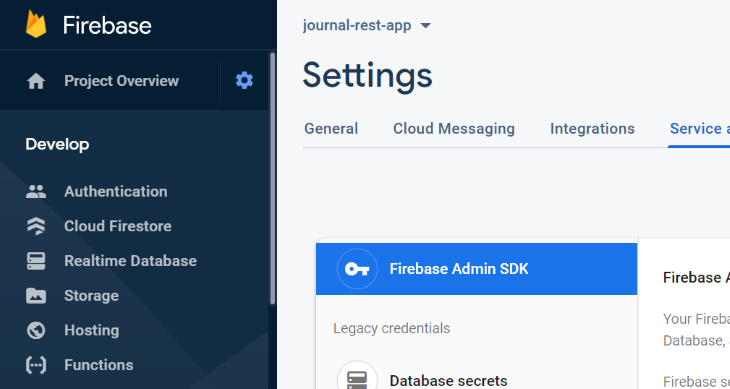
From the Settings page, navigate to Service accounts, select Node.js, and click on the Generate new private key button. This should generate a JSON configuration file for your new service account:
{
  "type": "service_account",
  "project_id": "journal-rest-api",
  "private_key_id": "private_key_id",
  "private_key": "private_key",
  "client_email": "client_email",
  "client_id": "client_id",
  "auth_uri": "auth_url",
  "token_uri": "token_url",
  "auth_provider_x509_cert_url": "auth_provider_x509_cert_url",
  "client_x509_cert_url": "client_x509_cert_url"
}
An easy way to use our new service account information would be to move the JSON file to our project directory and then import it where it’s needed. However, it’s recommended to keep this information private, and if our codebase is pushed to a remote repository, storing it in the project directory will expose it to public view.
A better way to use the information from our service account is by storing the needed key-value pairs as our Firebase environment variables. For our application, we’ll need the private_key, project_id, and client_email. Let’s store these as environment variables. To do so, we’ll go back to our terminal and run the following command:
firebase functions:config:set private.key="YOUR API KEY" project.id="YOUR CLIENT ID" client.email="YOUR CLIENT EMAIL"
Before running the above command, remember to substitute the string values with the one in your JSON file. It’s important to note that only lowercase characters are accepted in keys, and each of the keys should be named using periods — for example, private.key. If the update is successful, you should receive a response that looks like this:
+  Functions config updated.

Please deploy your functions for the change to take effect by running firebase deploy --only functions
Let’s re-deploy our functions for the changes we’ve made to take effect:
npm run deploy
Now that we have our service account information as Firebase environment variables, let’s set up our config file. We’ll create a new folder named config in the ./functions/src directory, and inside it, a new file named firebase.ts:
└── functions
    └── src
        └── config
           ├── firebase.ts
Let’s paste the following code inside the firebase.ts file:
import * as admin from "firebase-admin";
import serviceAccount from "./admin.json";

admin.initializeApp({
  credential: admin.credential.cert(serviceAccount as admin.ServiceAccount),
});

const db = admin.firestore();
export {admin, db};
We started by importing the Firebase admin for initializing our app and Firebase functions for accessing the Firebase environment variables. We went on to call the admin.initializeApp() function and supplied an object argument to it, which contains our service account credentials. We’ve also used functions.config().name_of_variable to access our environment variables.
Notice that we added a .replace() method to the private key. This replaces \\n in the private key string to \n. Without this, we would get an invalid PEM format error message when we try to use the variable. We also added a databaseUrl key after the credential.
You should replace [your_project_id] with the one you provided when creating your Firebase project. Next, we created a variable for our Firestore database named db and gave it the value admin.firestore(). Finally, we exported admin and db from the firebase.ts file.
Firestore is a NoSQL database for mobile, web, and server development. It offers a seamless integration with Firebase cloud functions, and its flexible and scalable nature makes it a good fit for building web APIs. Like all NoSQL databases, Firestore is non-relational and is made up of documents and collections. These documents contain a set of key-value pairs and are stored in collections.
In Firestore, documents and collections can be created from the Firebase console or through Cloud Functions. To create documents or collections from our Cloud Functions, we’ll use the db we exported from the Firebase config file:
db.collection("entries").doc().create({ document_object_here });
The line of code above will create a new document in the collection named entries, and if such a collection does not exist, a new one will be created with the provided name. We can also create an empty document and then provide key-value pairs for it later on:
const entry = db.collection("entries").doc();

const entryObject = {
  id: entry.id,
  title: "entry title here",
  text: "entry text here",
};

entry.set(entryObject);
Firebase documents have a .set() method that can be used to update them. We’ll see how to use a few other methods as we progress.
With our database config set up, we can now add functionality for creating journal entries. Inside the ./functions/src directory, let’s create a new file named entryController.ts. We’ll use this file to house all the controllers for our entry. Inside the entryController.ts file, we’ll start by importing our Response type from express and db from ./config/firebase:
import {Response} from 'express';
import {db} from './config/firebase';
Next, we’ll define a type for our entries and then use it to create our Request type:
...
type EntryType = {
  title: string,
  text: string,
  coverImageUrl: string
}

type Request = {
  body: EntryType,
  params: { entryId: string }
}
For the Request type, we included entryId as a property of params. We’ll use this property when we want to edit an entry. Next, let’s create our addEntry function:
...
const addEntry = async (req: Request, res: Response) => {
  const {title, text} = req.body;
  try {
    const entry = db.collection("entries").doc();
    const entryObject = {
      id: entry.id,
      title,
      text,
    };

    entry.set(entryObject);

    res.status(200).send({
      status: "success",
      message: "entry added successfully",
      data: entryObject,
    });
  } catch (error) {
    res.status(500).json("We found an error posting your request!");
  }
};
In our addEntry function, we started by destructuring title and text from the request body. Next, we created a new Firebase document using the db.collection().doc() method and then updated the document with our entryObject. Our new document comes with an id. We’ll need to store this id as part of its key-value pairs so that we can easily access it.
res.status(200).send() returns a response to our user if the API request is successful. We also wrapped our database actions in a try…catch statement so that if there’s an error with our database requests, the catch block will respond with a 500 error and message from the error object.
The 500 HTTP status code does not cover user input errors or other types of errors, so we’ll need to cover those cases before making our database requests or using a middleware for that purpose.
To use our addEntry function, let’s export it from the entryController.ts file:
...
export {addEntry};
Next, we’ll import it in our ./functions/src/index.ts file:
...
import {addEntry} from "./entryController";
Then, we’ll add the following code below the line where we initialized express:
app.post('/entries', addEntry);
Our index.ts file should now look like this:
import {onRequest} from "firebase-functions/v2/https";
import express from "express";
import {addEntry} from "./config/entryController";

const app = express();

app.get("/", (req, res) => res.status(200).send("Hey there!"));
app.post("/entries", addEntry);

exports.app = onRequest(app);
To redeploy our app, we’ll go back to the Functions directory on our terminal and run the following command:
npm run deploy
If our deployment is successful, we should get a response that looks like this:
+  functions: Finished running predeploy script.
i  ...
+  functions[app(us-central1)]: Successful update operation.

+  Deploy complete!
To test our API, let’s navigate to the Functions section of our Firebase console. We should see our deployed function named app and its URL. To add a new entry to our Firestore database, we’ll append the route /entries to our URL. It should look like this: https://us-central1-project-id-here.cloudfunctions.net/app/entries.
Then, we’ll send a POST request using an API client like Postman or Insomnia to our URL with the properties title and text in our request body:
{
  "title": "My first entry",
  "text": "Hey there! I'm awesome!"
}
We should get a similar response to this:
{
    "status": "success",
    "message": "entry added successfully",
    "data": {
        "id": "g8fBsSVQWlkby9GMf0LC",
        "title": "My first entry",
        "text": "Hey there! I'm awesome!"
    }
}
Now that we’ve seen how to add entries to our Firestore database using Cloud Functions, let’s see how we can get data from it. For this, we’ll create a new function named getAllEntries in the entryController.ts file:
...
const getAllEntries = async (req: Request, res: Response) => {
  try {
    const allEntries = await db.collection("entries").get()
    return res.status(200).json(allEntries.docs)
  } catch(error) {
     return res.status(500).json("We found an error fetching your request!");
  }
}

export {addEntry, getAllEntries}
In our getAllEntries function, we’ve used the db.collection('entries').get() method to retrieve all the data in our entries collection and then accessed the documents in our response statement using the docs property. If we try using this function to retrieve entries through an API client, we’ll get a response that includes sensitive information like our private key. Let’s avoid this by updating our function to return only the entry data:
const getAllEntries = async (req: Request, res: Response) => {
  try {
    const allEntries: EntryType[] = [];
    const querySnapshot = await db.collection("entries").get();
    querySnapshot.forEach((doc: any) => allEntries.push(doc.data()));
    return res.status(200).json(allEntries);
  } catch (error) {
    return res.status(500).json("We found an error fetching your request!");
  }
};

export {addEntry, getAllEntries};
In our getAllEntries function, we started by creating an array named allEntries with type EntryType[]. Next, we assigned the data from our db.collection().get() method to a variable named querySnapshot. In Firestore, a QuerySnapshot contains the result of a query. The forEach method loops through our QuerySnapshot and pushes the document data to our allEntries array.
To use our getAllEntries function, we’ll import it in the ./functions/src/index.ts file and then add it to a GET request method:
...
import {addEntry, getAllEntries} from "./config/entryController";

const app = express();

app.get("/", (req, res) => res.status(200).send("Hey there!"));
app.post("/entries", addEntry);
app.get("/entries", getAllEntries);

exports.app = onRequest(app);
Let’s re-deploy our app and make a GET request to ./entries. We should receive a response that looks like this:
[
    {
        "text": "Hey there! I'm awesome!",
        "id": "nS4so0TiUI0YLQH3xZLT",
        "title": "My first entry"
    }
]
Now that we’ve seen how to make POST and GET requests from Firebase Cloud Functions to our Firestore database, let’s see how we can update and delete entries. To add the functionality for updating entries, we’ll create a new function named updateEntry in the entryController.ts file:
...
const updateEntry = async (req: Request, res: Response) => {
  const {body: {text, title}, params: {entryId}} = req;

  try {
    const entry = db.collection("entries").doc(entryId);
    const currentData = (await entry.get()).data() || {};
    const entryObject = {
      title: title || currentData.title,
      text: text || currentData.text,
    };

    await entry.set(entryObject).catch((error) => {
      return res.status(400).json({
        status: "error",
        message: error.message,
      });
    });

    return res.status(200).json({
      status: "success",
      message: "entry updated successfully",
      data: entryObject,
    });
  } catch (error) {
    return res.status(500).json("We found an error updating an entry!");
  }
};
In our updateEntry function, we started by fetching the requested document by its ID provided in the request params. We used the db.collection().doc() method for this. Next, we got the current document data object with the .data() method so that when we update an entry with the .set() method, we can replace any field not provided by the user with the current entry data.
Let’s also create a function for deleting entries:
...
const deleteEntry = async (req: Request, res: Response) => {
  const {entryId} = req.params;

  try {
    const entry = db.collection("entries").doc(entryId);
    await entry.delete().catch((error) => {
      return res.status(400).json({
        status: "error",
        message: error.message,
      });
    });

    return res.status(200).json({
      status: "success",
      message: "entry deleted successfully",
    });
  } catch (error) {
    return res.status(500).json("We found an error deleting an entry");
  }
};
Our deleteEntry function also gets the document using the entryId from our request params and the db.collection().doc() method. Next, we used the delete method to delete our entry. We also added the catch method to watch for errors and return a response if our database operation is unsuccessful.
To use our new functions, we’ll export them from the entryController.ts file:
...
export {addEntry, getAllEntries, updateEntry, deleteEntry};
We can now import them in the ./functions/src/index.ts file:
...
import {
  addEntry,
  getAllEntries,
  updateEntry,
  deleteEntry,
} from "./config/entryController";
With the functions imported, let’s add the patch and delete routes:
...
app.patch("/entries/:entryId", updateEntry);
app.delete("/entries/:entryId", deleteEntry);
Our index.ts file should now look like this:
import {onRequest} from "firebase-functions/v2/https";
import express from "express";
import {
  addEntry,
  getAllEntries,
  updateEntry,
  deleteEntry,
} from "./config/entryController";

const app = express();

app.get("/", (req, res) => res.status(200).send("Hi yah!"));
app.post("/entries", addEntry);
app.get("/entries", getAllEntries);
app.patch("/entries/:entryId", updateEntry);
app.delete("/entries/:entryId", deleteEntry);

exports.app = onRequest(app);
To test the new functions, we’ll re-deploy our app using the npm run deploy command and then send a PATCH or DELETE request to /entries/:entryId using an API client like Postman. Remember that we included an entryId in the body of our entries when creating them. We can get those IDs by sending a GET request to ./entries.
Now that we’ve introduced the Firestore database, let’s take a deeper look into some of its most common patterns and tools in order to better understand how this tool really works.
As it was previously mentioned, the Firebase Firestore database stores its data using documents and collections. A document is a lightweight record that contains fields that end up mapping to a value, as the official documentation explains, and it is also known as the unit of storage for this database. Inside documents, we can have maps of data that represent the unit that we’re trying to model.
Similarly, the Firestore documentation describes collections as simple containers for documents. For example, we can have a collection called Cars that contains multiple entries of the given type.
Firestore is a schemaless tool, which gives you all the freedom when it comes to what fields you put in each document, and what data types you store in those fields. We can also create subcollections, which are collections inside another collection, that are directly associated with a specific document.
Every document has a precise location within the Firestore database, which helps it be uniquely defined and indentified. In order to reference any particular location for a document from your code, it is imperative to first create a reference to it that will allow easy access. According to Firebase, a reference is a lightweight object that points to a location in your database. It is possible to create references from your code that do not particularly point to any data. Similarly, we can create references from the code that only live locally, and never perform any network operations.
Now, let’s review some of the best practices when modeling data for the Firestore database. First, database normalization should be used in order to avoid data repetition, and to stay as close to a single source of truth as possible. Next, make sure to really think of the design of your data, going as far as thinking of any future improvements that may come along with scale. And finally, denormalization, or the process of adding redundant data to a database that is mainly normalized, may be used as a tool to improve the speed in which the database can be read.
Now that we have a good idea of what the Firestore is, and how to use it through Firebase Functions and TypeScript, let’s take a short detour and explore the Realtime Database.
Similarly to Cloud Firestore, the Realtime Database is a NoSQL database for mobile, web, and server development. It also offers a seamless integration with Firebase cloud functions, and its flexible and scalable nature makes it a good fit for building web APIs. Like all NoSQL databases, Firestore is non-relational, but differently to the Firestore, the Realtime Database tool saves its data in JSON format.
Before getting started, let’s open up the Firebase console and access the Realtime Database section:

Click on Create Database, and enable the test mode for the purposes of this tutorial:
Finally, we’ll continue by creating our first database, and noting the database URL before getting back into our code.
Just as with the Firestore, data can be created, deleted, and manipulated from the Firebase console directly, or through Cloud Functions. Starting from where we left off, let’s open up our firebase.ts file and update some values in order to make it point at our newly created Realtime Database, instead of the Firestore:
import * as admin from "firebase-admin";
import serviceAccount from "./admin.json";

admin.initializeApp({
  credential: admin.credential.cert({
    privateKey: functions.config().private.key.replace(/\\n/g, '\n'),
    projectId: functions.config().project.id,
    clientEmail: functions.config().client.email
  }),
  databaseURL: "https://[your_project_id]-default-rtdb.firebaseio.com/",
});

const db = admin.database();
export {admin, db};
More specifically, we’ll update the databaseURL to point at our new database, and we’ll also refactor the db field assignment to read admin.database() instead of admin.firestore() in order to specify the different database that we want to use:
const ref = db.ref('server/saving-data/');
Once the firebase.ts file has been updated to utilize the alternative database tool, we’ll have to get back to the other two files and refactor them accordingly as well. Let’s get back to the entryController.ts file from before, and get rid of all the const functions; i.e., addEntry, getAllEntries, deleteEntry, and updateEntry.
That means that the index.ts file will also need some clean up as well. Your index.ts file should look like this:
import {onRequest} from "firebase-functions/v2/https";
import express from "express";


const app = express();

app.get("/", (req, res) => res.status(200).send("Hello, Realtime Database!"));

exports.app = onRequest(app);
With these updates to our setup, we are now ready to use our newly created Realtime Database. In the following sections, we’ll run through the same series of examples we did for the Firestore, and showcase who to add, get, delete, and update data using Firebase Functions.
Now that we’ve seen how to set up the Realtime Database with Firebase Functions, let’s go over the first of the CRUD operations; i.e., creating — or adding — data into our database.
First and foremost, we’ll get into the entryController.ts file, and we will re-write the addEntry function in order to use the new Realtime Database instead of the Firestore:
const addEntry = async (req: Request, res: Response) => {
  const {id, title, text} = req.body;
  try {
    const entryObject = {
      title,
      text,
    };

    db.ref("entries/" + id).set(entryObject);

    res.status(200).send({
      status: "success",
      message: "entry added successfully",
      data: entryObject,
    });
  } catch (error) {
    res.status(500).json("We found an error posting your request!");
  }
};

export {addEntry);
You’ll notice that this new version of the addEntry function is very similar to the one that we had for the Firestore service. The main difference between the version from before and this one, line 9 from above, where we invoke a db.ref("entries/" + id).set(entryObject); instead of doing entry.set(entryObejct). While a little bit more verbose, both of these lines of code are basically achieving the same thing, which is adding a new entry into our database instance.
The way we would test this new functionality is the same as before. Starting off by updating our index.ts, we’ll have to both import the new functino, as well as adding the support for it in the following way:
...
import {addEntry} from "./config/entryController";
...
app.post("/entries", addEntry);
Running firebase deploy should upload the new version of our endpoint into Firebase, and similarly to before, using a tool such as Postman with a JSON body containing both a title and text fields should attempt to reach our REST API:
{
  "id": "1",
  "title": "My first entry",
  "text": "Hey there! I'm awesome!"
}
Now that we’ve gone over a basic creation flow, let’s look at the second CRUD operation and figure out how we can read, or get, all of the entries at once. To do this, we’ll return to our entryController.ts file and re-create the getAllEntries function from the bottom up:
const getAllEntries = async (req: Request, res: Response) => {
  db.ref("entries").get().then((snapshot) => {
    if (snapshot.exists()) {
      return res.status(200).json(snapshot);
    } else {
      return res.status(500).json("Error fetching your request!");
    }
  });
};

export {addEntry, getAllEntries};
This time around, the new version of the function looks different. Instead of surrounding everything inside the function in a try-catch block, we’ll simply grab our db instance and ask it to retrieve a reference to the entries bucket in the form of snapshot.
Inside this asynchronous call, we’ll check if the snapshot exists, and print either the results or an error, accordingly. The else clause of this conditional statement is serving as our catch clause from before.
Then, we’ll export the new function, and make sure to import it back inside the index.ts file, as follows:
...
import {addEntry, getAllEntries} from "./config/entryController";
...
app.get("/entries", getAllEntries);
With everything back in place, we can run firebase deploy in order to get everything uploaded in Firebase. We can test this new functionality by either accessing the /entries page of the website that Firebase provides for us, or by calling it directly from Postman. A successful call should return all of the entries that have been added up to this point:
{
    "1": {
        "text": "Hey there! I'm awesome!",
        "title": "My first entry"
    }
}
Last but not least, let’s review how to delete and update calls. Starting with the update operation, we’ll revive the old updateEntry call from before, and we’ll refactor this function to use the new database type instead of Firestore:
const updateEntry = async (req: Request, res: Response) => {
  const {body: {text, title}, params: {entryId}} = req;

  try {
    const entry = db.ref("entries").child(entryId);
    const entryObject = {
      title: title,
      text: text,
    };

    await entry.update(entryObject).catch((error) => {
      return res.status(400).json({
        status: "error",
        message: error.message,
      });
    });

    return res.status(200).json({
      status: "success",
      message: "entry updated successfully",
      data: entryObject,
    });
  } catch (error) {
    return res.status(500).json("We found an error updating an entry!");
  }
};

export {addEntry, getAllEntries, updateEntry};
Similarly to the addEntry function, the new version of the updateEntry call is very similar to its Firestore counterpart. The two main differences between this iteration of the updateEntry code and the former are the way we get a reference to our data in the line const entry = db.ref("entries").child(entryId);, and the way we post the updated data in entry.update(entryObject). Other than that, the flow is almost the same as before.
In order to test this particular function, we should first update the index.ts file to import the new functionality, and expose it as part of our API, as we’ve done before:
...
import {addEntry, getAllEntries, updateEntry} from "./config/entryController";
...
app.patch("/entries/:entryId", updateEntry);
Once everything is in place, run firebase deploy, and then open up a Postman instance and fill a PATCH call to the URL https://app-rc72r44auq-uc.a.run.app/entries/1, and a JSON body that contains the updated fields:
{
  "title": "Updated entry!",
  "text": "The PATCH call is working."
}
If the update call is successful, a sequential GET call should showcase a different set of data, reflecting the update call we’ve just performed.
Similar to the update call, the delete function is very similar to what we had before, barring a single line of code that specifies the deletion process for the Realtime Database, which differs from the same process from the Firestore side:
const deleteEntry = async (req: Request, res: Response) => {
  const {entryId} = req.params;

  try {
    const entry = db.ref("entries").child(entryId);
    await entry.remove().catch((error) => {
      return res.status(400).json({
        status: "error",
        message: error.message,
      });
    });

    return res.status(200).json({
      status: "success",
      message: "entry deleted successfully",
    });
  } catch (error) {
    return res.status(500).json("We found an error deleting an entry");
  }
};

export {addEntry, getAllEntries, updateEntry, deleteEntry};
As we can see, the only line that changed from the Firestore version of this call is entry.remove(), where the reference fetching call is also different from before, but we saw that change in the updateEntry function just above.
Speaking of which, testing this last piece of functionality inside the new deleteEntry works almost the same as with the updateEntry, where we do a DELETE call on the same address https://app-rc72r44auq-uc.a.run.app/entries/1, but we exclude the body for this call because it doesn’t need it.
After all these new changes, the index.ts file should look almost the same as it did before with the Firestore set up:
import {onRequest} from "firebase-functions/v2/https";
import express from "express";
import {
  addEntry,
  getAllEntries,
  updateEntry,
  deleteEntry,
} from "./config/entryController";


const app = express();

app.get("/", (req, res) => res.status(200).send("Hello, Realtime Database!"));
app.post("/entries", addEntry);
app.get("/entries", getAllEntries);
app.patch("/entries/:entryId", updateEntry);
app.delete("/entries/:entryId", deleteEntry);

exports.app = onRequest(app);
The entryController.ts file is a little bit different, but follows about the same structure as before:
import {Response} from "express";
import {db} from "./firebase";

type EntryType = {
  id: string,
  title: string,
  text: string,
}

type Request = {
  body: EntryType,
  params: {entryId: string}
}

const addEntry = async (req: Request, res: Response) => {
  const {id, title, text} = req.body;
  try {
    const entryObject = {
      title,
      text,
    };

    db.ref("entries/" + id).set(entryObject);

    res.status(200).send({
      status: "success",
      message: "entry added successfully",
      data: entryObject,
    });
  } catch (error) {
    res.status(500).json("We found an error posting your request!");
  }
};

const getAllEntries = async (req: Request, res: Response) => {
  db.ref("entries").get().then((snapshot) => {
    if (snapshot.exists()) {
      return res.status(200).json(snapshot);
    } else {
      return res.status(500).json("Error fetching your request!");
    }
  });
};

const updateEntry = async (req: Request, res: Response) => {
  const {body: {text, title}, params: {entryId}} = req;

  try {
    const entry = db.ref("entries").child(entryId);
    const entryObject = {
      title: title,
      text: text,
    };

    await entry.update(entryObject).catch((error) => {
      return res.status(400).json({
        status: "error",
        message: error.message,
      });
    });

    return res.status(200).json({
      status: "success",
      message: "entry updated successfully",
      data: entryObject,
    });
  } catch (error) {
    return res.status(500).json("We found an error updating an entry!");
  }
};

const deleteEntry = async (req: Request, res: Response) => {
  const {entryId} = req.params;

  try {
    const entry = db.ref("entries").child(entryId);
    await entry.remove().catch((error) => {
      return res.status(400).json({
        status: "error",
        message: error.message,
      });
    });

    return res.status(200).json({
      status: "success",
      message: "entry deleted successfully",
    });
  } catch (error) {
    return res.status(500).json("We found an error deleting an entry");
  }
};

export {addEntry, getAllEntries, updateEntry, deleteEntry};
Now that we understand how to use both the Cloud Firestore and the Realtime Database, let’s go over some of the main differences between both of these tools, and consider which one of the two is better suited for some of the most common situations.
We should aim to use the Realtime Database for applications with simpler interactions, and save Firestore for applications that require more complex interactions with your data, like an e-commerce app, for example.
For applications that require many batch operations or have very large data sets, using Firestore is recommended. The Realtime Database should be saved for applications with both smaller datasets, and that require less operations.
When it comes to the modeling of our data, the Realtime Database should be used to keep more unstructured data saved in the form of JSON, while Firestore presents more structured data that uses documents and collections.
When we require a critically high availability for our data, the Cloud Firebase should be preferred over the Realtime Database. Nevertheless, the Realtime Database still has very high availability, with over 99.95% of uptime.
If your application requires frequent access to offline data and increased querying capabilities, consider using Firestore. If the application is intended to work with a consistent internet connection, however, both of the databases may serve the same purpose.
Last but not least, if you require your application to have multiple database instances in a single Firebase project, the Realtime Database is better suited for the job. Firestore, on the other hand, only supports a single database, so we should make sure we’ll never need multiple databases before committing to it.
In this article, we set up Firebase and used Cloud Functions to build a REST API with TypeScript and Firestore. We didn’t cover all the Firestore methods in this demo, but you can find them in the official docs, and with your knowledge from this article, they’ll be easier to understand.
In a production-ready app, you’ll need to set up middleware to handle many cases. For example, we could have a middleware that checks whether an entry exists before trying to update it. We could also have an authentication and authorization middleware (here’s a good way to handle authentication with Firebase React apps) just before the controller functions. With our app structure, adding middleware will be straightforward.
Here’s a link to the GitHub repo for our demo app. Feel free to reach out to me on LinkedIn if you need any help!

LogRocket lets you replay user sessions, eliminating guesswork by showing exactly what users experienced. It captures console logs, errors, network requests, and pixel-perfect DOM recordings — compatible with all frameworks, and with plugins to log additional context from Redux, Vuex, and @ngrx/store.
With Galileo AI, you can instantly identify and explain user struggles with automated monitoring of your entire product experience.
Modernize how you understand your web and mobile apps — start monitoring for free.

A real-world debugging session using Claude to solve a tricky Next.js UI bug, exploring how AI helps, where it struggles, and what actually fixed the issue.

CSS wasn’t built for dynamic UIs. Pretext flips the model by measuring text before rendering, enabling accurate layouts, faster performance, and better control in React apps.

Why do real-time frontends break at scale? Learn how event-driven patterns reduce drift, race conditions, and inconsistent UI state.

Test out Auth.js, Clerk, WorkOS, and Better Auth in Next.js 16 to see which auth library fits your app in 2026.
Would you be interested in joining LogRocket's developer community?
Join LogRocket’s Content Advisory Board. You’ll help inform the type of content we create and get access to exclusive meetups, social accreditation, and swag.
Sign up now

