
Python is a popular interpreted and dynamically typed programming language for building web services, desktop apps, automation scripts, and machine learning projects. Programmers often have to access the operating system’s file system when they work with Python-based software projects.

For example, we use text files as inputs, write text files as outputs, and process binary files often. Like any other popular, general-purpose programming language, Python also offers cross-platform file handling features. Python provides file handling features via several inbuilt functions and standard modules.
In this article, I will explain everything you need to know about Python file handling, including:
The Replay is a weekly newsletter for dev and engineering leaders.
Delivered once a week, it's your curated guide to the most important conversations around frontend dev, emerging AI tools, and the state of modern software.
Before getting started with the tutorial, make sure that you have the Python 3 interpreter installed. Otherwise, install the latest Python interpreter from the official releases. You can use this tutorial’s code snippets in your existing Python projects, too.
As the first activity, let’s write some code to read a text file. We need to create a file object first to read files.
Python offers the inbuilt open function to create a file object with several modes, such as read mode, write mode, etc. Create a text file named myFile.txt and input the following content.
Programming languages
C
C++
Python
JavaScript
Go
Now, create a new file named main.py and add the following code snippet.
myFile = open("myFile.txt", "r") # or open("myFile.txt")
print(myFile.read())
myFile.close()
The above code snippet’s first line creates the myFile file object with the given filename. The inbuilt open function creates a file handler using read mode because we have provided the r flag via the second parameter.
Make sure to call the close method to free up resources after using the file. The read method returns the file content, so you will see the content once you execute the above code, as shown below.
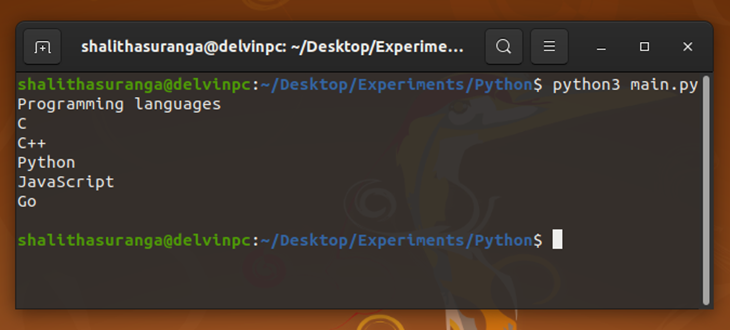
The read method reads the entire file at once. If you don’t want to read all at once, you can specify a byte size with the read method’s parameter. For example, the following code snippet reads only the first 11 bytes.
myFile = open("myFile.txt", "r")
print(myFile.read(11)) # Programming
myFile.close()
You will see the first word (“Programming”) as the output — because the first word has 11 letters and a letter’s size is equal to one byte in ASCII encoding. If you print the result of read(11) again, you will see the next 11 bytes (“ languages\n”) because the file cursor moved 11 places with the previous read(11) method call. You can reset the file cursor back to the beginning by using the seek method, as shown in the following example.
myFile = open("myFile.txt")

print(myFile.read(11)) # Programming
print(myFile.read(10)) # languages
myFile.seek(0) # Sets file cursor to the beginning
print(myFile.read(11)) # Programming
myFile.close()
In most scenarios, it’s easy to process file content line by line. You don’t need to implement a lines-oriented file reading mechanism by yourself — Python provides inbuilt features to read a file line by line. You can read a file line by line with a for-in loop and the readlines method, as shown below.
myFile = open("myFile.txt", "r")
for line in myFile.readlines():
    print(line)
myFile.close()
It’s possible to get the current line number with a for-enumerate loop because the readlines method will return lines using the list type. The following code snippet will print the line content with its respective line number.
myFile = open("myFile.txt", "r")
for i, line in enumerate(myFile.readlines()):
    print(i, line) # line number and content
myFile.close()
Earlier, we created file objects with the read mode by using the r flag. Writing files is not possible with the read mode, so we have to use the write mode (w) for writing files.
It is also possible to enable both read and write modes together using the r+ or w+ flag; we will use the w+ flag in upcoming examples.
To get started with file writing, let’s input the following text to the current myFile.txt by writing some Python code.
Programming languages
Rust
Ruby
TypeScript
Dart
Assembly
Use the following script to update myFile.txt with the above content.
myFile = open("myFile.txt", "w")

content = """Programming languages
Rust
Ruby
TypeScript
Dart
Assembly"""

myFile.write(content)
myFile.close()
Here, we defined the text file content using the Python multiline string syntax, and we wrote the content to file using the write method. Make sure to use the write mode with the w flag — otherwise, the write operation will fail with the io.UnsupportedOperation exception.
Sometimes, we often have to append new content to an existing file. In those scenarios, reading and writing the entire content is not a good approach due to the higher resources consumption. Instead, we can use the append mode (a).
Look at the following code. It will add a new programming language to the list in myFile.txt.
myFile = open("myFile.txt", "a")
myFile.write("\nBash")
myFile.close()
The above code snippet adds a new line character (\n) and a new word to the existing file without writing the entire file content. As a result, we will see a new entry in our programming languages list. Try adding more entries and see what happens!
Apart from the original file content, a file on the disk will contain some metadata, or file attributes, which include things like size, last modified time, last accessed time, etc.
Look at the file code below, which displays file size, the last accessed time, and the last modified time.
import os, time

stat = os.stat("myFile.txt")
print("Size: %s bytes" % stat.st_size)
print("Last accessed: %s" % time.ctime(stat.st_atime))
print("Last modified: %s" % time.ctime(stat.st_mtime))
The os.stat function returns a stat results object with many file attribute details. Here we used st_size to get the file size, at_atime to get the last file accessed timestamp, and st_mtime to get the last modified timestamp. The stat results object can be different according to your operating system. For example, on the Windows operating system, you can retrieve Windows-specific file attributes via the st_file_attributes key.
If you need to get only file size, you can use the os.path.getsize method without retrieving all metadata, as shown in the following code.
import os, time

size = os.path.getsize("myFile.txt")
print("Size: %s bytes" % size)
Python offers the os.mkdir function to create a single directory. The following code snippet creates myFolder in the current working directory.
import os

os.mkdir("myFolder")
If you try to make multiple directories recursively with the above code, it will fail. For example, you can’t create myFolder/abc at once because it requires the creation of multiple directories. In those scenarios, the os.makedirs function will help us, as shown below.
import os

os.makedirs("myFolder/abc") # Creates both "myFolder" and "abc"
Python also provides an easy API to list directory contents via the os.listdir function. The following code snippet lists all files and directories in your current working directory.
import os

cur_dir = os.getcwd()
entries = os.listdir(cur_dir)

print("Found %s entries in %s" % (len(entries), cur_dir))
print('-' * 10)
for entry in entries:
    print(entry)
Once you execute the above script, it will show your current directory’s entries, as shown below.
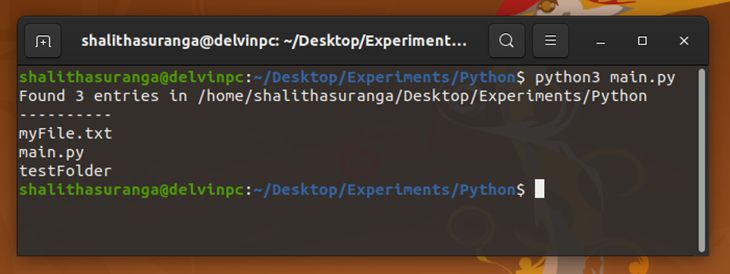
Try executing the script from a different directory. Then it will display entries of that specific directory because we use the os.getcwd function to get the current working directory.
Sometimes we need to list directory content recursively. The os.walk function helps us with the recursive directory listing. The following code lists all entries of the current working directory recursively.
import os

cur_dir = os.getcwd()
for root, sub_dirs, files in os.walk(cur_dir):
    rel_root = os.path.relpath(root)
    print("Showing entries of %s" % rel_root)
    print("-" * 10)
    for entry in sub_dirs + files:
            print(entry)
The os.walk function has a recursive implementation internally. It returns three values for each entry:
Here we used root, sub_dirs, and files variables respectively, with a for-loop to capture all entries.
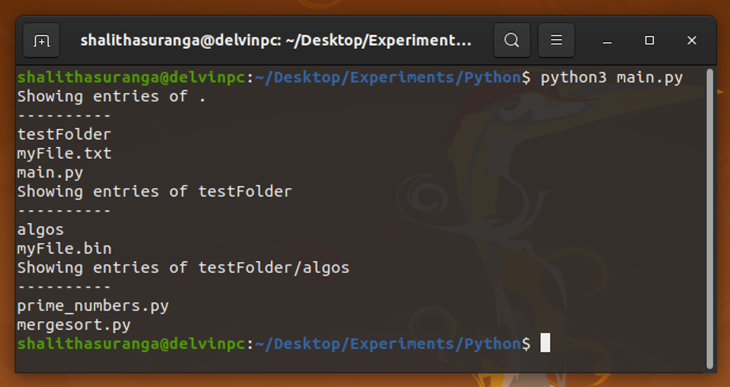
We can use the os.remove function to remove a file. It’s possible to use the os.path.exists function before os.remove to prevent exceptions. Look at the following example code snippet.
import os

file_to_remove = "myFile.txt"

if os.path.exists(file_to_remove):
    os.remove(file_to_remove)
else:
    print("%s doesn't exist!" % file_to_remove)
The Python standard library also offers the os.rmdir function to remove a single directory. It behaves similar to os.mkdir and won’t remove a directory if the particular directory has some entries. First, try to remove a single directory with the following code.
import os

dir_to_remove = "myFolder"

if os.path.exists(dir_to_remove):
    os.rmdir(dir_to_remove)
else:
    print("%s doesn't exist!" % dir_to_remove)
The above code will throw an error if myFolder contains subfolders or files. Use the following code snippet to remove a directory recursively.
import os, shutil

dir_to_remove = "myFolder"

if os.path.exists(dir_to_remove):
    shutil.rmtree(dir_to_remove) # Recursively remove all entries
else:
    print("%s doesn't exist!" % dir_to_remove)
When we work with automation scripts, sometimes we need to perform file searches on the disk. For example, programmers often need to find log files, image files, and various text files via their Python scripts. There are a few different approaches to performing file searches in Python:
os.listdir function and checking each entry with an if condition inside a for loopos.walktree function and validating each entry with an if condition inside a for loop.glob.glob function and obtaining only entries you needOverall, the third approach is best for most scenarios because it has inbuilt filtering support, very good performance, and requires minimal code from the developer’s end (more Pythonic). Let’s implement a file search with the Python glob module.
import glob, os

query = "**/*.py"

entries = glob.glob(query, recursive=True)
no_of_entries = len(entries)
if no_of_entries == 0:
    print("No results for query: %s" % query)
else:
    print("Found %s result(s) for query: %s" % (no_of_entries, query))

print("-" * 10)
for entry in entries:
    print(entry)
The above code lists all Python source files in the current directory recursively. The first two asterisks (**) in the query variable instruct Python to search every sub-directory, while the last asterisk refers to any filename.
Run the above script. You will see Python source files, as shown below.
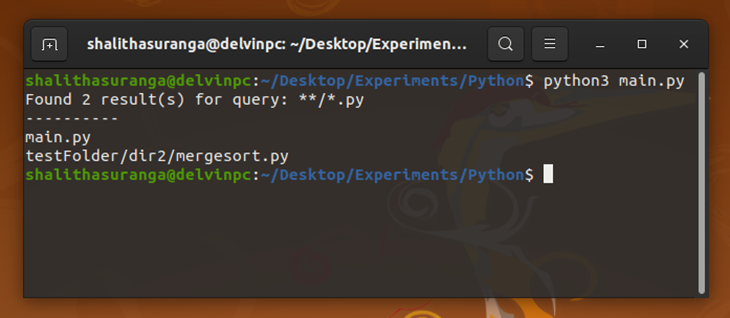
Try to search different file types by changing the query variable.
Earlier, we processed text files. The inbuilt open function creates file objects with the text mode (t) by default. Non-text files such as image files, zip files, and video files cannot be viewed as plain-text files — because there are no readable English sentence binary files. Therefore, we have to treat binary files as non-text files via byte-level (or bit-level) processing.
To get started with binary file handling, let’s write a binary file with some bytes. We are going to save the following bytes into myFile.bin.
01010000 01111001 01110100 01101000 01101111 01101110
For simplicity, we can represent the above bytes with the following decimal values respectively.
80 121 116 104 111 110
Now, add the following code to your Python source file and execute it to create the binary file.
myBinaryFile = open("myFile.bin", "wb") # wb -> write binary
bytes = bytearray([80, 121, 116, 104, 111, 110])
myBinaryFile.write(bytes)
myBinaryFile.close()
Here, we passed a byte array instance to the file object’s write method. Also, note that we used binary mode (b) to create the file object. After executing the above code snippet, open the newly created myFile.bin with your favorite text editor. You will see the following result.
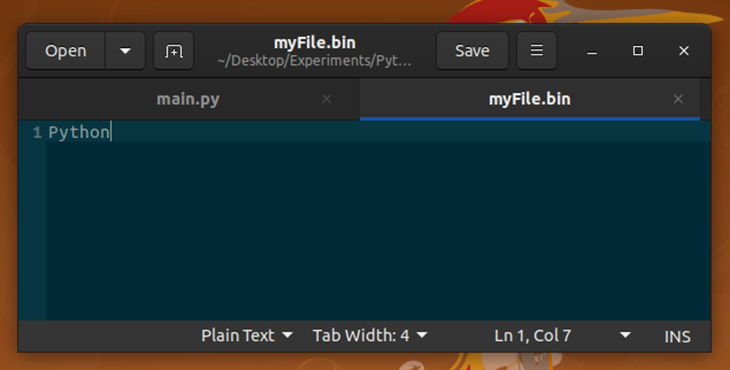
We have received “Python” as the output because the byte array’s bytes represent known ASCII characters. For example, 80 (01010000) represents letter P in ASCII encoding. Even though we saved readable text inside a binary file, almost all binary files contain unreadable byte streams. Try opening an image file via a text editor.
Now we can see the binary file read operation in the following example code.
myBinaryFile = open("myFile.bin", "rb")

bytes = myBinaryFile.read()
print(bytes) # bytearray(b'Python')
print("Bytes: ", list(bytes)) # Bytes:  [80, 121, 116, 104, 111, 110]
myBinaryFile.close()
Python returns bytes with the read method for the binary mode. Here we converted bytes to a bytearray instance using the bytearray constructor.
Programmers often use archive files with Python-based web applications, web services, desktop applications, and utility programs to output or input multiple files at once. For example, if you are building a web-based file manager, you may offer a feature for users to download multiple files at once via a programmatically generated zip file.
Python standard library offers archive file processing APIs via the shutil module. First, let’s make an archive with myFolder’s content. Look at the following code. Make sure to create myFolder and add some files into it before running the code snippet.
import shutil

output_file = "myArchive"
input_dir = "myFolder"
shutil.make_archive(output_file, "zip", input_dir)
You can extract the archive file into myNewFolder with the following code.
import shutil

input_file = "myArchive.zip"
output_dir = "myNewFolder"
shutil.unpack_archive(input_file, output_dir)
The shutil module offers cross-platform API functions to copy and move files as well. Look at the following examples.
import shutil

# copy main.py -> main_copy.py
shutil.copy("main.py", "main_copy.py")
# move (rename) main_copy.py -> main_backup.py
shutil.move("main_copy.py", "main_backup.py")
# recursive copy myFolder -> myFolder_copy
shutil.copytree("myFolder", "myFolder_copy")
# move (rename) myFolder_copy -> myFolder_backup
# if myFolder_backup exists, source is moved inside folder
shutil.move("myFolder_copy", "myFolder_backup")
print("Done.")
Programmers follow various coding practices. Similarly, Python programmers also follow different coding practices when they handle files.
For example, some programmers use try-finally block and close file handlers manually. Some programmers let the garbage collector close the file handler by omitting the close method call — which is not a good practice. Meanwhile, other programmers use the with syntax to work with file handlers.
In this section, I will summarize some best practices for file handling in Python. First, look at the following code that follows file handling best practices.
def print_file_content(filename):
    with open(filename) as myFile:
        content = myFile.read()
        print(content)

file_to_read = "myFile.txt"

try:
    print_file_content(file_to_read)
except:
    print("Unable to open file %s " % file_to_read)
else:
    print("Successfully print %s's content" % file_to_read)
Here, we used the with keyword to implicitly close the file handler. Also, we handle possible exceptions with a try-except block. While you are working with Python file handling, may sure that your code has the following points.
with syntax, make sure to close opened file handlers properly. The Python garbage collector will clean the unclosed file handlers, but it’s always good to close a file handler via our code to avoid unwanted resource usageswith keyword for handling files, make sure to use the same syntax for all places where you are handling fileflush and seek methods, as shown below:def process_file(filename):
with open(filename, "w+") as myFile:
# w+: read/write and create if doesn't exist unlike r+
# Write content
myFile.write("Hello Python!")
print("Cursor position: ", myFile.tell()) # 13
# Reset internal buffer
myFile.flush()
# Set cursor to the beginning
myFile.seek(0)
print("Cursor position: ", myFile.tell()) # 0
# Print new content
content = myFile.read()
print(content)
print("Cursor position: ", myFile.tell()) # 13
file_to_read = "myFile.txt"
try:
process_file(file_to_read)
except:
print("Unable to process file %s " % file_to_read)
else:
print("Successfully processed %s" % file_to_read)
The above content saves a string to the file first. After that, it reads the newly added content again by resetting the internal buffer. The flush method clears the temporarily saved data in memory, so the next read will return the newly added content. Also, we need to use the seek(0) method call to reset the cursor to the beginning because the write method sets it to the end.
Python offers a simple syntax for programmers. Therefore, almost all file operations are easy to implement. But, Python has some issues with the standard library design, so there are multiple API functions to the same thing. Therefore, you have to select the most suitable standard module according to your requirement.
Also, Python is a slow language compared to other popular programming languages. With this in mind, make sure to optimize your Python script without using too many resources. For example, you can optimize performance by processing large text files line by line without processing the entire content at once.
In this tutorial, we discussed generic text file handling and binary file handling. If you need to process specific file formats, it may be worth it to select a better library or standard module. For example, you can use the csv standard module for processing CSV files and the PyPDF2 library for processing PDF files. Also, the pickle standard module helps you to store (and load) Python data objects with files.

@container scroll-state: Replace JS scroll listeners nowCSS @container scroll-state lets you build sticky headers, snapping carousels, and scroll indicators without JavaScript. Here’s how to replace scroll listeners with clean, declarative state queries.

Explore 10 Web APIs that replace common JavaScript libraries and reduce npm dependencies, bundle size, and performance overhead.

Russ Miles, a software development expert and educator, joins the show to unpack why “developer productivity” platforms so often disappoint.

Discover what’s new in The Replay, LogRocket’s newsletter for dev and engineering leaders, in the February 18th issue.
Hey there, want to help make our blog better?
Join LogRocket’s Content Advisory Board. You’ll help inform the type of content we create and get access to exclusive meetups, social accreditation, and swag.
Sign up now