In this tutorial, you’ll learn about what AWS Amplify is and how to use it while building a Flutter to-do app.

The majority of organizations today use Amazon Web Services (AWS) to transition to a cloud-based model that provides 90+ services and products for fast, efficient, serverless, and secure development of web and mobile applications.
One among such services is AWS Amplify, and it’s gaining attention with a simplified and abstracted platform to aid web and mobile developers. It comes with a set of tools and services that offers users options to configure backends, connect apps, deploy static web apps, and manage context outside the AWS Console.
In this tutorial, you’ll learn how to do the following:
N.B., this tutorial assumes you have some prior knowledge of Flutter. If you are new to Flutter, please go through the official documentation to learn about it.
However, before proceeding, make sure that you have the following requirements:
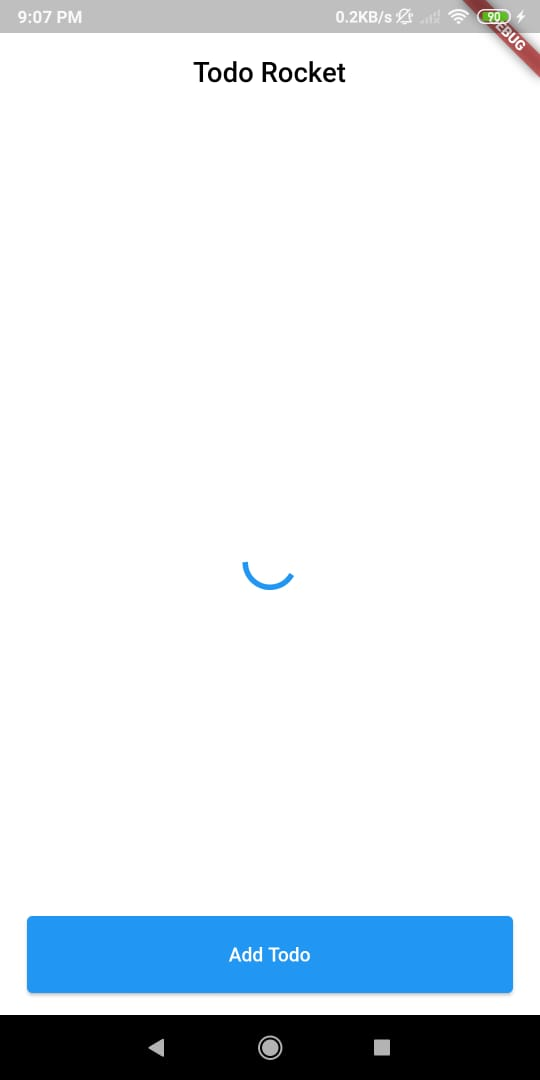
Download the starter app containing all the prebuilt UI from here, as you’ll focus on learning Amplify currently.
Open it in your editor, build and run the app:
Now, you need to install Amplify CLI, which is a toolchain to configure services required to fuel your backend as follows:
npm install -g @aws-amplify/cli
N.B., you are installing Amplify CLI globally using -g.
After installation, configure Amplify by using the below command:
amplify configure
N.B., the above configuration asks you to sign invto the AWS Console.
Next, Amplify CLI will ask you to create an IAM user, as follows:
Specify the AWS Region
? region:  # Your preferred region
Specify the username of the new IAM user:
? user name:  # User name for Amplify IAM user
Complete the user creation using the AWS console
Amazon IAM (Identity and Access Management) enables you to manage users and user permissions in AWS. You can learn more about Amazon IAM here.
Now, go to the console and create a user with administrator access to utilize various AWS resources.
Grab the accessKeyId and secretAccessKey after user creation, as Amplify CLI will ask you to provide these to connect CLI with the created IAM user:
Enter the access key of the newly created user:
? accessKeyId:  # YOUR_ACCESS_KEY_ID
? secretAccessKey:  # YOUR_SECRET_ACCESS_KEY
This would update/create the AWS Profile in your local machine
? Profile Name:  # (default)

Successfully set up the new user.
In the next step, you’ll start setting up your project and initialize Amplify in it.
Add the Amplify plugins in the pubspec dependencies as follows:
amplify_flutter: ^0.2.0
amplify_datastore: ^0.2.0
amplify_datastore_plugin_interface: ^0.2.4
Either save it using your IDE to install the plugins or use the below command for that:
flutter pub get
Update the target iOS platform to 13.0 or later by navigating to the /ios directory and updating the Podfile:
platform :ios, '13.0'
Update the Android SDK version to 21 or later by navigating to the android/app directory and updating build.gradle:
minSdkVersion 21
Now, you are all set to use Amplify.
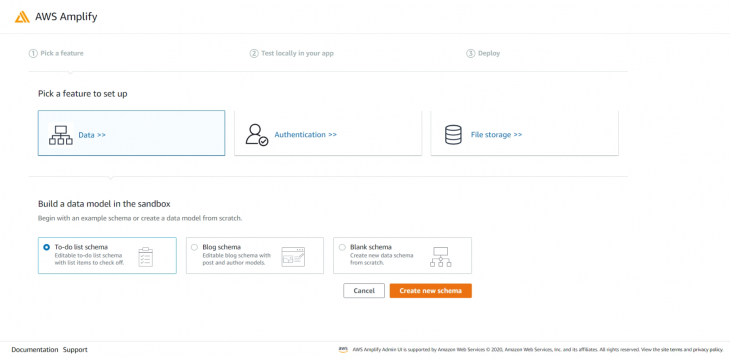
Now, you need to create a data model which will be utilized by your blog app. These models are created as GraphQL Schemas.
Navigate to Amplify Admin and select the Data feature:

Next, select the To-do list schema and click on Create new schema:
Next, click on Test locally in your app.
Now complete the deployment steps:
amplify pull --sandboxId <UUID>
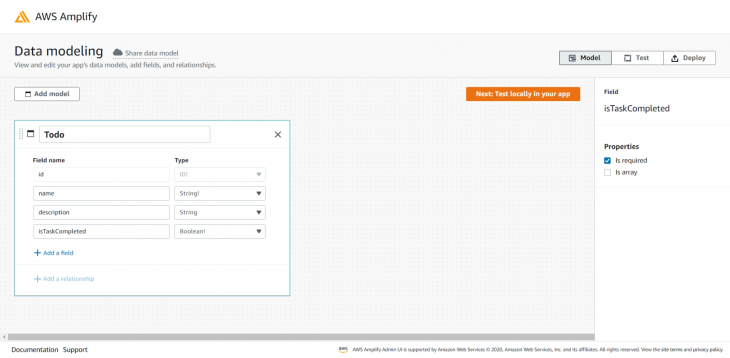
Till now, a few new directories and files have been added to the root of your app. To check the GraphQL schema generated, navigate to amplify\backend\api\amplifyDatasource\schema.graphql and you should see the following:
type Todo @model @auth(rules: [{allow: public}]) {
  id: ID!
  name: String!
  description: String
  isTaskCompleted: Boolean!
}
N.B., you can learn more GraphQl Schemas here.
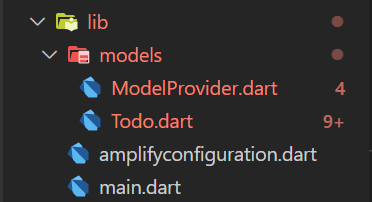
Now, your models are successfully generated and can be found in todorocket\lib\models.
Now, you’ll Integrate Amplify DataStore and use the generated model.
Update the todo_view.dart to initialize Amplify Libraries, as follows:
// Amplify Flutter Packages
import 'package:amplify_flutter/amplify.dart';
import 'package:amplify_datastore/amplify_datastore.dart';

// Generated in the previous step
import 'models/ModelProvider.dart';
import 'amplifyconfiguration.dart';
Update the _configureAmplify method in _TodosViewState class as below:
  final AmplifyDataStore _dataStorePlugin =
      AmplifyDataStore(modelProvider: ModelProvider.instance);

Future<void> _configureAmplify() async {
    try {
      await Amplify.addPlugins([_dataStorePlugin]);

      await Amplify.configure(amplifyconfig);
    } catch (err) {
      debugPrint('Erro occured while configuring Amplify $err');
    }
  }
Here, you did the following:
AmplifyDataStore object, _dataStorePlugin._configureAmplify method to use _dataStorePlugin to configure Amplify.Next, create a list of types of Todo, and update the body property of the build method as below:
List<Todo> _todos = [];

@override
  Widget build(BuildContext context) {
    ...
      // body: const Center(child: CircularProgressIndicator()),
      body: _isLoading
          ? const Center(child: CircularProgressIndicator())
          : TodosList(todos: _todos),
    ...
  }
}
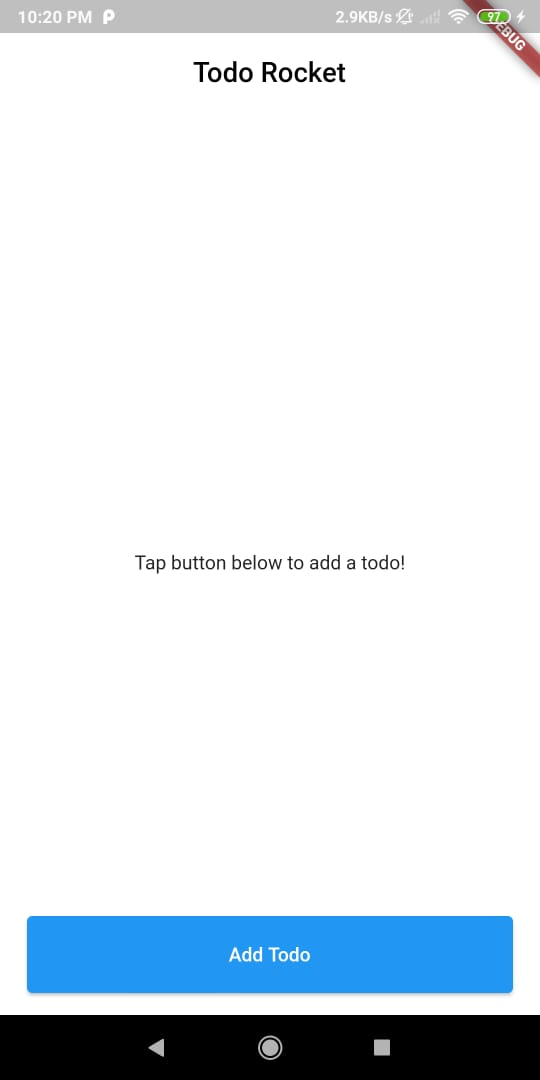
Here, you are checking whether Amplify is configured or not. Restart your app, now you’ll see a message instead of a progress indicator:
Now, you need to update the _fetchTodos method to use the CRUD API locally using DataStore:
Future<void> _fetchTodos() async {
    try {
      List<Todo> updatedTodos = await Amplify.DataStore.query(Todo.classType);

      // update the UI state to reflect fetched todos
      setState(() {
        _todos = updatedTodos;
      });
    } catch (e) {
      print('An error occurred while querying Todos: $e');
    }
  }
In the above code, you are using a DataStore.query() for all todo entries and assigning the result to _todos list. If you restart your project now, you won’t see any todo item as we haven’t used the Save query yet.
The Add button in the Home screen navigates you to the Add To-do Form view that doesn’t do anything when clicking on the Save button. You need to fix this so that you can see a Todo on the Home screen.
Update the _saveTodo method, as below:
Future<void> _saveTodo() async {
    String name = _nameController.text;
    String description = _descriptionController.text;

    Todo newTodo =
        Todo(name: name, description: description, isTaskCompleted: false);

    try {
      await Amplify.DataStore.save(newTodo);
      Navigator.pop(context);
    } catch (e) {
      debugPrint('Error occured while saving Todo $e');
    }
  }
Here, you created a newTodo object and saved it using DataStore. If you try to save a Todo now, you’ll be redirected to the Home screen. However, you cannot see any new Todo even after restarting the app. So to fix this, you need to create a query to list them all.
TodosUpdate the _initializeApp method in the _TodosViewState class, as following:
Future<void> _initializeApp() async {

  await _configureAmplify();

  await _fetchTodos();

  setState(() {
    _isLoading = false;
  });
}
N.B., you can also use .then after the _configureAmplify method.
In the above code, you called the _fetchTodos method to fetch all the Todos from the DataStore after the Amplify configuration.
Next, update the _fetchTodos method as below:
Future<void> _fetchTodos() async {
    try {
      List<Todo> updatedTodos = await Amplify.DataStore.query(Todo.classType);

      setState(() {
        _todos = updatedTodos;
      });
    } catch (e) {
      print('An error occurred while querying Todos: $e');
    }
  }
Here, you are querying all the Todo entries by passing the Todo classType to DataStore and updating the UI state to display the fetched data.
If you restart your app now, you can see your added Todos. However, if you create a new Todo, you won’t see them on the Home screen unless you restart your app. Now you’ll address this issue and make real-time Todo creation.
Todo UpdatesAmplify DataStore provides a way to subscribe to data updates to your model.
Now, add a StreamSubscription under the _TodosViewState:
late StreamSubscription _subscription;
Here you created a subscription to Todo model update events that’ll be later initialized at runtime.
Next, update the dispose method as below:
@override
void dispose() {
  _subscription.cancel();
  super.dispose();
}
In the above code, you cancel the subscription when the state is removed from the tree.
Next, update the _initializeApp method as below:
Future<void> _initializeApp() async {

  await _configureAmplify();

  _subscription = Amplify.DataStore.observe(Todo.classType).listen((event) {
    _fetchTodos();
  });

  await _fetchTodos();

  setState(() {
    _isLoading = false;
  });
}
In the above code, you are listening for the Todo updates by passing the Todo classType to Amplify.DataStore.observe(), and when an update event comes, you are fetching the to-do list.
If you restart your application and start adding new Todo, they’ll start popping up on your Home screen.
Now, what happens after you complete your Todo? You need to mark that Todo as done, and if you noticed, you can see a checkbox on a Todo item. So now you need to update your Todo when your task is done.
TodoIn DataStore, you cannot directly manipulate a record as the models in DataStore are immutable. So to update one record, you’ll use the copyWith method.
Now, update the _toggleIsComplete method in the TodoItem class as below:
Future<void> _toggleIsComplete() async {
    Todo updatedTodo = todo.copyWith(isTaskCompleted: !todo.isTaskCompleted);
    try {
      await Amplify.DataStore.save(updatedTodo);
    } catch (e) {
      print('An error occurred while saving Todo: $e');
    }
  }
Here you are creating a new instance of the Todo you want to update, but with additional properties updated and then again passing the new instance to Amplify.DataStore.save() to update.
Now, restart your app and you are now able to toggle in between the complete and incomplete state of your Todo. Additionally, if you wish you can also delete a Todo.
TodoDeleting a Todo is much easier than updating it because you don’t need to copy the object to delete it. So to delete a Todo from the existing project, you can use the long-press gesture or change according to your liking.
Now, update the _deleteTodo method in TodoItem as follows:
void _deleteTodo(BuildContext context) async {
    try {
      await Amplify.DataStore.delete(todo);
    } catch (e) {
      print('An error occurred while deleting Todo: $e');
    }
  }
In the above code, you are passing the Todo object to DataStore.delete() to delete data from DataStore.
Reload your app once and you should be able to long-press an item to delete it. Now you have a fully-featured CRUD application in your hands.
Next, you’ll connect your app to AWS.
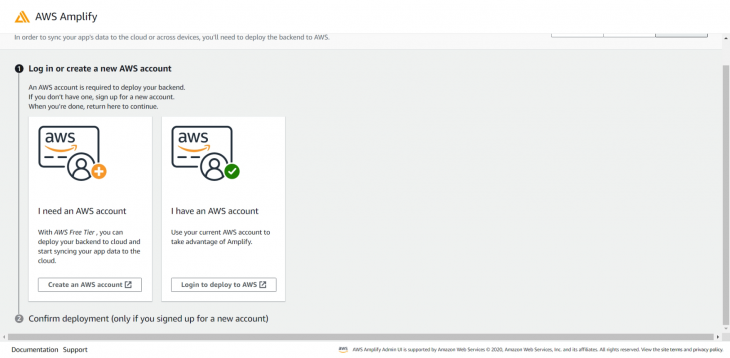
For deployment of your Amplify sandbox backend, return to the sandbox link and log in to your AWS account.
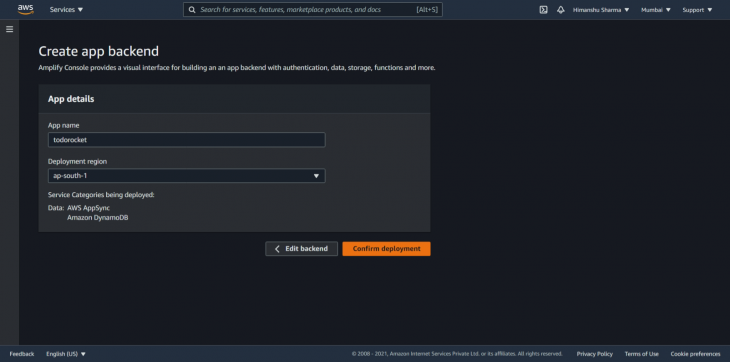
To create your app backend, provide the data in creation form:
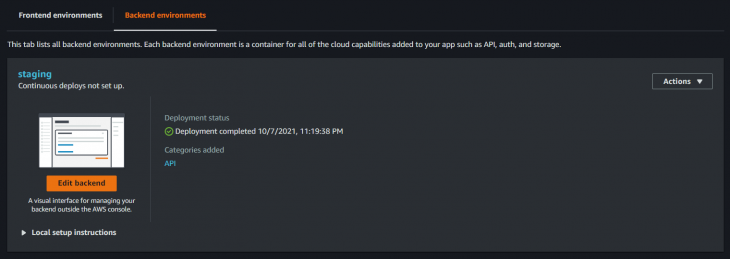
Next, AWS will start deploying your backend, and when the status is displayed as Deployment completed, click on Edit backend to open your admin UI.
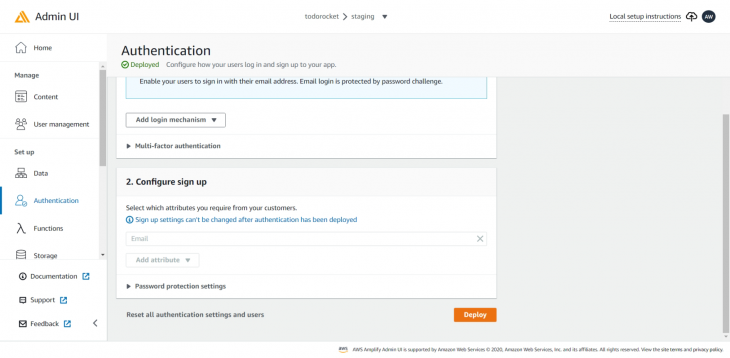
Since your To-do model specifies an @auth directive, we need to first add authentication. From the left panel, select Authentication. Click Deploy with default values.
After authentication deployment, click on the Local setup instructions on the top right.

Now, copy the command to pull the backend in your local and run it.
This will prompt you to log in to Amplify Admin UI using Amplify CLI; click Yes.
Later proceed according to your choices:
amplify pull --appId <appId> --envName staging

? Choose your default editor:
    `<your editor of choice>`
? Choose the type of app that you're building
    `flutter`
? Where do you want to store your configuration file?
    `./lib/`
? Do you plan on modifying this backend?
    `Yes`
Now we need to add some additional plugins that will ensure that DataStore has access to the API access it requires for communicating with the cloud:
amplify_api: ^0.2.0
amplify_auth_cognito: ^0.2.0
Add the above dependencies in your pubspec.yaml and do flutter pub get.
Next, add these plugins before you configure Amplify in the _TodosViewState class and update the _configureAmplify method:
final AmplifyAPI _apiPlugin = AmplifyAPI();
final AmplifyAuthCognito _authPlugin = AmplifyAuthCognito();

Future<void> _configureAmplify() async {
    try {
      await Amplify.addPlugins([_dataStorePlugin, _apiPlugin, _authPlugin]);

      await Amplify.configure(amplifyconfig);
    } catch (err) {
      debugPrint('Erro occured while configuring Amplify $err');
    }
  }
Since Amplify can only be configured once, you will need to do a full restart (stop and restart the app) now instead of just a hot restart. And you’re done!
You can find the starter and final project here. In this tutorial, you learned about AWS Amplify and how you can easily use DataStore to build a featured CRUD Application. However, this is only the beginning, you can learn more about authentication, storage, function, REST/GraphQl APIs, and more libraries from the AWS docs here.
We hope you enjoyed this tutorial. Feel free to reach out to us if you have any queries. Thank you!
Would you be interested in joining LogRocket's developer community?
Join LogRocket’s Content Advisory Board. You’ll help inform the type of content we create and get access to exclusive meetups, social accreditation, and swag.
Sign up now
Learn how OpenAPI can automate API client generation to save time, reduce bugs, and streamline how your frontend app talks to backend APIs.

Discover how the Interface Segregation Principle (ISP) keeps your code lean, modular, and maintainable using real-world analogies and practical examples.

<selectedcontent> element improves dropdowns

Learn how to implement an advanced caching layer in a Node.js app using Valkey, a high-performance, Redis-compatible in-memory datastore.


