If you’re building AI applications, you’re probably juggling more than one LLM in your application: GPT4 for general tasks, Claude for coding, or maybe even the latest Nano Banana for image generation. During development, you might also want to experiment with open source models locally, if your hardware can handle it.

But manually defining each model instance throughout your application can quickly make your code messy. And when it’s time to deploy to production and use SOTA models in the cloud, the last thing you’d want is to rewrite half your codebase.
In this article, we’ll show a handy pattern for routing LLM calls in an “environment-aware” manner, using AI SDK’s middleware. The idea is simple: the application environment (dev or prod) decides whether LLM queries are sent to a local model (like Llama 3.2) or a production model (GPT-5).
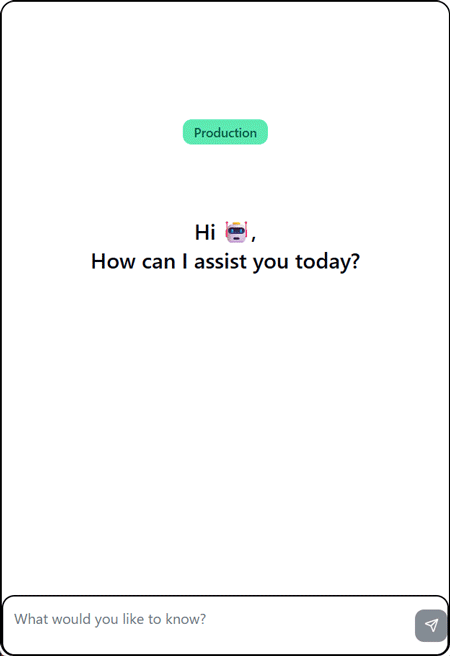
By the end, we’ll have a simple chatbot application with environment-aware model routing for every request to the LLM:

Here’s the source code to the final product.
The Replay is a weekly newsletter for dev and engineering leaders.
Delivered once a week, it's your curated guide to the most important conversations around frontend dev, emerging AI tools, and the state of modern software.
So, where does environment-aware routing come in handy? Here’s why it’s worth learning about:
Instead of hardcoding model choices across our codebase, we’ll centralize all models in a single file and then use AI SDK’s middleware to route requests sent to the LLM. This way, the same code runs in any environment without changing imports or rewriting function calls.
There is a huge library of open source models you might want to try in your application. Or maybe you built a custom Python model that your TypeScript AI dev team needs to test. Environment-aware routing lets you swap models easily, without touching the rest of your application code.
Running models locally can help reduce costs and is more private since your conversations aren’t stored on a cloud database somewhere. This is especially useful during development as you don’t want to burn through your production model’s budget while debugging. With environment-aware routing, you can save premium models for production and get free AI responses during development. Of course, you’ve already paid the initial price with your hardware budget.
Now that you understand the motivation behind this, let’s move on to set up a model locally using Ollama.
Ollama is a tool for downloading and running open-source language models locally on your computer. It runs on your machine with no internet required. You could even create your local version of ChatGPT by pairing Ollama with OpenWebUI.
Ollama exposes an OpenAI-compatible API endpoint (via localhost:11434) to make locally installed models accessible from your application code.
Ollama works on Windows, macOS, and Linux. To download and install it, navigate to the Ollama download page and pick your OS to start the download process.
Once installed, you can use the ollama CLI to pull (download) and run models. For example, this command will list the models you have available locally:
ollama list
Next, let’s actually download an open-source model from Ollama’s library.
Large language models come in many flavors, and choosing one can feel a lot like picking your first Linux distro. You’ll need to weigh factors like model size, context window, and how much your hardware can handle. On top of that, some models don’t support tool calling or streaming output, two foundational concepts in AI engineering. It’s exciting, but also a little overwhelming at first.
To keep things simple, we’ll start with a reliable baseline: Meta’s Llama family. The llama3.2 model, in particular, is only a 2GB download for the 3B parameter version. That’s light enough to run on most devices. If you have more memory, you can move up to the larger llama3.1 variants (8B, 70B, or even 405B).
Meta’s Llama family strikes a great balance because it offers both streaming output and tool calling, while still being practical for local setups:
This makes it a great “first pick” for experimenting with local LLMs.
To download Llama and get started, run:
ollama pull llama3.2:latest
Once the download is complete, you can run the model with:
ollama run llama3.2
This will drop you into an interactive session where you can start prompting the model directly from your terminal.
When you’re done, simply type to close the session:
/bye
Note: Running models locally has tradeoffs. While Ollama makes it easy to experiment with many open models and save cost in the process, inference speeds are not fast as cloud providers. For example, a 32GB RAM device runs the llama3.1 8B model smoothly, but inference has noticeable latency. Consider your device, use case, and tradeoffs.
Let’s create a fresh Next.js project and get the AI SDK integrated. The AI SDK is a TypeScript agent framework that makes working with different language models feel consistent, regardless of cloud or local Ollama models.
In your terminal, run:
## bash
npx create-next-app@latest ai-routing-demo
cd ai-routing-demo
When prompted, choose TypeScript and App Router — we’ll need both for this setup.
Now let’s install the AI SDK packages we’ll need:
## bash
pnpm add ai @ai-sdk/react @ai-sdk/openai @ai-sdk/anthropic @ai-sdk/xai ollama-ai-provider-v2
Here’s what each package does:
ai: The core AI SDK with utilities and middleware@ai-sdk/react: React-specific hooks like useChatollama-ai-provider-v2: The Ollama provider for the Vercel AI SDK. Note that we’re using v2 as this supports the new AI SDK. The original library has not received updates recently (eight months at the time of writing).@ai-sdk/openai, @ai-sdk/anthropic, @ai-sdk/xai: Providers for production models. In our example, we’re using OpenAI, Anthropic, and XAI.Make sure to set up your .env.local file with all the API keys you need:
OPENAI_API_KEY=sk-...
ANTHROPIC_API_KEY=sk-...
XAI_API_KEY=...
LanguageModelMiddlewareMiddlewares have always been a helpful paradigm in software engineering. They have the ability to intercept and modify requests before they execute.
As such, a lot of logic can be written here to customize application logic. In our case, instead of scattering environment checks throughout the codebase, we can centralize all our model routing logic in dedicated files using the AI SDK’s Language Model Middleware.
First, let’s create a src/models.ts file that initializes both local and production models:
// src/models.ts
import { ollama } from 'ollama-ai-provider-v2'
import { createOpenAI } from '@ai-sdk/openai'
import { createAnthropic } from '@ai-sdk/anthropic'
import { createXai } from '@ai-sdk/xai'

// Initialize cloud providers with API keys from .env
const openai = createOpenAI({ apiKey: process.env.OPENAI_API_KEY })
const anthropic = createAnthropic({ apiKey: process.env.ANTHROPIC_API_KEY })
const xai = createXai({ apiKey: process.env.XAI_API_KEY })

// Local Ollama models
export const llama3_2 = ollama('llama3.2:latest')
// other models on my list (:
export const llama3_1 = ollama('llama3.1:latest')
export const deepseek_r1 = ollama('deepseek-r1:7b')
export const gptOss = ollama('gpt-oss:latest')
export const qwen3 = ollama('qwen3:latest')
export const nomicEmbedText = ollama('nomic-embed-text') // an embedding model — faster than Open AI's text-embedding-small-3

// Production models (via cloud APIs)
export const gpt4o = openai('gpt-4o')
export const claud3_5_sonnet = anthropic('claude-3-5-sonnet-latest')
export const xai_grok = xai('grok-4-latest')
Now for the fun part. Create src/wrapped-models.ts, where we’ll define an AI SDK compatible middleware. For now, it will just log the model in use and then proceed:
// src/wrapped-models.ts
import type { LanguageModelV2Middleware } from '@ai-sdk/provider'
import { llama3_2, llama3_1, gpt4o, claud3_5_sonnet } from './models'

const environmentAwareMiddleware: LanguageModelV2Middleware = {
  wrapGenerate: async ({ doGenerate, model }) => {
    console.log(`🚀 Routing request to ${process.env.NODE_ENV}. Model: ${model.modelId}`);
    // in either case, we just call the underlying model now.
    return await doGenerate();
  },
  wrapStream: async ({ doStream, model }) => {
    console.log(`🚀 Routing request to ${process.env.NODE_ENV}. Model: ${model.modelId}`);
    return await doStream();
  },
}
The wrapGenerate and wrapStream functions are the important parts of our middleware. They intercept every generateText and streamText request and response respectively, giving us a chance to log, modify, or route them as needed. The doGenerate and doStream parameters are functions that execute the actual model call, while params contains the request details.
We can achieve the model selection feature we want with a simple function that uses a switch statement:
export function getModelByEnvironment() {
  const env = process.env.NODE_ENV || 'development'

  switch (env) {
    case 'development':
      return llama3_2

    case 'production':
      if (process.env.ANTHROPIC_API_KEY) {
        return claud3_5_sonnet
      } else if (process.env.OPENAI_API_KEY) {
        return gpt4o
      }
      throw new Error('No production API key found')

    default:
      return llama3_2
  }
}
This uses NODE_ENV to check the environment and uses llama3.2 for development. In production, we use Claude (claud3_5_sonnet) if an Anthropic key is available. If not, we’ll go with GPT-4o (gpt4o). We also throw an error if no key is found to prevent silent misrouting failures. This logic can be customized, of course, to use other models.
Now, we can use the wrapLanguageModel API from ai . It takes a language model (decided by the function above) and a language model middleware and returns a new language model that incorporates the middleware:
// src/wrapped-models.ts
import {
  wrapLanguageModel,
  extractReasoningMiddleware,
  simulateStreamingMiddleware,
} from 'ai'
import type { LanguageModelV2Middleware } from '@ai-sdk/provider'
import { llama3_2, llama3_1, gpt4o, claud3_5_sonnet } from './models'

const environmentAwareMiddleware: LanguageModelV2Middleware = {
  transformParams: async ({ type, params }) => {
    return params
  },
  wrapGenerate: async ({ doGenerate, model, params }) => {
    console.log(
      `🚀 Routing request to ${process.env.NODE_ENV} environment. Model: ${model.modelId}`
    )
    const result = await doGenerate()
    return result
  },
  wrapStream: async ({ doStream, model, params }) => {
    console.log(
      `🚀 Routing request to ${process.env.NODE_ENV} environment. Model: ${model.modelId}`
    )
    const result = await doStream()
    return result
  },
}

export const wrappedModel = wrapLanguageModel({
  model: getModelByEnvironment(),
  middleware: [
    environmentAwareMiddleware,
    simulateStreamingMiddleware(),
    extractReasoningMiddleware({ tagName: 'think' }),
  ],
})

export function getModelByEnvironment() {
   /** environment aware model routing logic **/
}
And that’s all it takes! Now we can pass wrappedModel as the model parameter to either generateText or streamText and have the right model provider chosen depending on our environment.
Notice we also use two built-in middlewares:
simulateStreamingMiddleware(): For models that do not support streaming output and return a full completion, this will simulate streaming it out chunk-by-chunk.extractReasoningMiddleware({ tagName: 'think' }): If you’re using a reasoning model (like Qwen3) this will look for <think>...</think> tags in the result and pull them out as a reasoning field that you can display on the frontend.The middleware stack is processed in order. Our environment-aware middleware runs first to handle routing, then simulateStreamingMiddleware ensures non-streaming models can work with streaming interfaces. Finally, extractReasoningMiddleware parses any reasoning tokens from models that support it.
The result is wrappedModel, which automatically logs the target environment and routes calls to the right underlying model. For example, in dev, it will log Routing request to development. Model: llama3.1:latest. While in prod, it might say production. Model: gpt-4o.
With the model ready, we’ll create an API route to handle chat messages. The Next.js App Router makes this straightforward and works smoothly with the AI SDK’s React Hooks. By default, the useChat Hook looks for a POST request on /api/chat/, so that’s where we’ll define our chat route:
// src/app/api/chat/route.ts
import { wrappedModel } from '@/wrapped-models';
import { convertToModelMessages, UIMessage, generateText, streamText, smoothStream } from 'ai';

export const maxDuration = 30; // allow streaming up to 30s

export async function POST(req: Request) {
  const { messages }: { messages: UIMessage[] } = await req.json();
  console.log('App Messages: ', messages);

  // use streamText to generate a streaming chat completion
  const result = streamText({
    model: wrappedModel,
    messages: convertToModelMessages(messages),
    experimental_transform: smoothStream(),
  });

  return result.toUIMessageStreamResponse();
}
When the front end calls this route with a list of messages, we use streamText from the AI SDK to get a streaming response. We pass wrappedModel (our env-aware model) and the message history.
The optional smoothStream() transformer makes the tokens flow more nicely to the client. Finally, toUIMessageStreamResponse() converts it into a form the useChat Hook can consume. You could also use generateText here for non-streaming, but streaming gives live feedback.
No matter whether wrappedModel is a local or cloud model, the code is the same. The middleware handles differences: e.g. if gpt-oss doesn’t natively stream, our simulateStreamingMiddleware will break its full response into chunks
For the frontend, we use Vercel’s AI Elements components (built on top of ShadCN) to quickly build a chat UI. After installing AI Elements (see their setup guide), run the following commands to add components:
# Intialize AI Elements
npx ai-elements@latest
# Install Chat UI components
npx ai-elements@latest add conversation
npx ai-elements@latest add message
npx ai-elements@latest add response
npx ai-elements@latest add prompt-input
These commands scaffold the Conversation, Message, PromptInput, and Response components into your components/ai-elements/ directory giving us an easier start.
Now let’s wire up our main page at src/app/page.tsx:
'use client';

import React, { useState } from 'react';
import { useChat } from '@ai-sdk/react';
import { Conversation, ConversationContent, ConversationScrollButton } from '@/components/ai-elements/conversation';
import { Message, MessageContent } from '@/components/ai-elements/message';
import { PromptInput, PromptInputTextarea, PromptInputSubmit } from '@/components/ai-elements/prompt-input';
import { Response } from '@/components/ai-elements/response';

export default function Chat() {
  const [input, setInput] = useState('');
  const { messages, status, sendMessage } = useChat();

  return (
    <div className="max-w-4xl mx-auto py-6 border rounded-lg h-[600px]">
      <Conversation>
        <ConversationContent>
          {messages.map((message) => (
            <Message from={message.role} key={message.id}>
              <MessageContent>
                {message.parts.map((part, i) =>
                  part.type === 'text' ? <Response key={i}>{part.text}</Response> : null
                )}
              </MessageContent>
            </Message>
          ))}
        </ConversationContent>
        <ConversationScrollButton />
      </Conversation>

      <PromptInput onSubmit={(e) => { e.preventDefault(); sendMessage({ text: input }); setInput(''); }} className="mt-4 flex">
        <PromptInputTextarea
          className="flex-1"
          autoFocus
          onChange={(e) => setInput(e.currentTarget.value)}
          value={input}
        />
        <PromptInputSubmit disabled={!input} status={status} />
      </PromptInput>
    </div>
  );
}
The useChat Hook handles all the complexity of managing conversation state, sending messages, and streaming responses. The AI Elements components give us a polished interface that works great out of the box, but you can customize them as needed.
Because of our setup, when you run npm run dev and visit your app, it goes to the local llama3.1 model via Ollama; in production, it goes to the cloud model. The rest of the UI code didn’t change at all – only our middleware did.
To test the difference, run your app in development and production modes. First, make sure your app works in development:
npm run dev
Open the app in your browser on http://localhost:3000 and send a few messages. You should see logs like:
🚀 Routing request to development environment. Model: qwen3:latest
Now let’s test production mode. Build your app and start it in production mode:
npm run build
npm start
Send another message and check the console. Now you’ll see:
🚀 Routing request to production environment. Model: claude-3-5-sonnet-latest
The beauty of this approach is that your application code never changes. The middleware handles all the routing logic, and your chat interface works identically regardless of which model is processing the requests.
What we’ve built here goes beyond just saving money on development costs or practicing AI privacy. We’ve created a flexible architecture that separates concerns cleanly and scales with your needs.
The middleware pattern gives you powerful hooks into the model execution process. You could extend this to add logging for analytics, implement caching, add guardrails, and more. More importantly, this approach keeps your business logic clean.
As you build more AI-powered features, you’ll find that this environment-aware pattern becomes a foundation you can build on. The AI landscape moves fast, but good architectural patterns are timeless.
This article showcases a curated list of open source mobile applications for Flutter that will make your development learning journey faster.
Discover what’s new in The Replay, LogRocket’s newsletter for dev and engineering leaders, in the April 1st issue.
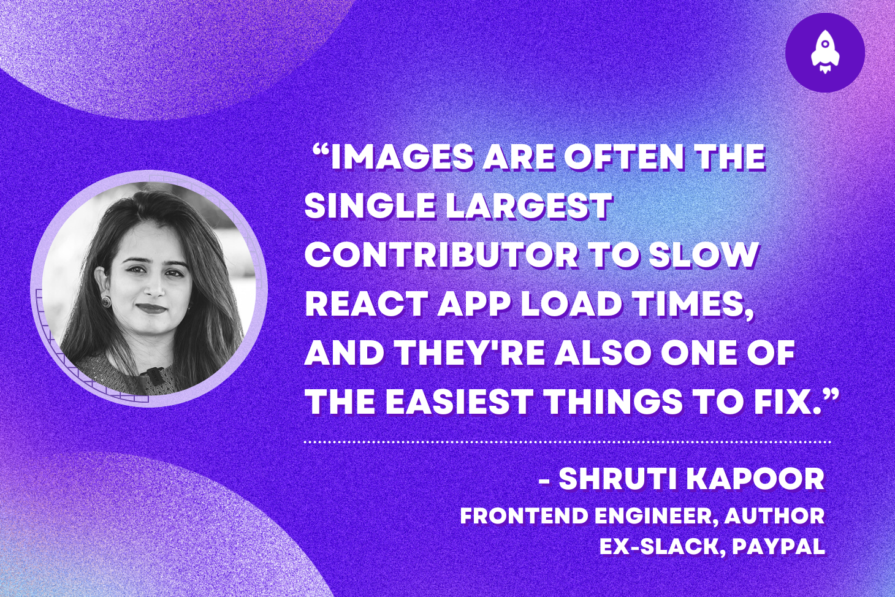
This post walks through a complete six-step image optimization strategy for React apps, demonstrating how the right combination of compression, CDN delivery, modern formats, and caching can slash LCP from 8.8 seconds to just 1.22 seconds.

Learn what vinext is, how Cloudflare rebuilt Next.js on Vite, and whether this experimental framework is worth watching.
Hey there, want to help make our blog better?
Join LogRocket’s Content Advisory Board. You’ll help inform the type of content we create and get access to exclusive meetups, social accreditation, and swag.
Sign up now

