One of the hassles a lot of software engineers face revolves around deployment. An engineer could build and test an application with all dependencies on a Windows OS without errors. Still, deploying the same application to a different operating system, such as Linux or Mac, could result in bugs and errors.
Before container technologies emerged, virtual machines (VMs) were the go-to solutions for dealing with such encounters. It turns out that VMs are slow and memory inefficient, partly because they have to be set up and launched for each application.
The technique of containerizing applications complements the inefficiencies of VMs; containers are lightweight packages that enable an application to run consistently on any operating system or infrastructure.
This tutorial will dive further into what it means to containerize an application and its benefits. We will investigate this by setting up Docker on our machine and containerizing a Flutter web app.
I’ll be using Visual Studio Code for this demonstration. To efficiently run Docker on Windows, ensure that your machine:
Container technologies make it possible to run applications in distributed environments consistently. These environments can include:
There is usually no guarantee that the application is exposed to consistent runtime protocols across these environments. For instance, you may build and test an application using Flutter v2.2.3, but at the production stage, the application ends up running on Flutter v2.5.1 and, as a result, something goes wrong.
Containers ensure that an application maintains its configured runtime protocol irrespective of the operating configurations of the host server.
It achieves this by packaging an application with its dependencies, settings, libraries, and other runtime protocols in an isolated state. This implies that the application runs independently of the hosting server configurations and without any incompatibilities.
Docker is an open source tool for building, testing, deploying, and managing containerized applications. In my opinion, it is the standard for implementing application containerization due to its ease of portability and design for modern microservice architecture.
Docker simplifies the process of orchestrating containers through its docker commands.
A server hosting three applications in three virtual machines would need three copies of a virtual OS managed by the hypervisor to run on the server. This requires a lot of resources because VMs that run these three apps will be very heavy and will consume a lot of CPU resources.
With containers, the container engine manages all three applications and shares the same host OS. A single infrastructure can support a variable amount of containers.
A developer can push and pull Docker images to and from a repository. Any machine can host these images to run its containers. This implies that you can always retrieve and run a container in your Docker image from wherever you are. This process is similar to how you would typically retrieve your application hosted on a remote Git repository.
Docker abstracts the process of manually setting up the application dependencies each time you change the application environment. Due to the independence and isolation of the Docker container, you don’t need to set up your application runtime configuration. The container already contains the dependencies that your application needs to be self-sufficient.
Once you build the image, Docker uses the configurations provided to sustain the application.
Scaling up an application is more manageable with containers when compared to virtual machines. Docker containers can scale up applications to withstand a heavier load. It can also reduce the processing effort when there is a drop in the weight of the load on the application.
The configurations of containers are immutable. When making changes to the configuration of an image, the container is replaced wholly and the image is rebuilt.
Let us proceed to containerize a Flutter web app with Docker.
As I mentioned at the start of this article, I’ll demonstrate this process on a Windows operating system. Once you have installed Docker on your system, open the command shell as an administrator.
Run the following command to check the version of Docker installed:
sh
docker --version
You should get an output displaying the version of Docker that you installed, in this format:
sh
Docker version 20.10.8, build 3967b7d
Next, let us test the installation by running a basic Docker command on the terminal.
sh
docker run hello-world
The expected output for this command is:
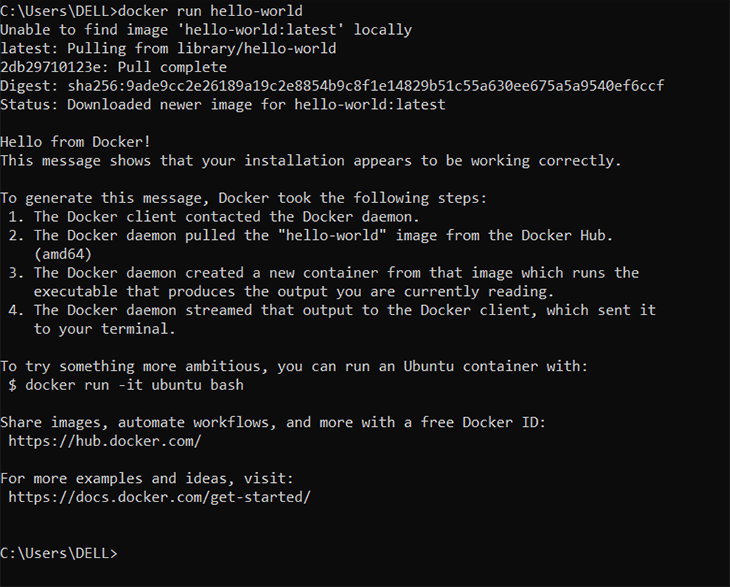
When run for the first time, the above command pulls the image from the Docker hub and runs an instance of it as a container.
If you are using a Linux operating system, you would have to grant root access to Docker to use it in your IDE. You can do this by running the following commands:
Create the Docker group:
sh

sudo groupadd docker
Add your user to the group:
sh

sudo usermod -a -G $USER
Activate the changes made to groups:
sh

newgrp docker
Now, verify you can run Docker commands from the shell without using the sudo command.
sh
docker run hello-world
Open the Flutter web application you’d like to containerize with your preferred IDE. Inside the root application folder, create a file named Dockerfile. Ensure the filename starts with uppercase “D”.
Now, add the following code inside the Dockerfile:
sh

# Install Operating system and dependencies
FROM ubuntu:20.04

RUN apt-get update
RUN apt-get install -y curl git wget unzip libgconf-2-4 gdb libstdc++6 libglu1-mesa fonts-droid-fallback lib32stdc++6 python3
RUN apt-get clean

# download Flutter SDK from Flutter Github repo
RUN git clone https://github.com/flutter/flutter.git /usr/local/flutter

# Set flutter environment path
ENV PATH="/usr/local/flutter/bin:/usr/local/flutter/bin/cache/dart-sdk/bin:${PATH}"

# Run flutter doctor
RUN flutter doctor

# Enable flutter web
RUN flutter channel master
RUN flutter upgrade
RUN flutter config --enable-web

# Copy files to container and build
RUN mkdir /app/
COPY . /app/
WORKDIR /app/
RUN flutter build web

# Record the exposed port
EXPOSE 5000

# make server startup script executable and start the web server
RUN ["chmod", "+x", "/app/server/server.sh"]

ENTRYPOINT [ "/app/server/server.sh"]
In the above Dockerfile, we started by installing the operating system (Ubuntu) and the required dependencies.
Next, we downloaded the Flutter SDK and set the SDK path in the environment path (this is also what you would do if you were setting up Flutter on your local machine).
Afterward, we copied our application to the container and built it with the Dockerfile.
Finally, we exposed a port=5000, through which we’ll serve the application from the container. Then we start the HTTP server using the server.sh script.
Next, create a subfolder in the root application folder. Name the folder server, then create a server.sh file inside the server folder, and add the following code.
sh

#!/bin/bash

# Set the port
PORT=5000

# Stop any program currently running on the set port
echo 'preparing port' $PORT '...'
fuser -k 5000/tcp

# switch directories
cd build/web/

# Start the server
echo 'Server starting on port' $PORT '...'
python3 -m http.server $PORT
In the server.sh file, we set the port to 5000, the same as what we exposed in the Dockerfile.
Then, we use the fuser command to terminate any other process currently running on port 5000 to make it available for our application. Finally, we start the server.
Open the terminal from the application root folder and run the following command:
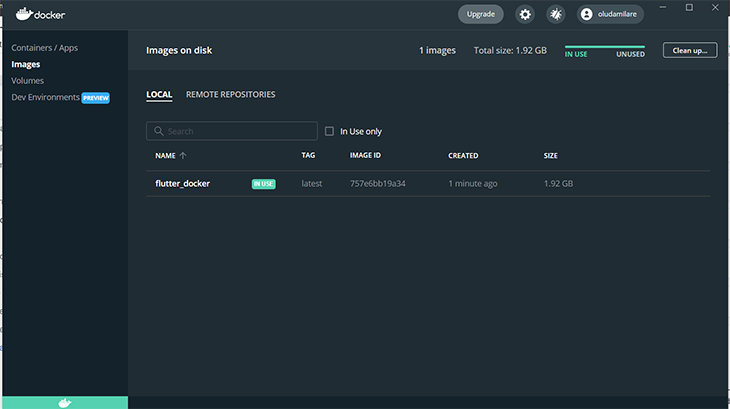
docker build . -t flutter_docker
This will build a Docker image with the name flutter_docker. You can view this image from the installed Docker desktop application. You can also view the image with the command docker images.
Run the following command:
docker run -i -p 8080:5000 -td flutter_docker
This command binds the port 5000 configured in the container to the TCP port 8080, accessible from the browser.
Your project structure should be in this format by the time you have completed the configurations:
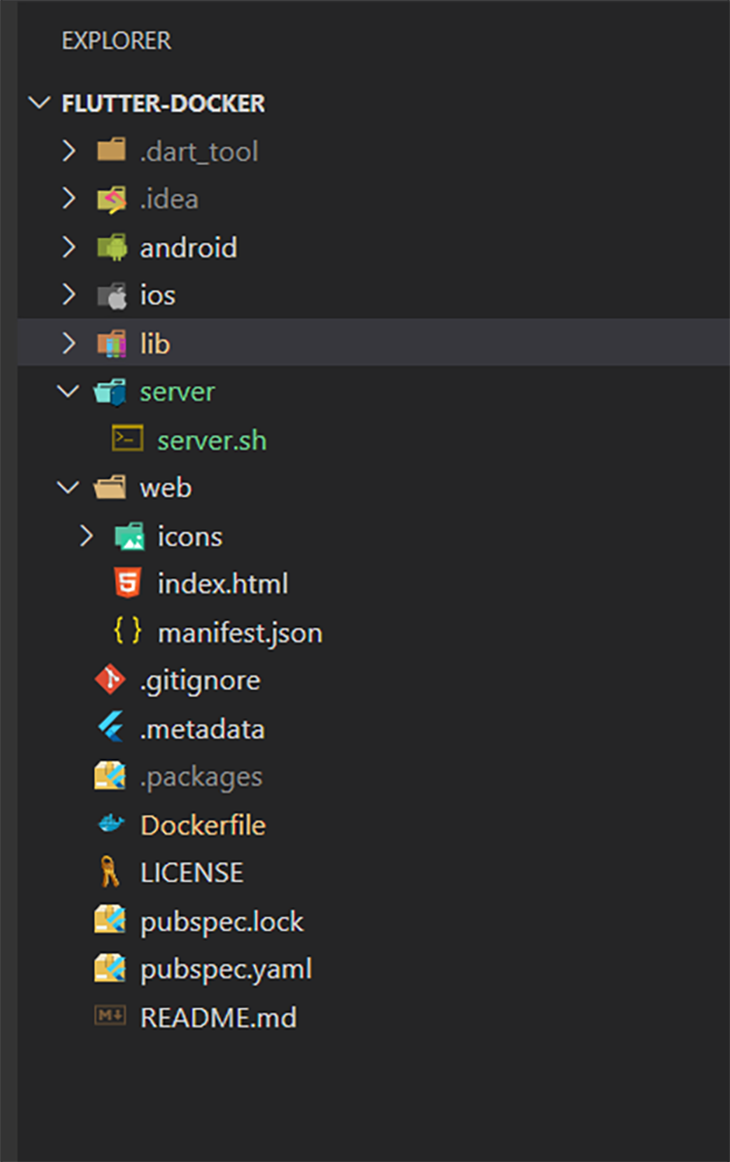
Proceed to view the application on localhost:8080 on your browser.
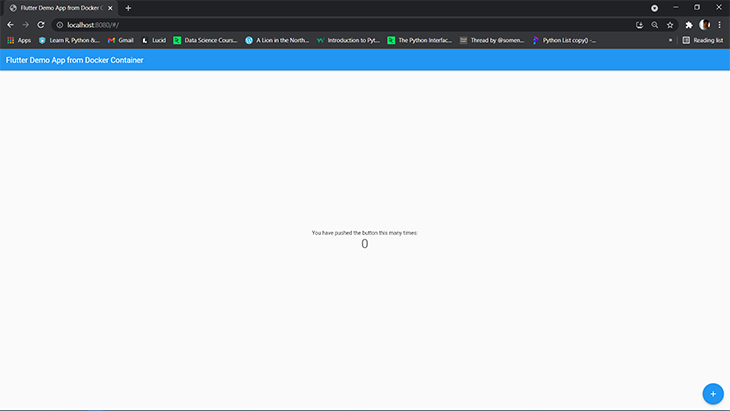
In this tutorial, we learned about the benefits of containerizing an application. We demonstrated how to set up Docker on our machine, and we proceeded to run our existing application from a Docker container.
With Docker, you don’t have to worry about your application breaking due to the incompatibilities of its host environments. You can learn more about Docker from the official documentation.
The aim is to ensure your application is flexible enough to run independently on its host. As we have demonstrated with a Flutter application, you can also containerize applications built with other tools.
Install LogRocket via npm or script tag. LogRocket.init() must be called client-side, not
server-side
$ npm i --save logrocket

// Code:

import LogRocket from 'logrocket';
LogRocket.init('app/id');
// Add to your HTML:

<script src="https://cdn.lr-ingest.com/LogRocket.min.js"></script>
<script>window.LogRocket && window.LogRocket.init('app/id');</script>
Hey there, want to help make our blog better?
Join LogRocket’s Content Advisory Board. You’ll help inform the type of content we create and get access to exclusive meetups, social accreditation, and swag.
Sign up now
Discover how the Interface Segregation Principle (ISP) keeps your code lean, modular, and maintainable using real-world analogies and practical examples.

<selectedcontent> element improves dropdowns

Learn how to implement an advanced caching layer in a Node.js app using Valkey, a high-performance, Redis-compatible in-memory datastore.

Learn how to properly handle rejected promises in TypeScript using Angular, with tips for retry logic, typed results, and avoiding unhandled exceptions.


9 Replies to "Containerizing Flutter web apps with Docker"
Hi, thanks for the great explanation on how to run flutter in a container, but I need to add something.
In the Dockerfile
1.) You need to remove the 1st line from “sh”
2.) Add these 2 lines to the Docker file
ENV TZ=Europe/Warsaw
RUN ln -snf /usr/share/zoneinfo/$TZ /etc/localtime && echo $TZ > /etc/timezone
This is necessary because apt-get wants to install the “libgconf-2-4” package and tzdata and we need to answer the question about TIMEZONE during installation/configuration. These 2 lines in the Dockerfile can configure TIMEZONE automatically.
Of course, we can also run nginx as a replacement with “python3 -m http.server $PORT” but that’s another story 🙂
After which line do we have to add the below line in Dockerfile?
ENV TZ=Europe/Warsaw
RUN ln -snf /usr/share/zoneinfo/$TZ /etc/localtime && echo $TZ > /etc/timezone
Why do you download the whole Flutter SDK every time?
I just wanted to put a pre-built web build into container.
ERROR: while running ` docker build -t flutter_web_test . `
=> ERROR [ 3/14] RUN apt-get install -y curl git wget unzip libgconf-2-4 gdb libstdc 1.1s
——
> [ 3/14] RUN apt-get install -y curl git wget unzip libgconf-2-4 gdb libstdc++6 libglu1-mesa fonts-droid-fallback lib32stdc++6 python3:
#6 0.329 Reading package lists…
#6 0.934 Building dependency tree…
#6 1.060 Reading state information…
#6 1.108 E: Unable to locate package lib32stdc++6
#6 1.108 E: Couldn’t find any package by regex ‘lib32stdc++6’
——
executor failed running [/bin/sh -c apt-get install -y curl git wget unzip libgconf-2-4 gdb libstdc++6 libglu1-mesa fonts-droid-fallback lib32stdc++6 python3]: exit code: 100
answer to why it is not working on M1
As you noticed yourself, you are starting a docker build based on an image that was built for another platform, i.e. you are running arm64 but the image is linux/amd64. This means that docker will run it but with an emulation layer, namely qemu.
Some incompatibility between Dart and qemu seems to be the problem. In the stacktrace you posted, qemu crashed when Dart runtime tried to execute InvokeCode(). This is actually a reported problem, see e.g.
dart-lang github issue: Building linux/amd64 Docker Image on Mac M1 (most relevant, I think)
flutter github: build flutter(3.0.3) docker image base on ubuntu:18.04 crash
another flutter issue: Unable to ‘pub upgrade’ flutter tool
answer to what to do
The Dart folks have no plans to analyze this any further since the problem lies with qemu and the problem was not reproduced with qemu outside docker.
It is also noteworthy that docker with qemu is only provided as a best effort and the docker project itself is unlikely to tackle the issue either, even if reported.
I did not find a filed issue for qemu itself.
There are basically two options:
Do the thing without qemu, meaning to build in a linux/arm64 container
This will work to some degree regarding flutter, but the next thing you will have to tackle is arm-based android build for linux, which is a whole new can of worms. See e.g. google’s android bug tracker, Please support Linux aarch64 for building apps and others.
Do the build without arm/M1 hardware
As sad as it is to realize this, it might be the straightforward solution to not cross-build in this case, at least for flutter with android build target. And likely also a logical one if you want to provide an intel compatible docker image to coworkers and/or CI which might not run M1. Ultimately, it is a question what your reference build platform is.
It was working fine, but for some reason now I always get this error:
exec /app/server/server.sh: no such file or directory
Does anyone have a solution for that?
Hello Sarah and folks,
I see same issue, any recommendations how to address very much appreciated.
Best, FS
Following steps to much time run
=> [ 3/14] RUN apt-get install -y curl git wget unzip libgconf-2-4 gdb libstdc++6 libglu1-mesa fonts-droid-fallback l 735.5s
=> => # questions will narrow this down by presenting a list of cities, representing
=> => # the time zones in which they are located.
=> => # 1. Africa 4. Australia 7. Atlantic 10. Pacific 13. Etc
=> => # 2. America 5. Arctic 8. Europe 11. SystemV
=> => # 3. Antarctica 6. Asia 9. Indian 12. US
=> => # Geographic area:
Any Idea why it takes to much time?
The above docker file is build around 1.92 GB flutter mage. Is there any way to reduce that image size?