
If you’re like me, you’re a fan of Rust and love to work with lean, mean tools tailored exactly to your needs. That’s why I’ve been using Vim as my main editor for Rust since the very beginning.

At first, the support and tool stability of Vim were not quite there. However, over the last couple of years, the tools have matured. With the advent of the Language Server Protocol (LSP), IDEs and editor integrations for most programming languages have improved quite a bit. With a standardized protocol, the exact same tools can now be used for all different IDEs and editors with only a little bit of glue code between the moving pieces.
In this post, we’ll go over how to configure Vim for Rust development. We’re going to stick to a rather minimalist setup that covers all the basics and gives you the power of rust-analyzer, the most widely used, state-of-the-art tool for providing IDE support for editors.
We will first look at some of the plugins I suggest as a baseline, what they do, and how to customize them. Then, we’ll create an example configuration and test some of the features we’re implementing with this setup.
If you’re a Vim user already but haven’t gotten around to setting up Vim for Rust development, you also might find some tips and tricks in here for your own setup. At the very least, this post will be a starting point to build your own customizations.
This guide will work for both Vim8 and NeoVim using the configuration provided below. In my experience at least, any customizations you may want to make or other plugins you want to add will work right out of the box with NeoVim. However, there might be different configuration options for Vim8 — just check out the documentation of the plugin and you’ll usually find what you need right there.
The Replay is a weekly newsletter for dev and engineering leaders.
Delivered once a week, it's your curated guide to the most important conversations around frontend dev, emerging AI tools, and the state of modern software.
First, let’s start by going over the plugins and tools we will use.
Let’s take a look at the core piece of this setup: rust-analyzer.
rust-analyzer is essentially a frontend compiler for IDEs. In other words, it’s a tool IDEs and editors can use to ask for information about Rust code, as well as interact with it in automated ways.
rust-analyzer implements the LSP and has, since its inception, cemented itself as the de facto standard baseline when it comes to Rust tooling.
Besides smart autocompletion, it also provides plenty of other advanced features you might know from other IDEs, such as auto-importing, go to definition, type declaration and implementation, find references, tree folding, run program and run tests, and code assists.
While I am personally a minimal user of magic functionality, I prefer very direct control over the code I write. In doing batch changes with sed, I’m sure there are plenty of people who are used to quality-of-life features and will greatly appreciate the immense amount of work that went into adding them to rust-analyzer.
What exactly you want to use this plethora of options for is up to you. As you’ll see below, you will also have the ability to fully configure rust-analyzer to your needs.
From my personal experience, however, even without any configuration or diving deep into the functionality, rust-analyzer and the Vim plugins using it provide everything you’ll need by default.
rust.vim provides the bare minimum needed for working with Rust in Vim, such as syntax highlighting, formatting, and file detection. There’s not much to be said — it’s just the default Rust configuration from the official rust-lang group on GitHub. It’s a very good baseline and starting point, so if you’re looking for an absolutely minimal setup, this might just be it.
Conquer of Completion, or coc, is essentially a specialized plugin for completion in the style of VS Code. It provides the possibility of loading extensions for different languages that can then work with LSP servers.
It’s a user-friendly plugin built with performance and flexibility in mind. I have been using coc for a while now and have been very happy with it. There is a rich ecosystem of language server plugins available for many different languages, and coc enables the user to fully customize how completion should work.
coc-rust-analyzer is essentially the aforementioned bridge from our LSP tool (rust-analyzer) to coc. It’s an officially supported coc plugin and you can install it by using the following code within Vim:
:CocInstall coc-rust-analyzer
This will download and install the latest rust-analyzer binary and wire everything together for you.
Upon editing Rust files in the future, you’ll be asked if you want to install an update if there’s a new version of rust-analyzer available:

There are several configuration options, which you can edit in $HOME/.config/nvim/coc-settings.json (you can get to the file by executing :CocConfig in Vim as well).
I personally haven’t felt the need to change the configuration around much. Since there are quite a few options, especially when it comes to customizing how the completion works and is displayed, it might be worth checking out the list of possible configurations.
The options you choose map directly onto rust-analyzer and even include features like custom cargo.
ALE is a very powerful plugin in its own right. If you wanted to, you could try to just use ALE as a master plugin to rule them all! Since it’s able to communicate with an LSP tool like rust-analyzer, ALE can handle syntax checking, autofixing files, autocompletion, and even some code-related functions.
Personally, I’m not too fond of huge single-tool solutions. However, ALE’s asynchronous syntax checking is fantastic and I’ve been using it for a while in several different languages, Rust included. I use it for that specific feature, with the option to enable other features for languages where other plugins lack a certain functionality.
In any case, if you’re a Vim user and haven’t heard of ALE, definitely check it out! If you’re thinking of switching to Vim for some coding, ALE might give you a lot out of the gate without the need to configure much of anything. It integrates very well with other widely used plugins and LSP servers.
In this configuration, I will use vim-plug, but you can use whichever you like. Most plugins include installation strings and guides for all the widely used ones. For this one, simply follow vim-plug’s installation instructions.
set nocompatible
filetype off
set encoding=utf-8

call plug#begin('~/.vim/plugged')

Plug 'rust-lang/rust.vim'
Plug 'neoclide/coc.nvim', {'branch': 'release'}
Plug 'dense-analysis/ale'

call plug#end()

let g:rustfmt_autosave = 1
let g:rustfmt_emit_files = 1
let g:rustfmt_fail_silently = 0

inoremap <silent><expr> <TAB>
      \ pumvisible() ? "\<C-n>" :
      \ <SID>check_back_space() ? "\<TAB>" :
      \ coc#refresh()
inoremap <expr><S-TAB> pumvisible() ? "\<C-p>" : "\<C-h>"

function! s:check_back_space() abort
  let col = col('.') - 1
  return !col || getline('.')[col - 1]  =~# '\s'
endfunction

if has('nvim')
  inoremap <silent><expr> <c-space> coc#refresh()
else
  inoremap <silent><expr> <c-@> coc#refresh()
endif

nmap <silent> gd <Plug>(coc-definition)
nmap <silent> gy <Plug>(coc-type-definition)
nmap <silent> gi <Plug>(coc-implementation)
nmap <silent> gr <Plug>(coc-references)
This minimal configuration simply adds the plugins at the top within our vim-plug begin/end calls.
Then, we configure our automatic rustfmt setup. This is nice, since it will automatically, on save, apply rustfmt to your file. All your files will always be correctly formatted based on your rustfmt configuration or the default.
Below that, there are some configurations from the coc example vim configuration.
These are essentially configurations concerning the autocompletion and how different key binds, such as Control + Space, Tab, or Control + N, work with your completion menu. I won’t go into detail here, as I simply use the default settings provided by coc.
Below that, you can see some bindings for the go to definition calls and the like. The nice thing is that the bindings will work in any language for which you use coc (provided that language’s LSP plugin supports it).
If you want to give coc a serious try, I would suggest you start from their example configuration. After that, you can remove the things you don’t need and add plugins, customizations, and other configurations.
When you start Vim with this configuration, you first need to execute the following:
:PlugInstall
If you’re using a different plugin manager, use whichever installation command that one uses (or manually download and install all the plugins).
Also, as mentioned above, don’t forget to execute the following within Vim to install the rust-analyzer plugin for coc:
:CocInstall coc-rust-analyzer
Anyway, that’s it for our minimal configuration! Let’s check out what it does and how it looks next.
Also, if you’re interested in my exact setup, feel free to check out my Vim configuration in my dotfiles repository. As a disclaimer, I change it frequently and use Vim for many things other than Rust, so there might be some useless stuff in there.
First, let’s take a look at a simple code file and how the syntax highlighting works:
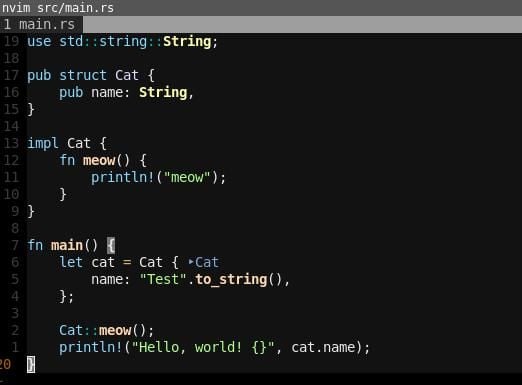
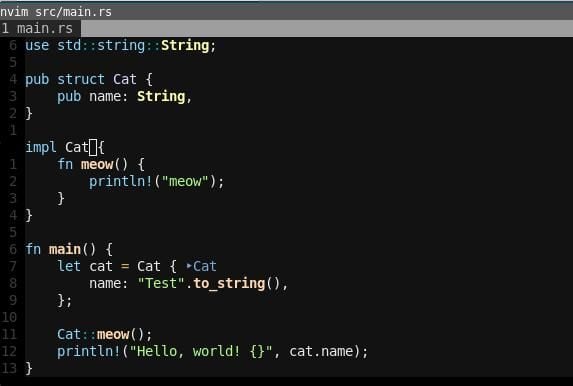
As you can see, rust.vim provides us with nice, readable default highlighting. Also, notice the >Cat next to the struct initialization. This is rust-analyzer giving us a hint for our Cat type. Obviously, this is more useful for inferred types, but this is what it looks like.
Let’s check out some autocompletion features:
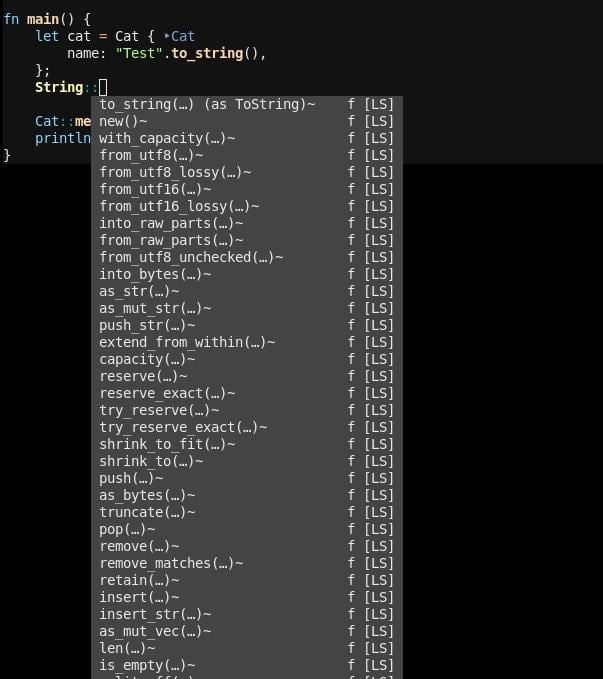
string::.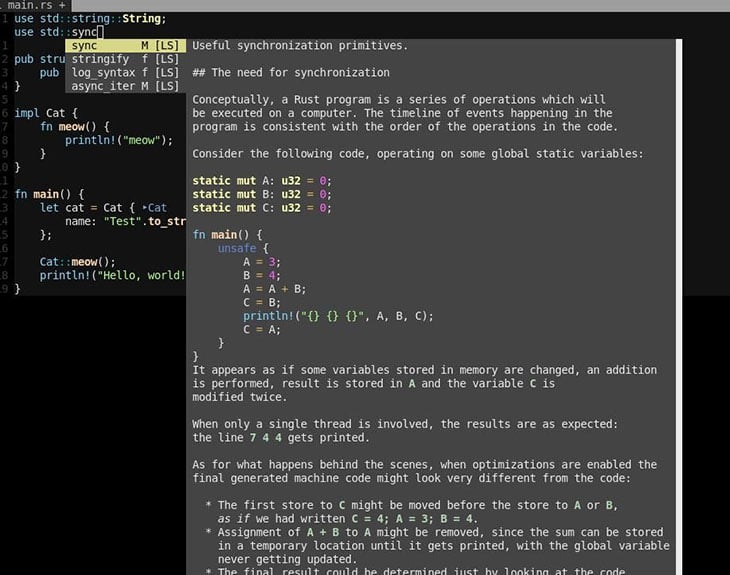
std::sync::.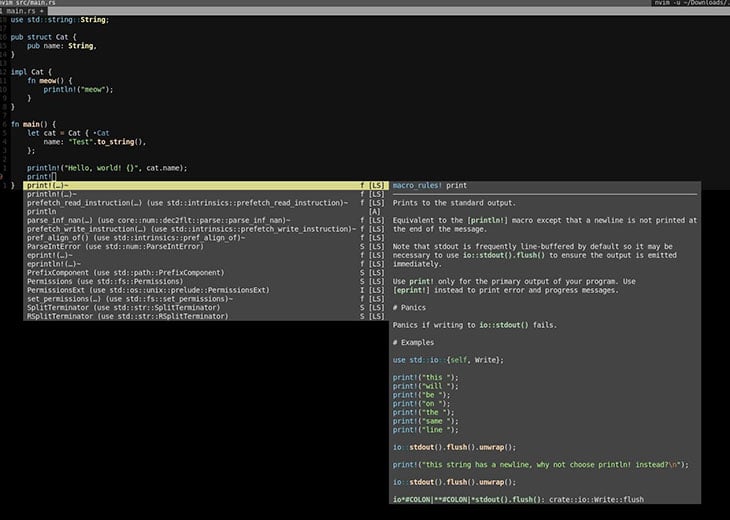
println! macro.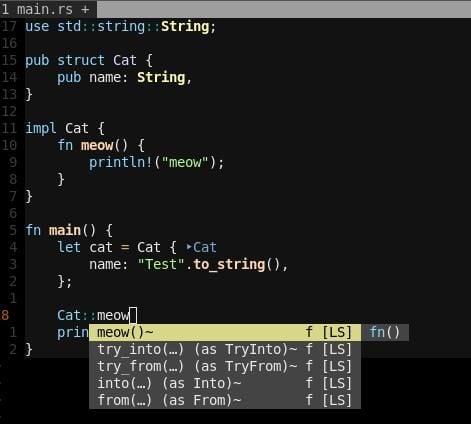
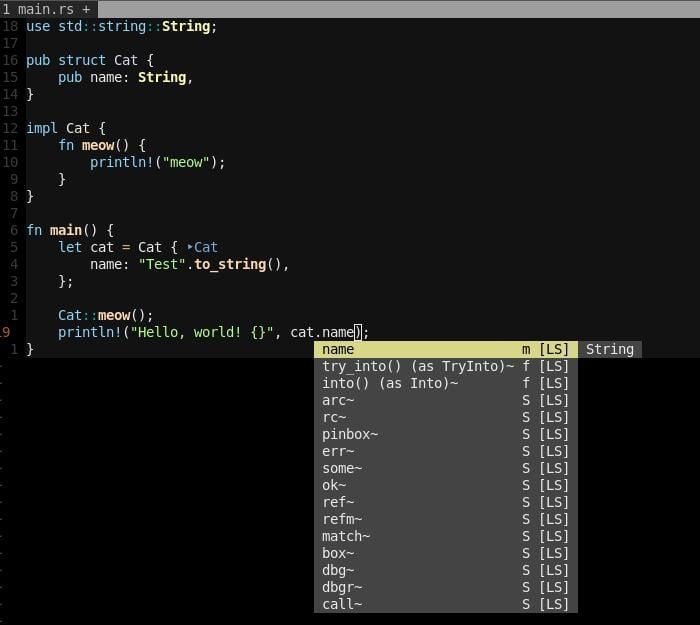
Above, you can see examples for autocompletion regarding imports, macros, function names, struct members, and static functions. This overlay and the displayed info can, as mentioned above, be heavily customized to your needs. My setup is pretty much the default, though.
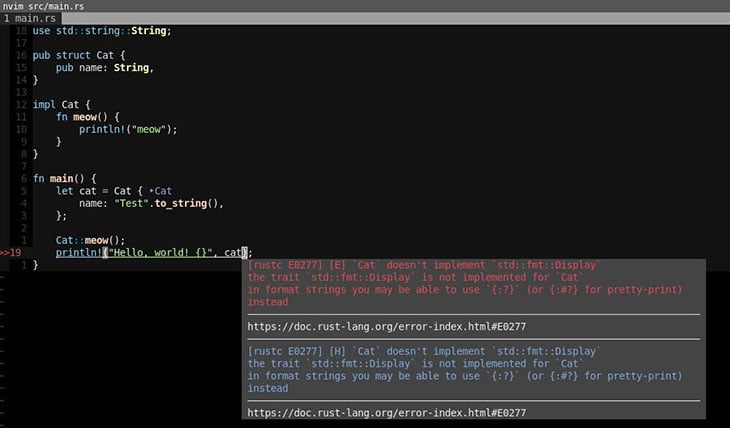
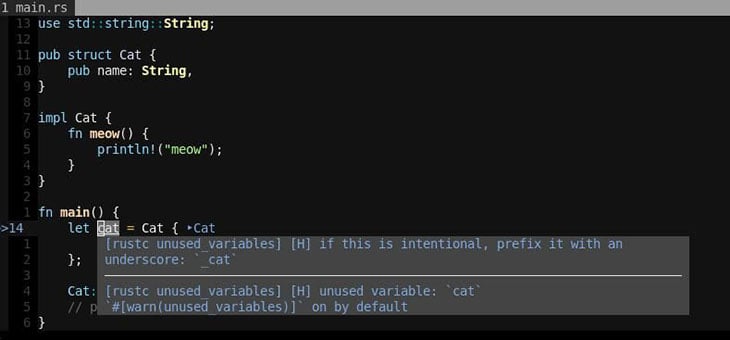
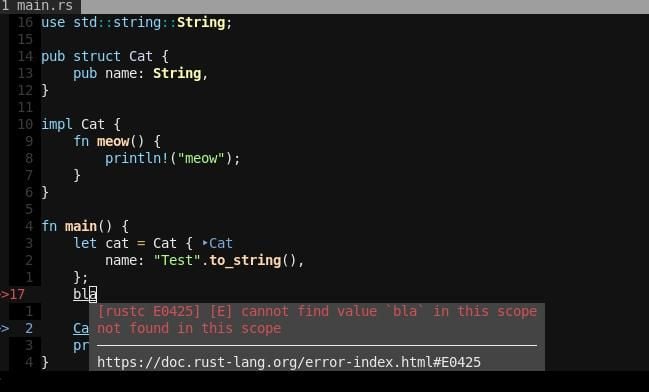
Let’s check out how rust-analyzer shows us errors and warnings together with ALE:
And, as described above, we can check out the automatic rustfmt on save:
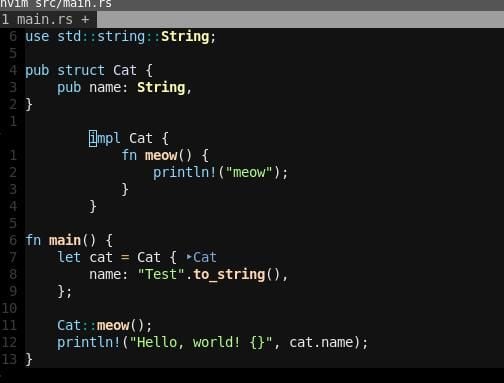
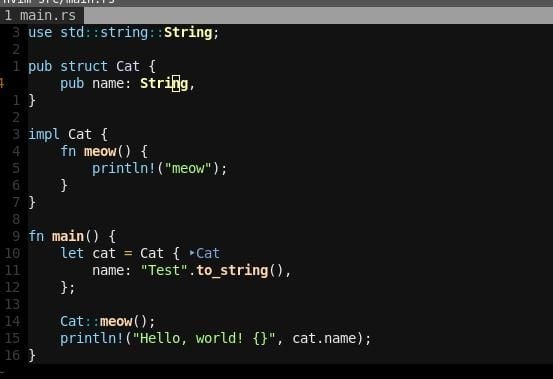
:w and set it to automatically reformat correctly.Also, if our cursor is above String like in the screenshot above, we can use the go to definition binding to jump to the definition of String in the Rust source:
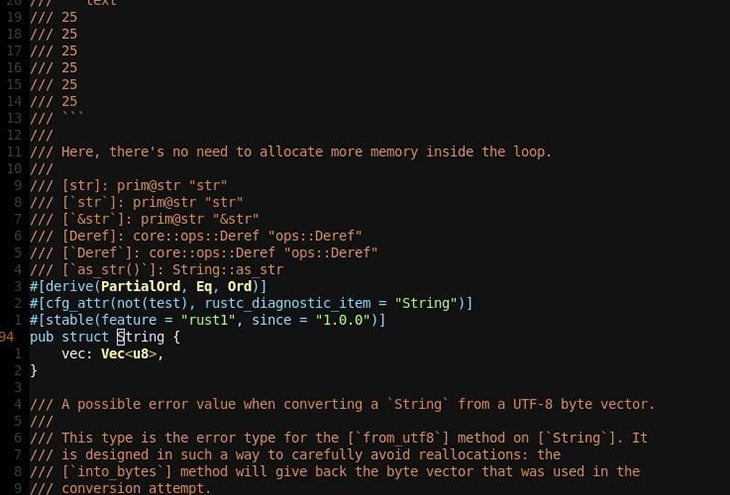
This works with our own custom types as well. Another neat thing is the Find References function, which shows us all references of a certain type:
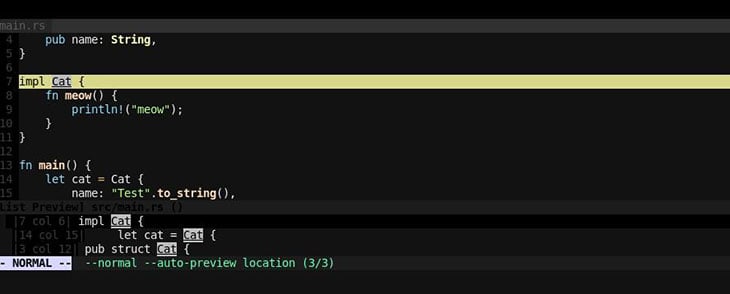
Pretty nice! And all with a minimal configuration and only a handful of plugins.
As you can see, Vim is a lean, robust setup for efficiently editing Rust code. It allows us to enable fancy IDE features without the sluggish UI or high resource usage.
As mentioned in the article, this is but one possible way to create such a setup. Vim, with its sheer unlimited ecosystem, empowers the motivated user to customize everything to their exact preference.
Not everyone likes to spend hours tinkering with their tools, however. Fortunately, the default configuration for the tools used in this article work quite well out of the box and the same is true for many other options as well. In most cases, the relevant plugins are well-documented and there are communities you can reference if you’re trying to achieve something more complex.
Debugging Rust applications can be difficult, especially when users experience issues that are hard to reproduce. If you’re interested in monitoring and tracking the performance of your Rust apps, automatically surfacing errors, and tracking slow network requests and load time, try LogRocket.
LogRocket lets you replay user sessions, eliminating guesswork around why bugs happen by showing exactly what users experienced. It captures console logs, errors, network requests, and pixel-perfect DOM recordings — compatible with all frameworks.
LogRocket's Galileo AI watches sessions for you, instantly identifying and explaining user struggles with automated monitoring of your entire product experience.

Modernize how you debug your Rust apps — start monitoring for free.

React Server Components and the Next.js App Router enable streaming and smaller client bundles, but only when used correctly. This article explores six common mistakes that block streaming, bloat hydration, and create stale UI in production.

Gil Fink (SparXis CEO) joins PodRocket to break down today’s most common web rendering patterns: SSR, CSR, static rednering, and islands/resumability.

@container scroll-state: Replace JS scroll listeners nowCSS @container scroll-state lets you build sticky headers, snapping carousels, and scroll indicators without JavaScript. Here’s how to replace scroll listeners with clean, declarative state queries.

Explore 10 Web APIs that replace common JavaScript libraries and reduce npm dependencies, bundle size, and performance overhead.
Would you be interested in joining LogRocket's developer community?
Join LogRocket’s Content Advisory Board. You’ll help inform the type of content we create and get access to exclusive meetups, social accreditation, and swag.
Sign up now
3 Replies to "Configuring Vim for Rust development"
This function call won’t work for nothing in gods name: “check_back_space()”
I had to convert it to global scope to make it work
Thanks Mario! I updated my vim, used Plug to install Col and LSP. Now my vim looks like a real IDE. Love it. One last thing would be, how to use debugger inside vim painlessly.
Much easier with Helix (the editor) – also uses rust-analyzer, but code completion works without additional tinkering.