PostgreSQL is one of the most popular SQL databases today. According to the official documentation, it is “a powerful, open-source object-relational database system with over thirty years of active development that has earned it a strong reputation for reliability, feature robustness, and performance.”

In this article, we will be looking at how we can use Postgres in a Go application.
Before we start working on this application, there are a few things we need to get set up:
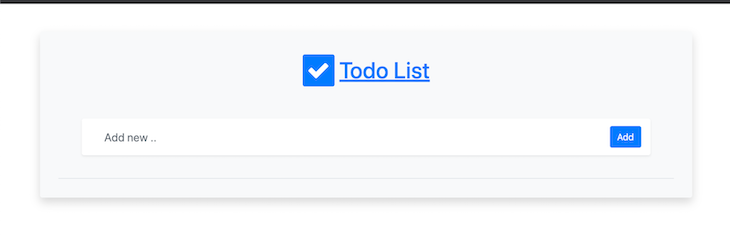
We will be building a full-stack web application that allows us to perform CRUD operations on our Postgres database. Basically, we will be building a to-do application. Here is how the finished app looks:
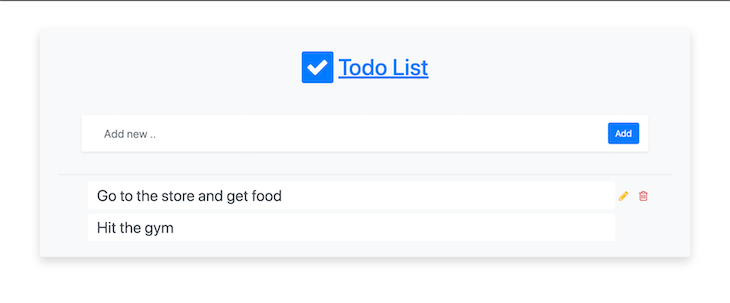
This application allows us to get, add, edit and delete to-do items from our database. Without further ado, let’s get started.
Create a file named server.go in your project folder and add the following code:
package main

import (
   "fmt"
   "log"
   "os"

   "github.com/gofiber/fiber/v2"
)

func main() {
   app := fiber.New()
   port := os.Getenv("PORT")
   if port == "" {
       port = "3000"
   }
   log.Fatalln(app.Listen(fmt.Sprintf(":%v", port)))
}
We start by importing the os module, the log module, and of course our web framework of choice, which in this case is Go Fiber. If you don’t have much experience with Go Fiber, here is a link to the Go Fiber documentation for you to check out.
What we are doing here is creating a new fiber object with fiber.New and assigning it to the app variable. Next, we check our environment variables for a variable named PORT, and if that doesn’t exist, we assign the port to 3000.
Then we call app.Listen to start an HTTP server that is listening on our port. Next, we call log.Fatalln() to log the output to the console in case of any errors. Before we run this code, let’s add some routes:
 func main() {
   app := fiber.New()

   app.Get("/", indexHandler) // Add this

   app.Post("/", postHandler) // Add this

   app.Put("/update", putHandler) // Add this

   app.Delete("/delete", deleteHandler) // Add this

   port := os.Getenv("PORT")
   if port == "" {
       port = "3000"
   }
   log.Fatalln(app.Listen(fmt.Sprintf(":%v", port)))
}
As you can see, I’ve added four methods to handle GET, POST, PUT and DELETE operations for our app as well as four handler methods that are called whenever someone visits those routes. Now, let’s define these methods so that Go will stop throwing errors:
func indexHandler(c *fiber.Ctx) error {
   return c.SendString("Hello")
}
func postHandler(c *fiber.Ctx) error {
   return c.SendString("Hello")
}
func putHandler(c *fiber.Ctx) error {
   return c.SendString("Hello")
}
func deleteHandler(c *fiber.Ctx) error {
   return c.SendString("Hello")
}
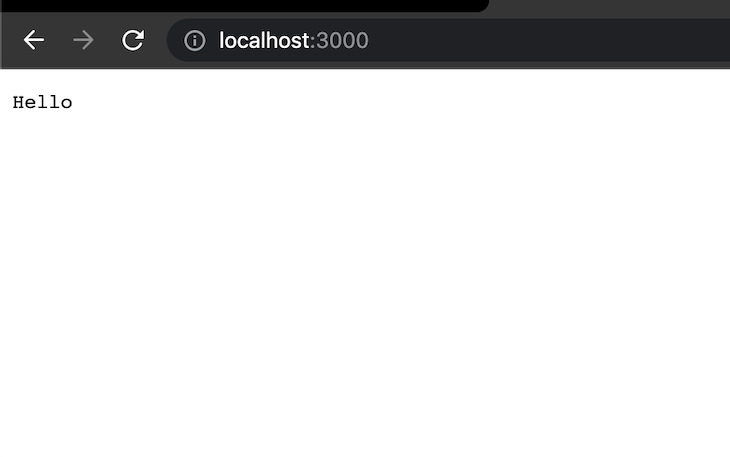
For now, we are just returning “Hello” on all the routes. Let’s run our app. On the command line, run the command "go mod init" followed by "go mod tidy". This will create a go.mod file and get all the dependencies the app needs.
For us to have hot reload while developing, we will need a Go package called Air.
Import it with "go get github.com/cosmtrek/air". Now start your app by running "go run github.com/cosmtrek/air". This starts up our web server and watches all the files in the project directory, allowing us to get a hot reload when a file changes.

Now visit http://localhost/ to view the app.
Let’s create a connection to our database. In your main method, before creating the instance of the Fiber app, add the following code:
 connStr := "postgresql://<username>:<password>@<database_ip>/todos?sslmode=disable
"
   // Connect to database
   db, err := sql.Open("postgres", connStr)
   if err != nil {
       log.Fatal(err)
   }
Make sure to replace username, password, and database_ip with the username, password, and IP address of your database.
First, we need to import the SQL drivers we will be using to connect to the database. CockroachDB is an SQL database, so we can connect to it using any Go Postgres/SQL database driver. In our case, we will be using the pq driver. Update your imports to this:
import (
   "database/sql" // add this
   "fmt"
   "log"
   "os"
   _ "github.com/lib/pq" // add this

   "github.com/gofiber/fiber/v2"
)
The pq driver relies on the database/sql package, so we import that as well. We will not be using the pq driver directly, so we prefix its import with an underscore.
We will be using the database/sql package to perform all our database actions like connection and executing queries. Now stop the app and run "go get github.com/lib/pq" to install the pq driver.
Next, we will add the code to create a database connection and also update our routes to pass the database connection to our handlers so we can use it to execute database queries:
 connStr := "postgresql://<username>:<password>@<database_ip>/todos?sslmode=disable"
   // Connect to database
   db, err := sql.Open("postgres", connStr)
   if err != nil {
       log.Fatal(err)
   }


   app := fiber.New()

   app.Get("/", func(c *fiber.Ctx) error {
       return indexHandler(c, db)
   })

   app.Post("/", func(c *fiber.Ctx) error {
       return postHandler(c, db)
   })

   app.Put("/update", func(c *fiber.Ctx) error {
       return putHandler(c, db)
   })

   app.Delete("/delete", func(c *fiber.Ctx) error {
       return deleteHandler(c, db)
   })
As you can see, in place of our handlers, we are now passing a function that accepts the fiber context object and passes it to our handlers together with the database connection. The fiber context object contains everything about the incoming request, like the headers, query string parameters, post body, etc. Reference the Fiber documentation for more details.
Now let’s update our handlers to accept a pointer to our database connection:
 func indexHandler(c *fiber.Ctx, db *sql.DB) error {
   return c.SendString("Hello")
}

func postHandler(c *fiber.Ctx, db *sql.DB) error {
   return c.SendString("Hello")
}

func putHandler(c *fiber.Ctx, db *sql.DB) error {
   return c.SendString("Hello")
}

func deleteHandler(c *fiber.Ctx, db *sql.DB) error {
   return c.SendString("Hello")
}
Now start the app again and you see it runs without errors. Here’s the full code up to here for reference.
package main

import (
   "database/sql" // add this
   "fmt"
   "log"
   "os"

   _ "github.com/lib/pq" // add this

   "github.com/gofiber/fiber/v2"
)

func indexHandler(c *fiber.Ctx, db *sql.DB) error {
   return c.SendString("Hello")
}

func postHandler(c *fiber.Ctx, db *sql.DB) error {
   return c.SendString("Hello")
}

func putHandler(c *fiber.Ctx, db *sql.DB) error {
   return c.SendString("Hello")
}

func deleteHandler(c *fiber.Ctx, db *sql.DB) error {
   return c.SendString("Hello")
}

func main() {
   connStr := "postgresql://<username>:<password>@<database_ip>/todos?sslmode=disable"
   // Connect to database
   db, err := sql.Open("postgres", connStr)
   if err != nil {
       log.Fatal(err)
   }
   app := fiber.New()

   app.Get("/", func(c *fiber.Ctx) error {
       return indexHandler(c, db)
   })

   app.Post("/", func(c *fiber.Ctx) error {
       return postHandler(c, db)
   })

   app.Put("/update", func(c *fiber.Ctx) error {
       return putHandler(c, db)
   })

   app.Delete("/delete", func(c *fiber.Ctx) error {
       return deleteHandler(c, db)
   })

   port := os.Getenv("PORT")
   if port == "" {
       port = "3000"
   }
   log.Fatalln(app.Listen(fmt.Sprintf(":%v", port)))
}
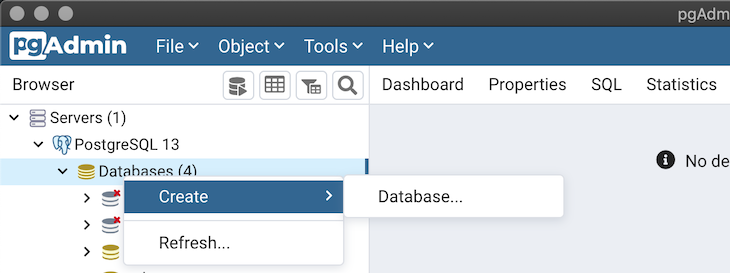
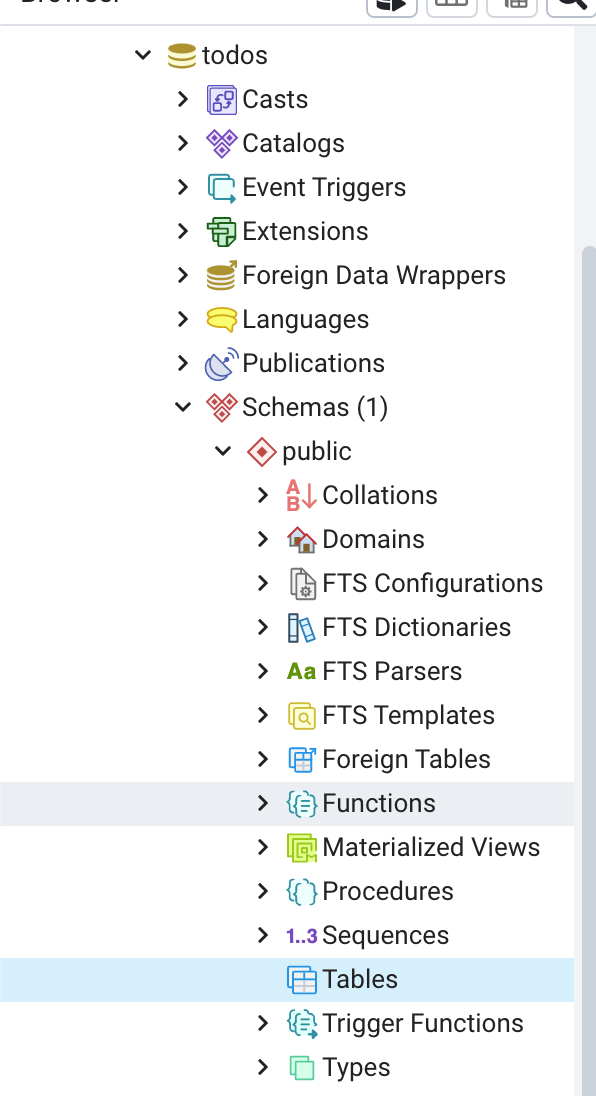
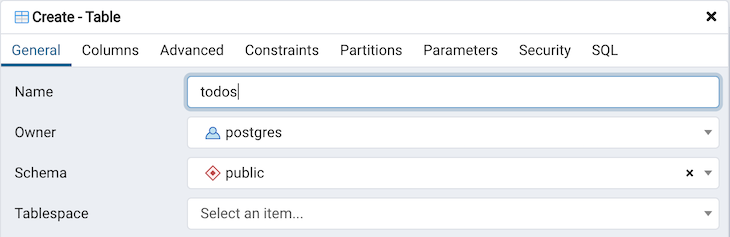
Before we start fleshing out our handlers, let’s set up our database. Navigate to your pgAdmin 4 console and create a database called todos.
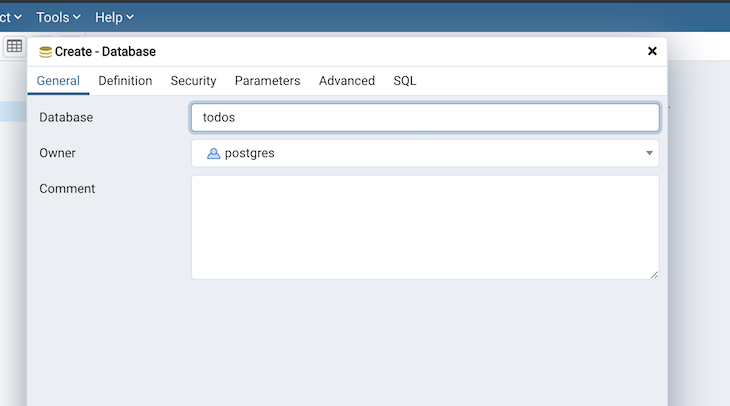
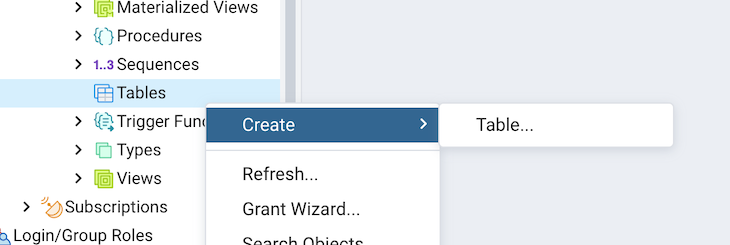
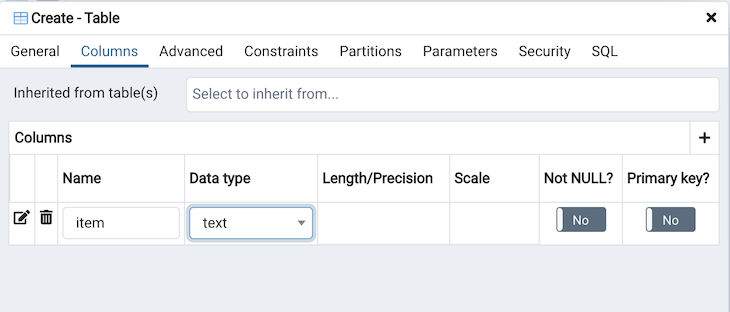
Click on Save to create the database. Now, expand the todos database, and under the public schema, create a new table called todos with a single column called item.
You have successfully created the database we will be connecting to. Close the pgAdmin application and let’s start fleshing out our handler methods.
Modify the index handler to this:
 func indexHandler(c *fiber.Ctx, db *sql.DB) error {
   var res string
   var todos []string
   rows, err := db.Query("SELECT * FROM todos")
   defer rows.Close()
   if err != nil {
       log.Fatalln(err)
       c.JSON("An error occured")
   }
   for rows.Next() {
       rows.Scan(&res)
       todos = append(todos, res)
   }
   return c.Render("index", fiber.Map{
       "Todos": todos,
   })
}
Okay, that’s a lot to take in! First, we are using the db object to execute an SQL query on the database with the db.Query() function. This returns to us all the rows that match our query as well as any errors that may have occurred. We call defer rows.Close() to close the rows and prevent further enumeration when the function completes. We check if there are any errors and then we loop through all the rows, calling rows.Next() with each iteration, and use the rows.Scan() method to assign the current value of the row to the res variable, which we define as a string. We then append the value of res to the todos array.
Note rows.Scan() requires you to pass in a variable of datatype that corresponds with the data stored in the database. For example, if you had multiple columns, say name and age, you would pass in a struct with the fields name and age. Refer to the SQL documentation for more info.
We then return to the index view and pass in the todos array into it. Talking about views, let’s configure our Fiber app to serve our HTML views. Modify your main method thus:
 engine := html.New("./views", ".html")
   app := fiber.New(fiber.Config{
       Views: engine,
   })
We configure our Fiber app to use the HTML templating engine and pass in ./views as the path to where our views are located. Stop the app and install the HTML engine with go get github.com/gofiber/template/html and make sure to import it as well.
Then, create a folder in your project root called views. In views, create a file called index .html and add the following code:
<!DOCTYPE html>
<html lang="en">
<head>
<meta charset="UTF-8">
<meta http-equiv="X-UA-Compatible" content="IE=edge">
<meta name="viewport" content="width=device-width, initial-scale=1.0">
<link rel="stylesheet" href="/style.css"/>
<link rel="stylesheet" href="https://stackpath.bootstrapcdn.com/bootstrap/4.1.3/css/bootstrap.min.css"/>
<link rel="stylesheet" href="https://fonts.googleapis.com/css2?family=Open+Sans:ital,wght@0,300;0,400;0,600;0,700;0,800;1,300;1,400;1,600;1,700;1,800&display=swap"/>
<link rel="stylesheet" href="https://stackpath.bootstrapcdn.com/font-awesome/4.7.0/css/font-awesome.min.css"/>
<link rel="stylesheet" href="https://cdnjs.cloudflare.com/ajax/libs/bootstrap-datepicker/1.9.0/css/bootstrap-datepicker.standalone.min.css"/>
<title>Document</title>
</head>
<body>
<div class="container m-5 p-2 rounded mx-auto bg-light shadow">
<!-- App title section -->
<div class="row m-1 p-4">
<div class="col">
<div class="p-1 h1 text-primary text-center mx-auto display-inline-block">
<i class="fa fa-check bg-primary text-white rounded p-2"></i>
<u>Todo List</u>
</div>
</div>
</div>
<!-- Create todo section -->
<div class="row m-1 p-3">
<div class="col col-11 mx-auto">
<form action="/" method="POST" class="row bg-white rounded shadow-sm p-2 add-todo-wrapper align-items-center justify-content-center">
<div class="col">
<input name="Item" class="form-control form-control-lg border-0 add-todo-input bg-transparent rounded" type="text" placeholder="Add new ..">
</div>
<div class="col-auto px-0 mx-0 mr-2">
<button type="submit" class="btn btn-primary">Add</button>
</div>
</form>
</div>
</div>
<div class="p-2 m-2 mx-4 border-black-25 border-bottom"></div>
<!-- Todo list section -->
<div class="row mx-1 px-5 pb-3 w-80">
<div class="col mx-auto">
<!-- Todo Item-->
{{range .Todos}}
<div class="row px-3 align-items-center todo-item editing rounded">
<div class="col px-1 m-1 d-flex align-items-center">
<input type="text" class="form-control form-control-lg border-0 edit-todo-input bg-transparent rounded px-3 d-none" readonly value="{{.}}" title="{{.}}" />
<input id="{{.}}" type="text" class="form-control form-control-lg border-0 edit-todo-input rounded px-3" value="{{.}}" />
</div>
<div class="col-auto m-1 p-0 px-3 d-none">
</div>
<div class="col-auto m-1 p-0 todo-actions">
<div class="row d-flex align-items-center justify-content-end">
<h5 class="m-0 p-0 px-2">
<i onclick="updateDb('{{.}}')" class="fa fa-pencil text-warning btn m-0 p-0" data-toggle="tooltip" data-placement="bottom" title="Edit todo"></i>
</h5>
<h5 class="m-0 p-0 px-2">
<i onclick="removeFromDb('{{.}}')" class="fa fa-trash-o text-danger btn m-0 p-0" data-toggle="tooltip" data-placement="bottom" title="Delete todo"></i>
</h5>
</div>
</div>
</div>
{{end}}
</div>
</div>
</div>
</form>
<script src="index.js"></script>
<script src="https://code.jquery.com/jquery-3.3.1.slim.min.js"></script>
<script src="https://cdnjs.cloudflare.com/ajax/libs/popper.js/1.14.3/umd/popper.min.js"></script>
<script src="https://stackpath.bootstrapcdn.com/bootstrap/4.1.3/js/bootstrap.min.js"></script>
<script src="https://stackpath.bootstrapcdn.com/bootlint/1.1.0/bootlint.min.js"></script>
</body>
</html>
This loops through the todos array we are passing in and displays each item. If you inspect the file, you will see that we are linking a stylesheet as well. Create a folder called public and within that, create a file called style.css and add the following code:
 body {
   font-family: "Open Sans", sans-serif;
   line-height: 1.6;
}

.add-todo-input,
.edit-todo-input {
   outline: none;
}

.add-todo-input:focus,
.edit-todo-input:focus {
   border: none !important;
   box-shadow: none !important;
}

.view-opt-label,
.date-label {
   font-size: 0.8rem;
}

.edit-todo-input {
   font-size: 1.7rem !important;
}

.todo-actions {
   visibility: hidden !important;
}

.todo-item:hover .todo-actions {
   visibility: visible !important;
}

.todo-item.editing .todo-actions .edit-icon {
   display: none !important;
}
Now, let’s configure Go to serve this file. Add this to your main method before starting the web server:
 app.Static("/", "./public") // add this before starting the app
   log.Fatalln(app.Listen(fmt.Sprintf(":%v", port)))
Start the app again and you should see the following.
For our other handlers, modify them thus:
 type todo struct {
   Item string
}

func postHandler(c *fiber.Ctx, db *sql.DB) error {
   newTodo := todo{}
   if err := c.BodyParser(&newTodo); err != nil {
       log.Printf("An error occured: %v", err)
       return c.SendString(err.Error())
   }
   fmt.Printf("%v", newTodo)
   if newTodo.Item != "" {
       _, err := db.Exec("INSERT into todos VALUES ($1)", newTodo.Item)
       if err != nil {
           log.Fatalf("An error occured while executing query: %v", err)
       }
   }

   return c.Redirect("/")
}

func putHandler(c *fiber.Ctx, db *sql.DB) error {
   olditem := c.Query("olditem")
   newitem := c.Query("newitem")
   db.Exec("UPDATE todos SET item=$1 WHERE item=$2", newitem, olditem)
   return c.Redirect("/")
}

func deleteHandler(c *fiber.Ctx, db *sql.DB) error {
   todoToDelete := c.Query("item")
   db.Exec("DELETE from todos WHERE item=$1", todoToDelete)
   return c.SendString("deleted")
}
First, we create a struct to hold a to-do item. Then, in our postHandler, we get the name of the to-do item we want to insert into the database from the request body. Next, we use the db.Exec() method to execute an SQL query where we add the new to-do item into the database. Then we redirect back to the homepage.
N.B., we use the db.Query() method whenever we expect a result from the database query and db.Exec() when we don’t. Again, refer to the SQL documentation for more info.
For our put handler, we get the old and new item names from the request query string parameters. Then we execute a query to replace the old name with the new one in the database. Finally, we redirect back to the homepage.
For our delete handler, we get the name to delete from the request query string parameters and execute a query to delete the name from our database, then we send back a string that says "deleted". We are returning this string so we know that the function was completed successfully.
If you examine the index.html file, you will notice that we are calling an updateDb and a deleteFromDb function whenever you click the Edit button and the Delete buttons respectively.

These functions have been defined in an index.js file that we are linking below in the HTML file. Here is what the index.js file looks like:
 function removeFromDb(item){
   fetch(`/delete?item=${item}`, {method: "Delete"}).then(res =>{
       if (res.status == 200){
           window.location.pathname = "/"
       }
   })
}

function updateDb(item) {
   let input = document.getElementById(item)
   let newitem = input.value
   fetch(`/update?olditem=${item}&newitem=${newitem}`, {method: "PUT"}).then(res =>{
       if (res.status == 200){
       alert("Database updated")
           window.location.pathname = "/"
       }
   })
}

Now add the above code in a file called index.js in the public folder.
Ok here’s the full server.go file code for a reference
package main

import (
   "database/sql" // add this
   "fmt"
   "log"
   "os"

   _ "github.com/lib/pq" // add this

   "github.com/gofiber/fiber/v2"
   "github.com/gofiber/template/html"
)

func indexHandler(c *fiber.Ctx, db *sql.DB) error {
   var res string
   var todos []string
   rows, err := db.Query("SELECT * FROM todos")
   defer rows.Close()
   if err != nil {
       log.Fatalln(err)
       c.JSON("An error occured")
   }
   for rows.Next() {
       rows.Scan(&res)
       todos = append(todos, res)
   }
   return c.Render("index", fiber.Map{
       "Todos": todos,
   })
}

type todo struct {
   Item string
}

func postHandler(c *fiber.Ctx, db *sql.DB) error {
   newTodo := todo{}
   if err := c.BodyParser(&newTodo); err != nil {
       log.Printf("An error occured: %v", err)
       return c.SendString(err.Error())
   }
   fmt.Printf("%v", newTodo)
   if newTodo.Item != "" {
       _, err := db.Exec("INSERT into todos VALUES ($1)", newTodo.Item)
       if err != nil {
           log.Fatalf("An error occured while executing query: %v", err)
       }
   }

   return c.Redirect("/")
}

func putHandler(c *fiber.Ctx, db *sql.DB) error {
   olditem := c.Query("olditem")
   newitem := c.Query("newitem")
   db.Exec("UPDATE todos SET item=$1 WHERE item=$2", newitem, olditem)
   return c.Redirect("/")
}

func deleteHandler(c *fiber.Ctx, db *sql.DB) error {
   todoToDelete := c.Query("item")
   db.Exec("DELETE from todos WHERE item=$1", todoToDelete)
   return c.SendString("deleted")
}

func main() {
   connStr := "postgresql://postgres:gopher@localhost/todos?sslmode=disable"
   // Connect to database
   db, err := sql.Open("postgres", connStr)
   if err != nil {
       log.Fatal(err)
   }
   engine := html.New("./views", ".html")
   app := fiber.New(fiber.Config{
       Views: engine,
   })

   app.Get("/", func(c *fiber.Ctx) error {
       return indexHandler(c, db)
   })

   app.Post("/", func(c *fiber.Ctx) error {
       return postHandler(c, db)
   })

   app.Put("/update", func(c *fiber.Ctx) error {
       return putHandler(c, db)
   })

   app.Delete("/delete", func(c *fiber.Ctx) error {
       return deleteHandler(c, db)
   })

   port := os.Getenv("PORT")
   if port == "" {
       port = "3000"
   }
   app.Static("/", "./public")
   log.Fatalln(app.Listen(fmt.Sprintf(":%v", port)))
}
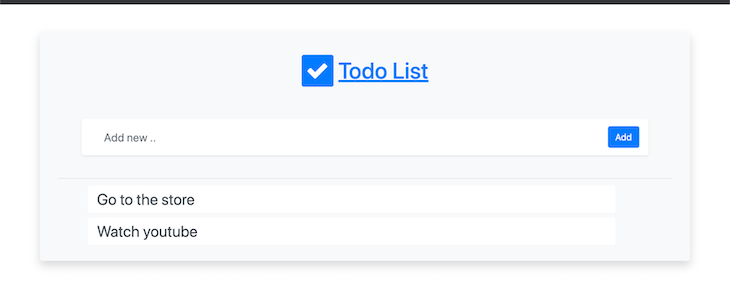
If you followed the above tutorial correctly, this is what your app should look like:
We have finally come to the end of this tutorial. We have taken a look at how to connect to a PostgreSQL database with Go and we have successfully built a to-do application with this. There are so many ways this can be improved, and I can’t wait to see what you build next. Thanks for reading.
Install LogRocket via npm or script tag. LogRocket.init() must be called client-side, not
server-side
$ npm i --save logrocket

// Code:

import LogRocket from 'logrocket';
LogRocket.init('app/id');
// Add to your HTML:

<script src="https://cdn.lr-ingest.com/LogRocket.min.js"></script>
<script>window.LogRocket && window.LogRocket.init('app/id');</script>
Hey there, want to help make our blog better?
Join LogRocket’s Content Advisory Board. You’ll help inform the type of content we create and get access to exclusive meetups, social accreditation, and swag.
Sign up now
Discover how the Interface Segregation Principle (ISP) keeps your code lean, modular, and maintainable using real-world analogies and practical examples.

<selectedcontent> element improves dropdowns

Learn how to implement an advanced caching layer in a Node.js app using Valkey, a high-performance, Redis-compatible in-memory datastore.

Learn how to properly handle rejected promises in TypeScript using Angular, with tips for retry logic, typed results, and avoiding unhandled exceptions.


8 Replies to "Building a simple app with Go and PostgreSQL"
Where can I see my db ip address?
If you are running your project locally, your db ip address will be localhost. If on the cloud, the cloud platform will show it on your dashboard.
Awesome read. We’re gonna win the league bro!
PUT request is not working. I get the error PUT http://localhost:3000/ 405 (Method Not Allowed) every time.
I got the same problem here
The error is caused by the redirect at the end of the Update handler. Replace this with:
return c.SendStatus(fiber.StatusOK)
Pleas provide your source code in a public repository
Thanks!