According to the official documentation, Deno is a simple, modern, and secure runtime for JavaScript and TypeScript that uses V8 and is built in Rust. It supports TypeScript and vanilla JS out of the box and uses third-party packages with browser compatible URLs to manage modules.

By default, Deno is secure, which means there is no file, network, or environment access unless explicitly enabled. For a full explanation of what Deno is, how it works, and why it’s trending, read more here.
In this article, we will walk through how to use Oak and MongoDB with Deno to build a RESTful web API, but before we do that, let’s review Oak and MongoDB.
Oak is a middleware framework for Deno’s http server that also includes a router middleware, both of which are heavily inspired by Koa. Oak is the most popular middleware framework of choice when it comes to building web applications with Deno.
MongoDB is a cross-platform, document-oriented database program used by developers to handle application data. MongoDB stores data in JSON-like documents for optimal development productivity.
We will add MongoDB in our example below, but I recommend checking out this article for more detailed setup information.
To get the most out of the following sections, this tutorial assumes a few requirements:
We will be building a simple REST API that will allow us to perform basic CRUD operations.
| METHOD | URL           | Description                   |
|--------|---------------|-------------------------------|
| GET    | /rooms        | Return all rooms from the DB  |
| GET    | /rooms/:id    | Return a single room          |
| POST   | /rooms         | Create a new room            |
| PUT    | /rooms/:id    | Update existing room          |
| DELETE | /rooms/:id    | Delete room                   |
First, we will create a file called server.ts. Then, we will create a Deno server and import our Router from Oak. Next, we will create our route middleware functions using Oak middleware framework.
See below:
// server.ts
import { Application, Router } from "https://deno.land/x/oak/mod.ts";

// these functions does not exist yet, we will create them later
import { getAllRooms, createRooms, getRoom, updateRoom, deleteRoom  } from './routes.ts'
const app = new Application();
const router = new Router();
const port: number = 8000;

router.get('/', (ctx) => {
    ctx.response.body = 'Hello from Deno'
})
// these functions does not exist yet, we will create them later
    .get('/rooms', getAllRooms)
    .get('/rooms/:id', getRoom)
    .post('/rooms', createRooms)
    .put('/rooms/:id', updateRoom)
    .delete('/rooms/:id', deleteRoom)

// Here, we are telling our application to use the router
app.use(router.routes());
app.use(router.allowedMethods())
app.listen({ port })
console.log(`Server is running on port ${port}`);
In line 6s and 7, we have initialized our application and imported router from the Oak modules.
In line 9, we have configured a Hello from Deno response when a request is made to the root of our API.
In line 10, we have made it so that our callback accepts a parameter called ctx, short for context. For reference, “context” in Oak represents the current request being sent through Oak’s middleware.
Finally, our app will be running on port 8000.
To set up MongoDB, we are going to create a mongodb.ts file and add the following lines of code:
import { MongoClient } from "https://deno.land/x/[email protected]/mod.ts";

const client = new MongoClient();

client.connectWithUri("mongodb+srv://<DBNAME>:<DBPASSWWORD>@cluster0.6lbak.mongodb.net/deno-oak?retryWrites=true&w=majority");

const db = client.database('denoOakApi')

export default db;
As you’ll notice, our first step is to import MongoClient from Deno MongoDB driver package, followed by initializing and connected to our hosted database.
We are now ready to try performing basic CRUD operations that will allow us to create, read, update and delete data in our MongoDB database using Deno and Oak.
First, we will create a file called routes.ts and add the following lines of code:
import { RouterContext } from "https://deno.land/x/oak/mod.ts";
import db from './mongodb.ts'

const roomsCollection = db.collection('rooms');

const getAllRooms = async (ctx: RouterContext) => {
    const rooms = await roomsCollection.find()
    ctx.response.body = rooms
}
We can now test our API using Postman. To run the app, navigate to the root of your working directory and run the following command on your terminal:
deno run --allow-net --allow-plugin --allow-read --allow-write --unstable server.ts

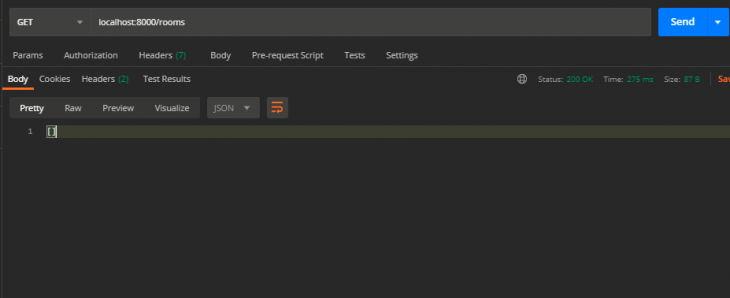
Now, open up Postman and make a GET request to localhost:8000/rooms. If done correctly, you should get an empty array (see below). This is because we haven’t added any data to our database yet.

In order to read data, there must first be data to read. In the code block below, we will set ourselves up to add data to our database:
const createRooms = async (ctx: RouterContext) => {
    const { room_number, size, price, isAvailable } = await ctx.request.body().value;
    const room: any = {
        room_number,
        size,
        price,
        isAvailable
    }
    const id = await roomsCollection.insertOne(room)
    room._id = id;
    ctx.response.status = 201
    ctx.response.body = room
}
Note that in line 2, we have destructured room_number, size, price and isAvailable from the body of our request and then inserted the respective values into our roomsCollection in the MongoDB database. In line 11, we have sent a 201 status that will return the newly created room to the user.
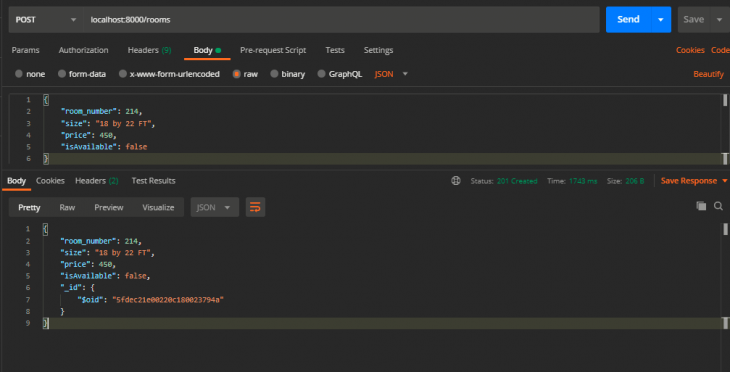
To test out this function, we can create a new room on Postman. To do this, make a POST request to localhost:8000/rooms after adding the following data to the body of your request:
{
    "room_number": 214,
    "size": "18 by 22 FT",
    "price": 450,
    "isAvailable": false
}

We now have our newly created data with a unique id.
In this example, we will retrieve a single room by its id. To do so, we will get the id of the document from the param of the request — as demonstrated in line 3 below. Finally, we will query our MongoDB database to find the document where the value of _id is the same as the value coming from ctx.params.id
const getRoom = async (ctx: RouterContext) => {
    // get the id of the document from the params object
    const id = ctx.params.id
    const room = await roomsCollection.findOne({ _id: { $oid: id } })
    ctx.response.body = room
}
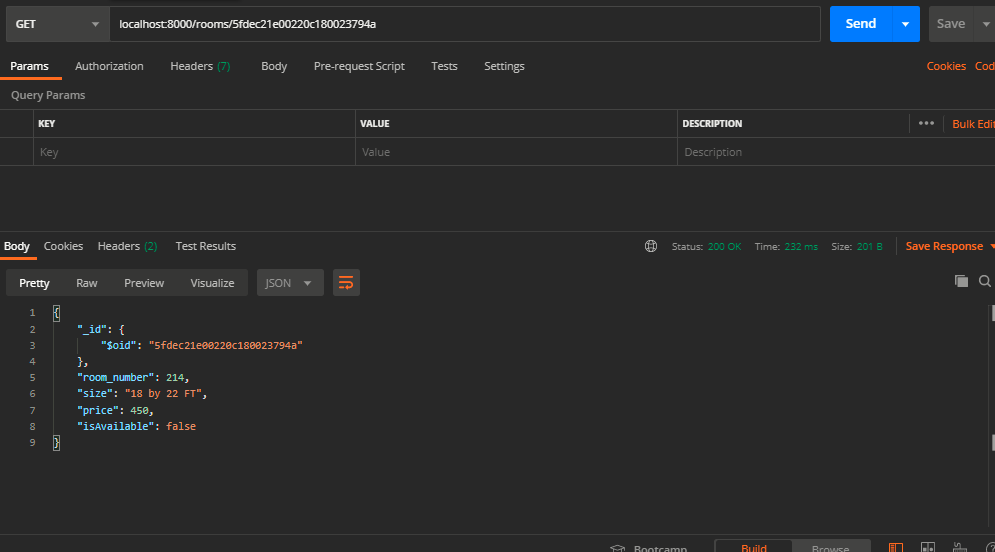
To test it on Postman, make a GET request to localhost:8000/rooms/<documentID>

To update an existing document, we need to get the id of the document and then call $set on the fields we want to update. Using $set is the key here; without $set, we would delete all other fields not specified on our codebase.
const updateRoom = async (ctx: RouterContext) => {
    // get the id of the document from the params object
    const id = ctx.params.id
    const { room_number, size, price, isAvailable } = await ctx.request.body().value;
    const { modifiedCount } = await roomsCollection.updateOne({ _id: { $oid: id } }, {
        $set: {
            price,
            isAvailable
        }
    })
    // If the id does not exist in collection, we return a 404 status and send a custom message
    if (!modifiedCount) {
        ctx.response.status = 404;
        ctx.response.body = { message: 'Room not found' }
        return;
    }
    ctx.response.body = await roomsCollection.findOne({ _id: { $oid: id } })
}
To test the API on Postman, make a PUT request to localhost:8000/rooms/<documentID>.
The process of deleting data from our MongoDB collection with Deno and Oak is pretty straightforward.
Once we get the id of the document from the params with ctx.params.id (as we did in the earlier example), all that’s left to do is to call the MongoDB deleteOne method on our collection and pass the id of the document we want to delete.
const deleteRoom = async (ctx: RouterContext) => {
    const id = ctx.params.id

    const room = await roomsCollection.deleteOne({ _id: { $oid: id } });

    if (!room) {
        ctx.response.status = 404;
        ctx.response.body = { message: 'Room not found' }
        return;
    }
    ctx.response.status = 204;
}
In this article, we have implemented a RESTful API by building a simple CRUD app using the Deno framework, Oak. We have also connected our Deno app to MongoDB.
As is to be expected, what we’ve covered only scratches the surface of what can be achieved with Deno runtime and Oak framework. For more practice, read this tutorial on building RESTful APIs using Deno and Postgres. For more on Deno, read their official documentation.
Let me know in the comments section below what you thought of this tutorial. I am social on Twitter and GitHub. Thank you for reading and stay tuned.
Hey there, want to help make our blog better?
Join LogRocket’s Content Advisory Board. You’ll help inform the type of content we create and get access to exclusive meetups, social accreditation, and swag.
Sign up now
Learn how OpenAPI can automate API client generation to save time, reduce bugs, and streamline how your frontend app talks to backend APIs.

Discover how the Interface Segregation Principle (ISP) keeps your code lean, modular, and maintainable using real-world analogies and practical examples.

<selectedcontent> element improves dropdowns

Learn how to implement an advanced caching layer in a Node.js app using Valkey, a high-performance, Redis-compatible in-memory datastore.