Vitepress is a static site generator powered by Vite and Vue.js that is quickly gaining popularity in the frontend world. It has excellent features that simplify building static sites and offers minimal functionalities without compromising performance. With Vitepress, you can design your pages and content using Markdown and different themes to build web pages faster.
This article aims to familiarize you with Vitepress by building a blog using Vitepress and Vue.js with Markdown.
Jump ahead:
Vitepress, as the name suggests, is powered by Vite. Vite replaces tools like Rollup and Webpack and aims to address the pain points of Webpack and other frontend build tools. The primary benefits of using Vite are:
You can find more details about Vite here.
Webpack takes longer to start a development server, which can be unbearable for developers. When the documentation site gets larger, it becomes very annoying to work with Webpack. This was the primary motivation for developing Vitepress. If you have worked with Vuepress before, Vitepress is very similar, and both frameworks focus on building documentation pages with ease. One difference is that Vuepress uses Webpack and Vitepress uses Vite.
Instead of refactoring the codebase of Vuepress, Evan You, the founder of Vue and Vitepress, created the new static site generator with support for Vite and Vue 3. Their layouts are also designed for documentation sites. However, you can create layouts too.
Because it is in its alpha phase, Vitepress still lacks more features than Vuepress, but it is also effortless to work with because the team behind Vitepress wanted to keep it minimal.
It’s worth mentioning that Vitepress does not support the current Vuepress ecosystem because the team at Vitepress wants to keep the theming API minimal so that customizations can be done in the theme. To learn more about how Vitepress differs from Vuepress, refer to their official documentation.
Even though Vitepress can be used to build well-designed documentation sites quickly, you can extend the features of Vitepress to develop your blog. In this article, we will focus on creating a blog and learning the theming and customizations in Vitepress.
After going through the article, you can develop your documentation site or blog using Vitepress and Vue 3. But before diving into the article, please ensure you have a basic understanding of Vue 3.
Getting started with Vitepress is extremely easy. You can start building your website with Vitepress by installing two primary developer packages. On your working directory, install vue and vitepress as developer dependencies.
To install the packages, run the following commands:
npm i -D vue vitepress
The -D flag will install the packages as developer dependencies. Now, create a folder inside the working directory and name it whatever you want. Typically, the folder is named docs, so I’ll also use the docs name for the folder.
After creating docs, you’ll need to add some scripts to your package.json file. Copy the following scripts and paste them into your package.json file:
"scripts": {
    "docs:dev": "vitepress dev docs",
    "docs:build": "vitepress build docs",
    "docs:serve": "vitepress serve docs"
  },
Now, the setup for a barebone Vitepress app is ready. Create a Markdown file with the title index.md and add some dummy content inside the docs. Start the development server by running the command npm run docs:dev inside the terminal.
The default development port for Vitepress is localhost:5173. The index.md file will serve as the index.html file or the entry point for your Vitepress static site. If you visit the URL, you’ll be able to view your Vitepress page. Vitepress ships with a default theme. You can use different options the theme provides for customizing your website.
However, because the index.md file is empty, you won’t be able to see anything. You can add some text to index.md to see the changes on your Vitepress page. To customize the features, create a folder called .vitepress (be careful with the dot at the start) inside the docs. This folder is used to configure the Vitepress options.
Three types of configurations can be done on Vitepress: app config, theme config, and front matter config. The app config includes features like site title, Markdown parser customization, and more. At the same time, the theme config determines the application’s look. For example, if you want to add a navigation bar to your website, you’ll need to update the theme config.
The front matter config can override the global configuration for a specific page, app configs, and theme configs.
Create a file called config.js inside this file. Vitepress will read this file to customize your application. This file can also be created with extensions like .ts, .mjs, .mts etc.
Let’s look at a dummy config.js file to understand how the theme can be customized:
export default {
  title: 'My Blog',
  description: 'Just playing around.',
  themeConfig: {
    nav: [
      { text: 'Home', link: '/' },
      { text: 'Blog', link: '/articles/' },
      { text: 'External', link: 'https://google.com' },
    ],
  },
};
The object in the above code consists of three options: title, description, and themeConfig. The title and description keys are used for describing your website’s title and meta description. All these are app configurations.
Adding a head key can also add specific links for Google fonts or CSS files to the head. You can find all the app config options here.
The theme configurations can be added to an object with a themeConfig key, as shown above. The nav array defines the elements in the navigation bar, and you can also add dropdowns for navigation items. Here’s an example of how to use this:
export default {
  themeConfig: {
    nav: [
      { text: 'Guide', link: '/guide' },
      {
        text: 'Dropdown Menu',
        items: [
          { text: 'Item A', link: '/item-1' },
          { text: 'Item B', link: '/item-2' },
          { text: 'Item C', link: '/item-3' }
        ]
      }
    ]
  }
}
You can also add sidebars, footers, social links, and more with themeConfig.
Now, let’s add some posts to our blog. Create a folder called articles inside the docs folder and add any post in Markdown format. For example, let’s add a Markdown post called article1.md.
Now, open the index.md file we created earlier, and add the article1.md link. The index.md Markdown file will look like this:
[Article 1](/articles/article1)
Adding this will render the post as below on your homepage:
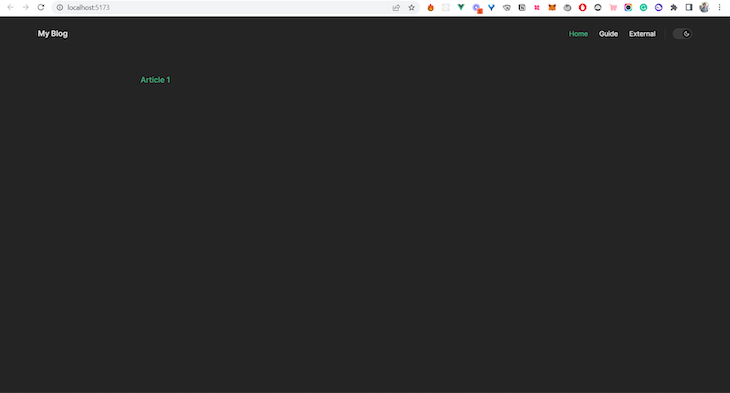
If you click the link, it will render your Markdown file as an HTML page. One great thing about Vitepress is that you can add Vue 3 components directly to your Markdown files to configure your homepage easily.
Let’s add a blog post card on the homepage. Create a components folder inside the docs. Now, create a file called ArticleCard.vue. A Vue component can contain a template, script, and style. First, let’s take a look at the template:
<template>
  <a :href="href">
    <div class="card">
      <div class="flex">
        <div class="media">
          <img :src="image" :alt="title" />
        </div>
        <div class="details">
          <h2 class="title">{{ title }}</h2>
          <p class="excerpt">{{ truncateText(excerpt, 50) }}</p>
          <div class="author">
            <div>
              <h3 class="name">{{ author }}</h3>
              <p class="date">{{ date }}</p>
            </div>
          </div>
        </div>
      </div>
    </div>
  </a>
</template>
The code is fairly simple, as we only use a few props to pass data into the component. Let’s look at the script to explore the props:
<script>
export default {
  props: {
    title: {
      type: String,
      required: true,
    },
    excerpt: {
      type: String,
      required: true,
    },
    image: {
      type: String,
      required: true,
    },
    author: {
      type: String,
      required: true,
    },
    date: {
      type: String,
      required: true,
    },
    href: {
      type: String,
      required: true,
    },
  },
  methods: {
    truncateText(text, length) {
      if (text.length > length) {
        return text.substring(0, length) + "...";
      }
      return text;
    },
  },
};
</script>
The props for the card are title, excerpt, image, author, date, and href. The names of the props are self-explanatory. Along with that, we have a function that truncates the excerpt size. It takes some text and the length of the characters as arguments and returns a truncated text with trailing dots. I won’t explain the basic styling because I assume you know the basics of CSS.
The styles for this component are seen below:
<style scoped>
.card {
  border-radius: 0.5rem;
  box-shadow: 0 0.5rem 1rem rgba(0, 0, 0, 0.15);
  margin-bottom: 1.5rem;
  overflow: hidden;
  width: 100%;
}

.card:hover {
  box-shadow: 0 0.5rem 1rem rgba(0, 0, 0, 0.25);
  transition: ease-in-out 0.2s all;
}

.flex {
  display: flex;
}

.media {
  width: 45%;
  height: 100%;
  object-fit: cover;
  object-position: center;
}

.details {
  margin-left: 1.2rem;
}

.title {
  border-top: none;
  margin: 0 0;
}

.name {
  margin: 0 0;
  font-size: 0.7rem;
  color: #999;
}
</style>
I’ve also made a hero component. Here’s the code for the Hero.vue:
<template>
  <div class="hero">
    <div class="hero-body">
      <div class="container">
        <h1 class="title">Hey, I'm {{ name || "John Doe" }}.</h1>
        <h2 class="subtitle">
          {{ subtitle }}
        </h2>
      </div>
    </div>
  </div>
</template>

<script>
export default {
  props: {
    name: {
      type: String,
      required: true,
    },
    subtitle: {
      type: String,
      required: true,
    },
  },
};
</script>

<style>
h2.subtitle {
  font-size: 1.2rem;
  border-top: none;
}
</style>
Now that we have created the components, let’s add them to the index.md file:
<script setup>
  import Hero from './components/Hero.vue'
  import ArticleCard from './components/ArticleCard.vue'
</script>

<Hero name="Nemo" subtitle="Welcome to my blog. This one is built with Vitepress and Vue.js. Vitepress is super cool." />

<ArticleCard title="Article 1" excerpt="Lorem i" image="https://images.unsplash.com/photo-1664663751485-c58e9276ccce?ixlib=rb-1.2.1&ixid=MnwxMjA3fDB8MHxwaG90by1wYWdlfHx8fGVufDB8fHx8&auto=format&fit=crop&w=1167&q=80" author="John Doe" href="/articles/article1" date="2022-08-01" />
This is just like any standard Vue component. However, if you want to add Markdowns in this file, you can directly add them after the ending script tag.
Your homepage will now look like this:
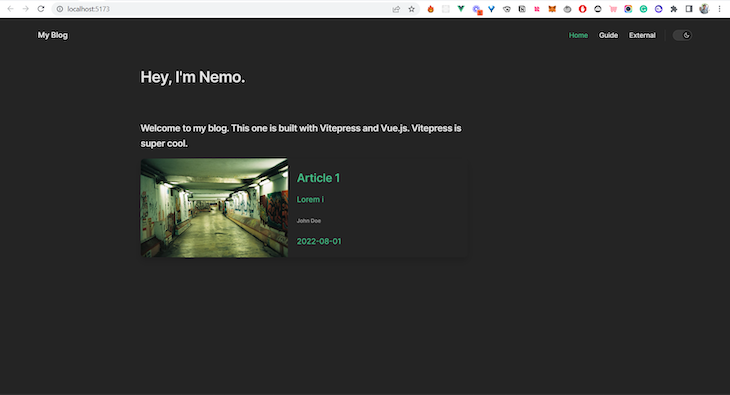
Right now, we have the default colors set by Vitepress. You can customize the colors of the component through the style tag in the component. For the Markdown-specific files, you can also override the default styles. You can refer to the documentation for more details.
Right now, there’s one problem with the blog. It will be a terrible idea to manually add all the articles to the index .md file every time you add a new article. So, how do we fix this?
Vuepress has inbuilt support for front matter fetching. You can access the front matter details by accessing the $site variable. But this is not the case with Vitepress. To keep Vitepress minimal, it does not support it. We have to figure out a way to do this ourselves.
One way to achieve this is to write a simple script that will fetch the front matter details and write it to a JSON file.
Let’s take a look at a simple script for doing this:
// Credits to Divyansh Singh
// Twitter: @_brc_dd

import fs from 'node:fs/promises';
import matter from 'gray-matter';
import removeMd from 'remove-markdown';

const articles = await fs.readdir('./docs/articles');

const data = await Promise.all(
  articles.map(async (article) => {
    const file = matter.read(`./docs/articles/${article}`, {
      excerpt: true,
      excerpt_separator: '

',
});
const { data, excerpt, path } = file;
const contents = removeMd(excerpt)
.trim()
.split(/\r\n|\n|\r/);
return {
...data,
title: contents[0].replace(/\s{2,}/g, '').trim(),
path: path.replace('./docs/', '').replace(/\.md$/, '.html'),
excerpt: contents
.slice(1)
.join('')
.replace(/\s{2,}/g, '')
.trim(),
};
})
);
await fs.writeFile('./data.json', JSON.stringify(data), 'utf-8');
First, we need to install gray-matter and remove-markdown. The gray-matter package reads the front matter from Markdown files, while the remove-markdown package is used to remove any Markdown from a text. To install the packages, run the npm i remove-markdown gray-matter command.
Now let’s discuss the script. The first step is to read the directory where the articles are stored. In this case, the articles are inside the docs/articles folder. We are storing the values inside the folder in a variable called articles.
Now, inside a Promise, we’ll map through each item available inside the articles folder. The Markdown is read using the matter.read function available in the gray-matter package. This function returns all the necessary information like the path, excerpt, etc. It also contains a data object that stores the front matter details.
The excerpt is read by reading the quote(>) after the heading. For the <!-- more --> divider, it would consider the quote as the excerpt. The divider is defined in the above code as excerpt_separator:
---
Author: Nemo
Updated: 2022-06-01
image: https://images.unsplash.com/photo-1664575198263-269a022d6e14?ixlib=rb-1.2.1&ixid=MnwxMjA3fDF8MHxwaG90by1wYWdlfHx8fGVufDB8fHx8&auto=format&fit=crop&w=1170&q=80
---
# Si pace ad caput
> lorem ipsum dolor sit amet consectetur adipiscing elit sed do eiusmod tempor incididunt ut labore et dolore magna aliqua
Now, the required data is restructured from the file. The excerpt is cleaned using the removeMd package. A regex operation is used to clean the CRLF and LF line breaks. Finally, the data is returned.
In the data, the path is replaced from ./docs/articles/article.md to /articles/article.html for rendering it as an HTML. Save the script as getArticles.mjs. If you want, you can keep it without any extensions as well.
The mjs extension is used so that we can use ECMAScript modules. The data generated from the script is written into a data.json file in JSON format. To run this script every time a new build is started, change your package scripts to this:
"scripts": {
    "docs:dev": "node getArticles.mjs && vitepress dev docs",
    "docs:build": "node getArticles.mjs && vitepress build docs",
    "docs:serve": "vitepress serve docs"
  },
Adding the node getArticles.mjs command at the start ensures that the script runs before the Vitepress server starts.
Now, on the homepage, let’s iterate over the articles and render them in the ArticleCard. A simple v-for loop can be used for rendering the articles. Let’s take a look at the final index.md page:
<script setup>
  import Hero from './components/Hero.vue'
  import ArticleCard from './components/ArticleCard.vue'

  import data from '../data.json'
</script>

<Hero name="Nemo" subtitle="Welcome to my blog. This one is built with Vitepress and Vue.js. Vitepress is super cool." />

<div v-for="(article, index) in data" :key="index">
  <ArticleCard :title="article.title" :excerpt="article.excerpt" :image="article.image" :author="article.Author" :href="article.path" :date="article.Updated" />
</div>
When you start your Vitepress app, your homepage will look similar to the screenshot below:
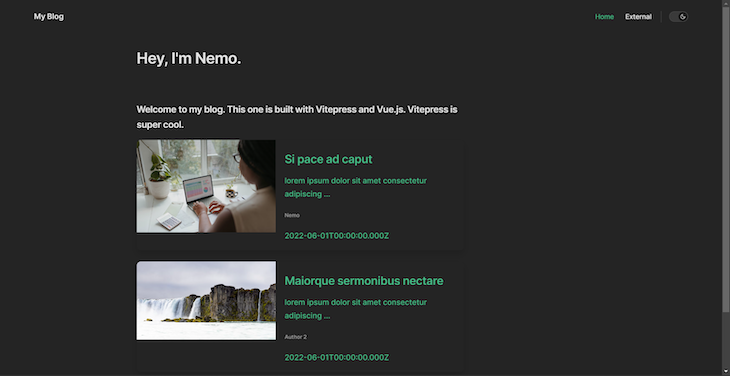
Your blog is now ready!
You can visit this Stackblitz repo to check a working version of this, or you can also check out the GitHub repository for the complete code.
The purpose of the article was to help you get started with Vitepress. It showed you how to extend Vitepress to build your blog and customize the pages as you want. Vitepress provides a minimal approach to building static sites for documentation sites or blogs.
Vitepress is still in its alpha stage, so things can break. It is a good idea not to use Vitepress for your production apps just now. But if you want to explore more about the library, you can check out the documentation.
Debugging Vue.js applications can be difficult, especially when users experience issues that are difficult to reproduce. If you’re interested in monitoring and tracking Vue mutations and actions for all of your users in production, try LogRocket.

LogRocket lets you replay user sessions, eliminating guesswork by showing exactly what users experienced. It captures console logs, errors, network requests, and pixel-perfect DOM recordings — compatible with all frameworks.
With Galileo AI, you can instantly identify and explain user struggles with automated monitoring of your entire product experience.
Modernize how you debug your Vue apps — start monitoring for free.

Discover how React Fiber works under the hood. Learn how React builds the DOM, handles concurrent rendering, and works alongside React 19 features and the new React Compiler.

Learn how to use Skybridge, an open-source React framework, to build and deploy cross-platform AI apps and interactive UI widgets for ChatGPT, Claude, and MCP clients from a single codebase.

Learn how to set up Meilisearch, index documents, and build keyword, semantic, and hybrid search with AI-powered retrieval.

Compare pnpm and npm across security defaults, disk usage, dependency strictness, and workspace policy to decide which package manager fits your project.
Would you be interested in joining LogRocket's developer community?
Join LogRocket’s Content Advisory Board. You’ll help inform the type of content we create and get access to exclusive meetups, social accreditation, and swag.
Sign up now

