Editor’s note: This article was last updated by Hussain Arif on 31 October 2024 to include the pdfmake library, which is still in beta at the time of writing.
Some of the most popular HTML to PDF conversion libraries for Node.js include:
There are many scenarios where it’s useful to export HTML content and then download it as a PDF, or Portable Document Format, document for easy sharing. HTML to PDF conversion is helpful for web apps that return documents like receipts, invoices, reports, or bank statements. It’s also useful for sharing dynamic webpages, and bulk data from web applications.
Now that we have briefly discussed why conversion is useful, let’s write some code!
Puppeteer is a Google-developed Node.js library that provides a high-level API for controlling headless (or full) Chrome or Chromium browsers. Even though its main use case is automation/testing, the library features an API to lets users turn website content into PDF files.
As stated before, Puppeteer allows you to automate various tasks in a web browser, such as web scraping, website testing, screenshot creation, and PDF generation. It leverages the capabilities of the Chrome or Chromium web browser to render HTML content into PDF files.
To set up and use Puppeteer, you’ll first need to initialize your Node.js project:
#create the project
mkdir pdf-creation-javascript
cd pdf-creation-javascript #navigate to the folder
#tell NPM to bootstrap this folder and turn it into a JavaScript project.
npm init -y
As a second step, go to your package.json file and add the type property:
//package.json
{
  "type": "module",
  //further code..
This will tell Node that we want to use the ES Module syntax.
Next, install the Puppeteer library as a dependency in your project:
#note: this will install a binary of Google Chrome as well!
npm i puppeteer
# this file will hold the code necessary
touch puppeteer-example.js
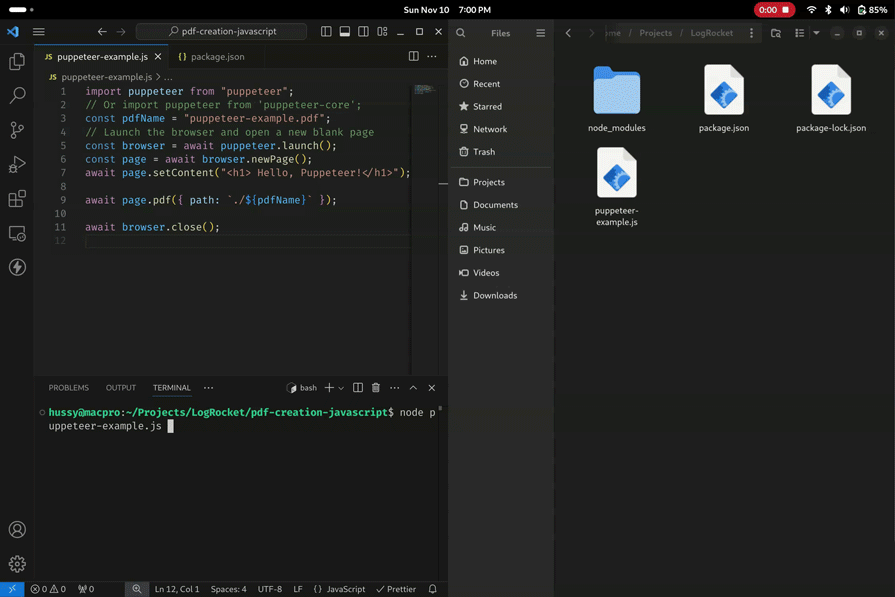
Now, write the conversion script inside your JavaScript file. Here’s an example:
//puppeteer-example.js
import puppeteer from "puppeteer";

const pdfName = "puppeteer-example.pdf";
// Launch the browser and open a new blank page
const browser = await puppeteer.launch();
const page = await browser.newPage();
//set the HTML of this page
await page.setContent("<h1> Hello, Puppeteer!</h1>");
//save the page into a PDF and call it 'puppeteer-example.pdf'
await page.pdf({ path: `./${pdfName}` });
//when, everything's done, close the browser instance.
await browser.close();
In this script, we are importing the Puppeteer library, launching a headless Chromium browser, and then creating a new page in the browser. Then, we are using the pdf method to tell Puppeteer that we want to save our webpage as a PDF file.
Next, execute your script using Node.js by running the following command:
node puppeteer-example.js
This will be the output:
For more information about Puppeteer, check out the following LogRocket tutorials:
jsPDF is a popular JavaScript PDF generator that allows users to generate PDF files in the browser dynamically. The library is well-maintained, stable, easy to use, and has rich documentation.
Unlike Puppeteer, jsPDF can run on the client’s device. This is great for situations where we want to generate PDFs without compromising user privacy. Moreover, jsPDF also supports modifying existing layouts. As a full-featured PDF library, jsPDF can also create PDFs from scratch or edit existing ones, incorporating images, tables, and shapes.
Note: Currently, jsPDf relies on the html2canvas library to render HTML into a PDF file. Because of this, we can’t run the library in a Node environment.
Because we can’t run jsPDF in Node, we have to run our PDF-generation logic on the client side. As a first step, create an HTML file like so:
touch jspdf-example.html #create an HTML file to run our jspDF related code.
Next, write this code in your jspdf-example.html module:
<!--file name: jspdf-example.html-->
<html>
  <head>
    <!-- import all needed dependencies into this HTML file -->
    <script
      src="https://unpkg.com/jspdf@latest/dist/jspdf.umd.min.js"
      type="text/javascript"
    ></script>
    <script src="https://cdnjs.cloudflare.com/ajax/libs/html2canvas/1.4.1/html2canvas.min.js"></script>
    <script src="https://cdnjs.cloudflare.com/ajax/libs/dompurify/3.1.7/purify.min.js"></script>
  </head>
  <body>
    <h1>Hello, jsPDF</h1>
    <!--When clicked, invoke the code to save the PDF -->
    <button onclick="savePDF()">Click me</button>
    <script>
      window.jsPDF = window.jspdf.jsPDF;
      window.html2canvas = html2canvas;
      const pdf = new jsPDF();
      //the HTML that will be converted to PDF:
      const element = "<h1>Hello, jsPDF!</h1>";
      function savePDF() {
        // this function will convert our HTMl code to PDF and then save it on the user's machine
        pdf.html(element, {
          callback: function (pdf) {
            pdf.save("./jspdf-example.pdf");
            console.log("saved");
          },
        });
      }
    </script>
  </body>
</html>
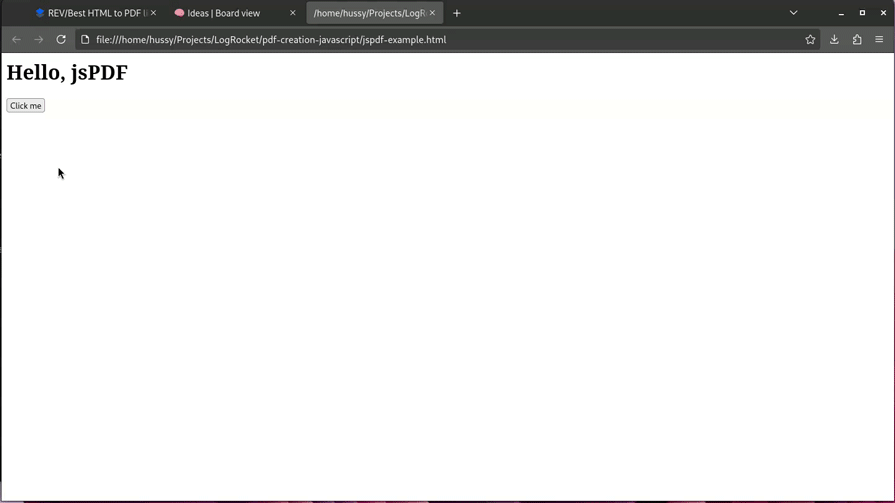
In the code above, we used the html function to convert our HTML content (saved in the element variable) to a PDF format. Finally, we then invoked the save function to download the generated PDF as a file called jspdf-example.pdf.
This will be the output:
PDFKit is one of the oldest and most well-established PDF libraries in the JavaScript ecosystem, and it is still well-maintained and regularly updated. This library is a popular option for creating and manipulating PDF documents in a server-side environment, typically using Node.js. It allows you to programmatically generate PDF files by defining each page’s content, layout, and formatting.
PDFKit provides a high-level API for PDF document generation and supports various features, making it a versatile tool for creating custom PDFs. Several PDF libraries have been developed as wrappers around PDFKit, supporting custom fonts and image embedding.
To use PDFKit in your project, simply install the package using npm:
npm install pdfkit
touc pdfkit-example.js
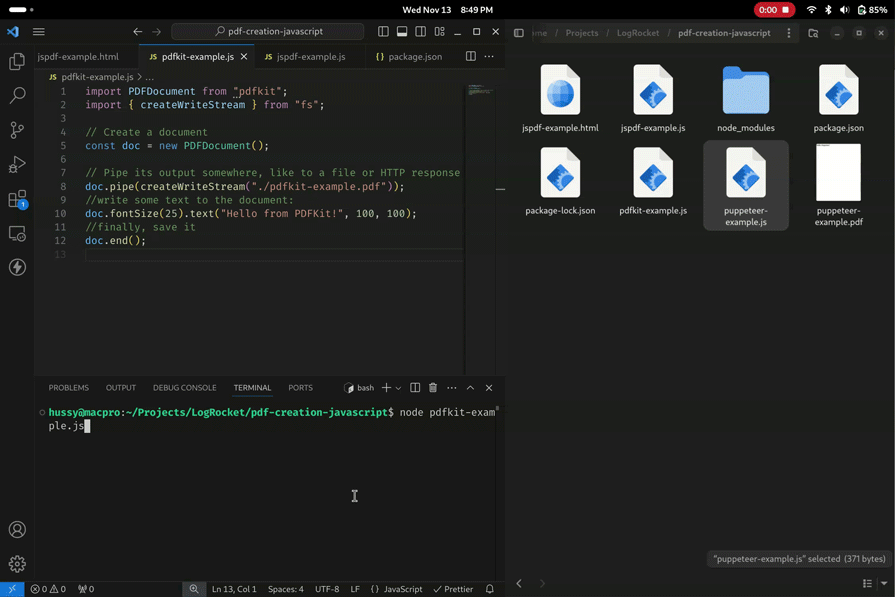
Inside your JavaScript file, write the code for creating a PDF document and adding HTML content using PDFKit. Here’s a basic example:
import PDFDocument from "pdfkit";
import { createWriteStream } from "fs";
// Create a document
const doc = new PDFDocument();
// Pipe its output:
doc.pipe(createWriteStream("./pdfkit-example.pdf"));
//write some text to the document:
doc.fontSize(25).text("Hello from PDFKit!", 100, 100);
//finally, save it
doc.end();
In this script, we are importing the fs (file system) module and the PDFDocument class from the PDFKit library, and then creating a new PDF document using PDFDocument. Afterward, we are piping the PDF output to a writable stream or file named pdfkit-example.pdf.
When the script is run, this will be the output:
Just like other libraries discussed earlier, pdfmake is another alternative for programmatically building PDFs. Although it’s still in beta, the developers support many features out of the box, with some of them being:
As always, the first step to bundle our library within our project is to install it via npm:
npm install pdfmake
touch pdfmake-example.js
Because pdfmake is still in beta, we have to bring our own fonts. In our example, we’ll use Roboto. When the font is downloaded, make sure to place it in your project directory like so:
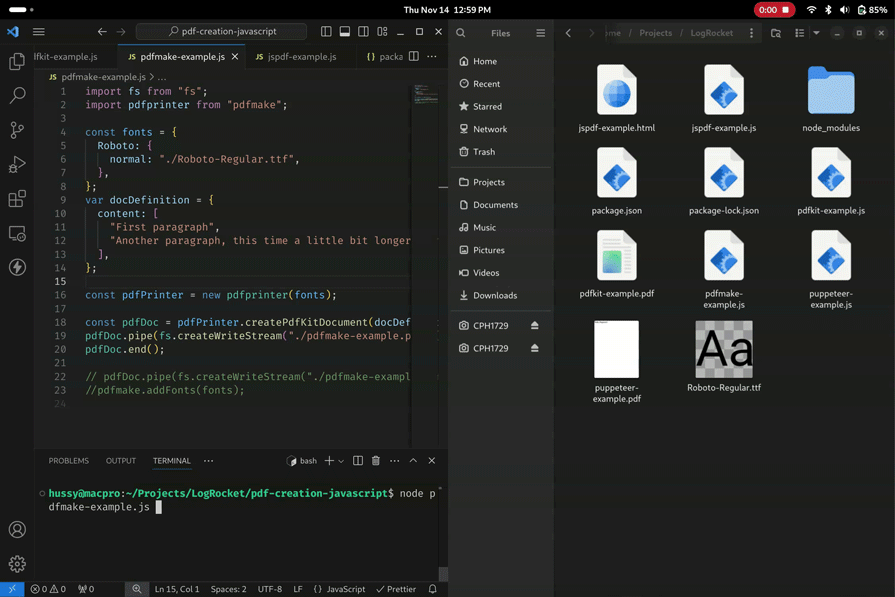
This block of code demonstrates the usage of the pdfmake library:
//file name: pdfmake-example.js
import fs from "fs"; //we will interact with the filesystem
import pdfprinter from "pdfmake";

//specify what fonts we will use:
const fonts = {
  Roboto: {
    normal: "./Roboto-Regular.ttf",
  },
};
//our content for the PDF:
var docDefinition = {
  content: [
    "First paragraph",
    "Another paragraph, this time a little bit longer to make sure, this line will be divided into at least two lines",
  ],
};
//pass our fonts array and our contents to PDFMake:
const pdfPrinter = new pdfprinter(fonts);
const pdfDoc = pdfPrinter.createPdfKitDocument(docDefinition);
//finally save it:
pdfDoc.pipe(fs.createWriteStream("./pdfmake-example.pdf"));
pdfDoc.end();
In the script above, we used the pdfprinter class and specified the content (the docDefinition object) and the fonts (fonts object) that we’ll use for our document. Then, we used the pipe method to save the PDF to the local system:
For easy reference, here’s a summary of how the Puppeteer, jsPDF, PDFKit, and pdfmake libraries compare in terms of PDF generation, file size, browser integration, and community support:
| Puppeteer | jsPDF | PDFKit | pdfmake | |
|---|---|---|---|---|
| PDF generation | Generates PDFs from HTML and webpage content | Generates PDFs from HTML and SVG content | Creates PDFs from scratch | Creates PDFs from scratch |
| File size | No control over PDF size | No control over PDF size | Provides control over PDF file size | No control over PDF size |
| Community support and update | Active community support and updates | Active community support and updates | Active community support and updates | Small, but growing community support and frequent updates |
| Can run both on the server and client? | Both | Only client | Both | Both |
Choosing a conversion library for your Node.js project can be a bit daunting, but there are several great options available. If you want to generate PDF from scratch, PDFKit or pdfmake may be the best option. To quickly convert HTML or SVG content to PDFs, jsPDF may be more suitable. For webpage rendering and interactive content, consider using Puppeteer.
The best HTML to PDF conversion library is heavily dependent on your project type and personal preference.
If you’ve used any of these libraries before, or have worked with one we didn’t mention in this article, leave a comment below!
 Monitor failed and slow network requests in production
Deploying a Node-based web app or website is the easy part. Making sure your Node instance continues to serve resources to your app is where things get tougher. If you’re interested in ensuring requests to the backend or third-party services are successful, try LogRocket.

LogRocket lets you replay user sessions, eliminating guesswork around why bugs happen by showing exactly what users experienced. It captures console logs, errors, network requests, and pixel-perfect DOM recordings — compatible with all frameworks.
LogRocket's Galileo AI watches sessions for you, instantly identifying and explaining user struggles with automated monitoring of your entire product experience.
LogRocket instruments your app to record baseline performance timings such as page load time, time to first byte, slow network requests, and also logs Redux, NgRx, and Vuex actions/state. Start monitoring for free.
Hey there, want to help make our blog better?
Join LogRocket’s Content Advisory Board. You’ll help inform the type of content we create and get access to exclusive meetups, social accreditation, and swag.
Sign up now
Discover how the Interface Segregation Principle (ISP) keeps your code lean, modular, and maintainable using real-world analogies and practical examples.

<selectedcontent> element improves dropdowns

Learn how to implement an advanced caching layer in a Node.js app using Valkey, a high-performance, Redis-compatible in-memory datastore.

Learn how to properly handle rejected promises in TypeScript using Angular, with tips for retry logic, typed results, and avoiding unhandled exceptions.


