In this era of advanced technologies, writing scripts for web scraping, testing, and monitoring can be tricky. That’s why the team at Google Chrome has provided a tool that lets you perform common actions on the Chromium or Chrome browser programmatically through JavaScript, via a simple and easy-to-use API called Puppeteer.
In this blog post, you’ll learn about Puppeteer, and how to use it to scrape a web page and record automated UI tests for your project.
For this tutorial, you need basic knowledge of JavaScript and Node.js.
According to Google, “Puppeteer is a Node library that provides a high-level API to control headless Chrome or Chromium over the DevTools Protocol. It can also be configured to use full non-headless Chrome or Chromium.”
With Puppeteer, you can scrape websites, generate screenshots and PDFs of pages, act as crawlers for SPA and generate pre-rendered content, automate your form submissions, test UI, access web pages and extra information using DOM API, and, finally, automate performance analysis.
Let’s demonstrate how Puppeteer works by scraping a job portal, which is easy to accomplish and will help us understand web scraping in general.
Ready? Let’s dive in.
Begin by setting up your Node project:
mkdir JobScrapper
cd JobScrapper

yarn add puppeteer
Note that you can use puppeteer-core if you don’t want to download the Chromium browser, which you can read about here.
jobScript.js fileAdd the following codes inside the script file you just created:
const puppeteer = require("puppeteer");
const jobUrl = process.env.JOB_URL;
let page;
let browser;
let cardArr = [];
class Jobs {
    static async init() {
        // console.log('Loading Page ...')
        browser = await puppeteer.launch();
        page = await browser.newPage();
        await page.goto(jobUrl, { waitUntil: "networkidle2" });
        await page.waitForSelector(".search-card");
    }
    static async resolve() {
        await this.init();
        // console.log('Grabbing List of Job URLS ...')
        const jobURLs = await page.evaluate(() => {
            const cards = document.querySelectorAll(".search-card");
            cardArr = Array.from(cards);
            const cardLinks = [];
            cardArr.map(card => {
                const cardTitle = card.querySelector(".card-title-link");
                const cardDesc = card.querySelector(".card-description");
                const cardCompany = card.querySelector(
                    'a[data-cy="search-result-company-name"]'
                );
                const cardDate = card.querySelector(".posted-date");
                const { text } = cardTitle;
                const { host } = cardTitle;
                const { protocol } = cardTitle;
                const pathName = cardTitle.pathname;
                const query = cardTitle.search;
                const titleURL = protocol + "//" + host + pathName + query;
                const company = cardCompany.textContent;
                cardLinks.push({
                    jobText: text,
                    jobURLHost: host,
                    jobURLPathname: pathName,
                    jobURLSearchQuery: query,
                    jobURL: titleURL,
                    jobDesc: cardDesc.innerHTML,
                    jobCompany: company,
                    jobDate: cardDate.textContent
                });
            });
            return cardLinks;
        });
        return jobURLs;
    }
    static async getJobs() {
        const jobs = await this.resolve();
        await browser.close();
        // console.log(jobs)
        return jobs;
    }
}
export default Jobs;
Here, the Jobs class has three important methods: Init, resolve, and getJobs.
The Init method initializes the Puppeteer instance and creates a browser object, which in turn is used to create a new page in the browser with newPage() method. We’ll call goto() with the URL we want our browser to visit and specify networkidle2, which comes in handy for pages that perform long-polling or any other side activity. After that, wait for a particular HTML element with the specified class .search-card to be loaded into the viewport.
The second method, the resolve method, calls the Init method, evaluates the page that was opened, and queries for all HTML elements with .search-card. It iterates each of them and retrieves specific information such as job title, posted date, company, and description, then pushes them to an array for displaying.
Lastly, the getJobs method simply calls the resolve method to get the list of all the jobs found and returned back to the caller.
Now, create a server.js file to display the jobs by entering the following code:
// Create a simple Express API
const express = require("express");

// Require the Job Scrapper
const Jobs = require("./jobScript");

// Instantiate Express server
const app = express();
const port = 9000;

// Get Jobs from with the Scrapper and return a Job with jobs
app.get("/", async (req, res) => {
  const jobs = await Jobs.getJobs();
  res.json(jobs);
});

// Listen to port 9000
app.listen(port, () => {});

// PS: If you encounter problem with `Module not found` run:
// npm i puppeteer
// again
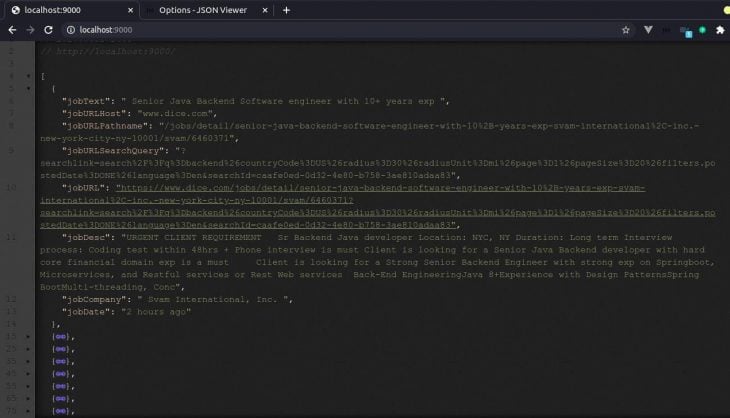
Below is a JSON sample of all the successfully scrapped jobs based on the job website URL that was provided.
Now that we know what Puppeteer is and what it can do, let’s look at an important usage of Puppeteer: automated testing.
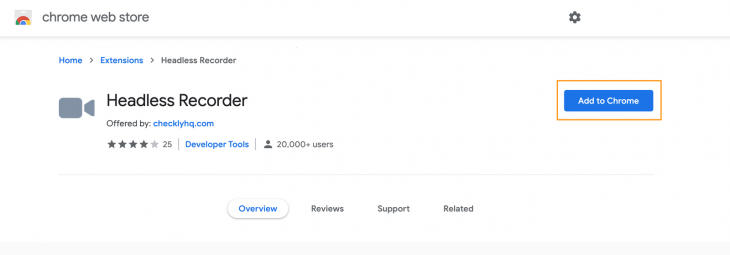
Using Puppeteer Recorder, a Chrome extension, we can record our browser interactions and activities, then generate a Puppeteer script for automated testing.
Here’s a list of helpful actions that Puppeteer Recorder Chrome extension can perform:
waitForNaigation and setViewPortdata-id attributeFirst, install the Chrome extension for Puppeteer Recorder by clicking Add to Chrome.
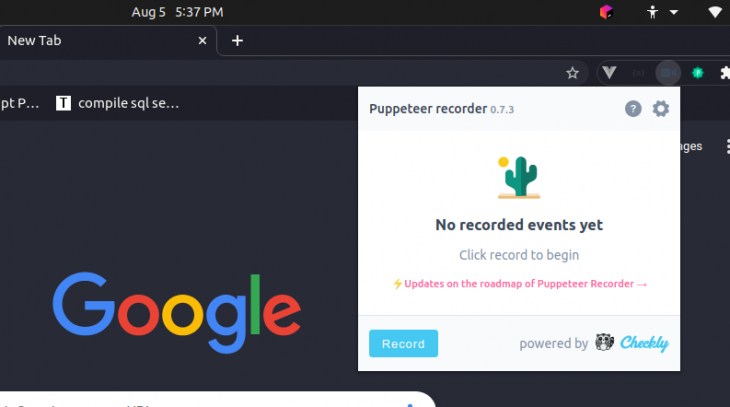
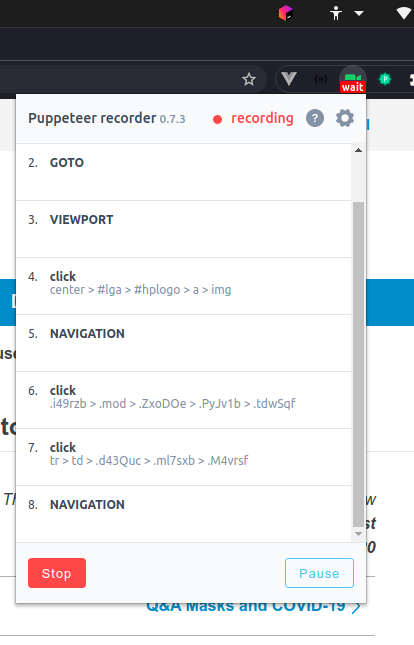
Here are the basics of recording a session in Puppeteer Recorder. To begin, select the icon and click on Record. After typing in an input element, hit tab. You can click on different links, and input elements to record your session.
It’s important to wait for each page to load fully after clicking on it. To stop recording, click on Pause. You can resume recording with the Resume button, and stop recording completely with Stop. Finally, you can copy the generated script clicking Copy to Clipboard.
Automated UI testing is used to test whether or not an application is functioning correctly by navigating websites and using technology in a way that a mimics how a normal user would. It helps identify errors, bugs, and broken links on websites during web development before the website finally goes live.
Many tools have been developed to achieve this, including Selenium and TestComplete, but we will demonstrate how to achieve this with Puppeteer.
Now, let’s record an automated UI test.
Before you start recording, go to settings and uncheck the headless and waitForNavigation options to enable a smooth recording.
Click on the Puppeteer Extension icon, then click on Record:
Next, type www.google.com into the address bar and click around the browser so Puppeteer Recorder can record a few events.
Make sure to watch the wait and rec statuses on the Puppeteer icon bar — they will give you a clue when to proceed to the next event or click.
You can click on Stop when you have recorded enough events for your UI test. Next, copy the generated Puppeteer script and run your test using Node/Express server.
I have recorded some event in the script below:
  const puppeteer = require("puppeteer");
  (async () => {
    const browser = await puppeteer.launch({ headless: false });
    const page = await browser.newPage();
    await page.goto(
      "https://www.google.com/search?q=what+is+puppeteer+js&oq=wh&aqs=chrome.0.69i59j69i64j0l3j5l3.7647j0j7&sourceid=chrome&ie=UTF-8"
    );
    await page.setViewport({ width: 1366, height: 669 });
    await page.waitForSelector(
      ".g:nth-child(3) > .rc:nth-child(1) > .r > a > .LC20lb"
    );
    await page.click(".g:nth-child(3) > .rc:nth-child(1) > .r > a > .LC20lb");
    await page.waitForSelector(
      ".blog_post-main_content > .blog_post-body > .blog_post_body > p> a:nth-child(3)"
    );
    await page.click(
      ".blog_post-main_content > .blog_post-body > .blog_post_body > p > a:nth-child(3)"
    );
    await browser.close();
  })();
Running the Puppeteer script is straightforward once you have set up your testing environment. Using Node/Express, you can simply paste in the generated code and execute it:
const express = require("express");
const app = express();
const port = 9000;
app.get("/test", (req, res) => {
  const puppeteer = require("puppeteer");
  (async () => {
    const browser = await puppeteer.launch({ headless: false });
    const page = await browser.newPage();
    await page.goto(
      "https://www.google.com/search?q=what+is+puppeteer+js&oq=wh&aqs=chrome.0.69i59j69i64j0l3j5l3.7647j0j7&sourceid=chrome&ie=UTF-8"
    );
    await page.setViewport({ width: 1366, height: 669 });
    await page.waitForSelector(
      ".g:nth-child(3) > .rc:nth-child(1) > .r > a > .LC20lb"
    );
    await page.click(".g:nth-child(3) > .rc:nth-child(1) > .r > a > .LC20lb");
    await page.waitForSelector(
      ".blog_post-main_content > .blog_post-body > .blog_post_body > p > a:nth-child(3)"
    );
    await page.click(
      ".blog_post-main_content > .blog_post-body > .blog_post_body > p > a:nth-child(3)"
    );
    await browser.close();
  })();
});
app.listen(port, () => {});
Now, you’re done! Congratulations.
In this article, we learned about Puppeteer and how to scrape a web page with it. We also learned about Puppeteer Recorder and to use it to automate your UI testing. As always, you can get all of the code in this blog post from my GitHub Repository. Happy coding!

LogRocket is a frontend application monitoring solution that lets you replay problems as if they happened in your own browser. Instead of guessing why errors happen, or asking users for screenshots and log dumps, LogRocket lets you replay the session to quickly understand what went wrong. It works perfectly with any app, regardless of framework, and has plugins to log additional context from Redux, Vuex, and @ngrx/store.
In addition to logging Redux actions and state, LogRocket records console logs, JavaScript errors, stacktraces, network requests/responses with headers + bodies, browser metadata, and custom logs. It also instruments the DOM to record the HTML and CSS on the page, recreating pixel-perfect videos of even the most complex single-page apps.
Would you be interested in joining LogRocket's developer community?
Join LogRocket’s Content Advisory Board. You’ll help inform the type of content we create and get access to exclusive meetups, social accreditation, and swag.
Sign up now
Which AI frontend dev tool reigns supreme in July 2025? Check out our power rankings and use our interactive comparison tool to find out.

Learn how OpenAPI can automate API client generation to save time, reduce bugs, and streamline how your frontend app talks to backend APIs.

Discover how the Interface Segregation Principle (ISP) keeps your code lean, modular, and maintainable using real-world analogies and practical examples.

<selectedcontent> element improves dropdowns


