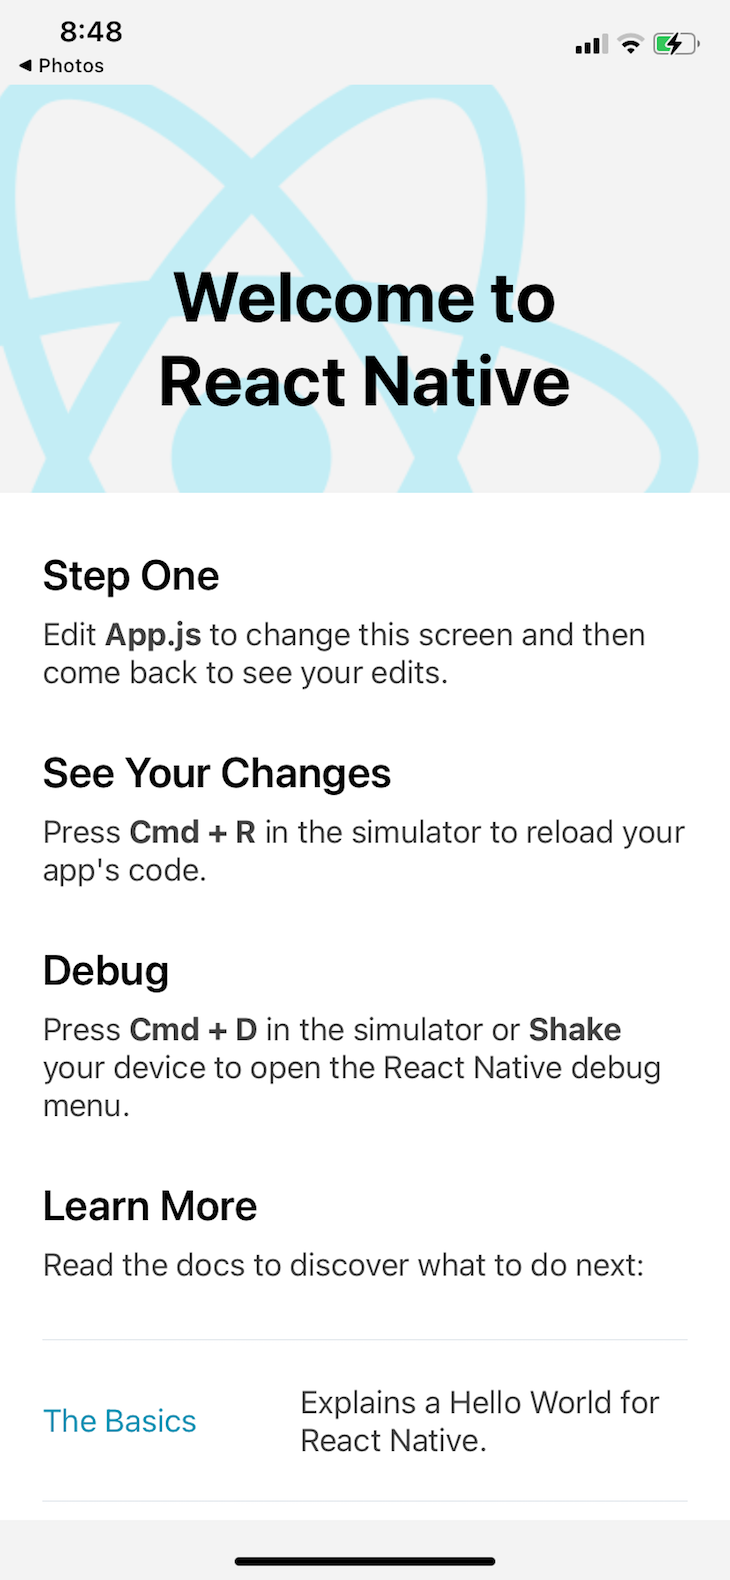
When developing a mobile app, you need to build and run your app on a simulator or device to test it and view the changes. This is unlike working with web apps where you don’t need to build the app every time.
When working with React Native and iOS, it’s typical to use Xcode as build tool. Building apps that run on iOS requires at least some Xcode knowledge.
In this tutorial, we’ll walk you through some best practices to help you get started using Xcode and offer some tips that will change the way you develop iOS apps with React Native.
Here’s what we’ll cover:
info.plist fileXcode is an IDE and code editor created by Apple to help developers build Apple products — namely, mobile apps for iOS and desktop apps for macOS.
Xcode is a complete environment that contains a set of integrated tools and apps designed to assist with all development processes, including testing, building, deploying, compiling, and debugging.
You can build a React Native app either on a simulator or on a real device. If you intend to run it on an iOS device or simulator, the use of Xcode is often required.
You can build a React Native app either using the React Native CLI, which allows you to run build commands from your terminal, or Xcode. I prefer to use Xcode for the following reasons:
Let’s walk through how to build and run a React Native app with the React Native CLI. Then, we’ll do the same directly on a real device.
The React Native CLI is a simple and straightforward way to get your React Native app running. When you first install a React Native app using the CLI, it provides simple instructions and allows you to start, build, and run the app in one simple command:
react-native run-ios
You can also use npx:
npx react-native run-ios
Basically, this runs bunch of scripts in the background that interact and instruct Xcode to run and lunch the simulator. If you don’t specify a simulator, the CLI uses the default one it finds on Xcode. Here’s how to tell the CLI which simulator you want to run the app on:
react-native run-ios --simulator "iPhone X"
If you want to run your app on a device, you must first make sure your device is connected via USB to your computer. Then, run the CLI command with --device"iPhone name":
react-native run-ios --device "Said's iPhone"
The second way to build and run a React Native app is to use Xcode directly, which is the method I use.
Inside Xcode navigate to File → Open and browse to your project directory. In the iOS folder, select appName.xcodeproject or appName.xcodeworkspace if you have one.
You can build the app by going to the tab navigator (Product→ Build) or using the shortcut ⌘ + B:

It’s a good practice to use the simulator to run and test the app. However, sometimes it’s necessary to test the accuracy of the UI on a real device.
The most obvious benefit to running you app on the device is that it enables you to experience your app the way the user sees it. Simulators are limited and don’t always represent the app with total accuracy. For example, you can’t access the device camera when using a simulator.
I prefer always to use the device because it gives me a more complete idea of how the app works on the user’s end.
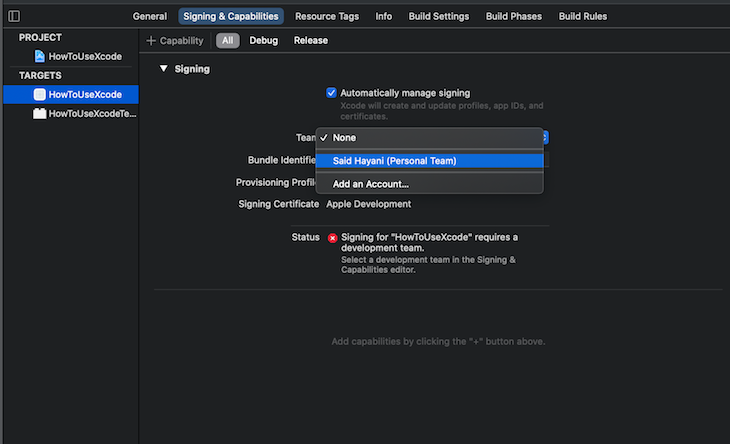
To run and build a React Native on a real device, you must have:
After connecting the iPhone, the Xcode will show the connected devices as a target:
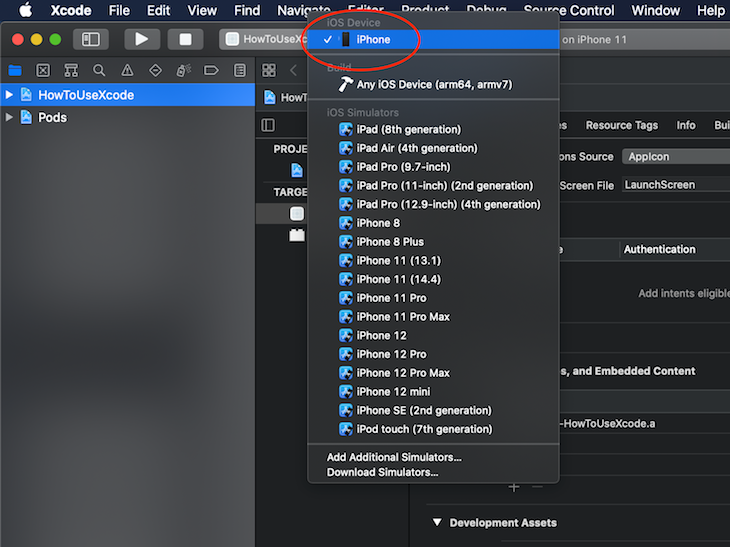
In my case, the name of my iPhone is “iPhone.” You may see a different name for your device, such as “Tony’s iPhone.”
Select the device you want to build and run the app on, then click the build button. The React Native CLI will automatically open a terminal and start the server. If it’s not started yet, you can go to your terminal and run npm start:
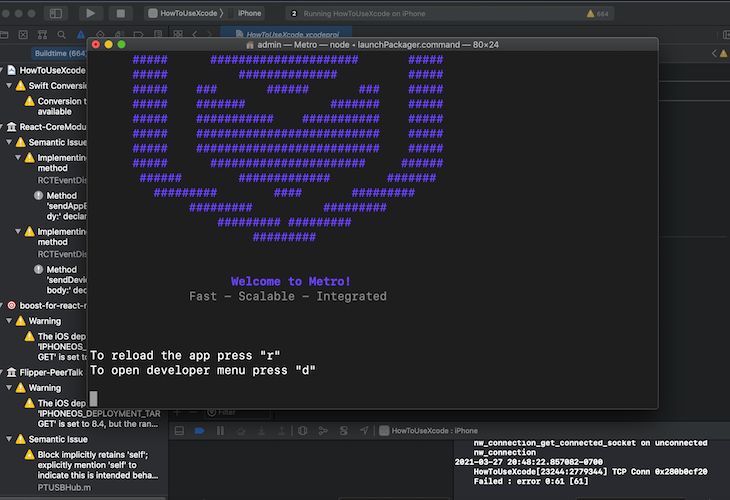
If your build is successful, the app will launch automatically on your device:
To ensure that the device is connected to the server, you can go to the terminal and press r to reload the app or d to open the developer menu. Alternatively, you can shake your device to pull up the developer menu.
You should see the live reload working as well:
As you move forward in your React Native development journey, you’ll find yourself dealing with unexpected issues, especially with the app build. These issues usually stem from either mismatched versions between React Native packages and iOS or the tools used to build the app, such as Xcode.
Over time, you’ll become familiar with these issues and more efficient in solving them.
The simulator is a just a virtual device, but it has almost everything you need to test and run your code. Let’s explore some things you can do with a simulator.
The simulator provides a variety of features for debugging your app, especially the accessibility features. For example, you can enable Color blended Layers to test colors’ accessibility.
In the Xcode, Open the Debug tab:

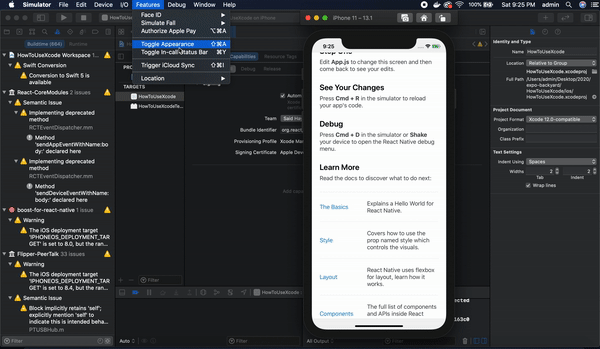
If you have the latest version of Xcode (12.4), there is a feature that enables you to see what your app looks like in dark mode. You can preview your dark mode by hitting Shift + Command + A or by navigating to the Features tab and clicking Toggle Appearance:
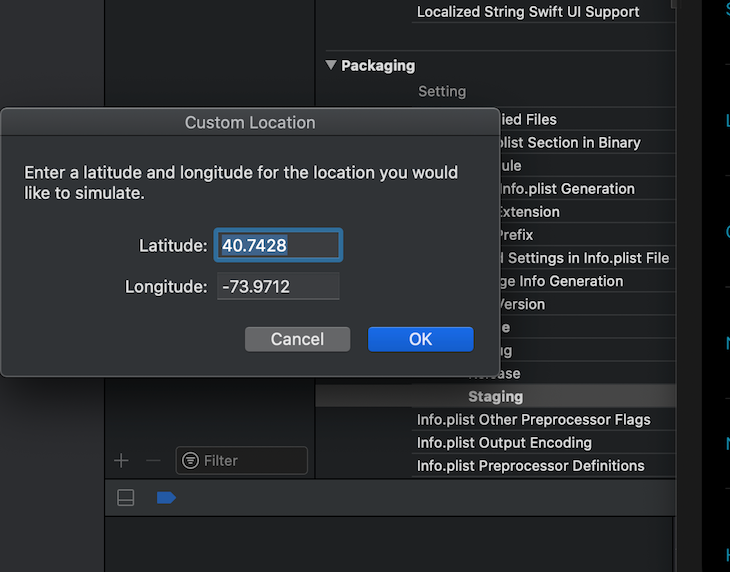
You can simulate GPS location using the simulator. By default, the simulator has one GPS point, but you can add custom GPS locations:
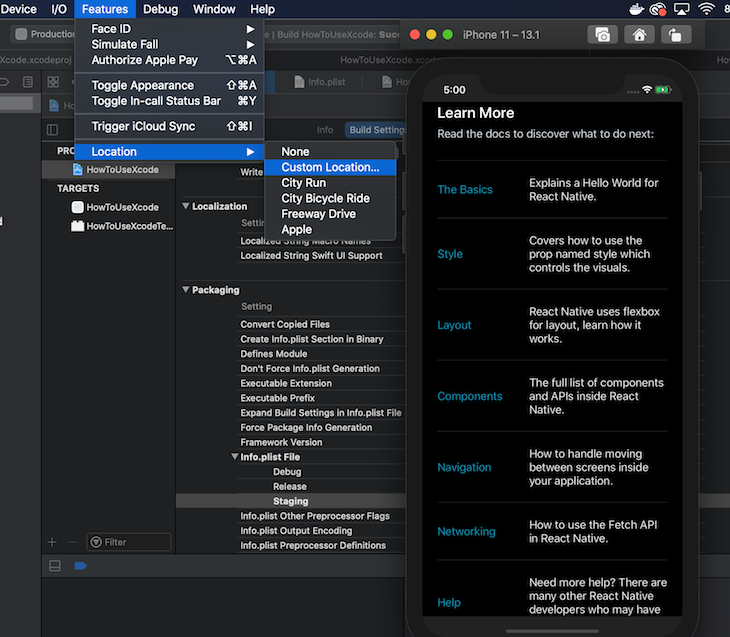
If you’re using Xcode 10 or below, navigate to Debug → Location → Custom Location. Enter the longitude and latitude and the simulator will use these custom coordinates as the default location for the device.
An Xcode scheme defines a collection of targets to build, a configuration to use when building, and a collection of tests to execute.
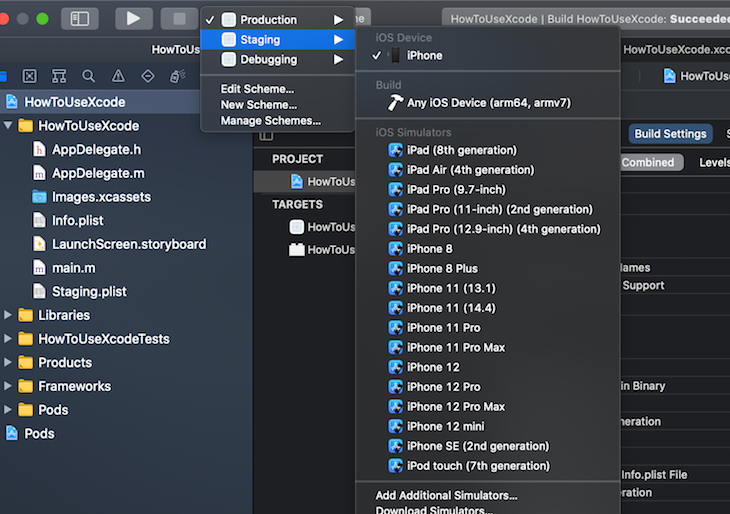
You can use schemes to create different builds for your app. This enables you to test the app in different environments. For example, you could create a build just for the test, staging, development, and production builds.
Let’s say we have to create three different builds: a build for testing or staging, a development build, and a build for production. Each build will have a unique build identifier and a custom name.
To see how this works, let’s create the schemes: staging, production, development.
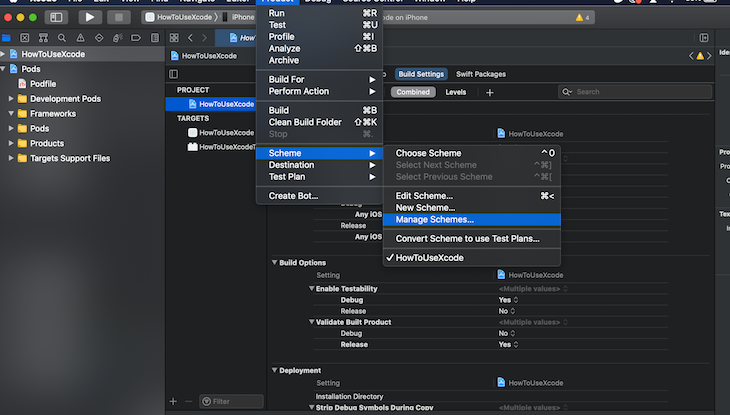
Go to Product → Manage Scheme:
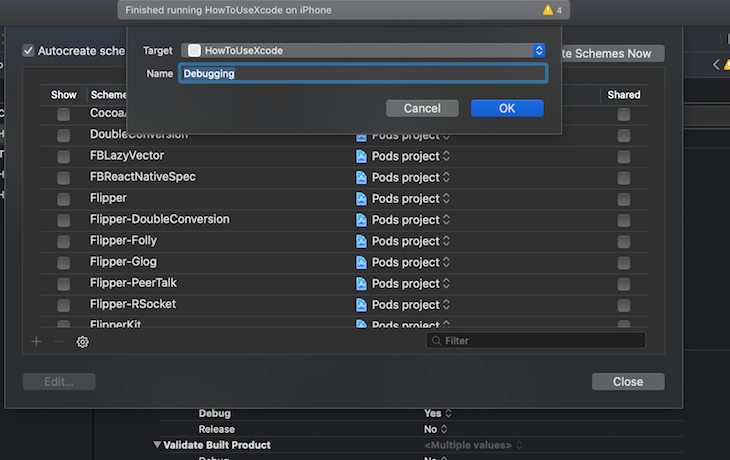
Click the + to create a new scheme:
Do the same with Production and Staging. Make sure to uncheck the default scheme:
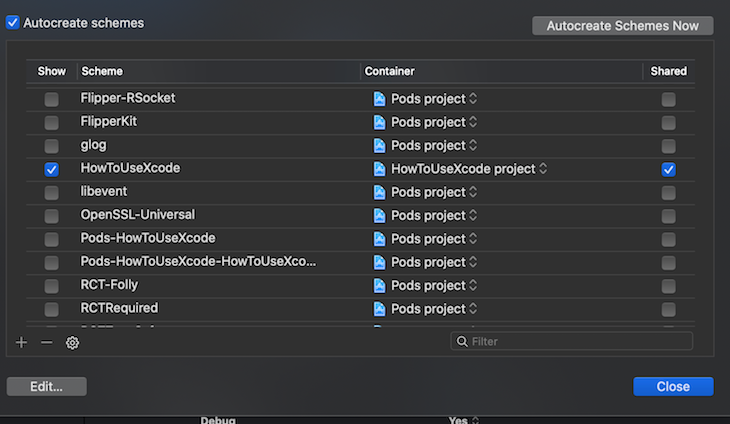
Check all the three builds you just created:

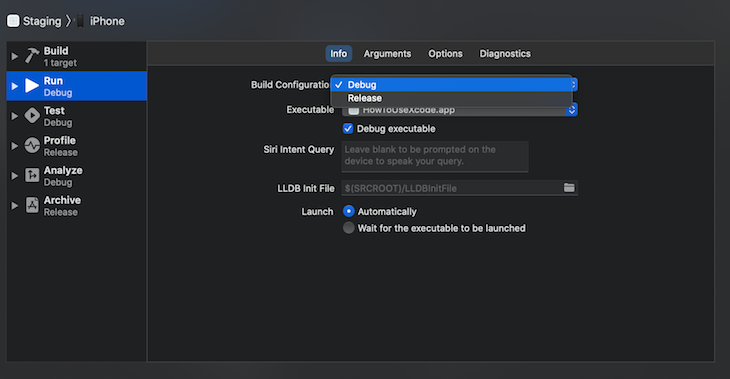
The next step is to set specific build settings for each scheme. Go to Product → Scheme → Edit Scheme:
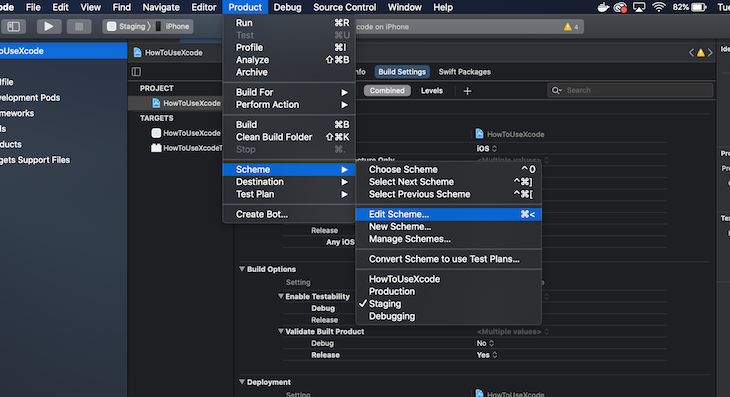
You can select the type of build configuration you want to use when the app is running, among many other options:
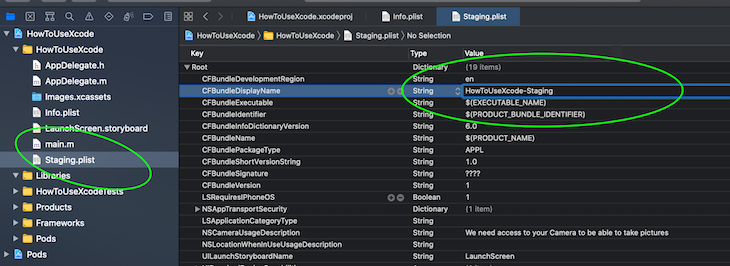
info.plist fileinfo.plist is an XML file that’s used to store a list of app properties, such as the AppName, version, permissions description, settings, etc.
When an Xcode project is created it comes with a info.plist by default. You can have multiple plist files in one workspace. You might create more than one plist file for different environments — for example, Staging.plist, Production.plist, Development.plist. Only one file can be used at a time.
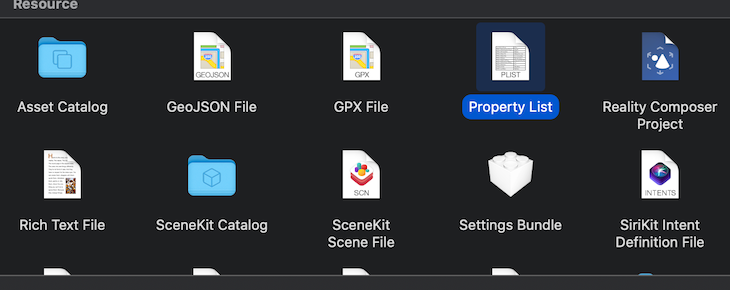
Given that we created a file for staging (Staging.plist), right-click on the project directory and select New File:
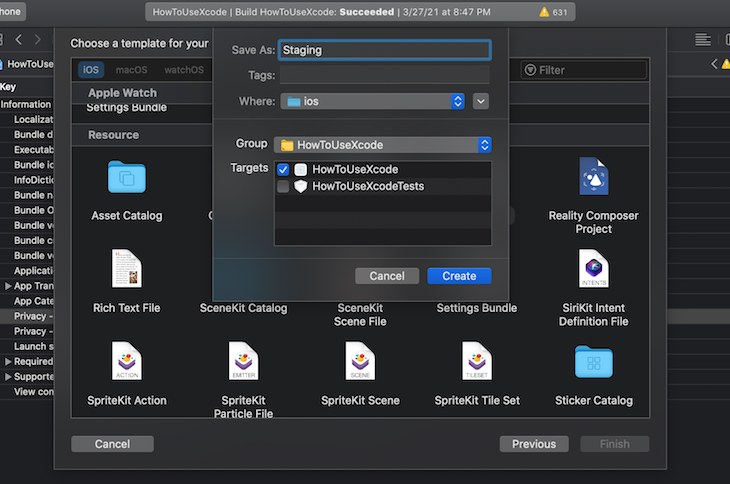
Choose a Property Lis file and give it a name, such as Staging.
It’s best to copy the values from the info.plist, then make a change to it to avoid any syntax issues. Open the file as source code, then copy and paste.
Let’s change the app displayName in the Staging.plist file:
Now we need Xcode to use Staging.plist instead of info.plist when building.
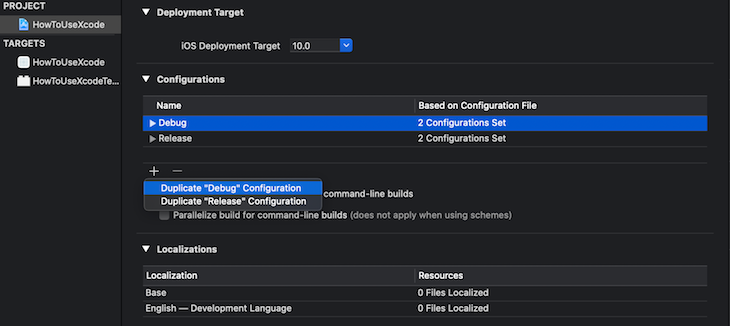
First, we need to create a build configuration and associate the staging file with it. Click on the project icon, then look for Configurations in the Info tab. Simply duplicate a Debug or Release config, create a new configuration, and name it Staging:
After creating the staging build configuration, the next step is to tell the Xcode what property list file it should use when a specific build is used. In our case, we want it to use Staging, so we have to add the path of Staging.plist.
Go to the build settings, look for the Packaging tab, and click on the info.plist file. It will extend and the three build configurations we have — Debug, Release , and Staging — will display. Add the path to Staging, which is AppName/Staging.plist:
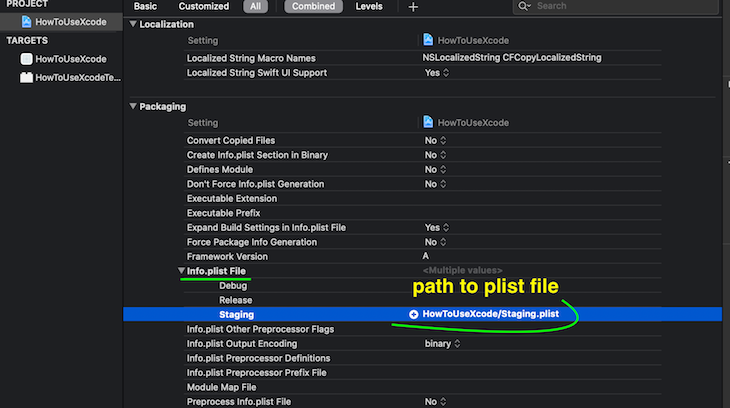
Now, when running the Staging Build configuration, it will use Staging.plist automatically.
You can use info.plist to add and declare permissions of the iOS feature your app has access to. If your app is trying to use APIs that requires permission, you need to add the description of the usage into the info.plist. For example, if your app is using the native camera feature, you need to add the usage description, as shown below.
Click the + button and look for the Privacy- Camera Usage Description:
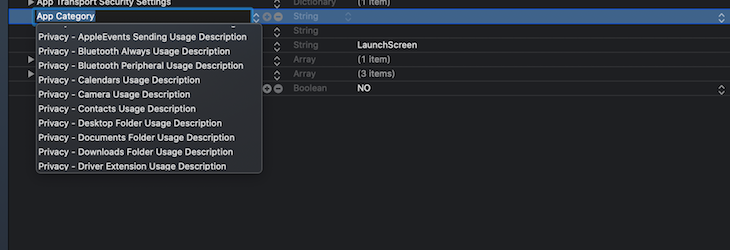
Then, add the value description of the usage on the right:

Knowing how to use Xcode when building iOS apps with React Native is a game-changer. With a solid foundation in Xcode, you can more easily identify and fix build issues more efficiently. Most importantly, knowing how to get the most out of Xcode’s features will improve the developer experience overall and help you do more with your iOS applications in React Native than you previously thought possible.

LogRocket's Galileo AI watches sessions for you and and surfaces the technical and usability issues holding back your React Native apps.
LogRocket also helps you increase conversion rates and product usage by showing you exactly how users are interacting with your app. LogRocket's product analytics features surface the reasons why users don't complete a particular flow or don't adopt a new feature.
Start proactively monitoring your React Native apps — try LogRocket for free.

I migrated 20 production-style components from Tailwind to StyleX. Here’s what the data showed about LOC, CSS bundle size, build time, and type safety.

A guide for using JWT authentication to prevent basic security issues while understanding the shortcomings of JWTs.

Discover how to build, render, and automate product demo videos with Remotion, replacing traditional screen recordings with reusable React code.

Chrome’s Modern Web Guidance embeds modern web platform skills into AI coding agents, helping them choose native HTML, CSS, and browser APIs over legacy patterns.
Hey there, want to help make our blog better?
Join LogRocket’s Content Advisory Board. You’ll help inform the type of content we create and get access to exclusive meetups, social accreditation, and swag.
Sign up now

