
Editor’s note: This tutorial was updated on 2 June 2022 to include the most recent version of Firebase, along with modular SDK APIs.

Storing and retrieving user-generated data is pretty common in mobile and web apps nowadays, and as such, there are different cloud services that give mobile and web developers the ability to store data.
Among these services is Google’s Firebase. Firebase is a BaaS (backend-as-a-service), which means it allows both web and mobile developers to perform common backend tasks like user authentication and creating databases with no need for maintenance or upkeep.
React Native, on the other hand, is a UI framework that allows developers to use their knowledge of React, a popular frontend framework, to build native apps that work across both Android and iOS devices. React Native improves productivity as developers do not have to manage two different codebases for both the iOS and Android versions of a particular app.
In this article, you will learn how to store, retrieve, and update user-generated data with Firebase. At the end of this article, we will have built a “to do” Android app that saves and retrieves the different tasks in a database, using a database service provided by Firebase.
To follow along with this article, you should have a working understanding of React and React Native.
The Replay is a weekly newsletter for dev and engineering leaders.
Delivered once a week, it's your curated guide to the most important conversations around frontend dev, emerging AI tools, and the state of modern software.
Firstly, let’s create a new React Native project. You can visit the official React Native documentation for guides on setting up the basics.
Once that is done, you can now create a new React Native project:
npx react-native init ToDoApp
We also need to install the dependencies we will use in the project. These dependencies are:
Run these commands in your terminal to install these dependencies:
npm install firebase
npm install @react-native-community/checkbox
# --- or ---
yarn add firebase
yarn add @react-native-community/checkbox
Now that the setup is done, we can start building our app!
Before we start writing our code, we need to do some setup for Firebase to work perfectly with our app.
First, create a file called firebase-config.js in the root directory of your project to implement Firebase configuration and initialization.
Now, go to the Firebase website.
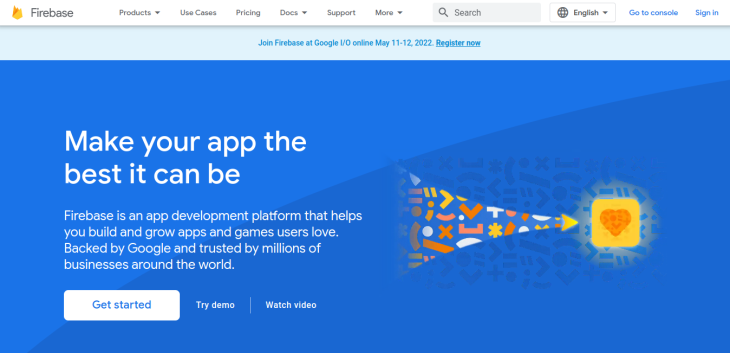
Click on the Get Started button and you will be taken to a page where you can create a new project. Once you are done creating a new project, you should be taken to a dashboard page similar to the image below.
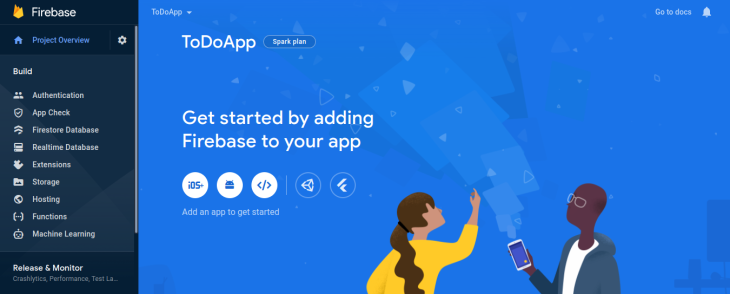
Select the Build option from the side menu. After that is done, you should now be able to select from the two database options that Firebase provides: Realtime Database and Firestore Database, both of which have similar functionality.
If you are unsure of which database service to use, you can check out this guide by Firebase on choosing a database. In this article, we will be making use of the realtime database.
Once you select the Realtime Database option and create a new database, a modal for setting the security rules for your database should pop up. Select Start in test mode. Now you should be at a page that shows the data in your database (which is empty for now).
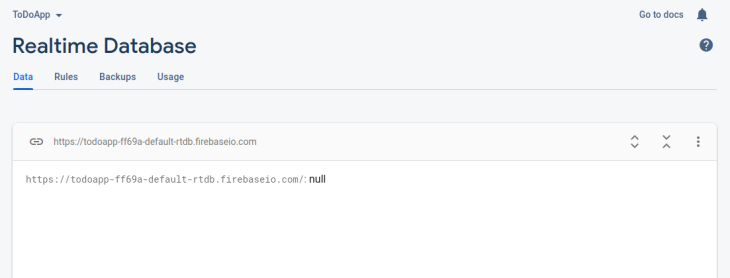
Now that the database has been created and is ready to use, we need to get some connectivity information (Firebase configuration) from our Firebase project. These pieces of information or data will help link our code to our Firebase project.
To get our Firebase configuration details, go back to the project overview page and add a web app to the Firebase project. After registering the app, you should get the configuration details in the form of a JavaScript object:
const firebaseConfig = {
  apiKey: 'XXXXXXXXXXXXXXXXXXXXXXX',
  authDomain: 'todoapp-XXXX.firebaseapp.com',
  databaseURL: 'https://todoapp-XXXXXX.firebaseio.com',
  projectId: 'todoapp-XXXX',
  storageBucket: 'todoapp-XXXX.appspot.com',
  messagingSenderId: 'XXXXXXX',
  appId: "XXXXXXXXXXXXXXXXXXXXXXXXXXXXXXXXXXXX"
};
Now open your firebase-config.js file and import the Firebase app module and database module. After importing Firebase modules, you need to copy and paste the Firebase configuration details in the file. Make sure to use the original Firebase secret identifiers from the dashboard instead of the following XXX placeholders:
import { initializeApp } from 'firebase/app';
import { getDatabase } from 'firebase/database';

const firebaseConfig = {
    apiKey: 'XXXXXXXXXXXXXXXXXXXXXXX',
    authDomain: 'todoapp-XXXX.firebaseapp.com',
    databaseURL: 'https://todoapp-XXXXXX.firebaseio.com',
    projectId: 'todoapp-XXXX',
    storageBucket: 'todoapp-XXXX.appspot.com',
    messagingSenderId: 'XXXXXXX',
    appId: 'XXXXXXXXXXXXXXXXXXXXXXXXXXXXXXXXXXXX'
};
Now we just need to initialize a Firebase app using the configuration details we got from Firebase. Once that is done, we will get a reference to the database service provided by Firebase for our app and export it:
const app = initializeApp(firebaseConfig);
const db = getDatabase(app);

export { db };
We can now read and write to our realtime database with the db reference!
Let’s begin to write the code! Note that I will be writing all my code in my App.js file for simplicity in the tutorial, but make sure to structure your production applications properly.
First of all, we need a component to display a task from the to do list and manage the state of that task. This component will be responsible for indicating whether or not a certain task has been done. We will call this component ToDoItem:
import React from 'react';
import {
  StyleSheet,
  View,
  Text,
  Button,
  ScrollView,
  TextInput
} from 'react-native';
import CheckBox from '@react-native-community/checkbox';

const ToDoItem = () => {
  return (
    <View>
      <CheckBox/>
      <Text>
        A random To-Do item
      </Text>
    </View>
  );
};
As you can see, we imported the CheckBox component from @react-native-community/checkbox. This checkbox will be used to indicate whether or not a particular to-do task has been accomplished.
Now let us style our component! React Native comes with a StyleSheet that we can use to define styles for our different elements:
const styles = StyleSheet.create({
  todoItem: {
    flexDirection: 'row',
    marginVertical: 10,
    alignItems: 'center',
  },
  todoText: {
    paddingHorizontal: 5,
    fontSize: 16
  },
});
We can now apply these styles in the style attribute of each element like so:
<View style = {styles.todoItem}></View>
We want to style our ToDoItem component differently once the checkbox has been checked. To do this, we will create a state called doneState to manage the state of the to-do task — whether the task has been accomplished or not — using the useState Hook from React.
Firstly, import the useState Hook alongside React like this:
import React, { useState } from 'react';
Now, with the useState Hook imported, we can create our state like this:
const [doneState, setDone] = useState(false);
Basically, we created a state called doneState, which has an initial value of false. If, at some point in the future, we want to update the value of doneState and set it to true, we can always use setDone:
setDone(true);
The CheckBox comes with a prop called value, which enables us to control when the checkbox should be checked. In this case, we want to check our checkbox when the task has been done (when the value of doneState is true).
Since the value prop of our checkbox component is dependent on the value of doneState, we want to change the value of doneState to the opposite of the current value whenever the checkbox is clicked.
This can be done with the onValueChange prop that comes with the CheckBox component. We will create an event handler called onCheck for the onValueChange event of the checkbox:
const onCheck = (isChecked) => {
  setDone(isChecked);
};
Now, as I pointed out before, we want to style our ToDoItem component differently once it has been checked. Once it has been checked, the opacity of the ToDoItem will be reduced. Let us implement that:
return (
    <View style={styles.todoItem}>
      <CheckBox
        onValueChange={onCheck}
        value={doneState}
      />
      <Text style={[styles.todoText, {opacity: doneState ? 0.2 : 1}]}>
        A random To-Do item
      </Text>
    </View>
  );
};
Now that we have the basic parts of our ToDoItem component ready, let us create our App component, which will serve as the home screen of our app.
We need two pieces of state for our App component: todos, which contains all the to-do items, and presentTodo, which will be the current to-do item being added. We also need to add a View component to contain the list of to-do items; a TextInput component in which the user will type out a new to-do item; a button to add a to-do item; and another button to clear our database, thereby getting rid of all the to-do items.
With some styling, our App component should look like this:
const App = () => {
  const [todos, setTodos] = useState({});
  const [presentTodo, setPresentTodo] = useState('');

  function addNewTodo() {
    setPresentTodo('');
  }

  function clearTodos() {

  }

  return (
    <ScrollView
      style={styles.container}
      contentContainerStyle={styles.contentContainerStyle}>
      <View>
        {/* Empty view: will contain to-do items soon */}
      </View>

      <TextInput
        placeholder="New todo"
        value={presentTodo}
        style={styles.textInput}
        onChangeText={text => {
          setPresentTodo(text);
        }}
        onSubmitEditing={addNewTodo}
      />

      <View>
        <View style={{marginTop: 20}}>
          <Button
            title="Add new todo"
            onPress={addNewTodo}
            color="green"
            disabled={presentTodo == ''}
            />
        </View>

        <View style={{marginTop: 20}}>
          <Button
            title="Clear the todo list"
            onPress={clearTodos}
            color="red"
            style={{marginTop: 20}}
          />
        </View>
      </View>
    </ScrollView>
  );
}

const styles = StyleSheet.create({
  container: {
    flex: 1,
    paddingTop: 12
  },
  contentContainerStyle: {
    padding: 24
  },
  textInput: {
    borderWidth: 1,
    borderColor: '#afafaf',
    borderRadius: 5,
    paddingHorizontal: 10,
    marginVertical: 20,
    fontSize: 20,
  },
  todoItem: {
    flexDirection: 'row',
    marginVertical: 10,
    alignItems: 'center'
  },
  todoText: {
    paddingHorizontal: 5,
    fontSize: 16
  },
});
Now, we are ready to start working with some Firebase code to persist our task items in Firebase’s real-time database.
First, we need to import the database from the firebase-config.js file:
import { db } from './firebase-config.js';
Before we move on, we need to understand how data is structured in the real-time database that Firebase provides. The data is literally structured as a JSON tree.
According to the documentation:
“All Firebase Realtime Database data is stored as JSON objects. You can think of the database as a cloud-hosted JSON tree. Unlike a SQL database, there are no tables or records. When you add data to the JSON tree, it becomes a node in the existing JSON structure with an associated key.”
This makes working with the Realtime Database easy and familiar.
When our App component mounts, the first thing we want to do is get all the current to-do items and add them to our todos state object. To do so, we need to get a reference to a particular location on our database. The path to this location will be called todos. Once we have done that, we need to listen for changes to the contents of that path or location. This is very similar to listening for events in vanilla JavaScript. In this case, we will be listening for an event called value.
Again, according to the Firebase documentation:
“[This event allows us] to read a static snapshot of the contents at a given path, as they existed at the time of the event. This method is triggered once when the listener is attached and again every time the data, including children, changes.”
The event callback function is passed a snapshot that contains all the data at that location, including child data. We can now grab the data from the snapshot using the val() method. This data is usually in the form of a JavaScript object:
useEffect(() => {
  return onValue(ref(db, '/todos'), querySnapShot => {
    let data = querySnapShot.val() || {};
    let todoItems = {...data};
    setTodos(todoItems);
  });
}, []);
We used the OR (||) operator to assign an empty object to the data variable if we have no data in the path we are reading from. Note that here we are returning the return value of the onValue function to unsubscribe from the Firebase event handler when the React component unmouts — the useEffect hook’s return value is helpful for cleanups like this. Here we used the useEffect hook with an empty dependency array to register the event handler only once with the first render of the App component.
Make sure to import the onValue function from the Firebase database module. You can import any supported Firebase modular API function as follows:
import {
  ref,
  onValue,
  push,
  update,
  remove
} from 'firebase/database';
We also need to add some code to our addNewTodo() function. We want each to-do item to have a name or title and a value to indicate whether or not the relevant to-do task has been accomplished.
Therefore, we will use an object to represent each to-do item in our database. To add data to a particular location, we need to reference the path to the location to which we want to add the data and use the push() function:
function addNewTodo() {
  push(ref(db, '/todos'), {
    done: false,
    title: presentTodo,
  });
  setPresentTodo('');
}
To clear the data in our todos path, we just need to get a reference to that location and use the remove() function:
function clearTodos() {
  remove(ref(db, '/todos'));
}
Now, try adding a to-do item using the TextInput component. You should notice a change to your database in your database dashboard or console:
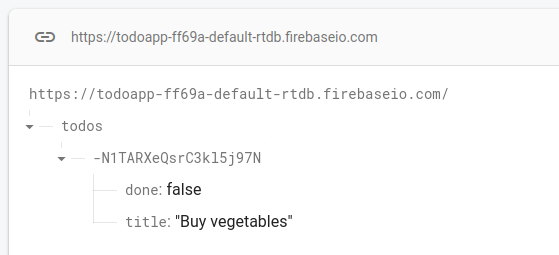
If we logged the list of to-do items to the console, we should have something like this:
{
  "-N1TARXeQsrC3kl5j97N":{
    "done":false,
    "title":"Buy vegetables"
  }
}
If you observe this result, you will notice that the list of to-do items is an object that has key names equal to a unique ID assigned to all to-do items by Firebase. The value of each to-do item is an object, which has a similar format to what we specified in our addNewTodo() function.
With this information in hand, we can now extract the keys from our todos state object and pass in the necessary props to each ToDoItem component.
Let’s extract the keys and assign them to a variable called todosKeys:
render() {
    const todosKeys = Object.keys(todos);
    return (
      <ScrollView ...>
        ...
      </ScrollView>
    );
}
Let’s add this to the empty View component in the App component:
<View>
  {todosKeys.length > 0 ? (
    todosKeys.map(key => (
      <ToDoItem
        key={key}
        id={key}
        todoItem={todos[key]}
      />
    ))
  ) : (
    <Text>No todo item</Text>
  )}
</View>
Now, we need to make some changes to our ToDoItem component. Since our to-do item components now have access to their appropriate names and state, we can get rid of the placeholder values. Our ToDoItem component should look like this now:
const ToDoItem = ({todoItem: {title, done}, id}) => {
  const [doneState, setDone] = useState(done);

  const onCheck = (isChecked) => {
    setDone(isChecked);
  };

  return (
    <View style={styles.todoItem}>
      <CheckBox
        onValueChange={onCheck}
        value={doneState}
      />
      <Text style={[styles.todoText, {opacity: doneState ? 0.2 : 1}]}>
        {title}
      </Text>
    </View>
  );
};
Right now, our simple to-do app is mostly done. There is still a slight problem, however: if you check a to-do item as done and you reload the app, that to-do item will be back to its original unchecked state. What’s the purpose of having a database we can’t update?
We will, therefore, need to update the value of done on the database whenever the checkbox has been checked. We can do this with the update() function. To update a particular field, you simply have to pass in an object containing the updated fields:
const onCheck = (isChecked) => {
  setDone(isChecked);
  update(ref(db, '/todos'), {
    [id]: {
      title,
      done: !doneState,
    },
  });
};
Now whenever you check a particular to-do item as done, the to-do item’s value of done should be updated in the database. Here is the complete App.js source file — compare with the file you’ve created or copy-paste it to get the app working:
import React, { useState, useEffect } from 'react';
import {
  StyleSheet,
  View,
  Text,
  Button,
  ScrollView,
  TextInput
} from 'react-native';
import CheckBox from '@react-native-community/checkbox';
import {
  ref,
  onValue,
  push,
  update,
  remove
} from 'firebase/database';
import { db } from './firebase-config.js';

const App = () => {
  const [todos, setTodos] = useState({});
  const [presentTodo, setPresentTodo] = useState('');
  const todosKeys = Object.keys(todos);

  useEffect(() => {
    return onValue(ref(db, '/todos'), querySnapShot => {
      let data = querySnapShot.val() || {};
      let todoItems = {...data};
      setTodos(todoItems);
    });
  }, []);

  function addNewTodo() {
    push(ref(db, '/todos'), {
      done: false,
      title: presentTodo,
    });
    setPresentTodo('');
  }

  function clearTodos() {
    remove(ref(db, '/todos'));
  }

  return (
    <ScrollView
      style={styles.container}
      contentContainerStyle={styles.contentContainerStyle}>
      <View>
        {todosKeys.length > 0 ? (
          todosKeys.map(key => (
            <ToDoItem
              key={key}
              id={key}
              todoItem={todos[key]}
            />
          ))
        ) : (
          <Text>No todo item</Text>
        )}
      </View>

      <TextInput
        placeholder="New todo"
        value={presentTodo}
        style={styles.textInput}
        onChangeText={text => {
          setPresentTodo(text);
        }}
        onSubmitEditing={addNewTodo}
      />

      <View>
        <View style={{marginTop: 20}}>
          <Button
            title="Add new todo"
            onPress={addNewTodo}
            color="green"
            disabled={presentTodo == ''}
            />
        </View>

        <View style={{marginTop: 20}}>
          <Button
            title="Clear the todo list"
            onPress={clearTodos}
            color="red"
            style={{marginTop: 20}}
          />
        </View>
      </View>
    </ScrollView>
  );
}

const ToDoItem = ({todoItem: {title, done}, id}) => {
  const [doneState, setDone] = useState(done);

  const onCheck = (isChecked) => {
    setDone(isChecked);
    update(ref(db, '/todos'), {
      [id]: {
        title,
        done: !doneState,
      },
    });
  };
  return (
    <View style={styles.todoItem}>
      <CheckBox
        onValueChange={onCheck}
        value={doneState}
      />
      <Text style={[styles.todoText, {opacity: doneState ? 0.2 : 1}]}>
        {title}
      </Text>
    </View>
  );
};

const styles = StyleSheet.create({
  container: {
    flex: 1,
    paddingTop: 12
  },
  contentContainerStyle: {
    padding: 24
  },
  textInput: {
    borderWidth: 1,
    borderColor: '#afafaf',
    borderRadius: 5,
    paddingHorizontal: 10,
    marginVertical: 20,
    fontSize: 20,
  },
  todoItem: {
    flexDirection: 'row',
    marginVertical: 10,
    alignItems: 'center'
  },
  todoText: {
    paddingHorizontal: 5,
    fontSize: 16
  },
});

export default App;
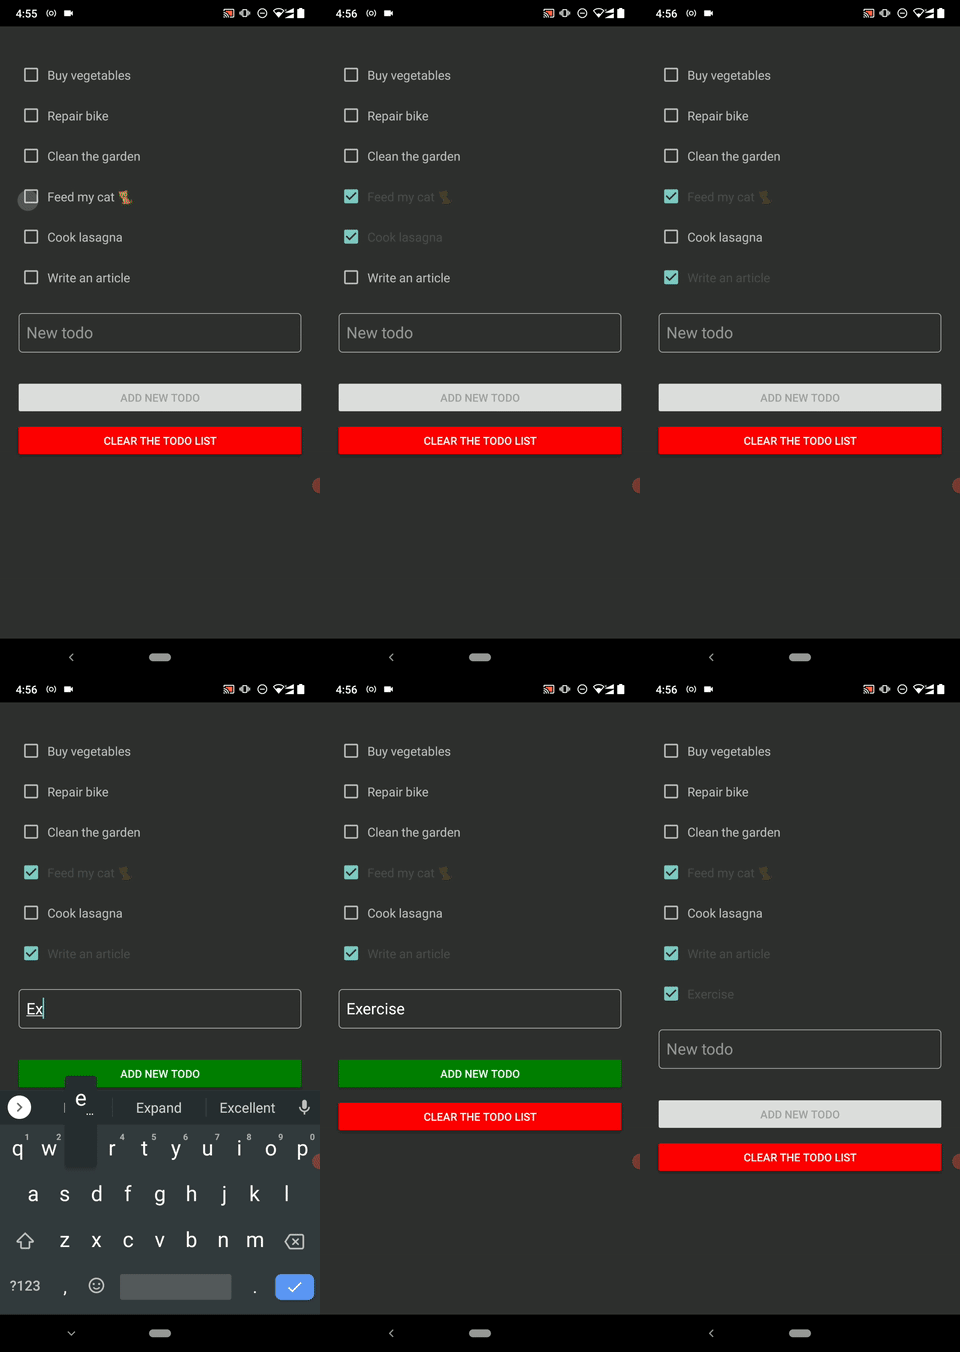
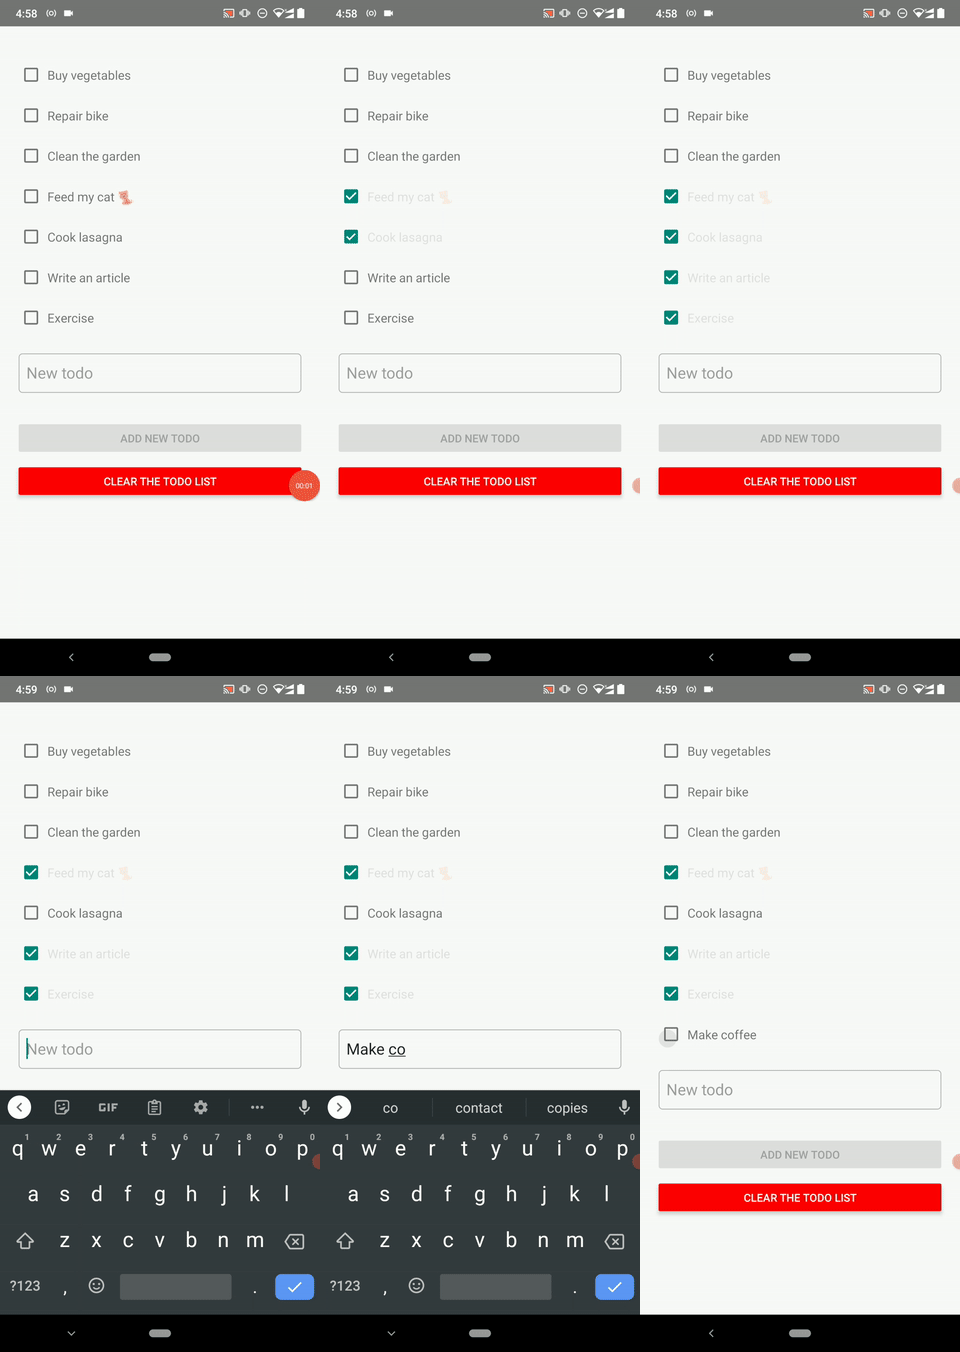
You will see the application as follows once you run your React Native project.
Android dark UI mode:
Android light UI mode:
Full source code of this app is available on GitHub.
That’s it! We have created our to-do Android app with a backend powered by Firebase!
Normally, you would add some authentication to this app so that users will be able to log in on any supported device in the world and still have access to their data. This can also be done with Firebase. You can check out my tutorial covering that topic here.
Also, try to add new features to the app such as editing existing to-do items, ordering to-dos, shuffling to-dos, and removing selected to-dos or removing only accomplished to-dos at once. You can browse details about all supported Firebase realtime database API functions from here.

LogRocket's Galileo AI watches sessions for you and and surfaces the technical and usability issues holding back your React Native apps.
LogRocket also helps you increase conversion rates and product usage by showing you exactly how users are interacting with your app. LogRocket's product analytics features surface the reasons why users don't complete a particular flow or don't adopt a new feature.
Start proactively monitoring your React Native apps — try LogRocket for free.

React Server Components and the Next.js App Router enable streaming and smaller client bundles, but only when used correctly. This article explores six common mistakes that block streaming, bloat hydration, and create stale UI in production.

Gil Fink (SparXis CEO) joins PodRocket to break down today’s most common web rendering patterns: SSR, CSR, static rednering, and islands/resumability.

@container scroll-state: Replace JS scroll listeners nowCSS @container scroll-state lets you build sticky headers, snapping carousels, and scroll indicators without JavaScript. Here’s how to replace scroll listeners with clean, declarative state queries.

Explore 10 Web APIs that replace common JavaScript libraries and reduce npm dependencies, bundle size, and performance overhead.
Would you be interested in joining LogRocket's developer community?
Join LogRocket’s Content Advisory Board. You’ll help inform the type of content we create and get access to exclusive meetups, social accreditation, and swag.
Sign up now
9 Replies to "Getting data for React Native apps with Firebase"
In a normal application, there is a backend which receives a token from Frontend(ReactNative) in this case, verifies the token and then writes into the database (Firebase Realtime), but in this there is no such verification happening ? How will this thing be taken care of ?
Firebase allows you to set security rules for your realtime database to prevent unverified users from writing to the database. This is often used in conjunction with Firebase’s OAuth service. I hope I answered your question.
If I wanted to pass a constant to MItem in addition to the list of Todo items, how would I do that?
Hey Lauren,
Can you make the question clearer?
Can i get the whole source code of this application?.
https://github.com/NodeJSs/React-Native-Firebase-To-Do
when i copy pasted the code in App.js and running it..It is showing error Android project not found. Are you sure this is a React Native project? If your Android files are located in a non-standard location (e.g. not inside ‘android’ folder), consider setting `project.android.sourceDir` option to point to a new location.
Hello, thank you very much for your tutorial! However, I am a little confused because in this documentation (https://rnfirebase.io/database/usage) I am not told to use firebase-config.js. Instead it uses @react-native-firebase/app. What is the difference between the two methods, and which is correct?
Should I still use UseEffect for OnValue requests to the database if I also want to re-render if other people make changes to the real-time database? (Example I want to display all to do list items created by anyone on the database in real time)