Have you ever viewed the page source for a web page while loading components asynchronously? If you have, there’s a possibility you may have noticed the actual content is not being rendered.

This is because the components are being loaded asynchronously and on the client side, which can be bad for SEO because crawlers will be unable to get the actual content when indexing the site.
This article will provide a method with which you can get the best of both worlds by using loadable-components to asynchronously load components.
We’ll be working with an existing Gatsby project in this article. The project already uses the loadable component, and we’ll see how to implement it better for SEO purposes.
We have a Gatsby site that uses dynamic data from Contentful, a content management system to render information and modules. The Gatsby site is a blog that shows all the posts from Contentful. The posts are written in a rich text editor, and we use a rich text renderer in the codebase to parse rich text to React components.
However, we’d also like to be able to display other things apart from blog posts on the site. To that end, we created a new content type in Contentful: custom blocks . A custom block, as the name suggests, would allow us to render custom blocks (content that is not necessarily a blog post) on the website.
This is where the challenge lies. As opposed to blog posts, which are always rendered in article format, custom blocks may need to be rendered by different and multiple React components depending on design. For example, there’s a React component for a pricing information custom block on Contentful, a React component for an FAQ custom block on Contentful, etc.
So, to implement that, there’s a file below that uses the custom block’s name to render its own component — i.e., if the custom block’s name matches any of the keys in CUSTOM_BLOCKS, then the corresponding component will be rendered.
// blocks.js
import TestPage from './TestPage'
import PricingInfo from './PricingInfo'
import FAQInfo from './FAQInfo'

const CUSTOM_BLOCKS = {
  TestPage: TestPage,
  PricingInfo: PricingInfo,
  FAQInfo: FAQInfo,
}
export default CUSTOM_BLOCKS
The custom blocks can then be used in a code snippet like the one below, where the CustomBlockComponent is only returned if there’s a corresponding match with customBlock.name.
// CustomBlock.js
import CUSTOM_BLOCKS from './blocks'

const CustomBlock = ({ customBlock }) => {
  const CustomBlockComponent = CUSTOM_BLOCKS[customBlock.name]
  if (!CustomBlockComponent) {
    return null
  }
  return <CustomBlockComponent customBlock={customBlock} />
}

export default CustomBlock
With this current implementation, we’re loading all the custom blocks and their components all at once, even though we don’t need them. Right now, it’s just two custom blocks, but imagine if it were a whole lot more than that.
A case like this is where loadable/component comes in. It allows us to only load the components when they are needed, i.e., asynchronously. Let’s add loadable/component to the first code snippet shared above.
// blocks.js
import loadable from '@loadable/component'

const CUSTOM_BLOCKS = {
  TestPage: loadable(() => import('./TestPage')),
  PricingInfo: loadable(() => import('./PricingInfo')),
  FAQInfo: loadable(() => import('./FAQInfo')),
}
export default CUSTOM_BLOCKS
All the custom blocks are being loaded asynchronously, so they’ll only be loaded when needed, which in turn results in the code being optimized for performance.
This is the reason why we have chosen to use loadable-components in our project, and it seems to solve the problem we initially had. However, importing the components with loadable means the content of the custom block will not be pre-rendered into the static HTML.
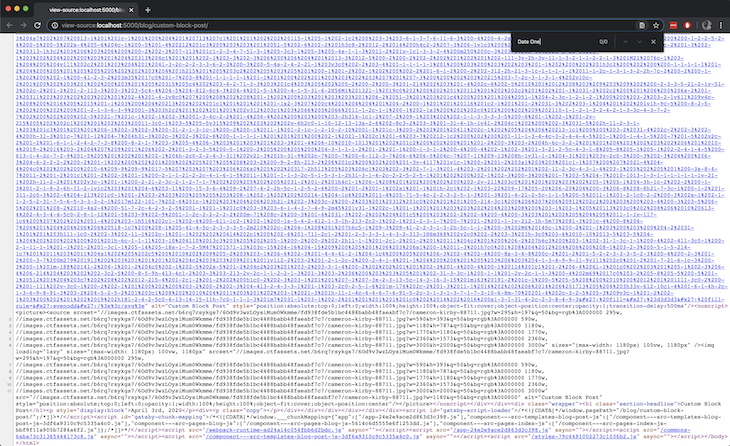
As an example, in the page source below, I’m expecting the Date One text to be in the source, but it’s not. The Date One text is inside one of the custom block files above, and it needs some JavaScript to be evaluated, hence, it’s not showing up.

This is what we’ll try to solve in this article: how to load the components asynchronously and also make sure that content gets rendered in the static HTML.
We can solve this by making some additional configurations to how loadable/component is set up. We already have loadable/component installed in the codebase, but we need to make some configurations. First, install the dependencies below.
yarn add -D @loadable/babel-plugin @loadable/webpack-plugin babel-preset-gatsby
The next thing is to add a custom Babel plugin to the project. To do that, we’ll need to modify the .babelrc.js file. In the plugins array, add the line below:
// .babelrc.js
{
  "plugins": [
    ...
    "@loadable/babel-plugin",
    ...
  ]
}
Next, we’ll add a custom webpack plugin to the gatsby-node.js file.
// gatsby-node.js
const LoadablePlugin = require('@loadable/webpack-plugin')

exports.onCreateWebpackConfig = ({ stage, actions }) => {
  actions.setWebpackConfig({
    plugins: [new LoadablePlugin()],
  })
}
exports.onCreateBabelConfig = ({ actions }) => {
  actions.setBabelPlugin({
    name: `@loadable/babel-plugin`,
  })
}
The final step in all of this is making sure that the content of the custom block is pre-rendered with the static HTML. One way to do that is by using the fallback prop of loadable/components.
The fallback prop determines what to show while the component is being loaded asynchronously. This is what will be used to make sure asynchronous components get rendered to the static HTML. How?
So, for asynchronous components, the following happens:
We can then take advantage of step two to get and save the current static HTML and then use that as a fallback. That’s exactly what’s being done in the code snippet below. If you recall above, the CustomBlock.js file simply checks whether a custom block component exists and then returns it.
Now it’s doing a whole more than that:
id to CustomBlock__, plus whatever the current custom block name isgetRenderedContent() functiongetRenderedContent function checks whether an element with an ID exists in the HTML and, if yes, returns it
// CustomBlock.js
import * as React from 'react'

import CUSTOM_BLOCKS from './blocks'</p>

<p>const getRenderedContent = customBlockName => {
  if (typeof window === 'undefined') return ''
  const element = window.document.querySelector(
    <code>#CustomBlock__${customBlockName}</code>
  )
  return element ? element.innerHTML : ''
}
const CustomBlock = ({ customBlock }) => {
  const CustomBlockComponent = CUSTOM_BLOCKS[customBlock.name]
  if (!CustomBlockComponent) {
    return null
  }
  return (
    <section id={<code>CustomBlock__${customBlock.name}</code>}>
      <CustomBlockComponent
        customBlock={customBlock}
        fallback={
          <div
            dangerouslySetInnerHTML={{
              __html: getRenderedContent(customBlock.name),
            }}
          />
        }
      />
    </section>
  )
}
export default CustomBlock
It’s a bit of a hack, but then we get to see the content of the asynchronous components in the page source, and that’s good for SEO.
Now we can build the site and run it in production with the commands below:
yarn build && serve public
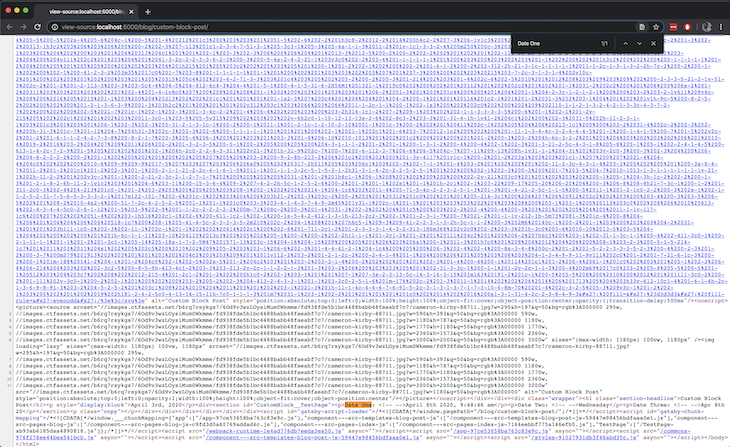
The dates are now coming up in the page source, which means the custom block elements are now being pre-rendered which in turn means crawlers can successfully crawl this page.

To simulate what I’ve explained in this article, there’s a GitHub repository that contains the codebase for the Gatsby project above. It also contains an exported Contentful space so you can set that up (by importing into a new space) and connect to the Gatsby project.
Install LogRocket via npm or script tag. LogRocket.init() must be called client-side, not
server-side
$ npm i --save logrocket

// Code:

import LogRocket from 'logrocket';
LogRocket.init('app/id');
// Add to your HTML:

<script src="https://cdn.lr-ingest.com/LogRocket.min.js"></script>
<script>window.LogRocket && window.LogRocket.init('app/id');</script>
Would you be interested in joining LogRocket's developer community?
Join LogRocket’s Content Advisory Board. You’ll help inform the type of content we create and get access to exclusive meetups, social accreditation, and swag.
Sign up now
Learn how OpenAPI can automate API client generation to save time, reduce bugs, and streamline how your frontend app talks to backend APIs.

Discover how the Interface Segregation Principle (ISP) keeps your code lean, modular, and maintainable using real-world analogies and practical examples.

<selectedcontent> element improves dropdowns

Learn how to implement an advanced caching layer in a Node.js app using Valkey, a high-performance, Redis-compatible in-memory datastore.