Editor’s note: This post was updated in October 2021 to include new information and updated examples.

Having accurate information about your users’ location is a great way to enhance the user experience. For example, you could use this data to show users what is around them, offer exclusive deals for products and services in their area, and much more. We’ll cover the following topics:
useState Hook<Polyline /> in React Native MapsFortunately, if you have a React application, implementing maps is a breeze using the react-native-maps library.
React Native Maps is a component system for maps that ships with platform-native code that needs to be compiled together with React Native. In this guide, we’ll demonstrate how to integrate Google Maps into your React Native application and introduce you to fundamental components such as <MapView /> and <Marker>.
Let’s get started!
Before rendering our MapView component, we first need to get an API key to incorporate Google Maps functionality in our app. To do so, procure your API secrets using these steps.
Next, under android/app/src/main/AndroidManifest.xml, add this block of code:
<application>
   <!-- You will only need to add this meta-data tag, but make sure it's a child of application -->
   <meta-data
     android:name="com.google.android.geo.API_KEY"
     android:value="YOUR_API_KEY"/> <!-- Your key goes here. -->

   <!-- You will also only need to add this uses-library tag -->
   <uses-library android:name="org.apache.http.legacy" android:required="false"/>
</application>
This will connect our SDK key to the React Native project.
Next, run the following command to install react-native-maps in your project.
yarn add react-native-maps -E
npm install react-native-maps
#Expo requires a different version of this package.
# so if you are using Expo, run this instead:
expo install react-native-maps
Remove all the default code from the App.js file and import the <MapView /> component from react-native-maps. Inside the component, render the <MapView /> component.
import React from "react";
import { StyleSheet, Text, View } from "react-native";
import MapView from "react-native-maps";
export default function App() {
  return (
    <View style={styles.container}>
    {/*Render our MapView*/}
      <MapView
        style={styles.map}
        //specify our coordinates.
        initialRegion={{
          latitude: 37.78825,
          longitude: -122.4324,
          latitudeDelta: 0.0922,
          longitudeDelta: 0.0421,
        }}
      />
    </View>
  );
}
//create our styling code:
const styles = StyleSheet.create({
  container: {
    ...StyleSheet.absoluteFillObject,
    flex: 1, //the container will fill the whole screen.
    justifyContent: "flex-end",
    alignItems: "center",
  },
  map: {
    ...StyleSheet.absoluteFillObject,
  },
});
The initialRegion prop shows the region that is to be displayed on the map when the component mounts. The initialRegion value cannot be changed after it has been initialized.
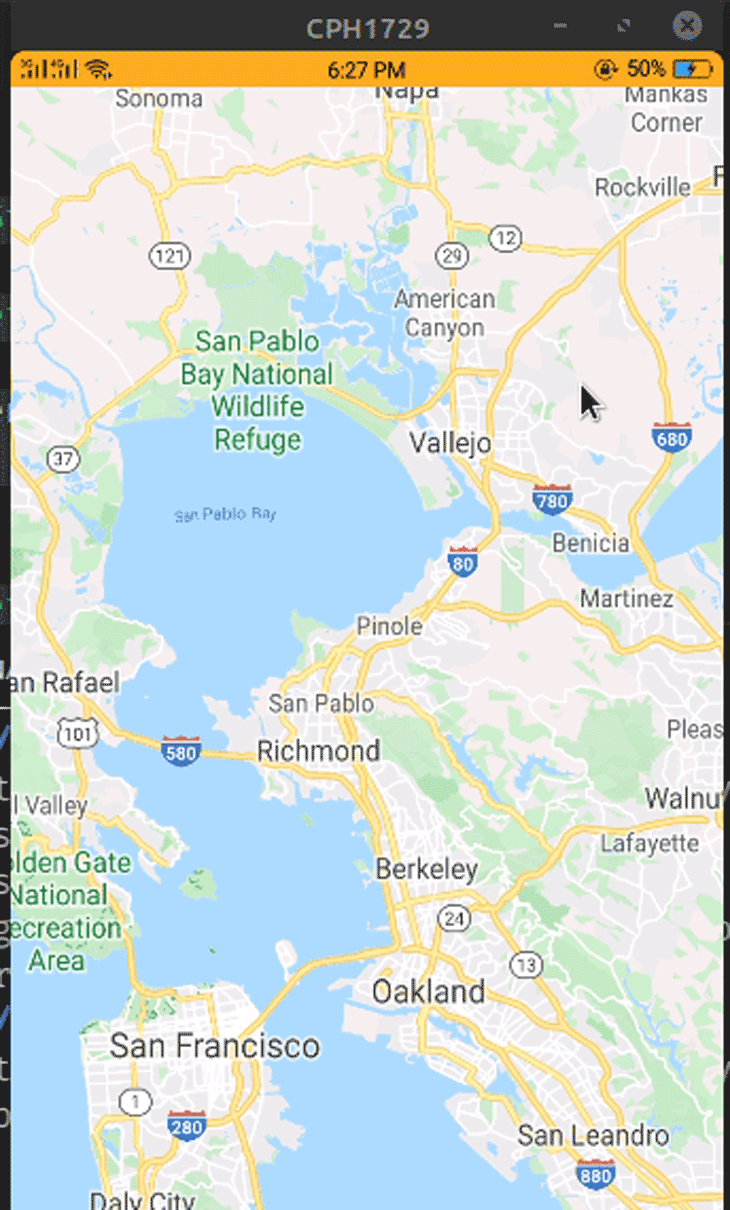
Don’t forget to add the style property to specify the dimensions; otherwise, you’ll end up with a white screen. The value { flex: 1 } will ensure that the <MapView /> takes up the entire screen.
You’ll need to pass an object with the latitude, longitude, and delta values of a region to the initialRegion prop. The latitudeDelta and longitudeDelta properties specify how much the area on the map must be zoomed. To change the region, use the region prop.
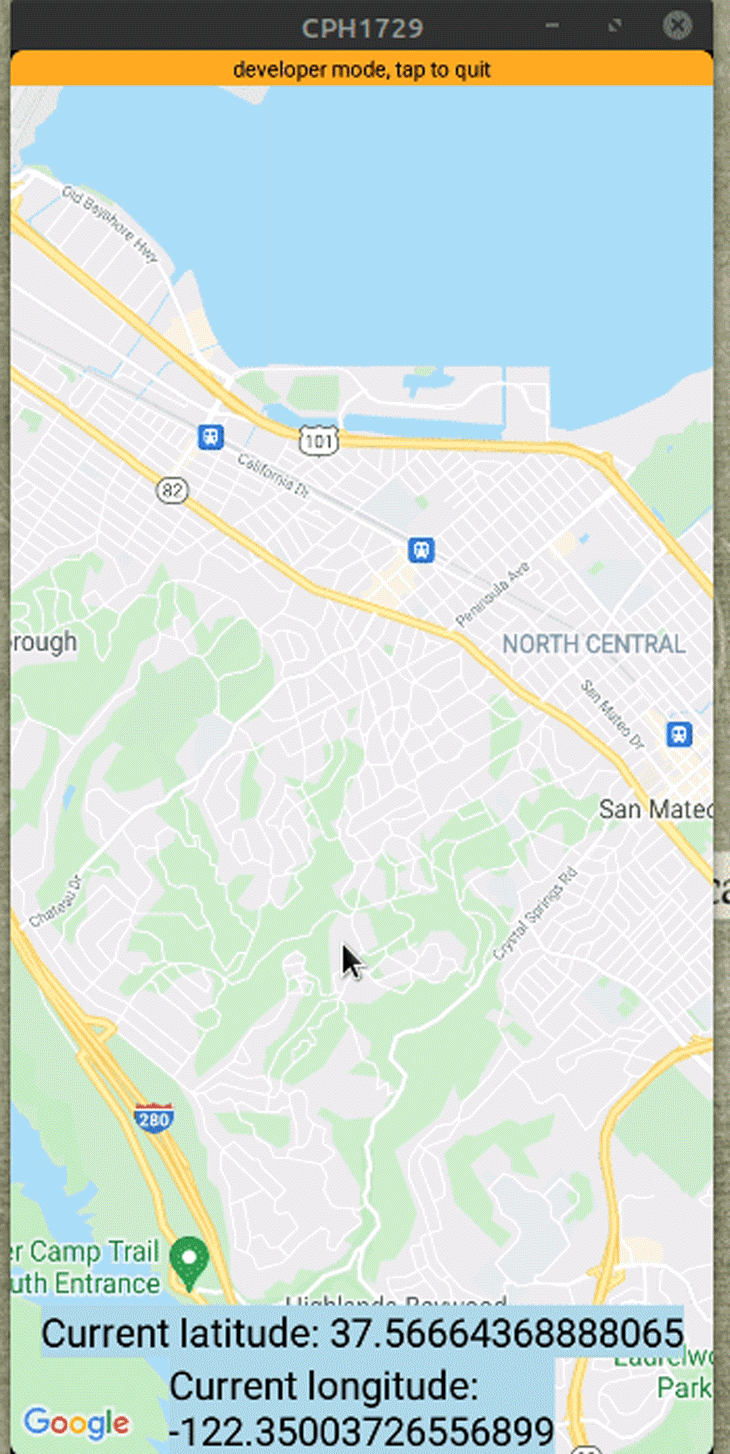
useState HookTo change the region with the useState Hook, use the onRegionChangeComplete prop to set the new region into the state. The onRegionChangeComplete is a callback prop that runs when the user has stopped panning around the map.
//extra code removed for brevity.
//create a Hook to store our region data.
const [region, setRegion] = useState({
  latitude: 51.5079145,
  longitude: -0.0899163,
  latitudeDelta: 0.01,
  longitudeDelta: 0.01,
});
return (
  <View style={styles.container}>
    <MapView
      style={styles.map}
      initialRegion={{
        latitude: 37.78825,
        longitude: -122.4324,
        latitudeDelta: 0.0922,
        longitudeDelta: 0.0421,
      }}
      //onRegionChangeComplete runs when the user stops dragging MapView
      onRegionChangeComplete={(region) => setRegion(region)}
    />
    {/*Display user's current region:*/}
    <Text style={styles.text}>Current latitude: {region.latitude}</Text>
    <Text style={styles.text}>Current longitude: {region.longitude}</Text>
  </View>
);
Start by importing Marker from react-native-maps.
import { Marker } from "react-native-maps";
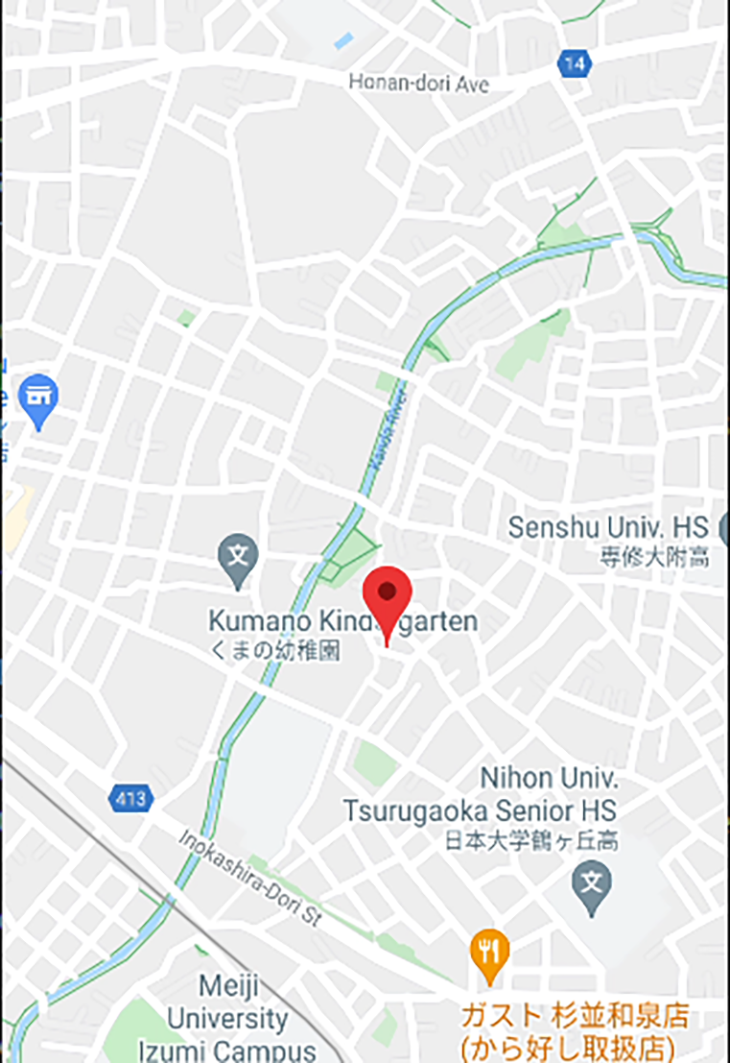
Next, render the <Marker /> component as a child of <MapView />. Pass the coordinate for the marker in the coordinate prop.
import { Marker } from "react-native-maps";
const tokyoRegion = {
  latitude: 35.6762,
  longitude: 139.6503,
  latitudeDelta: 0.01,
  longitudeDelta: 0.01,
};
return (
  <View style={styles.container}>
    <MapView
      style={styles.map}
      initialRegion={tokyoRegion} //your region data goes here.
    >
      {/*Make sure the Marker component is a child of MapView. Otherwise it won't render*/}
      <Marker coordinate={tokyoRegion} />
    </MapView>
  </View>
);
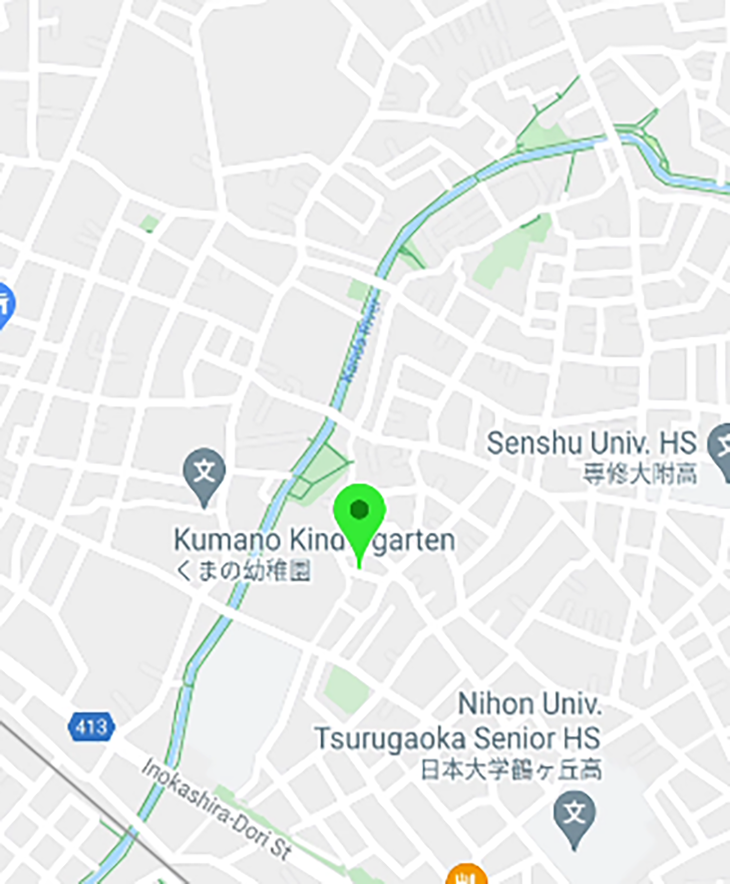
The marker should now be visible, as shown below.
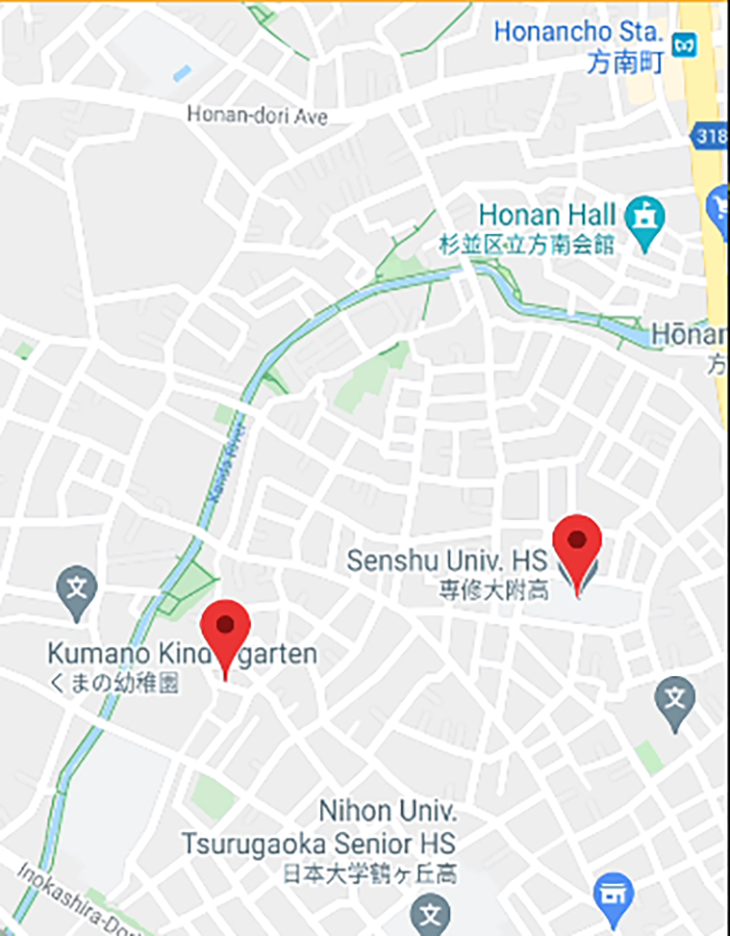
You can add n number of markers to the map and pass it as a direct child to the <MapView /> component.
Here is an example of multiple Marker components in the same MapView:
<MapView
  ref={mapRef}
  style={styles.map}
  initialRegion={tokyoRegion}
  onRegionChangeComplete={(region) => setRegion(region)}
>
  <Marker coordinate={tokyoRegion} />
  {/*marker to a nearby location */}
  <Marker
    coordinate={{
      latitude: 35.67714827145542,
      longitude: 139.6551462687416,
    }}
  />
</MapView>;
To change the color of the marker, use the pinColor prop.
<Marker
  coordinate={tokyoRegion}
  pinColor="green"
/>
Here, we are changing the color of the pin to green :
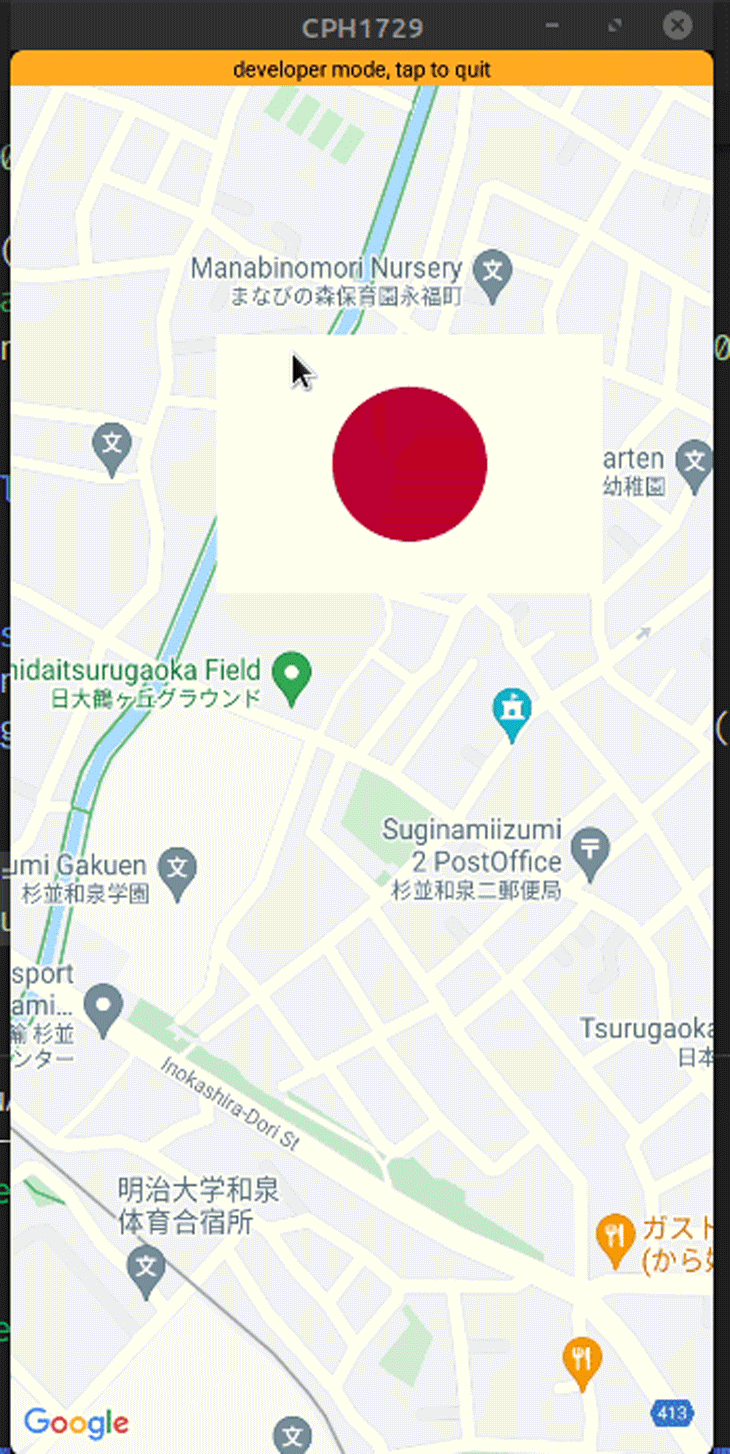
You can also add a custom marker image by passing the image prop to the <Marker /> component.
<Marker
  coordinate={{ latitude: 52.5200066, longitude: 13.404954 }}
  image={require("./japaneseFlag.png")} //uses relative file path.
/>
react-native-maps also allows developers use custom marker views. This might be helpful in situations where you want to indicate a location using a symbol. An example might be to display a Car component to show a position of a car dealer.
To do so, first start by writing some code to build a custom component, like so:
//create our custom marker component.
function CustomMarker() {
  return (
    <View style={styles.marker}>
      <Text style={styles.color}>Tokyo</Text>
    </View>
  );
}
//styles for our custom marker.
const styles = StyleSheet.create({
  marker: {
    paddingVertical: 10,
    paddingHorizontal: 30,
    backgroundColor: "#007bff",
    borderColor: "#eee",
    borderRadius: 5,
    elevation: 10,
  },
  text: {
  color: "#fff",
  },
});
Next, incorporate CustomMarker into your project.
 export default function App() {
  return (
    <View style={styles.container}>
      <MapView style={styles.map} initialRegion={tokyoRegion}>
        <Marker coordinate={tokyoRegion}>
          {/* CustomMarker has to be a child of Marker*/}
          <CustomMarker />
        </Marker>
      </MapView>
    </View>
  );
}

Generate the JSON object you’ll use to design the map from the Google style generator. Next, pass the generated style object to the customMapStyle prop of the <MapView /> component.
import React, { useState, useRef } from "react";
import { StyleSheet, Text, View, Button } from "react-native";
import MapView, { Marker } from "react-native-maps";

const mapStyle = []; //map styles go here!
export default function App() {
  return (
    <View style={styles.container}>
      <MapView
        style={styles.map}
        initialRegion={tokyoRegion}
        customMapStyle={mapStyle} //plug in our custom style into the customMapStyle prop.
      />
    </View>
  );
}
You can ignore the mapStyle variable — since we are generating the map style using the generator, you only need to paste the generated JSON object into your code and send it to the <MapView /> component.
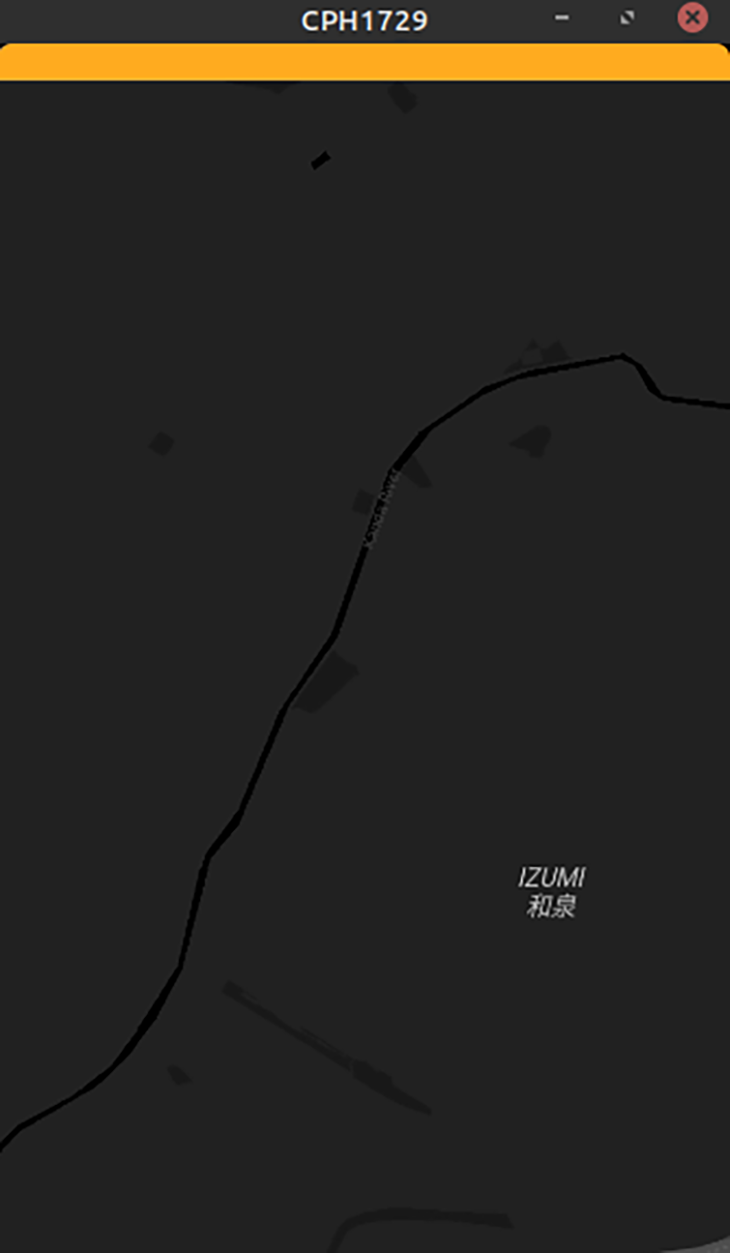
As you can see, the map style changed from the default light theme to a dark theme.
What if you want to animate to a particular coordinate?
First, create a reference to <MapView /> using the useRef() Hook:
import { useRef } from "react";

const mapRef = useRef(null);
<MapView
  ref={mapRef} //assign our ref to this MapView
  /*further code.. */
/>
This means that we can now execute methods to control our MapView component.
Next, add this block:
//extra code removed for brevity
//destination coordinates
const tokyoRegion = {
latitude: 35.6762,
longitude: 139.6503,
latitudeDelta: 0.01,
longitudeDelta: 0.01,
};
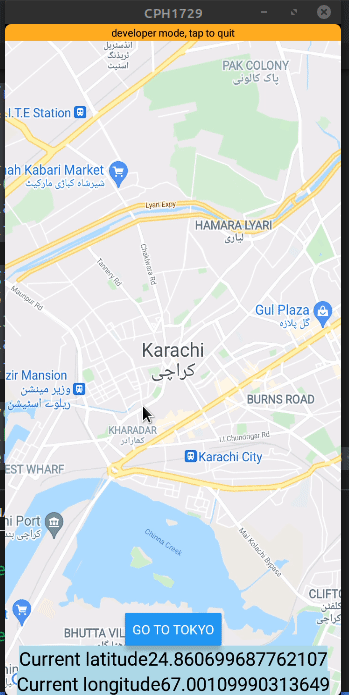
const goToTokyo = () => {
//Animate the user to new region. Complete this animation in 3 seconds
mapRef.current.animateToRegion(tokyoRegion, 3 * 1000);
};
return (
<View style={styles.container}>
<Button onPress={() => goToTokyo()} title="Go to Tokyo" />
</View>
);
Here is the breakdown of this snippet:
The useRef() Hook returns a mutable ref object whose current property has the value of the passed argument. If the value of the current property is undefined, that means the component is not yet mounted. Now, you can access any of the <MapView /> methods using mapRef.current.
The animateToRegion() method accepts any two parameters: the destination coordinates (in this case, tokyoRegion) and the animation duration in milliseconds.
In the end, the code in your App.js file should look like this:
export default function App() {
  const mapRef = useRef(null);
  const [region, setRegion] = useState({
    latitude: 51.5079145,
    longitude: -0.0899163,
    latitudeDelta: 0.01,
    longitudeDelta: 0.01,
  });
  const tokyoRegion = {
    latitude: 35.6762,
    longitude: 139.6503,
    latitudeDelta: 0.01,
    longitudeDelta: 0.01,
  };
  const goToTokyo = () => {
    //complete this animation in 3 seconds
    mapRef.current.animateToRegion(tokyoRegion, 3 * 1000);
  };
  return (
    <View style={styles.container}>
      <MapView
        ref={mapRef}
        style={styles.map}
        initialRegion={{
          latitude: 24.8607,
          longitude: 67.0011,
          latitudeDelta: 0.0922,
          longitudeDelta: 0.0421,
        }}
        onRegionChangeComplete={(region) => setRegion(region)}
      />
      <Button onPress={() => goToTokyo()} title="Go to Tokyo" />
      <Text style={styles.text}>Current latitude{region.latitude}</Text>
      <Text style={styles.text}>Current longitude{region.longitude}</Text>
    </View>
  );
}
const styles = StyleSheet.create({
  container: {
    ...StyleSheet.absoluteFillObject,
    flex: 1,
    justifyContent: "flex-end",
    alignItems: "center",
  },
  map: {
    ...StyleSheet.absoluteFillObject,
  },
  text: {
    fontSize: 20,
    backgroundColor: "lightblue",
  },
});
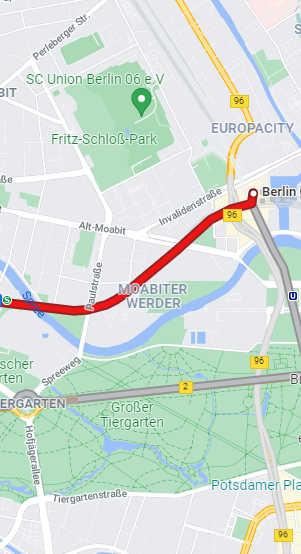
<polyline /> in React Native MapsYou can use the <Polyline /> component from the react-native-maps library to create lines between multiple coordinates. It accepts an array of coordinates in its coordinates prop. You can also specify additional props for styling purposes, such as strokeWidth, strokeColor, etc.
Let’s create a path between Tokyo and Chiba.
import { Polyline } from "react-native-maps";

const tokyoRegion = {
  latitude: 35.6762,
  longitude: 139.6503,
  latitudeDelta: 0.01,
  longitudeDelta: 0.01,
};
const chibaRegion = {
  latitude: 35.6074,
  longitude: 140.1065,
  latitudeDelta: 0.01,
  longitudeDelta: 0.01,
};

return (
  <View style={styles.container}>
    <MapView style={styles.map} initialRegion={tokyoRegion}>
      <Polyline
        coordinates={[tokyoRegion, chibaRegion]} //specify our coordinates
        strokeColor={"#000"}
        strokeWidth={3}
        lineDashPattern={[1]}
      />
    </MapView>
  </View>
);
Store the coordinates for the locations in their respective variables and pass them in an array to the coordinates prop of the <Polyline /> component.

If you look at the results, the line is drawn directly between these coordinates and does not take into account the actual geographical paths and roads. To do that, you’ll need to establish multiple coordinates between the source and destination locations by using the Google Maps Direction API, which returns all possible routes between two places.
To use the Direction API, you must first enable it for your project. Note that you need to have a valid billing address to use Google Cloud, otherwise the Directions feature won’t work.
First, create a helper function called getDirections. Here, write the following code:
import {decode} from "@mapbox/polyline"; //please install this package before running!
const getDirections = async (startLoc, destinationLoc) => {
  try {
    const KEY = "YOUR GOOGLE API KEY"; //put your API key here.
    //otherwise, you'll have an 'unauthorized' error.
    let resp = await fetch(
      `https://maps.googleapis.com/maps/api/directions/json?origin=${startLoc}&destination=${destinationLoc}&key=${KEY}`
    );
    let respJson = await resp.json();
    let points = decode(respJson.routes[0].overview_polyline.points);
    console.log(points);
    let coords = points.map((point, index) => {
      return {
        latitude: point[0],
        longitude: point[1]
      };
    });
    return coords;
  } catch (error) {
    return error;
  }
};
The decode() function will convert the encoded polyline points from the overview_polyline.points property into an array containing the latitude and longitude of all the coordinates.
As a result, this will allow the PolyLine component to read the location coordinates easily. Without it, react-native-maps throws an error.
import React, { useState, useEffect } from "react";
import { View, Text } from "react-native";
import MapView, { Polyline } from "react-native-maps";
import { decode } from "@mapbox/polyline";

const App = () => {
  const [coords, setCoords] = useState([]);

  useEffect(() => {
    //fetch the coordinates and then store its value into the coords Hook.
    getDirections("52.5200066,13.404954", "50.1109221,8.6821267")
      .then(coords => setCoords(coords))
      .catch(err => console.log("Something went wrong"));
  }, []);

  return (
    <>
      <MapView
        style={{ flex: 1 }}
        initialRegion={{
          latitude: 52.5200066,
          longitude: 13.404954,
          latitudeDelta: 0.1,
          longitudeDelta: 0.1
        }}
      >
        {/* finally, render the Polyline component with the coords data */}
        {coords.length > 0 && <Polyline coordinates={coords} />}
      </MapView>
    </>
  );
};

export default App;
You should now have a basic understanding of how to implement maps and build custom features on top of the react-native-maps library. You can put these lessons to use in your work to build myriad types of applications, from taxi services, to restaurant finders, to delivery apps, and much more. The react-native-maps library makes it simple to integrate maps and is an essential player in the React Native ecosystem.

LogRocket's Galileo AI watches sessions for you and and surfaces the technical and usability issues holding back your React Native apps.
LogRocket also helps you increase conversion rates and product usage by showing you exactly how users are interacting with your app. LogRocket's product analytics features surface the reasons why users don't complete a particular flow or don't adopt a new feature.
Start proactively monitoring your React Native apps — try LogRocket for free.
Would you be interested in joining LogRocket's developer community?
Join LogRocket’s Content Advisory Board. You’ll help inform the type of content we create and get access to exclusive meetups, social accreditation, and swag.
Sign up now
Which AI frontend dev tool reigns supreme in July 2025? Check out our power rankings and use our interactive comparison tool to find out.

Learn how OpenAPI can automate API client generation to save time, reduce bugs, and streamline how your frontend app talks to backend APIs.

Discover how the Interface Segregation Principle (ISP) keeps your code lean, modular, and maintainable using real-world analogies and practical examples.

<selectedcontent> element improves dropdowns


5 Replies to "Introduction to React Native Maps"
Sir when i am importing “MapView” from ‘react-native-maps”; it throwing error like { error: SyntaxError: /root/hello/App.js: Unexpected character ‘’ (4:8) }
Thank you very much for the tutorial
import MapView, {PROVIDER_GOOGLE, Marker} from ‘react-native-maps’; // remove PROVIDER_GOOGLE import if not using Google Maps
When I integrate maps, Maps doesn’t show properly, only blank screen with Google logo at the bottom displays
Have you specified the dimensions of MapView component?