Editor’s note: This article was last updated by Chimezie Innocent on 3 July 2024 to reflect the replacement of the useErrorHandler Hook with useErrorBoundary, which was introduced in the react-error-boundary v4 release, and to offer alternative strategies for handling async errors without react-error-boundary. To learn more about handling errors in React, visit our guide to error messages.

Errors are inevitable when building applications. They may stem from server issues, edge cases, or a plethora of other reasons. As such, many methods have been developed to prevent these errors from interfering with user and developer experience.
In React, one such method is the use of error boundaries. In this article, we’ll examine React error handling using react-error-boundary. By the end of this article, you should have a better understanding of how to implement error boundaries in your React applications, and how to handle both synchronous and asynchronous errors effectively.
React error boundaries are a crucial aspect of error handling in React applications. They are React components that catch JavaScript errors anywhere in their child component tree, log those errors, and display a fallback UI instead of the component tree that crashed. They’re like a JavaScript catch {} block but for components.
Before the introduction of error boundaries, errors inside components were used to propagate and eventually lead to white screens or broken UIs, affecting the overall UX. But, with error boundaries, these unhandled errors can be contained and managed effectively.
In terms of where to place these error boundaries, they can be set up around the entire app or individual components for more granular control. It’s important to note that error boundaries catch errors during rendering, in lifecycle methods, and in constructors of the whole tree below them. However, error boundaries do not catch errors for:
try/catch)setTimeout or requestAnimationFrame callbacks)Error boundaries were introduced in React v16, and to use them, you need to define a class component with either or both of the following lifecycle methods: getDerivedStateFromError() or componentDidCatch():
getDerivedStateFromError(): This lifecycle method renders a fallback UI after an error is thrown. It is called during the render phase, so side effects are not permittedcomponentDidCatch(): This method is used to log error information. It is called during the commit phase, so side effects are permittedLet’s consider a simple example of a class component that implements both the getDerivedStateFromError() and componentDidCatch() lifecycle methods taken from the React docs:
class ErrorBoundary extends React.Component {
  constructor(props) {
    super(props);
    this.state = { hasError: false };
  }

  static getDerivedStateFromError(error) {
    // Update state so the next render will show the fallback UI.
    return { hasError: true };
  }

  componentDidCatch(error, errorInfo) {
    // You can also log the error to an error reporting service
    console.log(error, errorInfo);
  }

  render() {
    if (this.state.hasError) {
      // You can render any custom fallback UI
      return <h1>Something went wrong.</h1>;
    }

    return this.props.children;
  }
}

// Usage in a component
class App extends React.Component {
  render() {
    return (
      <ErrorBoundary>
        <MyComponent />
      </ErrorBoundary>
    );
  }
}
In this example, ErrorBoundary is a React component that catches JavaScript errors in its child component tree, logs those errors, and then renders a fallback UI. If an error is thrown within MyComponent, it will be caught by the ErrorBoundary, logged to the console, and then the message "Something went wrong" will be rendered instead of the component tree that threw the error.
While class components and their lifecycle methods can help us implement error boundaries, react-error-boundary is a library that takes this functionality to the next level, making the process more straightforward and user-friendly. It’s a small library that provides a flexible way to handle JavaScript errors in React components.
react-error-boundary uses a more modern approach with React Hooks and functional components, which align better with the current trends in React development. The library uses a simple component called ErrorBoundary that you can use to wrap around potentially error-prone code.
ErrorBoundary component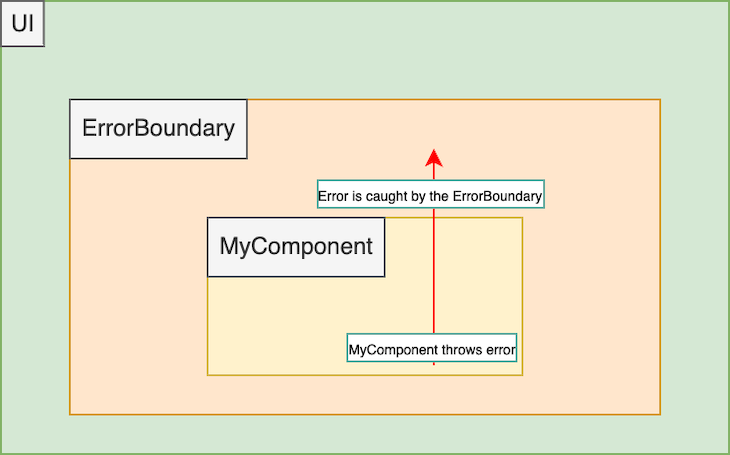
The ErrorBoundary component has a prop called fallbackRender (or fallbackUI) that accepts a function or a React element to display when an error is caught. It also provides a resetKeys prop that can be used to reset the state of your component when certain props change.
The beauty of react-error-boundary is that it eliminates the need to manually write class components and handle the state. It does all the heavy lifting behind the scenes, allowing developers to focus on building their applications.
Let’s take a look at an example of how we might use react-error-boundary in a component:
import { ErrorBoundary } from 'react-error-boundary'

function MyFallbackComponent({ error, resetErrorBoundary }) {
  return (
    <div role="alert">
      <p>Something went wrong:</p>
      <pre>{error.message}</pre>
      <button onClick={resetErrorBoundary}>Try again</button>
    </div>
  )
}

function MyComponent() {
  // Some component logic that may throw JS errors
}

function App() {
  return (
    <ErrorBoundary
      FallbackComponent={MyFallbackComponent}
      onReset={() => {
        // reset the state of your app here
      }}
      resetKeys={['someKey']}
    >
      <MyComponent />
    </ErrorBoundary>
  )
}
In this example, MyFallbackComponent is rendered whenever the ErrorBoundary catches an error. It displays the error message and provides a button to reset the error state and try rendering the component again. The onReset prop is used to clean up any side effects that happened before the error was thrown, and the resetKeys prop is used to control when the component state is reset.
The ErrorBoundary also has an onError prop, which is a function that gets called whenever an error is caught. This prop can be used to log errors to an error reporting service. From this place, we might log such errors to whatever error logging service we use. Here’s what that looks like:
...

// Error logging function
function logErrorToService(error, info) {
  // Use your preferred error logging service
  console.error("Caught an error:", error, info);
}

// App component
function App() {
  return (
    <ErrorBoundary FallbackComponent={ErrorFallback} onError={logErrorToService}>
      <MyComponent />
    </ErrorBoundary>
  );
}
One of the most powerful features of react-error-boundary is the ability to reset the error boundary state, which means clearing the error and attempting to render the component tree again. This can be beneficial when an error may be transient, such as a network error that occurs due to a temporary disconnection.
The error boundary can be reset using the resetErrorBoundary function provided to the fallback component. For example, this function can be called in response to a button click, allowing users to manually retry a failed operation.
ErrorBoundary also accepts an onReset prop, a function that gets called right before the error state is reset. This function is useful for performing any cleanup or state reset in your app that should happen before re-rendering after an error.
Lastly, the resetKeys prop is an array of values that, when changed, will trigger a reset of the error boundary. This can be useful when you know that changing certain props or state values should resolve the error. Here’s an example of how these props can be used:
import { ErrorBoundary } from 'react-error-boundary'

function ErrorFallback({ error, resetErrorBoundary }) {
  return (
    <div role="alert">
      <p>Something went wrong:</p>
      <pre>{error.message}</pre>
      <button onClick={resetErrorBoundary}>Try again</button>
    </div>
  )
}

function MyComponent({ someKey }) {
  // Some component logic that may throw JS errors
}

function App() {
  const [someKey, setSomeKey] = React.useState(null)

  return (
    <ErrorBoundary
      FallbackComponent={ErrorFallback}
      onReset={() => setSomeKey(null)} // reset the state of your app here
      resetKeys={[someKey]} // reset the error boundary when `someKey` changes
    >
      <MyComponent someKey={someKey} />
    </ErrorBoundary>
  )
}
In this example, if an error is caught in MyComponent, the ErrorFallback component is rendered, displaying the error message and a Try again button. When this button is clicked, it calls resetErrorBoundary, which triggers the onReset function and clears the error state, resulting in MyComponent being rendered again. If the someKey prop changes, the error boundary will also reset, providing a flexible way to recover from errors based on changes in your app’s state.
useErrorBoundary HookThe useErrorBoundary Hook is another useful feature provided by react-error-boundary. It’s a custom hook that allows you to show and dismiss error boundaries with convenience. The thrown error will be caught by the nearest error boundary, just like how throwing an error from a class component’s lifecycle methods or render function would be caught by an error boundary.
The useErrorBoundary Hook can be particularly useful when dealing with asynchronous code, where throwing an error would not be caught by a component’s error boundary. Here’s an example of how to use useErrorBoundary:
import { useErrorBoundary } from 'react-error-boundary'

function MyComponent() {
  const { showBoundary } = useErrorBoundary();

  async function fetchData() {
    try {
      // fetch some data
    } catch (error) {
      showBoundary(error);
    }
  }

  return (
    ...
  );
}

function App() {
  return (
    <ErrorBoundary FallbackComponent={ErrorFallback}>
      <MyComponent />
    </ErrorBoundary>
  );
}
In this example, MyComponent uses useErrorBoundary to get a function that can be called with an error. The fetchData function is an async function that fetches some data and catches any errors. If an error occurs, it’s passed to the handleError function, which throws the error so it can be caught by ErrorBoundary.
useErrorBoundary provides a powerful way to handle errors in function components. It works seamlessly with react-error-boundary’s ErrorBoundary component, making error handling in React a much more straightforward process.
You can also reset the error boundary using a method exposed by the useErrorBoundary Hook. resetBoundary requests the error boundary to retry the render that initially failed:
import { useErrorBoundary } from "react-error-boundary";

function ErrorFallback({ error }) {
  const { resetBoundary } = useErrorBoundary();

  return (
    <div>
      <p>Something went wrong:</p>
      <pre>{error.message}</pre>
      <button onClick={resetBoundary}>Try again</button>
    </div>
  );
}
withErrorBoundary function as HOCWhile React Hooks and functional components are becoming increasingly popular, there are still many cases where you might be working with class components, or you might prefer a higher-order component (HOC) pattern. The react-error-boundary package also provides a solution for this with the withErrorBoundary HOC.
withErrorBoundary is a higher-order component that wraps a given component with an error boundary. This can be a useful way to add error boundaries to your components without changing their implementation or adding extra JSX to your component trees. Here’s how you might use withErrorBoundary:
import { withErrorBoundary } from 'react-error-boundary'

function MyComponent() {
  // Your component logic
}

const MyComponentWithErrorBoundary = withErrorBoundary(MyComponent, {
  FallbackComponent: ErrorFallback,
  onError: logErrorToService,
  onReset: handleReset,
  resetKeys: ['someKey']
});

function App() {
  return <MyComponentWithErrorBoundary someKey={someKey} />
}
In this example, MyComponent is wrapped with an error boundary using withErrorBoundary. The second argument to withErrorBoundary is an options object, where you can provide the same props that you’d provide to the ErrorBoundary component: FallbackComponent, onError, onReset, and resetKeys.
This HOC approach can be an elegant solution when you want to add error boundaries to your components without modifying their implementation, or if you’re working with class components that can’t use Hooks. It shows the flexibility of react-error-boundary in accommodating different coding styles and paradigms in React development.
react-error-boundary offers a range of benefits that make it an ideal solution for handling errors in React applications. Here are a few of its key advantages:
The react-error-boundary library provides a simple and intuitive API that is easy to understand and use. It abstracts away the complexities of error handling and presents developers with a straightforward way to manage errors.
Unlike the traditional error boundaries in React, which require the use of class components, react-error-boundary is built with function components in mind. It uses Hooks, which better align with the current trends in React development.
react-error-boundary offers multiple ways to use error boundaries, including as a component, with an HOC, or through a custom Hook. This versatility allows developers to choose the best approach for their needs and coding style.
react-error-boundary allows a customizable fallback UI to be displayed when an error is caught. This can provide a much better UX than the application crashing or displaying a blank screen.
The library can reset the error state, allowing the application to recover from errors. This feature is especially useful for transient errors that can be resolved without a complete page reload.
Using the onError prop, errors can be logged to an error reporting service, providing valuable information for debugging and resolving issues.
react-error-boundary is actively maintained and widely used in the React community, so you can expect regular updates and improvements.
An important consideration when implementing error boundaries is ensuring that all potential errors in your application are properly caught and handled. The react-error-boundary library aids in this by providing the ability to catch errors from anywhere in a component tree.
This applies to whether they’re thrown from a class component’s lifecycle methods, a function component’s render function, or even asynchronous code when using the useErrorHandler Hook. However, catching the errors is only the first step.
Equally important is deciding what to do once an error has been caught. This is where the concept of retry mechanisms comes in. A retry mechanism is a way for the application to attempt to recover from an error, often by trying the failed operation again.
react-error-boundary provides built-in support for retry mechanisms through the resetErrorBoundary function and the resetKeys prop. The resetErrorBoundary can be called to clear the error and re-render the component tree. This can be triggered manually, such as in response to a button click, allowing users to retry a failed operation.
resetKeys is an array of values that, when changed, will trigger a reset of the error boundary. This powerful feature allows the error boundary to automatically retry, rendering the component tree when certain props or state values change. Here’s an example of how you might implement a retry mechanism with react-error-boundary:
import { ErrorBoundary } from 'react-error-boundary'

function ErrorFallback({ error, resetErrorBoundary }) {
  return (
    <div role="alert">
      <p>Something went wrong:</p>
      <pre>{error.message}</pre>
      <button onClick={resetErrorBoundary}>Try again</button>
    </div>
  )
}

function MyComponent({ retryCount }) {
  // Some component logic that may throw JS errors
}

function App() {
  const [retryCount, setRetryCount] = React.useState(0)

  return (
    <ErrorBoundary
      FallbackComponent={ErrorFallback}
      onReset={() => setRetryCount(retryCount + 1)} // increment the retry count on reset
      resetKeys={[retryCount]} // reset the error boundary when `retryCount` changes
    >
      <MyComponent retryCount={retryCount} />
    </ErrorBoundary>
  )
}
In this example, the App component maintains a retryCount state. When the "Try again" button is clicked in the ErrorFallback component, it calls resetErrorBoundary. This then triggers the onReset and then clears the error state.
The onReset increments the retryCount, which then causes the error boundary to reset due to the change in resetKeys, resulting in MyComponent being rendered again. Catching all errors and providing effective retry mechanisms is essential for building robust and resilient React applications, and react-error-boundary provides the tools you need to achieve this.
Several design patterns can be used when implementing error boundaries in React applications. The best one to use depends on your specific use case and the architecture of your application.
This approach involves wrapping individual components in error boundaries. This provides a high level of granularity, allowing you to handle errors in each component separately.
If a component crashes, the error boundary can catch the error and prevent it from propagating up the component tree. This means that only the crashed component is affected, and the rest of the application can continue to function normally.
Component-level error boundaries are particularly useful when you have components that are isolated from each other and don’t share a state. If one component fails, it won’t affect the others. However, this approach can lead to a lot of duplication if many components need to have their own error boundaries.
Layout-level error boundaries are placed higher in the component tree, often wrapping groups of related components. This is a good choice when you have closely related components and share a common state.
When an error occurs in one component, the layout-level error boundary can catch it and display an error message or a fallback UI for the entire group of components. This can be a good way to handle errors that affect a whole section of your application, such as a sidebar or a dashboard.
However, layout-level error boundaries are less granular than component-level ones. An error in one component can affect the entire group of components, even if the other components are working correctly.
Top-level error boundaries are placed at the very top of the component tree. They are a catch-all solution that can handle any error that occurs in your application. This approach ensures that if an error occurs anywhere in your application, it can be caught and handled gracefully.
This can prevent your entire application from crashing if an error occurs. However, top-level error boundaries are the least granular approach. An error can affect your entire application, not just the component or group of components where the error occurred.
As we learned earlier, react-error-boundary doesn’t catch async errors. This is because async codes run outside the render. When an error occurs in a promise or an async function, it returns a rejected promise. react-error-boundary is designed to catch synchronous errors that occur during rendering and lifecycle methods i.e., it handles errors that occur during the rendering phase, so it doesn’t catch async ones.
Similarly, functions like setTimeout and RequestAnimationFrame schedule codes to run after the render is complete, meaning they run outside the execution stack and thus, don’t get caught by react-error-boundary.
So, how do we handle such errors when they occur? To handle async errors that react-error-boundary can’t catch, we can create a custom hook that will be triggered by the ErrorBoundary in our async catch block.
See the code below:
import React, { useState, useEffect, useCallback } from "react";
import { ErrorBoundary } from "react-error-boundary";

const useAsyncError = () => {
  const [_, setError] = useState();
  return useCallback(
    (error) => {
      setError(() => {
        throw error;
      });
    },
    [setError]
  );
};

const BrokenComponent = () => {
  const [data, setData] = useState(null);
  const throwError = useAsyncError();

  useEffect(() => {
    fetch("http://some-site.wtf/rest")
      .then((res) => res.json())
      .then(setData)
      .catch((e) => {
        throwError(e);
      });
  }, []);
  return data;
};

export default function App() {
  return (
    <ErrorBoundary fallback={<p>Something went wrong</p>}>
      <BrokenComponent />
    </ErrorBoundary>
  );
}
Our custom error Hook useAsyncError gets called when the async error occurs and it then triggers ErrorBoundary. You can also throw specific messages in the catch block:
.catch((e) => {
    throwError(new Error("Async Error"));
});
Alternatively, react-error-boundary now exposes a Hook called useErrorBoundary that we can use to catch async errors:
import React, { useState, useEffect } from "react";
import { ErrorBoundary, useErrorBoundary } from "react-error-boundary";

const BrokenComponent = () => {
  const [data, setData] = useState(null);
  const { showBoundary } = useErrorBoundary();

  useEffect(() => {
    fetch("http://some-site.wtf/rest")
      .then((res) => res.json())
      .then(setData)
      .catch((e) => {
        showBoundary(e);
      });
  }, []);
  return data;
};

export default function App() {
  return (
    <ErrorBoundary fallback={<p>Something went wrong</p>}>
      <BrokenComponent />
    </ErrorBoundary>
  );
}
Testing is essential to software development, and React error boundaries are no exception. Proper testing of error boundaries ensures that they function correctly and handle errors as expected. You can use testing tools like Jest and React Testing Library to write unit tests for your error boundaries.
These tests can simulate errors in a component and verify that the error boundary catches the error and renders the fallback UI correctly. Here’s an example of what a unit test for an error boundary might look like:
import { render } from "@testing-library/react";
import ErrorBoundary from "../ErrorBoundary";
import ProblematicComponent from "../ProblematicComponent";

it("catches error and renders message", () => {
  console.error = jest.fn();

  render(
    <ErrorBoundary>
      <ProblematicComponent />
    </ErrorBoundary>
  );

  expect(screen.getByText("Something went wrong.")).toBeInTheDocument();
});
In this test, the <ProblematicComponent /> is designed to throw an error deliberately, and the ErrorBoundary component should catch the error and render the text Something went wrong.
Whether working with class or function components, react-error-boundary has you covered. Its flexible API, including components, higher-order components, and custom Hooks, provides various ways to integrate error handling into your components. Moreover, its support for custom fallback UIs, error reset functionality, and error reporting helps ensure a smooth UX even when things go wrong.
Incorporating react-error-boundary into your React application can lead to better error handling, easier debugging, and a better end product. By using this library, you can spend less time worrying about error management and more time focusing on what matters most: building great features for your users.
Install LogRocket via npm or script tag. LogRocket.init() must be called client-side, not
server-side
$ npm i --save logrocket

// Code:

import LogRocket from 'logrocket';
LogRocket.init('app/id');
// Add to your HTML:

<script src="https://cdn.lr-ingest.com/LogRocket.min.js"></script>
<script>window.LogRocket && window.LogRocket.init('app/id');</script>
Would you be interested in joining LogRocket's developer community?
Join LogRocket’s Content Advisory Board. You’ll help inform the type of content we create and get access to exclusive meetups, social accreditation, and swag.
Sign up now
<selectedcontent> element improves dropdowns

Learn how to implement an advanced caching layer in a Node.js app using Valkey, a high-performance, Redis-compatible in-memory datastore.

Learn how to properly handle rejected promises in TypeScript using Angular, with tips for retry logic, typed results, and avoiding unhandled exceptions.

AI’s not just following orders anymore. If you’re building the frontend, here’s how to design interfaces that actually understand your agent’s smarts.


One Reply to "React error handling with react-error-boundary"
Have you tried react-badly? Same idea as a wrapper around react error boundary