When it comes to creating applications, aesthetics, font choice, and the overall look and feel of an app drives whether a user sees it as high-quality or not.

Opening animations can also give a great first impression by setting the scene for an app. Popular in many current apps, a short, sharp opening animation can draw users in, sometimes without even noticing.
While there is already an official process for creating animations in Flutter to introduce a dynamic opening splash screen for apps, the official process does have some downsides to consider:
Fortunately for us, Flutter has a robust set of animation options, so we can create a fairly compelling opening animation with code we can re-use across multiple platforms and is web-supported.
To demonstrate this, we’ll create a dynamic opening screen for a food-ordering app called “Chowtime.” When a user opens the app, the first thing they see is the native Flutter opener, which looks like this:
You can also see the demo in your browser. So, let’s get started!
When designing an opener, we must think about these aspects:
Let’s see how we can create these elements.
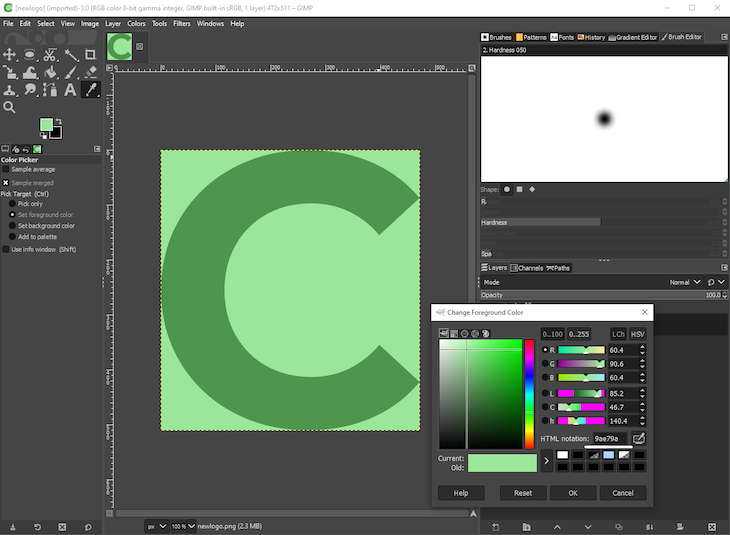
To create an image that displays immediately after opening the app, we can use a graphics editor tool like GIMP to create a 512×512 image for our opener. In our case, we’ll just use the letter “C” with a green background.

If you’re pursuing a similar concept in your app, you can (and should) use Google Fonts to find the best font for your app, as there is a google_fonts package for Flutter so you can easily use their fonts in Flutter apps.
After choosing a font, load it into the image editor, and play around with colors until you have your desired palette for the font and background color.
You can also use the eyedropper tool to select specific colors. Note the colors’ hex code; by using the hex code, you can add this exact color in Flutter by prefixing the code with 0xFF. So, if the color is 9ae79a, the Flutter equivalent is Color(0xFF9ae79a).
First up, add the flutter_native_splash package to the project, which lets us create native launch screens for Android, iOS, and the web.
Save the opener image at assets/newlogo.png. Then, we must tell flutter_native_splash what image and background color to use for the rest of the available space. To do this, open pubspec.yaml and add the following lines:
flutter_native_splash:
  color: "#9ae79a"
  image: assets/newlogo.png
The color here is exactly the same as what we got from the color picker tool in GIMP, meaning there is no 0xFF prefix. This is because the launch screen color doesn’t contain an alpha channel and has no transparency, and the leading 0xFF defines the transparency of the color.
Now, let’s generate all our cross-platform launch screens based on this image by running the following commands at the root of our project:
flutter pub get
flutter pub run flutter_native_splash:create
With this code implemented, the app should open with the image we created. However, it will abruptly change to the app’s opening screen. So how do we tie our newly created splash screen into the rest of our launch screen?
Looking at the finished animation at the beginning of this article, we can see that the letter “C” becomes smaller, unveiling the rest of the logo shortly after followed by a short animation of food falling into a bowl.
Normally, these types of animations can become quite complicated, so how do we achieve this efficiently and easily? In this case, we’ll use an implicit animation.
First, we must specify the objects we want to animate; in this case, animating from the letter “C” to the expanded “CHOWTIME” logo and resizing the text. While the text resizes, we must also increase the widget’s intermediate object bounds to incorporate the remainder of the logo text.
Doing this gives the displaying logo a wipe effect. To implement these animation changes, we’ll use two widgets: AnimatedDefaultTextStyle and AnimatedCrossFade.
AnimatedDefaultTextStyle widgetTo resize text over time, we use the AnimatedDefaultTextStyle widget. As with most widgets with the Animated prefix, we must specify a target size. When the widget’s size changes, Flutter automatically resizes our text for a defined duration. In this case, it looks like this:
AnimatedDefaultTextStyle(
  duration: transitionDuration, //a duration, set to one second
  curve: Curves.fastOutSlowIn,
  style: TextStyle(
    color: Color(0xFF4e954e), // our color from above, prefixed with 0xFF
    fontSize: !expanded ? _bigFontSize : 50, // change font size depending on expanded state
    fontFamily: 'Montserrat', // the font from Google Fonts
    fontWeight: FontWeight.w600, //
  ),
  child: Text(
    "C",
  ),
)
When the expanded boolean toggles and calls setState, the widget freely animates the size change from large to small. Nice.
AnimatedCrossFade widgetNow that the “C” is animating correctly, we want to display the rest of our logo while the text resizes. To accomplish this, we want to fade between an empty Container and a Row that contains our logo text and our animation:
AnimatedCrossFade(
  firstCurve: Curves.fastOutSlowIn, // the same curve as above
  crossFadeState: !expanded ? CrossFadeState.showFirst : CrossFadeState.showSecond,
  duration: transitionDuration, // the same duration as above
  firstChild: Container(), // an empty container
  secondChild: _logoRemainder(), // a Row containing rest of our logo
  alignment: Alignment.centerLeft, // "reveal" the logo from the center left
  sizeCurve: Curves.easeInOut,
),
Again, as the expanded boolean toggles, this widget animates between an empty box and the remainder of the logo, resizing the container as required.
Now that our logo resizes appropriately, we can find an animation that best represents the service provided by our app. When adding an animation, we can either create our own or download a premade one from lottiefiles.com; for efficiency, we’ll use a premade animation.
When looking for an animation, it’s best to choose one that lasts two to three seconds at most, starts with an empty canvas, and has a transparent background.
This food animation meets our criteria and aligns with the app’s service, so, download the lottie animation file in .json format and pop it into our assets folder, pubspec.yaml.
Again, in the application’s root folder, run the following command to install lottie in
our project:
flutter pub add lottie
When adding the animation to our opening screen, we want to be mindful of the following:
AnimationController to redirect to the app’s homepage when the animation finishesOur LottieBuilder.asset widget looks like this:
LottieBuilder.asset(
  'assets/food.json',
  onLoaded: (composition) {
    _lottieAnimation..duration = composition.duration; // set the duration of our AnimationController to the length of the lottie animation
  },
  frameRate: FrameRate.max, // makes the animation smoother
  repeat: false,
  animate: false, // don't start the animation immediately
  height: 100,
  width: 100,
  controller: _lottieAnimation,
)
The only thing left to do now is adding the appropriate timing for the animations by implementing the following durations:
expanded to true and calling setState to run the implicit animation and crossfade simultaneouslyProgrammatically, it looks like this:
Future.delayed(Duration(seconds: 1))
    .then((value) => setState(() => expanded = true))
    .then((value) => Duration(seconds: 1))
    .then(
      (value) => Future.delayed(Duration(seconds: 1)).then(
        (value) => _lottieAnimation.forward().then(
              (value) => Navigator.of(context)
                  .pushAndRemoveUntil(MaterialPageRoute(builder: (context) => HomePage()), (route) => false),
            ),
      ),
    );
And that’s it! We now have a fully animated splash screen for our app that works on iOS, Android, and the web and animates anytime we open it.
It’s fairly easy to use Flutter’s built-in animation tooling to create a visually appealing launch screen for users. With Flutter’s flutter_native_splash support, we don’t need to write our animations for each platform we use our app on.
You can find the full source code of the sample app here, which you can fork and play around with to your heart’s content. Happy hacking!
Install LogRocket via npm or script tag. LogRocket.init() must be called client-side, not
server-side
$ npm i --save logrocket

// Code:

import LogRocket from 'logrocket';
LogRocket.init('app/id');
// Add to your HTML:

<script src="https://cdn.lr-ingest.com/LogRocket.min.js"></script>
<script>window.LogRocket && window.LogRocket.init('app/id');</script>

Learn how to set up Meilisearch, index documents, and build keyword, semantic, and hybrid search with AI-powered retrieval.

Compare pnpm and npm across security defaults, disk usage, dependency strictness, and workspace policy to decide which package manager fits your project.

I migrated 20 production-style components from Tailwind to StyleX. Here’s what the data showed about LOC, CSS bundle size, build time, and type safety.

A guide for using JWT authentication to prevent basic security issues while understanding the shortcomings of JWTs.
Hey there, want to help make our blog better?
Join LogRocket’s Content Advisory Board. You’ll help inform the type of content we create and get access to exclusive meetups, social accreditation, and swag.
Sign up now

