SVGs are everywhere — icons, logos, animated illustrations, even subtle UI flourishes. But integrating them into a modern Next.js (v14+) project isn’t always straightforward. Should you import them as components? Drop them in /public? What about performance, maintainability, or styling?

This guide cuts through the confusion with updated 2025 guidance on the four most common SVG methods, including fresh examples, decision rules, and specific help for App Router and TypeScript users.
Whether you’re shipping a design system or just trying to avoid a “broken image” in production, we’ve got you covered.
Editor’s note: This post was last updated on June 2, 2025. This update adds a Quickstart section, simplified code examples, a method decision guide, App Router clarifications, SVGR config updates for Next.js 14+, and a new troubleshooting table.
The Replay is a weekly newsletter for dev and engineering leaders.
Delivered once a week, it's your curated guide to the most important conversations around frontend dev, emerging AI tools, and the state of modern software.
Need to render an SVG right now? Here’s a cheat sheet of the most common methods:
| Use case | Method | Code snippet |
|---|---|---|
| Inline SVG components | SVGR | import Icon from './icon.svg' |
| Static decorative images | /public folder + <img> |
<img src="/logo.svg" alt="Logo" /> |
| Optimized images (incl. SVG) | Next.js <Image /> |
<Image src="/logo.svg" alt="Logo" width={100} height={100} /> |
| Custom inline SVG markup | Paste SVG JSX inline | Direct JSX copy/paste inside your component |
SVGs are among the most popular image formats on the web today. In contrast to their raster image counterparts, vector images offer numerous benefits:
With the above benefits, you must understand how to add them to your projects.
Vercel, the company behind Next.js, provides a complete platform and a suite of software packages within its ecosystem for you to build and host full-stack applications using Next.js. For any problem you encounter while using Next.js, you will almost always find a solution within the Next.js ecosystem.
Every standard Next.js project comes with a built-in next/image component to work with images. You can use the next/image component for bitmap and vector images. Therefore, when using SVGs or other image formats in a Next.js application, the built-in next/image component will almost always be your first choice.
Next.js (especially v13+ and v14+) gives you several options for working with SVGs — depending on your performance needs and how much control you need over styling and interaction.
Below are four core methods you can use, each with its pros and cons.
Embedding an SVG directly in your JSX gives you maximum control. You can style individual parts, apply animations, and even bind interactivity.
But first, convert the raw SVG to JSX format. Tools like SVGR make this easy. SVGR converts the SVG to JSX syntax and wraps it in a React functional component, like this:
const TwitterIcon = ({ props }) => (
  <svg xmlns="http://www.w3.org/2000/svg" width={48} height={48} {...props}>
    <linearGradient
      id="a"
      x1={10.341}
      x2={40.798}
      y1={8.312}
      y2={38.769}
      gradientUnits="userSpaceOnUse"
    >
      <stop offset={0} stopColor="#2aa4f4" />
      <stop offset={1} stopColor="#007ad9" />
    </linearGradient>
    <path
      fill="url(#a)"
      d="M46.105 ..."
    />
  </svg>
)
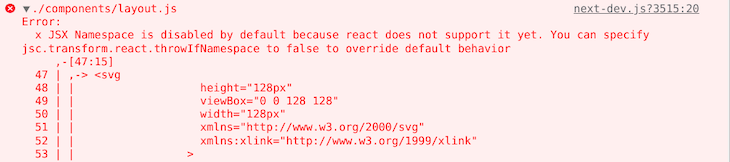
You may encounter the following error if you don’t convert your SVG to JSX syntax before embedding it in a React component, so always be sure to use a tool like SVGR:

You may also get the error below in Next.js instead of the above error:
next/image componentThe next/image component is the de facto component for loading and rendering images — including SVGs — in Next.js. This component efficiently loads and renders images and can optimize your images for faster page loading, performance, and visual stability. It is an extension of the HTML image element.
If you have set up a Next.js application using the Create Next App command line tool, the next/image component should be available for your application. With local SVG images, you can import and use the next/image component as in the example below:
import Image from 'next/image';
import twitterIcon from "../../public/images/twitter-icon.svg";

const App = () => (
  <div>
    <Image
      priority
      src={twitterIcon}
      alt="Follow us on Twitter"
    />
  </div>
);
You don’t need to specify the width and height props because Next.js will determine their values out of the box. On the other hand, for remote images, the src property should be an absolute or relative URL string. You should set the height and width properties like in the example below:
import Image from 'next/image';

const App = () => (
  <div>
    <Image
      priority
      src="/images/twitter-icon.svg"
      height={32}
      width={32}
      alt="Follow us on Twitter"
    />
  </div>
);
As you use the next/image component, be aware that Next.js serves static assets, such as images, from a public directory in your project’s root directory. Therefore, in the example above, the twitter-icon.svg file must be in the images directory in your public directory.
Next.js will import the icon and render it in the browser like the image below:
![]()
You can pass several props to the next/image component. Check the next/image component documentation for a complete list of the required and optional props. In this section, our focus is on using the next/image component to import and render SVGs in a Next.js application.
The next-images package is a third-party package for importing images in Next. You can use it instead of the built-in next/image component described above. With next-images, you can load images from your local machine or CDN. In addition, you can also use it to embed images with small bundle sizes in Base64 encoding and cache images by adding a content hash to image names.
Like any other npm package, install next-images from the npm package registry using the following command:
# npm
npm install next-images

# yarn
yarn add next-images
After installation, create a next.config.js file at the root of your project directory and add the following basic configuration:
const withImages = require('next-images');
module.exports = withImages();
After adding the necessary configuration to the next.config.js file, as described above, you can import the SVG into your component and render it, as shown here:
import twitterIcon from "./twitter-icon.svg";

const App = () => <img src={twitterIcon} alt="Follow us on Twitter" />;
When using the next-images package, you can load images from a file in your project directory or a CDN. Unlike the built-in next/image component and other third-party packages, the next-images package doesn’t support image optimization techniques such as compression and resizing out-of-the-box.
With modern versions of Next.js, you don’t need this third-party package. The built-in next/image component has all the features you need to import SVGs and other image formats. Nevertheless, this package may still be useful if your project uses older Next.js versions.
As previously mentioned, SVGR is a third-party package for converting an SVG image to a React component. Several popular React project template creators, like Create React App, actually use SVGR under the hood. Install it as a development dependency to start importing SVGs as React components in your Next.js application:
# npm
npm install --save-dev @svgr/webpack

# yarn
yarn add --dev @svgr/webpack
After installation, create a next.config.js file at the root of your project directory and add the following webpack configuration:
module.exports = {
  webpack(config) {
    const fileLoaderRule = config.module.rules.find((rule) =>
      rule.test?.test?.(".svg")
    );

    config.module.rules.push(
      {
        ...fileLoaderRule,
        test: /\.svg$/i,
        resourceQuery: /url/,
      },

      {
        test: /\.svg$/i,
        issuer: fileLoaderRule.issuer,
        resourceQuery: { not: [...fileLoaderRule.resourceQuery.not, /url/] },
        use: ["@svgr/webpack"],
      }
    );

    fileLoaderRule.exclude = /\.svg$/i;

    return config;
  },
};
You can now import the SVG as a React component and render it in your Next.js application. Here’s how that should look:
import TwitterIcon from "./twitter-icon.svg";
const Example = () => <TwitterIcon />;
Instead of importing SVG images using the SVGR package as in the previous sub-section, it is also possible to use a Babel plugin to achieve the same effect.
To start using babel-plugin-inline-react-svg, install it as a development dependency from the npm package registry using this command:
npm i -D babel-plugin-inline-react-svg
After installation, create a .babelrc or babel.config.json configuration file at the root of your project directory. You can copy and paste the code from the block below into it. If you have a Babel configuration file, Next.js will treat it as the ultimate source of truth.
You need to be aware that adding a custom Babel config will opt you out of using the Next.js compiler. However, the compiler is required for you to use the next/font module in your project. Therefore, to use babel-plugin-inline-react-svg, you have to stop using the next/font module.
An ordinary Next.js project setup using Create Next App will include the built-in next/babel preset. Because Next.js will treat a .babelrc or babel.config.json file at the root of your project directory as the primary source of information, it must have everything you will need — including those that Next.js needs. Refer to the following code:
{
  "presets": ["next/babel"],
  "plugins": ["inline-react-svg"]
}
After you’ve done this, you can import SVG images as React components and render them in your Next.js application:
import TwitterIcon from "./twitter-icon.svg";
const Example = () => <TwitterIcon />;
img tagThe simplest way of using SVGs in a React or Next application is the img tag, as in a regular HTML file. However, as hinted above, Next.js looks for static assets like images in the public directory in your application’s root directory. Be sure all the images you want to bundle with your application are in the public directory at build time.
You can also host the image on a different server and reference it using the image URL. The usage of the <img/> tag in Next.js is similar to the usage of the HTML img element. The src and alt attributes are required, as shown below:
<img src="/twitter-icon.svg" alt="Follow us on Twitter" />
You need to implement favicons when building websites and web applications. They help users easily identify your brand among open browser tabs, browsing history, bookmarks, and search engine results.
A typical favicon is an ICO image file. However, you can also use other image formats like SVG, PNG, and JPG. Next.js supports favicons out of the box.
If your Next.js project is using the Pages Router, you need to place the SVG icon in the public directory and add it to your head element using the built-in <Head /> component like so:
export default function Home() {
  return (
    <>
      <Head>
        <link rel="icon" href="/icon.svg" type="image/svg+xml" />
      </Head>
    </>
  );
}
If your project uses the App Router and your favicon is in ICO format, you need to name it favicon.ico and place it in the app directory. Next.js will process the favicon and add the relevant HTML tags to your document’s <head> element out of the box. For this to work, the favicon.ico file should be within the app directory, not in a sub-directory.
Similarly, if your favicon is an SVG or other image formats like JPG and PNG, you need to name it icon.(svg|jpg|png) and place it in the app directory. Next.js will load and process the icon and add the necessary HTML tags to the document’s <head> element. Next.js will use the image file to correctly infer the icon’s MIME type and size.
As an example, if your SVG icon has a width and height of 96px, Next.js will generate a <link> element like so:
<link rel="icon" href="/icon.svg?icon.65eec5af.svg" sizes="96x96" type="image/svg+xml">
Browsers usually cache static assets such as favicons. It is not uncommon for your page to display an old favicon after adding a new one. Therefore, you may need to clear the cache and reload the page for the browser to load the new favicon.
Use this quick decision tree to pick the best method:
className, pass props, or reuse it like a React component? → Use SVGR./public + <img>.<Image />.Still not sure? Start with SVGR for anything interactive or reusable, and fall back to <img> or <Image /> for quick wins.
Server components — SVG imports in server components require careful handling; inline SVGs or static /public folder usage are safest
Dynamic imports — When importing SVGs as React components in client components, use dynamic() with ssr: false if you encounter hydration errors
No built-in SVGR support yet — You still need to configure SVGR in next.config.js manually
/public folder or properly imported as a module?next/image? — Make sure you define width and height — required for SVG rendering.Cause: Missing SVGR config in next.config.js.
Fix:
module.exports = {
webpack(config) {
config.module.rules.push({
test: /\.svg$/i,
issuer: /\.[jt]sx?$/,
use: ['@svgr/webpack'],
});
return config;
},
};
Cause: Trying to import an SVG without a proper loader.
Fix: Use a static <img src="/your.svg" /> instead, or set up SVGR for inline use.
Cause: Styling may not apply to inline SVG if it’s embedded via <img>.
Fix: Use SVGR to inline the SVG as a React component — this lets Tailwind or CSS classes apply.
Cause: Mixing server/client components when importing SVGs.
Fix: Import the SVG only in Client Components, or use dynamic() with ssr: false:
import dynamic from 'next/dynamic';

const Logo = dynamic(() => import('./logo.svg'), { ssr: false });
I hope this article helped clarify the different ways to import and use SVGs and images in Next.js applications. The built-in next/image component offers a powerful, optimized solution for most use cases.
If your project has more specific needs, the third-party packages we covered can offer added flexibility — but be sure to weigh their maintenance status, security, and licenses before integrating them.
Have tips, questions, or your own experience with SVGs in Next.js? Drop a comment below — I’d love to hear it!
Debugging Next applications can be difficult, especially when users experience issues that are difficult to reproduce. If you’re interested in monitoring and tracking state, automatically surfacing JavaScript errors, and tracking slow network requests and component load time, try LogRocket.
LogRocket captures console logs, errors, network requests, and pixel-perfect DOM recordings from user sessions and lets you replay them as users saw it, eliminating guesswork around why bugs happen — compatible with all frameworks.
LogRocket's Galileo AI watches sessions for you, instantly identifying and explaining user struggles with automated monitoring of your entire product experience.
The LogRocket Redux middleware package adds an extra layer of visibility into your user sessions. LogRocket logs all actions and state from your Redux stores.


Modernize how you debug your Next.js apps — start monitoring for free.

Learn how to build advanced Next.js forms with rule engines, client-side previews, Server Actions, and server-validated form logic.

AI is reshaping engineering teams emotionally as well as technically. A CTO shares insights on fear, trust, burnout, identity, and leading through AI change.

Learn what context rot is, why AI agent sessions degrade over time, and how to fix it with compaction, prompt anchoring, context files, plan files, and RAG.

Learn about TypeScript v6’s breaking changes, new ES2025 features, and deprecated options. A complete migration guide from v5 to prepare for v7.
Would you be interested in joining LogRocket's developer community?
Join LogRocket’s Content Advisory Board. You’ll help inform the type of content we create and get access to exclusive meetups, social accreditation, and swag.
Sign up now

