Editor’s note: This article was last updated by Emmanuel John on 26 August 2024 to include the latest updates and information.

Authentication is crucial in web applications today. It’s a feature that many developers have had to implement in the past. Thankfully, many libraries have made this job easier by offering many built-in functionalities. In particular, Firebase is an excellent tool for handling user management and authentication.
In this tutorial, we will cover how to implement authentication using Firebase.
Acquired by Google in 2014, Firebase is a platform offering a suite of products including but not limited to:
These products allow developers to create and run applications easily and quickly.
Before you write a line of code, you will need a Firebase account. Head here to create one.
In Firebase, if you want API keys, you will need to create apps. These apps have to belong to projects. As a result, if you don’t already have a project set up, you need to create one. Once you do, create an app to get your keys.
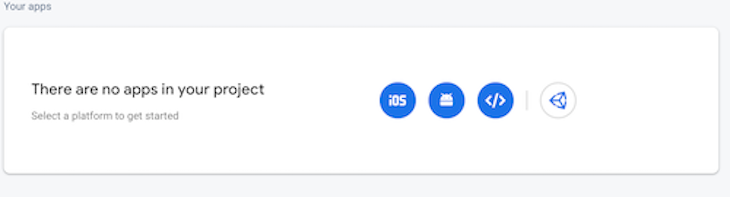
Now, click on the settings icon right beside Project Overview (in the top left part of your screen). In Project Settings and under General, you should see your app with its config.
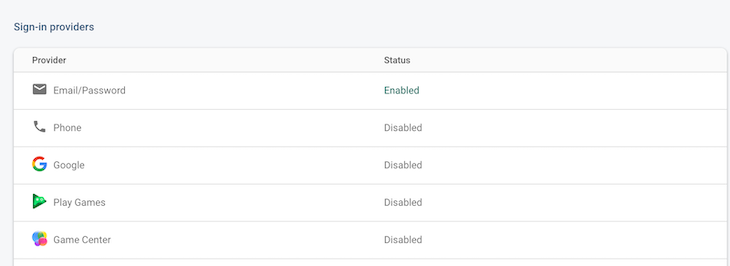
Before you head to your code, you will need to enable the sign-in methods you want to use. To do so, click on Authentication and then Sign in methods. Each one has different configurations, but for the sake of this tutorial, I will be focusing on the traditional email/password method.
To create a new Next.js project, use the create-next-app, which sets up everything automatically for you.
Run the following command :
npx create-next-app@latest
On installation, respond to the prompts as follows:
What is your project named? my-app
Would you like to use TypeScript? No
Would you like to use ESLint? Yes
Would you like to use Tailwind CSS? No
Would you like your code inside a `src/` directory? No
Would you like to use App Router? No
Would you like to use Turbopack for `next dev`? No
Would you like to customize the import alias (`@/*` by default)? No
What import alias would you like configured? @/*
The demo application uses the pages directory, therefore the routing will be file-system based such that when a file is added to the pages directory, it’s automatically available as a route.
Now that you have your keys, it’s time to add them to your Next.js project.
A Next.js project automatically ignores .env.local thanks to its .gitignore file, so you can copy/paste your keys and not worry that they will be committed to GitHub accidentally.
NEXT_PUBLIC_FIREBASE_PUBLIC_API_KEY=<YOUR_API_KEY>
NEXT_PUBLIC_FIREBASE_AUTH_DOMAIN=<YOUR_DOMAIN>
NEXT_PUBLIC_FIREBASE_PROJECT_ID=<YOUR_PROJECT_ID>
Don’t forget — in Next.js, the convention for naming environment variables is that they have to start with NEXT_PUBLIC.
Go ahead and install the Firebase library.
npm install --save Firebase
# or
yarn add Firebase
Install reactstrap and bootstrap libraries for styling.
npm install --save reactstrap bootstrap
# or
yarn add reactstrap bootstrap
Great! The library is installed and your API keys are set up. Time to use those keys to create a Firebase instance. Of course, Firebase comes with many useful tools, but for the sake of this article, we will only focus on authentication. As a result, you will only need Firebase/auth and the apiKey, authDomain, and projectId credentials.
Create a lib directory in the project root folder, then create firebase.js file and add the following:
// lib/firebase.js
import { initializeApp, getApps } from "firebase/app";
import { getAuth } from "firebase/auth";

const firebaseCredentials = {
  apiKey: process.env.NEXT_PUBLIC_FIREBASE_PUBLIC_API_KEY,
  authDomain: process.env.NEXT_PUBLIC_FIREBASE_AUTH_DOMAIN,
  projectId: process.env.NEXT_PUBLIC_FIREBASE_PROJECT_ID,
};

Object.keys(firebaseCredentials).forEach((key) => {
  const configValue = firebaseCredentials[key] + "";
  if (configValue.charAt(0) === '"') {
    firebaseCredentials[key] = configValue.substring(1, configValue.length - 1);
  }
});

export const firebaseConfig = firebaseCredentials;

export const firebaseApp =
  getApps().length === 0 ? initializeApp(firebaseConfig) : getApps()[0];
export const auth = getAuth(firebaseApp);
Sometimes, environment variables might include extra quotes (“), which must be removed. Most times this happens during deployment to production. The code also checks if the first character of a configuration value is a quote and, if so, removes it along with the closing quote.
The first thing you will need is an authUser that you can access throughout your app. This variable is not only helpful for user management but also for redirecting routes accordingly.
For example, if authUser is null, meaning the user hasn’t logged in, when that person tries to access a protected route (say, a dashboard), you should redirect them to the login page.
Thankfully, Firebase.auth keeps track of the state and comes with a built-in function called onAuthStateChanged that allows you to listen for state changes.
Create useFirebaseAuth.jsx in the lib directory and add the following:
// lib/useFirebaseAuth.jsx
import { useState, useEffect } from 'react'
import { auth } from './firebase';

import {
  onAuthStateChanged as _onAuthStateChanged,
} from "firebase/auth";

const formatAuthUser = (user) => ({
  uid: user.uid,
  email: user.email
});

export default function useFirebaseAuth() {
  const [authUser, setAuthUser] = useState(null);
  const [loading, setLoading] = useState(true);

  const authStateChanged = async (authState) => {
    if (!authState) {
      setLoading(false)
      return;
    }

    setLoading(true)

    var formattedUser = formatAuthUser(authState);

    setAuthUser(formattedUser);

    setLoading(false);

  };

  const onAuthStateChanged = (cb) => {
     return _onAuthStateChanged(auth, cb);
  }

  useEffect(() => {
    const unsubscribe = onAuthStateChanged(authStateChanged);
    return () => unsubscribe();
  }, []);

  return {
    authUser,
    loading,
  };
}
When the state changes, format the user depending on your needs, and finally, set it to your authUser variable. Use the loading variable to indicate whether Firebase is fetching data or not.
To access authUser and loading variables throughout your app, you will be using the Context API.
Tip: Unfamiliar with React Context? Don’t hesitate to check out .
First, create your context object with createContext with a default value (authUser as null and loading as true). Then, get the actual authUser and loading variables from useFirebaseAuth and pass it to the provider component.
You should also add a custom hook, in this case, useAuth, to access the current context value.
Create context/AuthUserContext.jsx file in the project root folder, then add the following:
// context/AuthUserContext.jsx

import { createContext, useContext} from 'react'
import useFirebaseAuth from '../lib/useFirebaseAuth';

const authUserContext = createContext({
  authUser: null,
  loading: true
});

export function AuthUserProvider({ children }) {
  const auth = useFirebaseAuth();
  return <authUserContext.Provider value={auth}>{children}</authUserContext.Provider>;
}

// custom hook to use the authUserContext and access authUser and loading
export const useAuth = () => useContext(authUserContext);
Then, in our _app.js, wrap this provider around your application. This ensures that the children components will be able to access your user context.
// pages/_app.js

import { AuthUserProvider } from '../context/AuthUserContext';

function App({ Component, pageProps }) {
  return <AuthUserProvider><Component {...pageProps} /></AuthUserProvider>
}

export default App
Protected routes are pages or sections of your app that should only be accessed by certain users. In this case, only logged-in users should access this content. To set this up, get the authUser and loading from your custom useAuth() hook.
With these variables in place, check if Firebase is still fetching data (i.e., loading is true), and, if not, whether authUser is null. If that is the case, then the user isn’t logged in and you should redirect them to the login page.
import { useEffect } from 'react';
import { useRouter } from 'next/router';
import { useAuth } from '../context/AuthUserContext';

import {Container, Row, Col, Button} from 'reactstrap';

const LoggedIn = () => {
  const { authUser, loading} = useAuth();
  const router = useRouter();

  // Listen for changes on loading and authUser, redirect if needed
  useEffect(() => {
    if (!authUser)
      router.push('/')
  }, [authUser])

  return (
    <Container>

        {
          loading ?
            <Row>
              <Col>Loading....</Col>
            </Row> :
            <>
              <Row>
                <Col>
                  { authUser && <div>Congratulations {authUser?.email}! You are logged in.</div> }
                </Col>
              </Row>
              <Row>
                <Col>
                  {/** Sign out button here**/}
                </Col>
              </Row>
            </>
        }
    </Container>
  )
}

export default LoggedIn;
Test it in your app and make sure the redirection is happening correctly.
Now, let’s move on to the juicy bit. One great thing about Firebase is that it comes with many built-in functions for signing in, creating users, and signing out.
So, let’s add them to the useFirebaseAuth function. Use firebase/auth to access the different functions (signInWithEmailAndPassword, createUserWithEmailAndPassword, and signOut):
Update useFirebaseAuth.jsx with the following:
import { createUserWithEmailAndPassword as _createUserWithEmailAndPassword, signInWithEmailAndPassword as _signInWithEmailAndPassword, signOut as _signOut } from "firebase/auth";

export default function useFirebaseAuth() {
  // ...
  const clear = () => {
    setAuthUser(null);
    setLoading(true);
  };

  const signInWithEmailAndPassword = (email, password) =>
    _signInWithEmailAndPassword(auth, email, password);

  const createUserWithEmailAndPassword = (email, password) =>
    _createUserWithEmailAndPassword(auth, email, password);

  const signOut = () =>
    _signOut(auth).then(clear);

  const onAuthStateChanged = (cb) => {
      return _onAuthStateChanged(auth, cb);
  };

  useEffect(() => {
    const unsubscribe = onAuthStateChanged(authStateChanged);
    return () => unsubscribe();
  }, []);

  return {
    authUser,
    loading,
    signInWithEmailAndPassword,
    createUserWithEmailAndPassword,
    signOut
  };
}
Update the default values in your context file as follows.
const authUserContext = createContext({
  authUser: null,
  loading: true,
  signInWithEmailAndPassword: async () => {},
  createUserWithEmailAndPassword: async () => {},
  signOut: async () => {}
});

export function AuthUserProvider({ children }) {
  const auth = useFirebaseAuth();
  return <authUserContext.Provider value={auth}>{children}</authUserContext.Provider>;
}
In your sign-up page, use your useAuth hook to retrieve your function for creating a user once again. createUserWithEmailAndPassword takes two parameters: email and password.
After finishing form validation, call this function. If it returns successfully with an authUser, then you can redirect the user accordingly.
Create sign_up.jsx file in the pages directory and add the following:
// pages/sign_up.jsx

import { useState } from 'react';
import { useRouter } from 'next/router';

import { useAuth } from '../context/AuthUserContext';

import { Container, Row, Col, Button, Form, FormGroup, Label, Input, Alert } from 'reactstrap';
import Link from 'next/link';

const SignUp = () => {
  const [email, setEmail] = useState("");
  const [passwordOne, setPasswordOne] = useState("");
  const [passwordTwo, setPasswordTwo] = useState("");
  const router = useRouter();
  // Optional error handling
  const [error, setError] = useState(null);

  const { createUserWithEmailAndPassword } = useAuth();

  const onSubmit = (event) => {
    event.preventDefault();
    setError(null);
    if (passwordOne === passwordTwo) {
      createUserWithEmailAndPassword(email, passwordOne)
        .then(authUser => {
          console.log("Success. The user is created in firebase");
          router.push("/logged_in");
        })
        .catch(error => {
          setError(error.message);
        });
    } else {
      setError("Passwords do not match");
    }
  };

  return (
    <Container className="text-center" style={{ padding: '40px 0px' }}>
      <Row>
        <Col>
          <h2>Register</h2>
        </Col>
      </Row>
      <Row>
        <Col>
          <Form style={{ maxWidth: '400px', margin: 'auto' }} onSubmit={onSubmit}>
            {error && <Alert color="danger">{error}</Alert>}
            <FormGroup row>
              <Label for="signUpEmail" sm={4}>Email</Label>
              <Col sm={8}>
                <Input
                  type="email"
                  value={email}
                  onChange={(event) => setEmail(event.target.value)}
                  name="email"
                  id="signUpEmail"
                  placeholder="Email"
                />
              </Col>
            </FormGroup>
            <FormGroup row>
              <Label for="signUpPassword" sm={4}>Password</Label>
              <Col sm={8}>
                <Input
                  type="password"
                  name="passwordOne"
                  value={passwordOne}
                  onChange={(event) => setPasswordOne(event.target.value)}
                  id="signUpPassword"
                  placeholder="Password"
                />
              </Col>
            </FormGroup>
            <FormGroup row>
              <Label for="signUpPassword2" sm={4}>Confirm Password</Label>
              <Col sm={8}>
                <Input
                  type="password"
                  name="password"
                  value={passwordTwo}
                  onChange={(event) => setPasswordTwo(event.target.value)}
                  id="signUpPassword2"
                  placeholder="Password"
                />
              </Col>
            </FormGroup>
            <FormGroup row>
              <Col>
                <Button>Sign Up</Button>
              </Col>
            </FormGroup>
            <FormGroup row>
              <Col className='text-white'>
                Have an account? <Link href="/sign_in">Sign in</Link>
              </Col>
            </FormGroup>
          </Form>
        </Col>
      </Row>
    </Container>
  );
};

export default SignUp;
Signing out is also very straightforward. Grab the signOut() function from useAuth() and add it to a button or a link.
Add the following to logged_in.jsx:
import { useEffect } from 'react';
import { useRouter } from 'next/router';
import { useAuth } from '../context/AuthUserContext';

import { Container, Row, Col, Button } from 'reactstrap';

const LoggedIn = () => {
  const { authUser, loading, signOut } = useAuth();
  const router = useRouter();

  // Listen for changes on loading and authUser, redirect if needed
  useEffect(() => {
    if (!authUser) router.push('/');
  }, [authUser]);

  return (
    <Container>
      {/* Other content here */}
      <Button onClick={signOut}>Sign out</Button>
      {/* Other content here */}
    </Container>
  );
};

export default LoggedIn;
And finally, the login functionality! It’s exactly the same as the previous two. Retrieve signInWithEmailAndPassword() from useAuth() and pass in the user’s email and password. If they are correct, redirect the user, and, if not, display the correct error message.
Create sign_in.jsx in the pages directory and add the following
import { useState } from 'react';
import Link from 'next/link';
import { useRouter } from 'next/router';

import { useAuth } from '../context/AuthUserContext';

import { Container, Row, Col, Button, Form, FormGroup, Label, Input, Alert } from 'reactstrap';

export default function Home() {
  const [email, setEmail] = useState("");
  const [password, setPassword] = useState("");
  const [error, setError] = useState(null);
  const router = useRouter();
  const { signInWithEmailAndPassword } = useAuth();

  const onSubmit = event => {
    setError(null);
    signInWithEmailAndPassword(email, password)
      .then(authUser => {
        router.push('/logged_in');
      })
      .catch(error => {
        setError(error.message);
      });
    event.preventDefault();
  };

  return (
    <Container className="text-center" style={{ padding: '40px 0px' }}>
      <Row>
        <Col>
          <h2>Login</h2>
        </Col>
      </Row>
      <Row style={{ maxWidth: '400px', margin: 'auto' }}>
        <Col>
          <Form onSubmit={onSubmit}>
            {error && <Alert color="danger">{error}</Alert>}
            <FormGroup row>
              <Label for="loginEmail" sm={4}>Email</Label>
              <Col sm={8}>
                <Input
                  type="email"
                  value={email}
                  onChange={(event) => setEmail(event.target.value)}
                  name="email"
                  id="loginEmail"
                  placeholder="Email"
                />
              </Col>
            </FormGroup>
            <FormGroup row>
              <Label for="loginPassword" sm={4}>Password</Label>
              <Col sm={8}>
                <Input
                  type="password"
                  name="password"
                  value={password}
                  onChange={(event) => setPassword(event.target.value)}
                  id="loginPassword"
                  placeholder="Password"
                />
              </Col>
            </FormGroup>
            <FormGroup row>
              <Col>
                <Button>Login</Button>
              </Col>
            </FormGroup>
            <FormGroup row>
              <Col className='text-white'>
                No account? <Link href="/sign_up">Create one</Link>
              </Col>
            </FormGroup>
          </Form>
        </Col>
      </Row>
    </Container>
  );
}
In this tutorial, we covered how to create a Firebase account, project, and app. Then, we learned how to use React Context to create a user context. To this context, we added user and loading variables along with logging, signing up, and signing out functions. Finally, we used those functions to implement authentication in our Next.js app thanks to Firebase!
The complete code for this tutorial is available on GitHub.
Debugging Next applications can be difficult, especially when users experience issues that are difficult to reproduce. If you’re interested in monitoring and tracking state, automatically surfacing JavaScript errors, and tracking slow network requests and component load time, try LogRocket.
LogRocket captures console logs, errors, network requests, and pixel-perfect DOM recordings from user sessions and lets you replay them as users saw it, eliminating guesswork around why bugs happen — compatible with all frameworks.
LogRocket's Galileo AI watches sessions for you, instantly identifying and explaining user struggles with automated monitoring of your entire product experience.
The LogRocket Redux middleware package adds an extra layer of visibility into your user sessions. LogRocket logs all actions and state from your Redux stores.


Modernize how you debug your Next.js apps — start monitoring for free.

A guide for using JWT authentication to prevent basic security issues while understanding the shortcomings of JWTs.

Discover how to build, render, and automate product demo videos with Remotion, replacing traditional screen recordings with reusable React code.

Chrome’s Modern Web Guidance embeds modern web platform skills into AI coding agents, helping them choose native HTML, CSS, and browser APIs over legacy patterns.

Learn how to use Fallow to analyze AI-generated code, detect dead code, duplicate logic, and complexity issues, and integrate automated code quality checks into your AI-assisted development workflow.
Would you be interested in joining LogRocket's developer community?
Join LogRocket’s Content Advisory Board. You’ll help inform the type of content we create and get access to exclusive meetups, social accreditation, and swag.
Sign up now

