Editor’s note: This guide to using TypeScript with React was last updated on 16 October 2023 to reflect changes since the release of TypeScript 5.

In this comprehensive tutorial, we’ll dive into the intricacies of using TypeScript in React projects. We’ll explore the rationalize behind integrating TypeScript in React, as well as how to install and configure TypeScript, ensuring a seamless setup. Additionally, we’ll explore how to use TypeScript interfaces with React components, demonstrating best practices to enhance workflow.
The Replay is a weekly newsletter for dev and engineering leaders.
Delivered once a week, it's your curated guide to the most important conversations around frontend dev, emerging AI tools, and the state of modern software.
Combining Typescript with React helps developers improve the quality of their codebase (or code output) and also streamlines the development process. Below are a few ways TypeScript is beneficial with React:
TypeScript provides static typing to JavaScript, which allows developers to define types for states and variables. This helps catch any errors during development, making the code more readable and easy to maintain.
When working with React, TypeScript enforces a consistent code style and organization with features such as interface, generics, and enums, which allows developers to build more scalable React applications.
When using TypeScript with React, errors are caught at the development stage before the code is compiled and executed. This prevents runtime errors and reduces debugging time.
TypeScript offers variable checks by checking the data type assigned to statically-defined variables. This reduces the possibility of assigning the wrong types to our variables.
TypeScript also runs compilation time checks that help flag errors such as wrong parameter assignments and syntax errors. This reduces the likelihood of calling the wrong function or accidentally skipping a variable declaration.
TypeScript allows you to define complex type definitions in the form of interfaces. This is helpful when you have a complex type that you want to use in your application, such as an object that contains other properties. Statically typing interfaces results in strict checks, which reduce the number of possible bugs you may produce without using interfaces in TypeScript.
Using TypeScript with React provides better IntelliSense and code completion for JSX (JavaScript XML), which allows us to write HTML code directly in our React project.
TypeScript is also helpful when using IDEs like Visual Studio, Visual Studio Code, Webstorm, Eclipse, etc. These provide better autocompletion and snippet generation, making development faster. Read more about TypeScript IDEs here.
TypeScript allows you to gradually adapt its usage in your existing projects. You can also configure the TypeScript compiler for this use case. Find a list of TypeScript compilers in the official TypeScript documentation.
Finally, TypeScript is an open source language backed by Microsoft. It’s widely loved and used by millions of developers worldwide. Because it’s so widely used, it’s easy to find support and answers to your questions if you get stuck while learning or using it.
.tsx files in TypeScriptThe introduction of .tsx in TypeScript came several releases after TypeScript v1.0. According to the release notes for TypeScript v1.6 where .tsx extension was introduced, the new extension was designed to enable JSX inside of TypeScript files, and make the new as operator the default way to cast.
The introduction of .tsx also resulted in three additional things:
.tsx files.tsx files.ts and .tsx in TypeScriptWith the introduction of the .tsx file extension, many developers wanted to know the difference between the new file extension and the existing .ts.
The .ts file extension is used when you are creating functions, classes, reducers, etc., that do not require the use of JSX syntax and elements, whereas the .tsx file extension is used when you create a React component and use JSX elements and syntax.
Now that we’ve gone over a general overview, let’s get to the installation. You can install TypeScript using either npm or Create React App.
To install TypeScript globally using npm, run either of the following commands in your terminal:
npm install -g typescript
npm install -D typescript
Once npm is done, you can verify that TypeScript is installed correctly:
tsc --v // Version 5.1.6
The code above will print out the version number of TypeScript installed.
To get started with a project after successful installation, create a folder that will hold the application and create a new directory:
mkdir typescript-react-project
Change the directory to the new folder:
>cd typescript-react-project
Then, initiate the project:
npm init
To install TypeScript with create-react-app, run the following in your terminal:
npx create-react-app .
The command above will create a simple folder structure for your application. Then, install all the necessary modules and get your project up and running for you.
For this tutorial, we’ll use the npm init method.
webpack is a module bundler that lets you compile JavaScript modules. To get started with webpack in TypeScript, we need to install webpack and a webpack plugin called ts-loader with the following command in the terminal:
npm install webpack webpack-cli ts-loader
Just like TypeScript, webpack also checks for a file called webpack.config.js for configuration. If it doesn’t already exist, create a new file called webpack.config.js and add the following code:
const path = require('path');
module.exports = {
  entry: './src/index.tsx',
  module: {
    rules: [
      {
        test: /\.tsx?$/,
        use: 'ts-loader',
        exclude: /node_modules/,
      },
    ],
  },
  resolve: {
    extensions: ['.tsx', '.ts', '.js'],
  },
  output: {
    filename: 'bundle.js',
    path: path.resolve(__dirname, 'dist'),
  },
};
The code above will direct webpack to enter through the ./src/index.ts file, load and compile all the .ts and .tsx files through the ts-loader, and then output a bundle.js file in our dist directory.
After everything you’ve configured so far, wouldn’t it make sense if you could just run a command like npm run magic any time you wanted to create a bundle? To do that, open the package.json file in the project root directory and update the scripts section with this:
"scripts": {
   "magic": "webpack"
}
index.tsx fileNow it’s time to create the main entry point file of our project. But before we do that, we need to install the following:
npm install react react-dom @types/react @types/react-dom
Next, create a new src folder at the root level of your project directory. Inside this src folder, add a file and name it index.tsx. Then, add the following code:
import * as React from "react";
import * as ReactDOM from "react-dom";
ReactDOM.render(
<div>
<h1>Hello, Welcome to React and TypeScript</h1>
</div>,
  document.getElementById("root")
);
Above is a simple React setup, except that it is using TypeScript. To compile the file, run the command below in your terminal:
npm run magic
A build folder with a file named bundle.js has been created. To find out if this newly created bundle works as expected, create a new index.html file that references the new build:
 <!DOCTYPE html>
<html>
  <head>
    <meta charset="utf-8">
    <title>Getting Started with Typescript and ReactJS</title>
  </head>
  <body>
    <!-- this is where react renders into -->
    <div id="root"></div>
    <script src="dist/bundle.js"></script>
  </body>
</html>
If you double-click on the index.html file to open it in a browser, you will see this:
Now that we understand the basics of writing React in TypeScript, let’s dive into how we can create React components, as this is an essential part of developing our application.
In the already created src folder, we’ll add a folder called components. This is the folder that will hold any React component we create. In the components folder, create a new file called FirstComponent.tsx and add the following code:
import React from "react";

const Logo = "https://logrocket-assets.io/static/home-hero-c97849b227a3d3015730e3371a76a7f0.svg";

const FirstComponent: React.FC<{}> = () => {
  return (
    <div>
      <h3>A Simple React Component Example with Typescript</h3>
      <div>
        <img height="250" src={Logo} alt="Logo" />
      </div>
      <p>This component shows the Logrocket logo.</p>
      <p>For more info on Logrocket, please visit <a href="https://logrocket.com">https://logrocket.com</a></p>
    </div>
  );
};

export default FirstComponent;
The above code block is a simple functional React component that returns a logo and some text. To make this new component accessible to React, we need to import and use the component in the base App.tsx file.
Update the App.tsx file to:
import React from "react";
import FirstComponent from "./components/FirstComponent";

const App = () => {
  return (
    <div>
      <h1>Hello, Welcome to React and TypeScript</h1>
      <FirstComponent />
    </div>
  );
};

export default App;
FirstComponent has been imported from its file module and used to render some texts and images on the user interface. Now, if you run the npm run start command and navigate to your browser, you will see this:

In React, Hooks and props can be safely typed using TypeScript to improve code quality. First, let’s create a custom Hook that manages data fetching from an endpoint and the safe typing of the Hook:
import { useState, useEffect } from "react";

interface User {
  id: number;
  name: string;
  email: string;
  username: string;
}

interface UsersState {
  users: User[] | null;
  loading: boolean;
  error: string | null;
}

const useUsers = (): UsersState => {
  const [state, setState] = useState<UsersState>({
    users: null,
    loading: true,
    error: null,
  });

  useEffect(() => {
    const fetchUsers = async () => {
      try {
        const response = await fetch(
          "https://jsonplaceholder.typicode.com/users"
        );
        const users = await response.json();
        setState({ users, loading: false, error: null });
      } catch (error) {
        setState({ users: null, loading: false, error: error.message });
      }
    };

    fetchUsers();
  }, []);

  return state;
};

function UserList() {
  const { users, loading, error } = useUsers();

  if (loading) {
    return <div>Loading...</div>;
  }

  if (error) {
    return <div>{error}</div>;
  }

  return (
    <ul>
      <li>
        {users?.map((user) => (
          <div key={user.id}>
            <p>{user.name}</p>
            <p>{user.email}</p>
            <p>{user.username}</p>
          </div>
        ))}
      </li>
    </ul>
  );
}

export default UserList;
In the code block above, a User interface is used to describe the interface/shape of the data that specifies the structure of the user object that will be returned from the endpoint.
The UsersState interface describes the shape of the state that is managed by the useUsers Hook. With Typescript, we can define the interface for both the expected data and state, ensuring. structured and type-safe environment. The useUsers Hook provides the type safety for the fetched data, as well as for the loading and error statuses, to ensure that the component (UserList) using this Hook receives and handles the data with the correct types.
This method of typing hooks enhances the type safety of the code, which reduces the likelihood of runtime errors related to data types and structures.
Now, let’s take a look at a simple example that demonstrates how to type props using TypeScript in a React component:
import React from "react";
type UserProps = {
  firstName: string;
  lastName: string;
};
const PropsComponent: React.FC<UserProps> = ({ firstName, lastName }) => {
  return (
    <div>
      <p>{firstName}</p>
      <p>{lastName}</p>
    </div>
  );
};

export default PropsComponent;
In the code block above, we define the custom type for the UserProp, which includes firstName and lastName. The PropsComponent is defined using the React.FC (React Functional Component) generic type, which takes in the pre-defined UserProps as an argument. This will ensure that whatever data we are getting back as props wherever the PropsComponent is used will conform to the type we have defined, i.e., it must have firstName and lastName values.
Let’s call this component inside App.tsx:
const App = () => {
  return <PropsComponent name="John" lastName="Bob" />;
};
export default App;
Now if you load your React app and check the UI, you’ll see the names rendered:

If you pass in other data that is not part of the data structure defined in the type, TypeScript will throw an error:
<PropsComponent firstName="John" lastName="Bob" age={30}/>
You will see this error in your console:
![]()
This way, TypeScript will enforce that the props passed to PropsComponet must adhere to the defined types, providing type safety and error checking during development.
One of TypeScript’s core principles is that type checking focuses on the shape that values have. This is sometimes called “duck typing” or “structural subtyping.”
In TypeScript, interfaces fill the role of naming these types and are a powerful way of defining contracts within your code and contracts with code outside of your project.
To see how you can use interfaces with your React components, create a file UserInterface.ts in the src folder and add the following code:
export default interface UserInterface{
  name: string;
  age: number;
  address: string;
  dob: Date;
}
The code block above defines a simple user interface, which will be passed in as props into a new component. Because this interface is strongly typed, notice you cannot pass an integer for the name key, as the value is a string.
Create a new component in the components folder called UserComponent.tsx and add the following code:
import React from "react";
import UserInterface from '../UserInterface';

const UserComponent: React.FC<UserInterface> = (props) => {
  return (
    <div>
      <h1>User Component</h1>
      Hello, <b>{props.name}</b>
      <br />
      You are <b>{props.age} years old</b>
      <br />
      You live at: <b>{props.address}</b>
      <br />
      You were born: <b>{props.dob.toDateString()}</b>
    </div>
  );
};

export default UserComponent;
The code block above is self-explanatory. UserInterface, previously defined, has been imported and used to define the expected structure of the props for UserComponent. It typically enforces a data structure that specifies what kind of data should be passed to UserComponent as props.
After creating our UserComponent, update the App.tsx file:
import React from "react";
import ReactDOM from "react-dom";
import FirstComponent from './components/FirstComponent';
import UserComponent from './components/UserComponent';

const App = () => {
  return (
    <div>
      <h1>Hello, Welcome to React and TypeScript</h1>
      <FirstComponent />
      <UserComponent name="John Doe" age={26} address="87 Summer St, Boston, MA 02110" dob={new Date()} />
    </div>
  );
};

export default App
Now, run npm run start, navigate to your browser, and view the updated changes. You should see this:
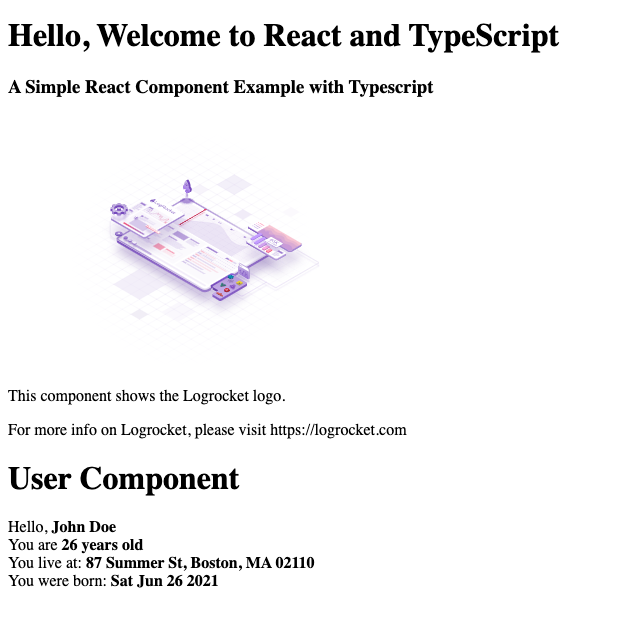
The UserInterface that was created has four fields (name, address, date of birth, and address), and that shapes the data that UserComponent expects. If you pass in a prop that is not part of these fields, an error will be thrown that you are passing a field that is not inside what it expects.
Let’s take a look at this in action:
const App = () => {
  return (
    <div>
      <h1>Hello, Welcome to React and TypeScript</h1>
      <FirstComponent />
      <UserComponent name="John Doe" age={26} address="87 Summer St, Boston, MA 02110" dob={new Date()} sex="Male" />
    </div>
  );
};

The sex field, along with other props, is being passed to UserComponent. However, TypeScript has identified the error, indicating that the sex field is not part of the defined interface.
In this tutorial, we demonstrated how to use TypeScript with React. We also walked through how to configure webpack with ts-loader to compile the TypeScript files and emit a final build.
Install LogRocket via npm or script tag. LogRocket.init() must be called client-side, not
server-side
$ npm i --save logrocket

// Code:

import LogRocket from 'logrocket';
LogRocket.init('app/id');
// Add to your HTML:

<script src="https://cdn.lr-ingest.com/LogRocket.min.js"></script>
<script>window.LogRocket && window.LogRocket.init('app/id');</script>

Learn how AI-assisted development governance uses rules, agents, hooks, and protocols to help AI coding tools produce safer, more consistent code.

A step-by-step guide to building your first MCP server using Node.js, covering core concepts, tool design, and upgrading from file storage to MySQL.

Using security headers in your Next.js apps is a highly effective way to secure websites from common security threats.

A deep dive into May 2026’s AI model and tool rankings. We break down performance, usability, pricing, and real-world capabilities across 50+ features to help you pick the right tools for your development workflow.
Hey there, want to help make our blog better?
Join LogRocket’s Content Advisory Board. You’ll help inform the type of content we create and get access to exclusive meetups, social accreditation, and swag.
Sign up now