The most exciting thing about frontend development is the ability to deliver stuff that excites people right away. We have seen demands for great user experience grow everyday, and developers are catching up with them nicely.
Augmented reality (AR) and virtual reality (VR) are some of the fastest growing user interfaces. Applications of AR and VR tech are boundless, especially in fields like education, medicine, and engineering. Thankfully, development of cross platform AR experiences is getting more accessible as we progress.
ViroReact is a library for developers who want to rapidly build AR and VR experiences. It allows code to run natively across all mobile VR (including Google Daydream, Samsung Gear VR, and Google Cardboard for iOS and Android) and AR (iOS ARKit and Android ARCore) platforms. Built on React Native, it allows React developers to adapt quickly to this new technology..
Today, we are building a sample menu app with ViroReact that will display food items in “AR space,” meaning that they will appear to be in the room with the user while looking through their phone camera.
Specifically, when our user focuses on a milkshake in our menu, the app should display a 3D milkshake with some snow flakes.
ViroReact was originally developed by the Viro Media company, but was open sourced in 2019. In late 2020, the Viro Community was formed to help maintain and move the project onwards, updating it so it could run with modern versions of React Native, along with the ability to add new features.
For this demo we will leverage the starter kit by Viro Community to keep things simple. You can integrate ViroReact in your existing app as well.
We’ll get started with the following commands:
git clone https://github.com/ViroCommunity/starter-kit.git
cd starter-kit
npm install
npx pod-install # (iOS)
npx react-native run-android # or npx react-native run-ios
Please note that development and debugging of AR apps is done best on specific devices. You will need a device with AR capabilities.
Let’s play around with some cool AR elements available via ViroReact. This exercise will make us a little more familiar with the dynamics of AR apps.
As a warmup, let’s create a simple box with texture and some animation.
Here is the code:
import React from 'react';
import {StyleSheet} from 'react-native';
import {
  ViroARScene,
  ViroARSceneNavigator,
  ViroMaterials,
  ViroAnimations,
  ViroBox,
} from '@viro-community/react-viro';

/**
 * Every 3D object will require materials to display texture on body.
 * We have to create all materials before we use them with our elements.
 */
ViroMaterials.createMaterials({
  /**
   * Material in its simplest form is just diffused color
   */
  white: {
    diffuseColor: 'rgba(255,255,255,1)',
  },
  /**
   * We can also diffuse a texture here.
   */
  grid: {
    diffuseTexture: require('./res/grid_bg.jpg'),
  },
});

ViroAnimations.registerAnimations({
  /** To begin with we have added simple rotation animation */
  rotate: {
    properties: {
    rotateY: '+=90',
    },
    duration: 2500, //.25 seconds
  },
});

const BoxTexture = () => {
  const onInitialized = (arSceneState, reason) => {
    console.log(reason);
  };

  return (
    /** ViroARScene will open up AR enabled camera in your scene */
    <ViroARScene onTrackingUpdated={onInitialized}>
    {/**
    * Here us our ViroBox a 3D element with position in AR space
    */}
    <ViroBox
        position={[0, -0.5, -1]}
        animation={{name: 'rotate', run: true, loop: true}} // We have defined our animation at the top;
        scale={[0.3, 0.3, 0.1]}
        materials={['grid']} // We have defined material at the top;
    />
    </ViroARScene>
  );
};

export default () => {
  // All AR scene will reside in ViroARSceneNavigator:
  return (
    <ViroARSceneNavigator
    autofocus={true}
    initialScene={{
        scene: BoxTexture,
    }}
    style={styles.f1}
    />
  );
};

const styles = StyleSheet.create({
  f1: {
    flex: 1,
  },
});
Here we have added a ViroBox element, which is a 3D box defined by width, height, and length. We positioned the box in 3D space and added materials over it. Materials are defined separately along with animations. Box serves as a building block for many 3D elements.
You can read about box, material, and animations in the ViroReact docs.
Let’s add some cool 3D models to our basic AR app.
3D objects are not as simple as 2D images; they are usually a mesh of a model (VRX or OBJ) file that defines geometry, plus a few images to define textures that are embedded over top.
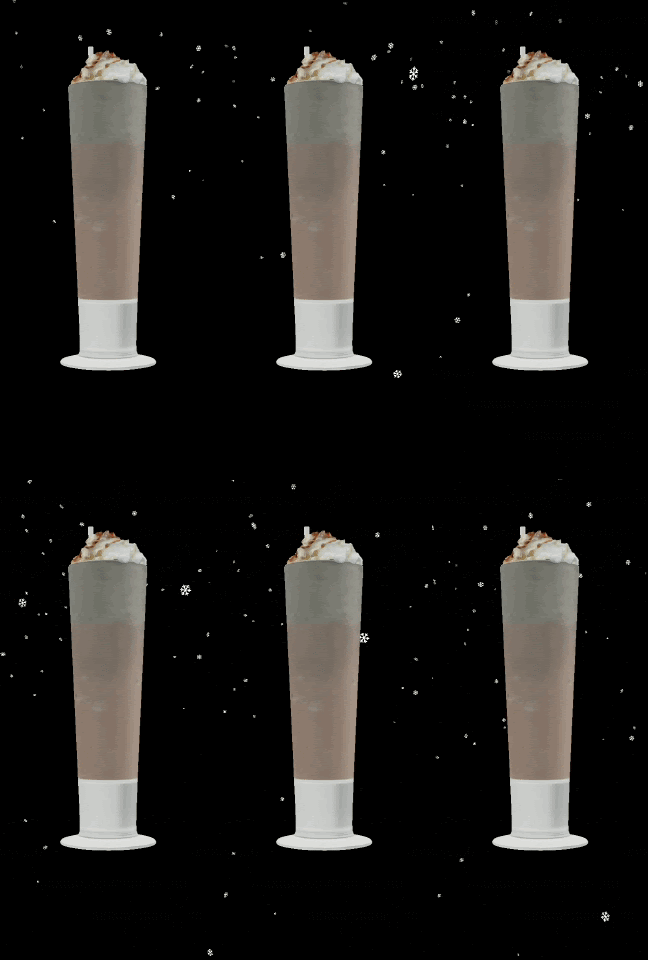
Here is our what our milkshake model looks like now:

As you can see, it comprises an object file, a diffuse texture, and a specular texture. All of these components combine together to deliver the best 3D experience.
Here we will use the Viro3DObject component to display a 3D model in our app:
ViroMaterials.createMaterials({
  shake: {
    diffuseTexture: require('./res/shake/diffuse.jpg'),
    specularTexture: require('./res/shake/specular.jpg'),
  },
});

...
<Viro3DObject
source={require('./res/shake/geometry.obj')}
position={[0, 0.2, 0]}
scale={[0.2, 0.2, 0.2]}
type="OBJ"
lightReceivingBitMask={3}
shadowCastingBitMask={2}
transformBehaviors={['billboardY']}
resources={[
    require('./res/shake/diffuse.jpg'),
            require('./res/shake/specular.jpg'),
      ]}
materials={['shake']}
/>
It’s not just about placing 3D objects in space. The best experience is when these objects are embedded into a scene like they are part of the real world.
Shadows play a vital role in making our scene closer to the real world. Let’s add some lights and planes so our objects look more real.
Here is how we will wrap our milkshake model in our scene:
<ViroNode
       position={[0, -0.5, -1]}
       dragType="FixedToWorld"
       animation={{name: 'appear', run: true, loop: true}} // We have defined our animation at the top;
       onDrag={() => {}}>
       {/* Spotlight to cast light on the object and a shadow on the surface, see
             the Viro documentation for more info on lights & shadows */}
       <ViroSpotLight
         innerAngle={5}
         outerAngle={45}
         direction={[0, -1, -0.2]}
         position={[0, 3, 0]}
         color="#ffffff"
         castsShadow={true}
         influenceBitMask={4}
         shadowMapSize={2048}
         shadowNearZ={2}
         shadowFarZ={5}
         shadowOpacity={0.7}
       />
       <Viro3DObject
         source={require('./res/shake/geometry.obj')}
         position={[0, 0.01, 0]}
         scale={[0.03, 0.03, 0.03]}
         type="OBJ"
         lightReceivingBitMask={5}
         shadowCastingBitMask={4}
         // transformBehaviors={['billboardY']}
         resources={[
           require('./res/shake/diffuse.jpg'),
           require('./res/shake/specular.jpg'),
         ]}
         materials={['shake']} // We have defined material at the top;
       />
       <ViroQuad
         rotation={[-90, 0, 0]}
         width={0.5}
         height={0.5}
         arShadowReceiver={true}
         lightReceivingBitMask={4}
       />
     </ViroNode>
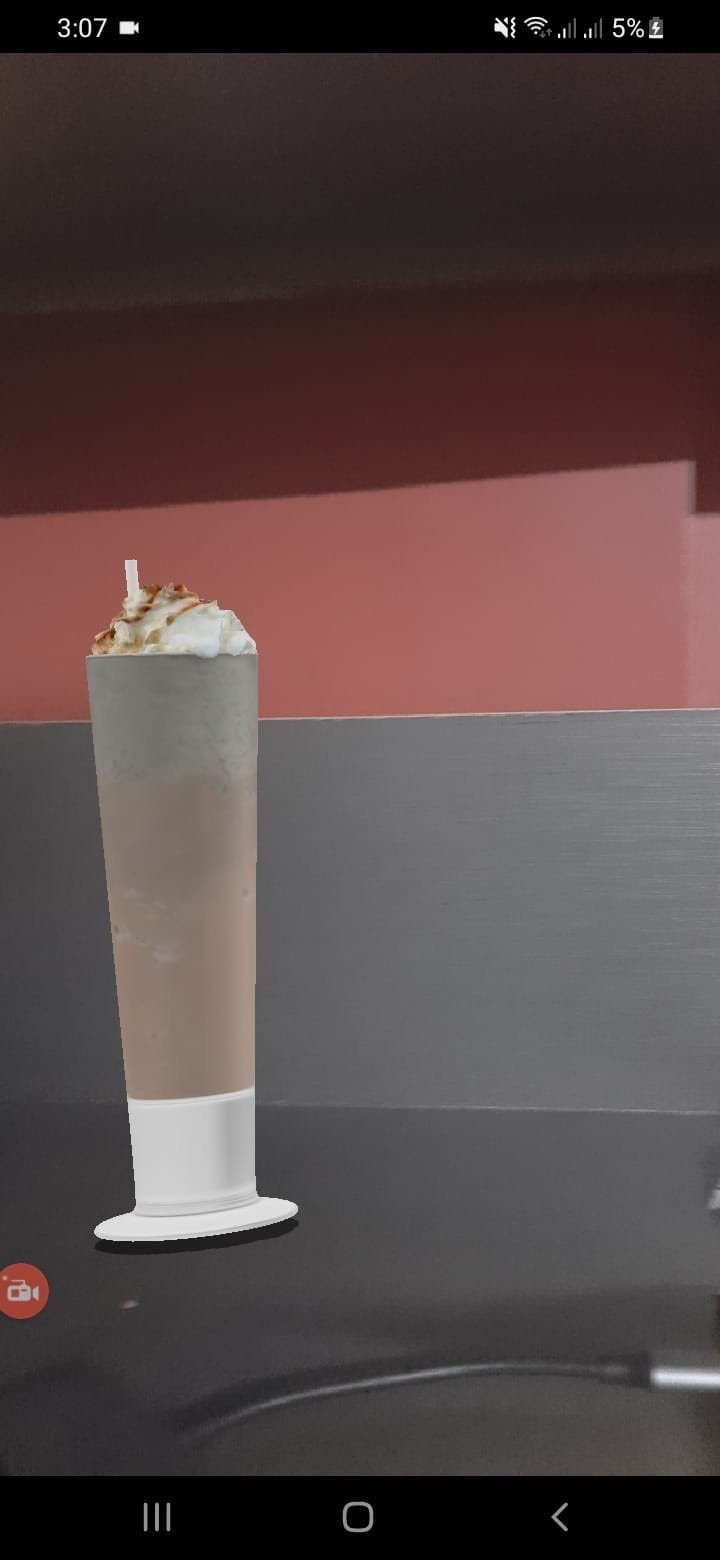
Now our milkshake model is wrapped in ViroNode, which behaves as a sub scene. Within that node we have ViroSpotLight to cast light and shadow on our 3D object. This shadow is received by ViroQuad.
Here are the results now:

Our static scene looks really cool now, but we can add some animation to make things look a bit more real.
Earlier, we added a simple animation on our box. Building on the same principles, we will add a little fade animation for our milkshake glass. Here is how it will look:
ViroAnimations.registerAnimations({
 appear: {
   properties: {
     opacity: 1,
   },
   duration: 2000,
 },
});
How about moving this glass? Let’s add some interactions on our 3D object by implementing pinch, drag, and rotate.
It’s as simple as handling any other React interaction; we will provide the scale, position, and rotation of our object from state variables and alter them in our callback methods. Here is how code will look:
 /*
  Pinch scaling should be relative to its last value *not* the absolute value of the
  scale factor. So while the pinching is ongoing set scale through setNativeProps
  and multiply the state by that factor. At the end of a pinch event, set the state
  to the final value and store it in state.
  */
 const _onPinch = useCallback(
   (pinchState, scaleFactor, source) => {
     console.log('_onPinch');
     var newScale = scale.map(x => {
       return x * scaleFactor;
     });

     if (pinchState === 3) {
       setScale(newScale);
       return;
     }
     arNodeRef.current.setNativeProps({scale: newScale});
     spotLightRef.current.setNativeProps({shadowFarZ: 6 * newScale[0]});
   },
   [scale],
 );
Let’s make our environment more classy. With ViroReact we can create some cool particle emitters that make our milkshake look more amazing.
Here is how to do it:
<ViroParticleEmitter
       position={[0, 4.5, 0]}
       duration={2000}
       visible={true}
       delay={0}
       run
       loop={true}
       fixedToEmitter={true}
       image={{
         source: require('./res/particle_snow.png'),
         height: 0.01,
         width: 0.01,
         bloomThreshold: 1.0,
       }}
       spawnBehavior={{
         particleLifetime: [5000, 5000],
         emissionRatePerSecond: [snowSpawnRate, snowSpawnRate],
         spawnVolume: {
           shape: 'box',
           params: [20, 1, 20],
           spawnOnSurface: false,
         },
         maxParticles: 2000,
       }}
       particleAppearance={{
         opacity: {
           initialRange: [0, 0],
           factor: 'Time',
           interpolation: [
             {endValue: 1.0, interval: [0, 500]},
             {endValue: 0.0, interval: [4000, 5000]},
           ],
         },
         rotation: {
           initialRange: [0, 360],
           factor: 'Time',
           interpolation: [{endValue: 1080, interval: [0, 5000]}],
         },
         scale: {
           initialRange: [
             [5, 5, 5],
             [10, 10, 10],
           ],
           factor: 'Time',
           interpolation: [
             {endValue: [6, 6, 6], interval: [0, 1000]},
             {endValue: [10, 10, 10], interval: [3000, 5000]},
             {endValue: [5, 5, 5], interval: [4000, 5000]},
           ],
         },
       }}
       particlePhysics={{
         velocity: {
           initialRange: [
             [-2 * windShear, -0.5, 0],
             [2 * windShear, -3.0 * fallSpeed, 0],
           ],
         },
       }}
     />
In this code, we have leveraged ViroParticleEmitter, which takes a simple png image to display as a particle, along with a few parameters to control frequency of emission and how long the particle stays on screen.
Here are the results:

Now it’s time for some magic. With ViroReact we can combine image recognition (IR) in our AR experiences. As our requirements mentioned, that milkshake will only appear on screen when our user points the camera on our menu with the milkshake’s photo.
We will add ViroARImageMarker to handle all of the IR stuff in ViroReact. Here is how our code will look like:
First, just like animations and materials, we have to register our IR targets:
ViroARTrackingTargets.createTargets({
 shake: {
   source: require('./res/shake.png'),
   orientation: 'Up',
   physicalWidth: 0.05, // real world width in meters
 },
});

<ViroARImageMarker
       target={'shake'}
       onAnchorFound={() =>
         setAnchorFound(true)
       }
>
...
</ViroARImageMarker
As you can see, ViroARImageMarker takes a target that is registered with ViroReact. The target is just a png image of an object we want to recognise. When the camera points to the target we start displaying our scene.
Imagination never stops, and neither does our eagerness to deliver amazing experiences. With tools like ViroReact at our disposal, it’s easier than ever before to create the best AR experiences. Let me know in the comments about the awesome things you’re creating with ViroReact.

LogRocket's Galileo AI watches sessions for you and and surfaces the technical and usability issues holding back your React Native apps.
LogRocket also helps you increase conversion rates and product usage by showing you exactly how users are interacting with your app. LogRocket's product analytics features surface the reasons why users don't complete a particular flow or don't adopt a new feature.
Start proactively monitoring your React Native apps — try LogRocket for free.
Hey there, want to help make our blog better?
Join LogRocket’s Content Advisory Board. You’ll help inform the type of content we create and get access to exclusive meetups, social accreditation, and swag.
Sign up now
Discover how the Interface Segregation Principle (ISP) keeps your code lean, modular, and maintainable using real-world analogies and practical examples.

<selectedcontent> element improves dropdowns

Learn how to implement an advanced caching layer in a Node.js app using Valkey, a high-performance, Redis-compatible in-memory datastore.

Learn how to properly handle rejected promises in TypeScript using Angular, with tips for retry logic, typed results, and avoiding unhandled exceptions.
2 Replies to "How to build an AR/VR app with ViroReact"
Hi very good post.
Just to understand lights config.
You write on the 3D model lightReceivingBitMask={5} but where is the light with influencebitmask of 5 ?
Thanks
Here’s a link to the new Viro Community docs, in case anyone needs them. https://viro-community.readme.io/docs