Authentication is an essential feature critical to the security that most modern web apps need. If breached, it can pose security risks to your users by exposing their data to the wrong folks. Instead of handling authentication from scratch, many modern web apps use Auth0, an easy-to-implement, adaptable authentication and authorization platform.

Auth0 currently provides a SPA SDK to handle authentication within Vue. Then, a Vue plugin already available in the documentation wraps the functionality of the SDK, which in turn provides a high-level API abstraction that handles a lot of the smaller details of authentication implementation.
In this tutorial, instead of using the plugin and SDK as explained above, you’ll learn how to implement authentication using Auth0, traditional Vuex, and Vue Router. In the end, you’ll build a functional authentication service using Vue and Auth0, and implement authentication in any web app of your choice using these same processes. Let’s get started!
The Replay is a weekly newsletter for dev and engineering leaders.
Delivered once a week, it's your curated guide to the most important conversations around frontend dev, emerging AI tools, and the state of modern software.
We will be using the Vue CLI to kickstart the project. If you already have Vue CLI installed on your system, you can skip to the next section.
First, you need to have the Vue CLI installed on your system. You can install it globally with this command:
npm install -g @vue/cli
We can now use the Vue CLI to create our project. Create a new project using this command:
vue create vue-sample-auth0
You will be asked to pick a preset. Choose Manually select features and then select Babel, Vuex, Router, and Linter/Formatter.
You will also be asked if you want to use History mode for Router — choose Yes. You can select any Linter you want, but for this tutorial I will be using ESLint and Prettier.
After the project has been created, navigate to the new project folder:
cd vue-sample-auth0
Then start the server:
npm run serve
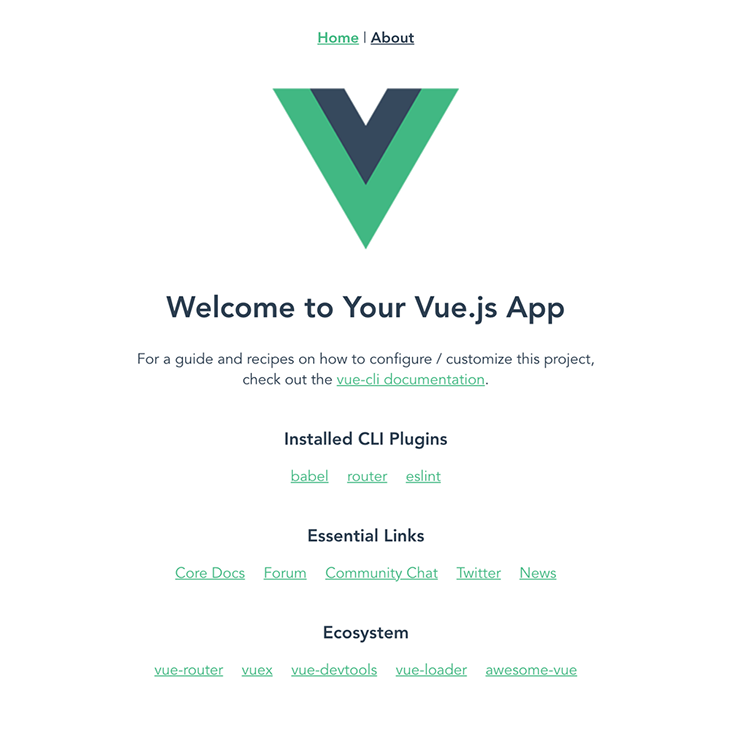
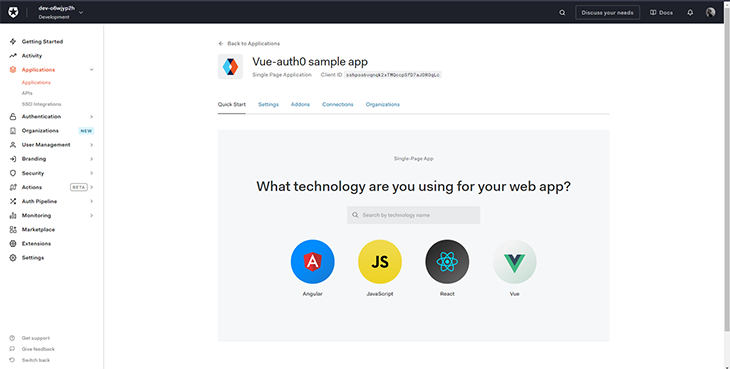
Once the server is started, you can open your browser to view it. You should see this:
We’ll now install Auth0’s library to handle authentication on the client side:
npm i auth0-js
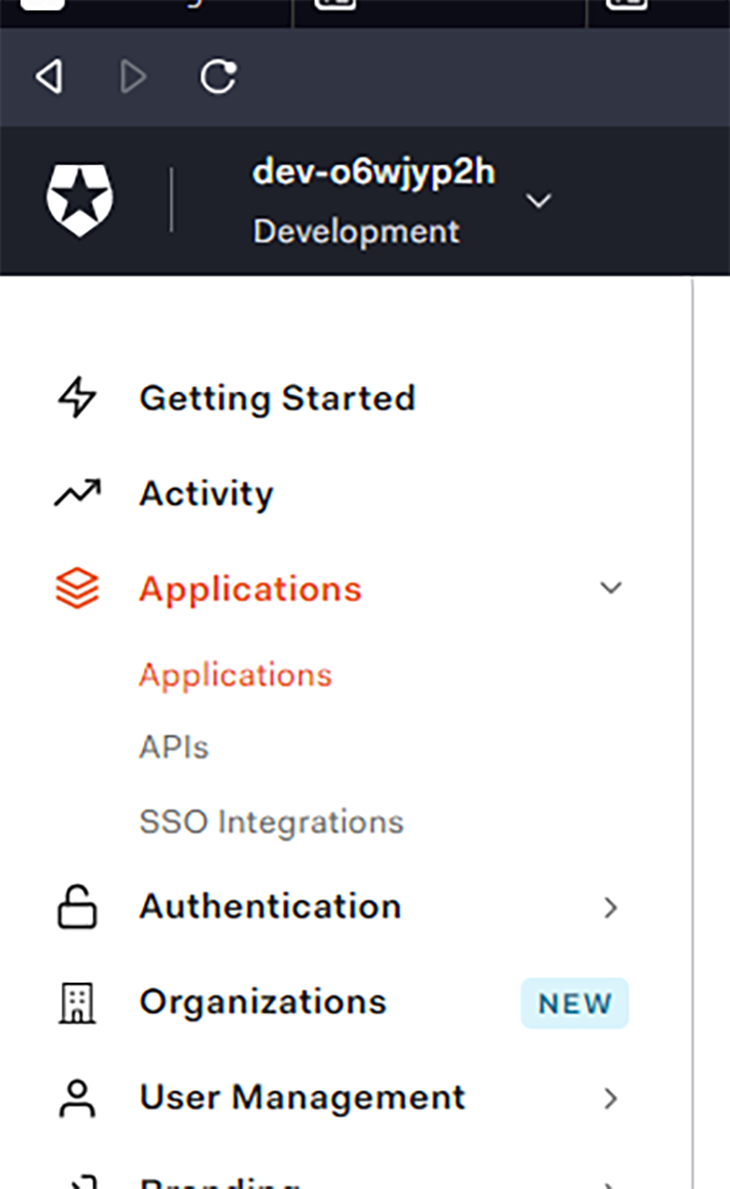
To get started with Auth0, you’ll need to sign up, create a new tenant, and select your region. Then you can proceed through these steps:
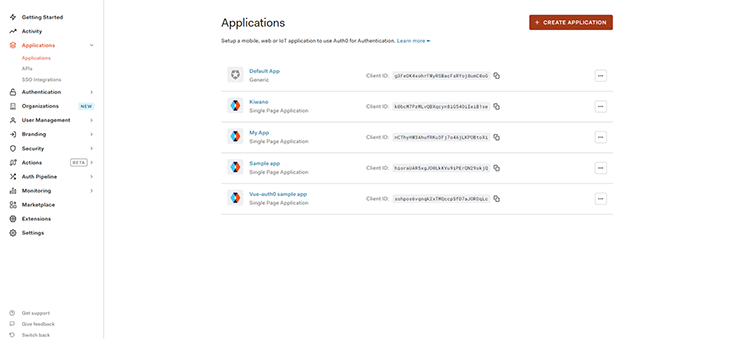
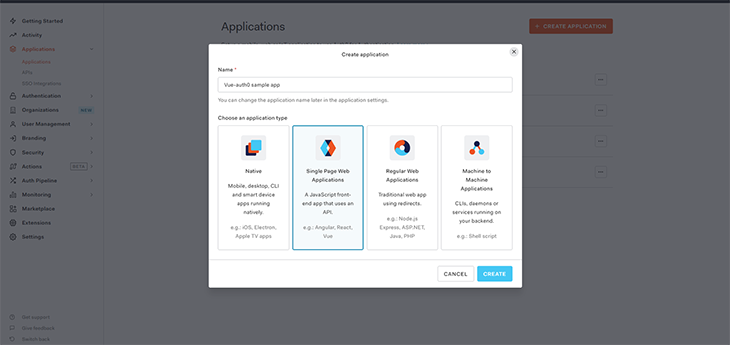
Now that you’ve created the application, it’s time to configure the settings.
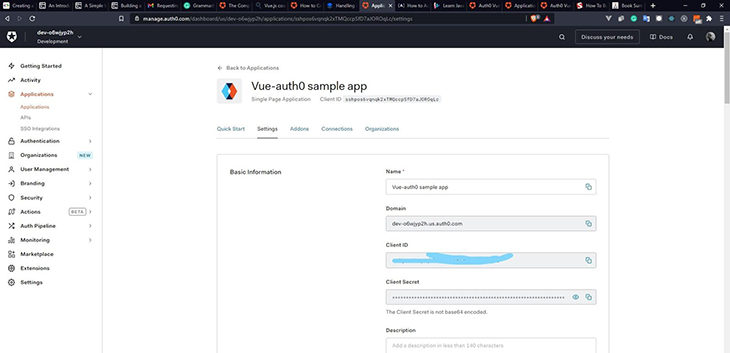
You will see your Domain and Client ID under the Basic Information section. We’ll come back to this later on; first, we need to store these values as environmental variables for our application to work.
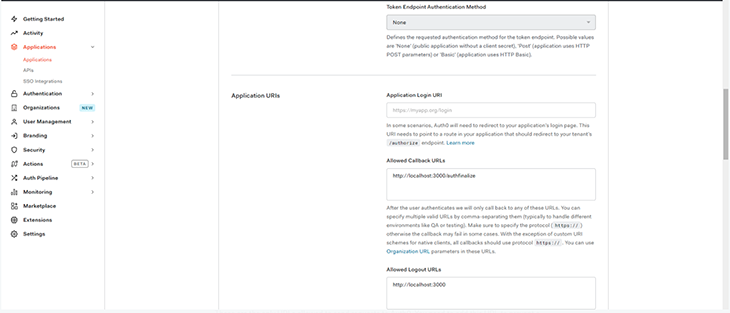
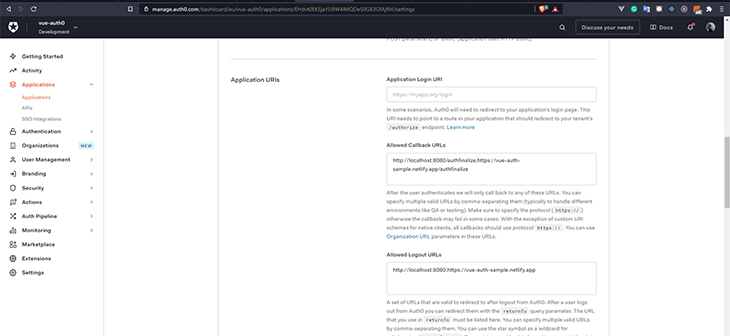
Under the Application URLs section, we will need to define these values:
Note that you’ll need to use your own local URL to test your application locally.
These are the only URLs you need to redirect your users after they successfully log in. We’ll use the local URL:
http://localhost:8080/authfinalize
I’ll explain why we’re sending the user to the authfinalize route later in the article.
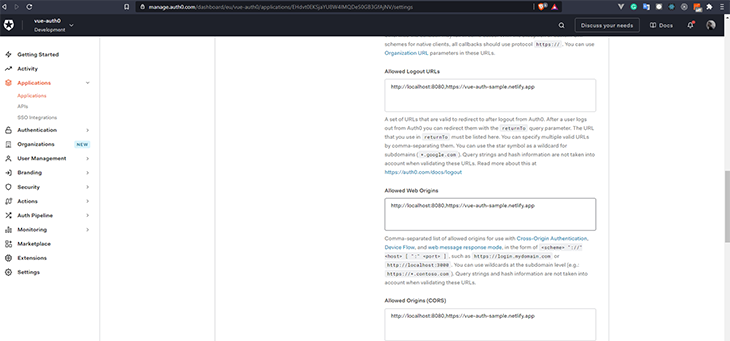
These are the URLs that Auth0 can use to redirect your users after they log out.
http://localhost:8080
These are the only URLs allowed to send requests to Auth0. You need to add this URL to prevent a cross-origin resource sharing (CORS) error. For now, we’ll add the local URL:
http://localhost:8080

These are the only URLs that are allowed to make any requests to the server.
http://localhost:8080
Here, we’ll have to set our id_token expiration in seconds. We’ll use 36,000s (10 hours) for this sample site:

Now, let’s go back to our project folder and create a .env file for our local development. Add these environment variables:
VUE_APP_AUTH0_CONFIG_RESPONSETYPE=token id_token
VUE_APP_AUTH0_CONFIG_SCOPE=openid profile email
VUE_APP_AUTH0_CONFIG_DOMAIN={{ Domain }}
VUE_APP_AUTH0_CONFIG_DOMAINURL=https://{{ Domain }}
VUE_APP_AUTH0_CONFIG_CLIENTID={{ ClientID }}
VUE_APP_DOMAINURL={{Local host URL}}
VUE_APP_DOMAINURL_REDIRECT={{ Allowed Callback URL }}
VUE_APP_EXPIRY=36000
These variables will be used within our project as we go on. The access token and id_token will be returned as response after authentication, which can be used to verify the identity of the authenticated user.
Domain, ClientID, and Allowed Callback URL can all be found on the Settings page. The only difference between our VUE_APP_AUTH0_CONFIG_DOMAIN and VUE_APP_AUTH0_CONFIG_DOMAINURL is that we need to add https:// in front of the domain. All environmental variables in Vue must have a prefix of VUE_APP.
We’ll consider Vuex as the single source of truth for our application, and so it’ll be used to initialize Auth0 within our application. We’ll also use it to handle data within our application.
First, we need to import auth0-js into our application and set up our state. Within our state, we’ll initialize Auth0 and add our application details from the environmental variables as discussed above.
import Vuex from "vuex";
import Vue from "vue";
import actions from "./auth/actions";
import getters from "./auth/getters";
import mutations from "./auth/mutations";
import auth0 from "auth0-js";
Vue.use(Vuex);
const state = () => ({
  userIsAuthorized: false,
  auth0: new auth0.WebAuth({
    domain: process.env.VUE_APP_AUTH0_CONFIG_DOMAIN,
    clientID: process.env.VUE_APP_AUTH0_CONFIG_CLIENTID,
    redirectUri: process.env.VUE_APP_DOMAINURL_REDIRECT,
    responseType: process.env.VUE_APP_AUTH0_CONFIG_RESPONSETYPE,
    scope: process.env.VUE_APP_AUTH0_CONFIG_SCOPE,
  }),
});
export default new Vuex.Store({
  namespaced: true,
  state,
  actions,
  getters,
  mutations,
});
We add userIsAuthorized to our state to accept boolean. We’ll use it as an indicator to know whether the user is logged in. Note that on the initial load of the application, this will register as false.
loginAuthenticating the user with Auth0 involves sending the user to an Auth0 portal outside our application. After that, we return them to our application. This login action will be called within our component to trigger this redirection.
//login.js

const login = ({state}) => {
    state.auth0.authorize()

}
export default login;
//logging in within the component

<template>
  <div class="home">
    <button @click="login">Login</button>
    <button @click="signup">Signup</button>
  </div>
</template>
<script>

export default {
  name: "Home",
  methods: {
    login() {
      this.$store.dispatch('login')
    },
    signup() {
      this.$store.dispatch('login')
    }
  }
};
</script>
authHandleAuthenticationWhen the user is returned to our application, the access token and id_token are sent back to us as a response. This action sets the expiration time for the token, and then stores access token, id_token, and expiration time locally before sending the user to the secured page, or the dashboard.
The function uses the parseHash from the Auth0 object inside our state to check if the user has the access token and id_token, and then it saves them locally before sending the user to the dashboard. On the other hand, if there’s an error, the user sees an error and gets redirected back to the homepage.
//auth0HandleAuthentication.js

import router from '../../../router/index'
const auth0HandleAuthentication = (context) => {
  context.state.auth0.parseHash((err, authResult) => {
    if (authResult && authResult.accessToken && authResult.idToken) {
      let expiresAt = JSON.stringify(
        (process.env.VUE_APP_EXPIRY * 1000) + new Date().getTime()
      );
      // save the tokens locally
      localStorage.setItem("access_token", authResult.accessToken);
      localStorage.setItem("id_token", authResult.idToken);
      localStorage.setItem("expires_at", expiresAt);
      router.push({ name : "dashboard"})
    }
    else if (err) {
      alert("There's is an issue with signing up", err)
      router.replace({ name: "home" })
    }
  })
};
export default auth0HandleAuthentication;
logoutWe use the logout button to sign out the user. It takes the user back to Auth0’s site to log them out of our application completely. Then, it sends them back to our application using the Allowed Logout URLs we previously added.
//logout.js

const logout = () => {
  localStorage.removeItem("access_token");
  localStorage.removeItem("id_token");
  localStorage.removeItem("expires_at");
  window.location.href =
    process.env.VUE_APP_AUTH0_CONFIG_DOMAINURL +
    "/v2/logout?returnTo=" +
    process.env.VUE_APP_DOMAINURL +
    "/&client_id=" +
    process.env.VUE_APP_AUTH0_CONFIG_CLIENTID;
};
export default logout;
//logging out on the dashboard page

<template>
  <div class="hello">
    <h2>Here's the dashboard</h2>
    <button @click="logout">Logout</button>
  </div>
</template>
<script>
export default {
  name: 'Dashboard',
  methods: {
    logout() {
      this.$store.dispatch('logout')
    }
  }
}
</script>
We will only have one mutation that’ll be used to trigger our userIsAuthorized indicator within our state.
 const setUserIsAuthenticated = (state, replacement) => {
    state.userIsAuthorized = replacement;
}
vue-routerThis is where the actions will be triggered and users will be routed, based on certain conditions in our route guards.
The user flow is direct:
/authfinalize page specifically) with the access token, id_token, etc.While setting up our routes, we will add the meta object for each route. This will allow us to identify the routes that are opened to everyone using requiresGuest, and the protected routes using requiresAuth.
These meta properties can be accessed on the route location and navigation guards.
import Vue from "vue";
import VueRouter from "vue-router";
import Store from "../store"
import Home from "../views/Home.vue";
import Authfinalize from "../views/Authfinalize"
import Dashboard from "../views/Dashboard"
Vue.use(VueRouter);
const routes = [
  {
    path: "/",
    name: "home",
    component: Home,
    meta : {
      requiresGuest : true,
    }
  },
  {
    path: "/dashboard",
    name: "dashboard",
    component: Dashboard,
    meta : {
      requiresAuth : true
    }
  },
  {
    path: "/authfinalize",
    name: "Authfinalize",
    component: Authfinalize,
  },
];
const router = new VueRouter({
  mode: "history",
  base: process.env.BASE_URL,
  routes,
});
router.beforeEach((to, from, next) => {
  const requiresAuth = to.matched.some((x) => x.meta.requiresAuth);
  const requiresGuest = to.matched.some((x) => x.meta.requiresGuest);
  const auth0callback = to.matched.some(record=>record.path == "/authfinalize");
  let routerAuthCheck = false;
  if(auth0callback) {
    Store.dispatch('auth0HandleAuthentication');
    next(false);
  }
  if( localStorage.getItem('access_token') && localStorage.getItem('id_token') && localStorage.getItem('expires_at') ){
    let expiresAt = JSON.parse(localStorage.getItem('expires_at'));
    routerAuthCheck = new Date().getTime() < expiresAt;
  }
  Store.commit('setUserIsAuthenticated', routerAuthCheck);
  if (requiresAuth) {
    if(routerAuthCheck){
      next();
    }
    else{
      Store.dispatch('logout');
    }
  }

  if (requiresGuest && routerAuthCheck) {
      next({ name: "dashboard" });
  }
  next();
})

export default router;
In our beforeEach router guard, we should check which meta-object the intended route has and assign it accordingly to either a requiresAuth or requiresGuest variable. We can also create an auth0callback variable if we are navigating to the /authfinalize path.
Then, we create a variable named routerAuthCheck and assign it to false. We will use this variable to trigger the mutation that’ll change the indicator within our Vuex that we talked about earlier.
The first if block checks if we’re navigating to the /authfinalize route, and then calls the auth0HandleAuthentication. Note that the only time we will navigate to this route is when we’re being redirected back from Auth0.
The second if block checks if the user is authenticated and then it makes a commit, which switches our indicator to true when logged in and vice-versa. Basically, it checks the local storage to see if the tokens and expiration date are still are there.
It then goes further to check if the expiration date is greater than the current time. routerAuthCheck will reflect whether it’s true or false, and then it’ll commit to the setUserIsAuthenticated mutation, which switches our app indicator.
The third if block checks if the intended route requires authentication (requiresAuth), then checks if the routerAuthCheck is true or false. If true, the user goes on to the dashboard. If false, the user is logged out.
The last if block checks if an authenticated user is routing to the homepage (requiresGuest). Then, it automatically sends them to the dashboard instead.
To deploy the app, you need to add your live URL to each of the settings demonstrated earlier. Separate each of the URLs with a comma.
Remember that you’ll have to create a new .env file and set the URL for the live version within your codebase or the platform you’re deploying to, depending on what platform you’re using for deployment.
While there are other methods of handling authentication, tools like Auth0 can give you the advantage of time while you’re still sure of the security of your application. You can check out our codebase on GitHub and find the demo site here. You can also find out more from Auth0’s documentation.
Debugging Vue.js applications can be difficult, especially when users experience issues that are difficult to reproduce. If you’re interested in monitoring and tracking Vue mutations and actions for all of your users in production, try LogRocket.

LogRocket lets you replay user sessions, eliminating guesswork by showing exactly what users experienced. It captures console logs, errors, network requests, and pixel-perfect DOM recordings — compatible with all frameworks.
With Galileo AI, you can instantly identify and explain user struggles with automated monitoring of your entire product experience.
Modernize how you debug your Vue apps — start monitoring for free.
Local AI proxy tutorial for detecting, masking, and rehydrating PII before prompts reach cloud LLMs.

Learn how Graph RAG uses connected knowledge structures to improve retrieval beyond simple text similarity.

Learn how sibling-index() enables clean, JavaScript-free stagger animations using native CSS.

useEffect breaks AI streaming responses in ReactSee why useEffect breaks AI streaming in React, and how moving stream state outside React fixes flicker and stale updates.
Would you be interested in joining LogRocket's developer community?
Join LogRocket’s Content Advisory Board. You’ll help inform the type of content we create and get access to exclusive meetups, social accreditation, and swag.
Sign up now

