Vue.js has grown in popularity over the past two years, with nearly 180,000 stars on GitHub at the time of writing. This increasing adoption has compelled developers around the world to build myriad tools and frameworks around Vue.js, inlcuding Nuxt.js and Gridsome.

In this guide, we’ll compare Gridsome vs. Nuxt.js, two frameworks built on Vue.js that you can use to build fast JAMstack applications. We’ll evaluate each in terms of the developer experience, general use and best practices, structure, and community adoption. To show how Nuxt.js and Gridsome work, we’ll build an example blog with both frameworks.
Here’s what we’ll cover:
To follow along with this Gridsome vs. Nuxt comparison and tutorial, you should have the following:
npm install -g yarn (Gridsome recommends using Yarn)npm install -g @gridsome/cli.Gridsome is a data-driven static site generator that generates HTML files from local files, CMSs, and external APIs. HTML files are initially loaded in the browser as static files and then hydrate into fully powered Vue.js apps. This improves SEO while providing all the benefits of Vue. The data is prefetched and stored in a GraphQL data layer.
Here’s an overview of Gridsome’s directory structure.
Nuxt.js is a very powerful Vue.js framework that allows you to build modern web applications any way you choose. Nuxt.js gives you the flexibility to build web applications either as single-page, server-side rendered, or statically generated.
Check the Nuxt.js documentation for an overview of the Nuxt directory structure.
To show how Gridsome works — and establish a frame of reference to compare to Nuxt.js — let’s explore how to build a blog with Gridsome.
To create a new Gridsome project, run:
gridsome create my-gridsome-blog
Open the newly created folder in your code editor and run gridsome develop to start the development server.
In your browser, open http://localhost:8080 and you should see your awesome — albeit unfinished — blog.
The /src directory is where you’ll be working with the .vue files. Starting with the /pages directory, every .vue file in the directory becomes a page in the browser, so the contents of About.vue will be on /about in the browser.
There are two ways to create pages in Gridsome: you can build file-based pages with the .vue files or you can use the pages API (more on this later).
Paste the code snippet below inside the <Layout></Layout> component in /pages/index.vue to replace the initial content.
<h1 class="blog-title">
  Welcome my awesome blog
</h1>
<p>I love Vue.js so I write about it.</p>
<div class="articles-list">
  <h2 class="article-list__section-heading">New Articles</h2>
  <!-- articles will be listed here -->
</div>
Before we move on, you’ll need to import the CSS for the blog globally. Create a file using this directory structure:
/src/assets/css/main.css
Paste the contents of this Gist in the main.css file and then import it at the top of the main.js file, which is in the root of the /src directory:
import '~/assets/css/main.css`
The main.js file is used to import global styles and scripts, You’ll also notice that we have access to the Vue instance in the exported function, we can use that to install Vue.js plugins, register global components (just like the default layout component) and directives.
Gridsome also has a number of reusable packages called plugins. These plugins can be used to implement some custom functionality in your apps. There are over 180 plugins currently listed on the Gridsome plugins page.
We’ll use the @gridsome/source-filesystem plugin to transform the content we write in markdown and load them in a GraphQL layer so we can query in our components.
The plugin also requires @gridsome/transformer-remark to work with markdown files.
To install the filesystem source plugin:
yarn add @gridsome/source-filesystem
To install the transformer:
yarn add --dev @gridsome/transformer-remark
To configure the plugin, modify the gridsome.config.js file to look like this:
module.exports = {
  siteName: 'Gridsome',
  plugins: [
    {
      use: '@gridsome/source-filesystem',
      options: {
        typeName: 'BlogPost',
        path: './blog/**/*.md',
      },
    },
  ],
  templates: {
    BlogPost: '/blog/:title',
  },
};
The gridsome.config.js file is where we register Gridsome plugins and configure the project:
typeName in the plugin options is the name we give the GraphQL collection for our blog posts and template (a .vue fill we create momentarily in /src/templates)path is where the plugin should look for markdown files to generate contenttemplates is the object that defines what the routes for template files should look like; :title, in this case, is the title of the blog post, which is dynamic.Create a blog folder in the root of the project, add a markdown file, hello.md, and paste the contents below:
---
title: Hello World
description: This is the first article for my awesome blog
date: 2021-01-14
published: true
---
# A h1 header
============
Paragraphs are separated by a blank line.
2nd paragraph. *Italic*, **bold**, and `monospace`. Itemized lists
look like:
  * this one
  * that one
  * the other one
Note that --- not considering the asterisk --- the actual text
content starts at 4-columns in.
> Block quotes are
> written like so.

## An h2 header
------------
Here's a numbered list:
 1. first item
 2. second item
 3. third item

```js
  // loop
  for(i= 0; i<=4; i++){
    console.log(i)
  }
```
Next, create a BlogPost.vue file in /src/templates. This file is responsible for rendering data from the GraphQL collection that has the type BlogPost, which is the same name we set in the gridsome.config.js file. The value of typeName in gridsome.config.js must match the file created in /src/templates.
Restart your server and open http://localhost:8080/___explore in your browser. You should see a GraphQL playground.
Paste the query below in the left tab and click the “play” button.
query {
  allBlogPost (filter: { published: {eq: true } } ) {
    edges {
      node {
        path,
        title,
        date(format: "DD MMM YYYY"),
        timeToRead,
        content,
      }
    }
  }
}
The query above fetches all the data associated with type BlogPost and filters by the ones that have published set to true.
Now that we have content, it’s time to display it.
Update the index.vue file in /src/pages with the code snippets below.
Add the query below just before the <script> tag in the file:
<page-query>
query {
  allBlogPost (filter:{ published: {eq: true } } ) {
    edges{
      node{
        path,
        title,
        date(format: "DD MMM YYYY"),
        timeToRead,
        description,
        content,
      }
    }
  }
}
</page-query>
The snippet above is the same query as the one we ran earlier in the GraphQL playground, except this time, the data is available as a computed property called $page, which we can access inside <script> and <template>.
Next, paste the code in the following snippet below the <h2> in the same file:
<div class="article-list__item" v-for="({ node: article }, index) in $page.allBlogPost.edges" :key="index">
  <h3>
    <g-link :to="article.path">{{ article.title }}</g-link>
    <!-- g-link is the Gridsome equivalent of router-link for Vue, but with some magic  ✨ -->
  </h3>
  <p>
    Published on <strong>{{ article.date }}</strong>
  </p>
  <p>{{ article.description }}</p>
</div>
You should now see your new article listed.
Now it’s time to create a .vue file in /src/templates.
Create a file called BlogPost.vue in src/templates and paste the content of the snippet below:
<template>
  <div>
    <Layout>
      <h1>{{ $page.post.title }}</h1>
      <p>
        Published on <strong>{{ $page.post.date }}</strong
        >, <strong>{{ $page.post.timeToRead }} min.</strong> read
      </p>
      <div v-html="$page.post.content"></div>
    </Layout>
  </div>
</template>

<page-query>
query blogPost ($path: String!) {
  post: blogPost (path: $path) {
    id
    title
    content
    date (format: "D MMMM YYYY")
    timeToRead
  }
}
</page-query>

<script>
export default {
  metaInfo() {
    return {
      title: this.$page.post.title,
    };
  },
};
</script>
Gridsome automatically passes the URL for this article called path to the query and that’s used to fetch the remaining data about this post, the data is now displayed on the page inside the <template> tag.
When you click on your article from the homepage, you should now see the content of your new article. Congratulations! You just built a blog with Gridsome.
Now that we’ve walked through building a blog with Gridsome, let’s do the same with Nuxt.js and then compare the developer experience.
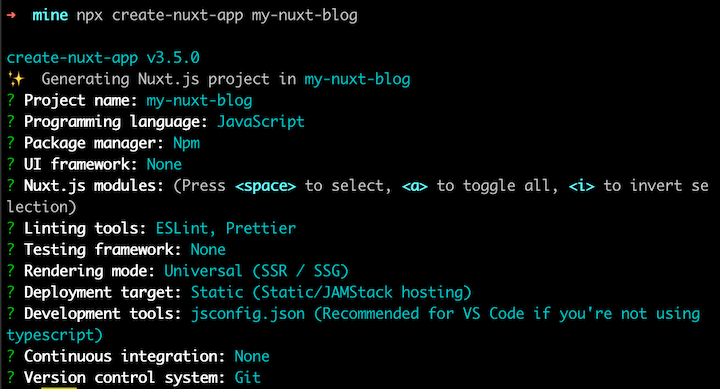
To set up a new Nuxt project, run the following command and follow the steps from the screenshot below (do not select any Nuxt.js modules during setup; just skip that part):
npx create-nuxt-app my-nuxt-blog
Follow these steps:
Open the newly created folder in your code editor and run this command:
npm run dev
Open http://localhost:3000 in your browser to see your new blog.

We’ll be working with the /pages directory first. Every .vue file in this directory is converted to a page in the browser, so index.vue will become /. This is called file-system routing in Nuxt.
Delete the <style></style> tag and modify the content of the <template> in /pages/index.vue to this:
<div class="container">
  <h1 class="blog-title">Welcome my awesome blog</h1>
  <p>I love Vue.js so I write about it.</p>
  <div class="articles-list">
    <h2 class="article-list__section-heading">New Articles</h2>
    <!-- articles will be listed here -->
  </div>
</div>
Next, create a CSS file with with this directory structure assets/css/main.css and paste the contents of this Gist in the file:
Import the CSS globally in the nuxt.config.js file:
export default = {
   css: ['~/assets/css/main.css'],
}
You should now see the changes in your browser.
Nuxt.js has a large collection of reusable packages called modules that can be used to add custom features to your applications. We’ll use the nuxt-content module.
Install the module:
npm install @nuxt/content # or using yarn, anyone is fine
Register the module for your app inside nuxt.config.js:
{
  modules: [
    '@nuxt/content'
  ],
  content: {
    // Options
  }
}
Create a new folder, /content, in the root of the project. In that folder, create a file called hello.md and paste the snippet below:
---
title: Hello World
description: This is the first article for my awesome blog
published: true
---

# A h1 header
============
Paragraphs are separated by a blank line.
2nd paragraph. *Italic*, **bold**, and `monospace`. Itemized lists
look like:
  * this one
  * that one
  * the other one
Note that --- not considering the asterisk --- the actual text
content starts at 4-columns in.
> Block quotes are
> written like so.

## A h2 header
------------
Here's a numbered list:
 1. first item
 2. second item
 3. third item

```js
  // loop
  for(i= 0; i<=4; i++){
    console.log(i)
  }
```
The content between the opening and closing (---) is known as front matter. You can create as many more markdown files as you’d like.
Listing blog posts
Now that we have content to work with, we can start creating pages to list all our blog posts as well as display the content of a single post.
Update the <script></script> tag of the /pages/index.vue file with the snippet below:
export default {
  async asyncData({ $content, params, error }) {
    const path = '/' // to fetch all the content
    const articles = await $content(path)
      .where({ published: { $eq: true } })
      .fetch()
      // eslint-disable-next-line node/handle-callback-err
      .catch((err) => {
        error({ statusCode: 404, message: 'Page not found' })
      })
    return {
      articles,
    }
  },
}
The Nuxt.js content module features a MongoDB-like query API for fetching data, so requests we make look similar to MongoDB queries.
The snippet above fetches all the content we have by specifying a root path (/) and adding a filter to only fetch content that have the published key set to true in the YAML frontmatter.
Next, update the <template> just below the comment to render the articles:
<div
v-for="(article, index) in articles"
:key="index"
class="article-list__item"
>
<h3>
<nuxt-link :to="`/article${article.path}`">{{ article.title }}</nuxt-link>
<!-- nuxt-link is the Nuxt equivalent of router-link for Vue -->
</h3>
<p>
Published on
<strong>{{
new Date(article.createdAt).toLocaleDateString()
}}</strong>
</p>
<p>{{ article.description }}</p>
<hr />
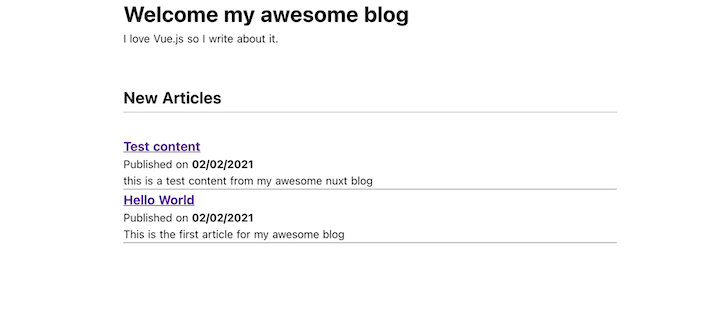
</div>
Check out the app in your browser. It should look like this:
Next, we’ll demonstrate how to render a single article.
In the /pages directory, create a file with this structure: /article/_path.vue. Paste the content of the snippet below into the newly created _path.vue file:
<template>
  <article class="container">
    <h1>Title: {{ article.title }}</h1>
    <hr />
    <br />
    <br />
    <nuxt-content :document="article" />
  </article>
</template>

<script>
export default {
  async asyncData({ $content, params, error }) {
    const { path } = params
    const article = await $content(path)
      .fetch()
      // eslint-disable-next-line node/handle-callback-err
      .catch((err) => {
        error({ statusCode: 404, message: 'Page not found' })
      })
    return {
      article,
    }
  },
}
</script>
The snippet above does two things: fetches the data from an article by the path and renders it in the template.
In the <script> tag of the component, we use the asyncData hook to fetch data server-side, since we do not have access to this yet. It’s worth mentioning that asyncData can only be used in pages.
The first parameter in the hook is the Nuxt context object, and we’re destructuring properties we need in the page. We use $content from the content module to make queries and params is an alias for $route.params on the client side. We take the path property from params and use that query for the article’s data.
In the <template> tag, we render the article by passing it to the global <nuxt-content/> component that was added by the content module, the component knows how to render the data passed to it already — as you may have noticed, the article’s content is not in HTML format.
Voila! your new Nuxt.js blog is ready.
Now that’s we’ve demonstrated how to build a blog with Gridsome and Nuxt.js, let’s compare the developer experience of using each framework.
Gridsome and Nuxt.js offer different approaches to scaffolding a new project. With Nuxt.js, you’d use the create-nuxt-app tool to start a new project. Nuxt gives you a lot of options to customize the project before installing dependencies.
To start a new project with Gridsome, on the other hand, you’d use the Gridsome CLI. With Gridsome, you have the option to use a starter template.
You can pretty much build any type of web application you want with Nuxt.js, including:
With Gridsome, you can only build statically generated applications, which is the framework’s sole purpose.
With Nuxt.js, you don’t need to learn a new tool with a different syntax, just JavaScript. With Gridsome, you do need some knowledge of GraphQL. You can learn about it as you build and reference the documentation in your app’s explorer.
The repositories for both the Gridsome example and the Nuxt.js example used in this tutorial are available on GitHub.
Install LogRocket via npm or script tag. LogRocket.init() must be called client-side, not
server-side
$ npm i --save logrocket

// Code:

import LogRocket from 'logrocket';
LogRocket.init('app/id');
// Add to your HTML:

<script src="https://cdn.lr-ingest.com/LogRocket.min.js"></script>
<script>window.LogRocket && window.LogRocket.init('app/id');</script>
Would you be interested in joining LogRocket's developer community?
Join LogRocket’s Content Advisory Board. You’ll help inform the type of content we create and get access to exclusive meetups, social accreditation, and swag.
Sign up now
Learn how to integrate MediaPipe’s Tasks API into a React app for fast, in-browser object detection using your webcam.

Integrating AI into modern frontend apps can be messy. This tutorial shows how the Vercel AI SDK simplifies it all, with streaming, multimodal input, and generative UI.

Interviewing for a software engineering role? Hear from a senior dev leader on what he looks for in candidates, and how to prepare yourself.

Set up real-time video streaming in Next.js using HLS.js and alternatives, exploring integration, adaptive streaming, and token-based authentication.


