
Learning how to handle multi-channel payment processing can help developers design more efficient and secure payment systems. By integrating various payment gateways into a single system, you can improve transaction success rates and offer a seamless payment experience to users.

This article will place the spotlight on HyperSwitch, a payment switch that provides you with a single API endpoint to interact with multiple payment processors and gateways. We will explore the features of HyperSwitch via the web-based control center and then connect with the Braintree and Stripe services.
Jump ahead:
Before beginning this tutorial, we recommend that you have accounts with the Braintree and Stripe services. If you do not have these accounts, sign up for a test account on Stripe and Braintree, then use the sandbox environments to follow along.
The Replay is a weekly newsletter for dev and engineering leaders.
Delivered once a week, it's your curated guide to the most important conversations around frontend dev, emerging AI tools, and the state of modern software.
While building a subscription-based or ecommerce product for a global audience, handling user payments across different regions can be challenging — especially when using third-party payment services.
The service facilitating the payments might only support specific regions or currencies, leaving others with no means of paying for their subscriptions or purchases. You might also have other requirements to integrate multiple payment services and switch between them within short notice.
Your solution might be to build these integrations into your application logic yourself.
While feasible, you will now have more complexities added to the payment logic of your product. You will need to integrate each provider via their SDKs or APIs, then develop a feature to automatically use the most suitable provider based on certain conditions.
What could be the way to eliminate these aforementioned challenges and use a single API to process payments from your users? A payment switch!
HyperSwitch is a payment switch that provides engineers with the ability to interact with multiple payment processors via a single API endpoint:
At the moment, HyperSwitch supports 30 payment processors — including Adyen, PayPal, and Square — with plans to increase the number of supported processors to over 100 within 2023. Check out the official HyperSwitch GitHub to see their public roadmap and learn more.
HyperSwitch is written in the much-loved Rust programming language. It’s fully open source and driven by developers within the community to resolve payment challenges. Their mission is to improve the developer experience with regard to payment operations.
Being an open source software, HyperSwitch provides you with the ability to use and deploy it via the HyperSwitch-managed environment on AWS, GCP, or by self-hosting within your own on-prem or cloud environments.
This article will focus on exploring HyperSwitch via its cloud environment.
Creating your HyperSwitch account is the first step toward using the service. HyperSwitch provides a sandbox environment through GitHub for you to safely try out the service using dummy transaction details while you set up your account for production use.
Navigate to the web dashboard to register an account with the HyperSwitch service:
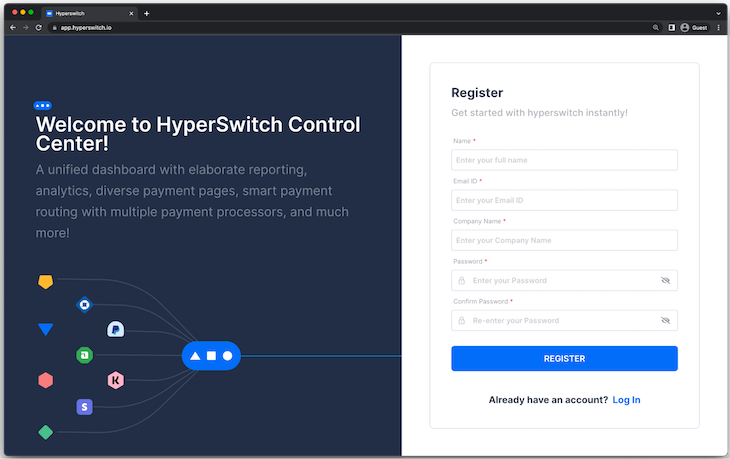
After your account is registered, you will be redirected to the HyperSwitch control center in test sandbox mode.
As shown in the next image, the control center displays metrics that have been aggregated from a sample business that has been running on HyperSwitch for 30 days. The sample data allows you to explore the features of the control center right from the start:
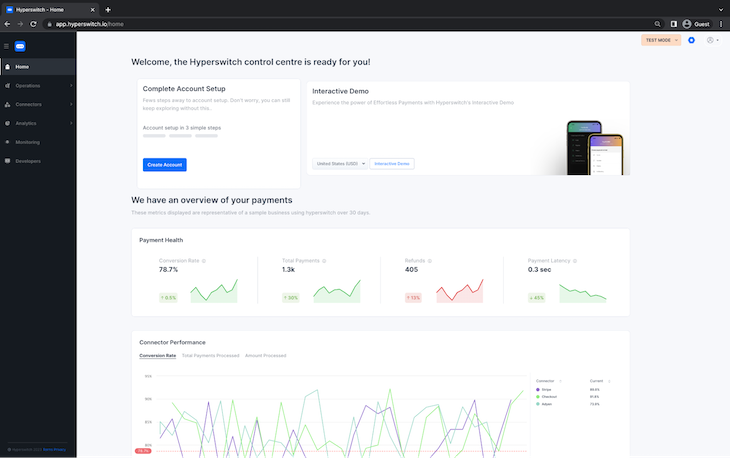
The dashboard shows the metrics of the connectors you have enabled such as their health and performance, then the payments received and refunds made from transactions over a period of time.
Payment processors on HyperSwitch enable you to use third-party payment services such as Stripe within your account to route payments.
Enabling a processor on HyperSwitch requires that you provide the API credentials generated in your account with the service. HyperSwitch will encrypt these credentials and only use them to authenticate the connections with the payment services.
Let’s proceed to configure two payment processors — one for Braintree and the other for the Stripe service. The Braintree and Stripe services both allow developers to create sandbox accounts for rapid testing without incurring charges.
Navigate to the Processors page under Connectors within the control center to view the list of processors supported on HyperSwitch:
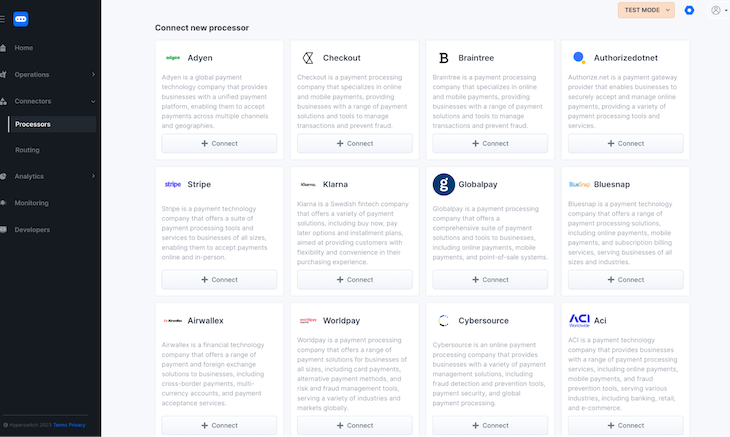
Braintree is a payment processing service that specializes in online and mobile payments for enterprises. Sign up for a Braintree Sandbox account to test the integration with HyperSwitch.
Note down the account Merchant ID, Public Key, and Private Key details displayed on the homepage of your Braintree sandbox account. You will need these details when connecting HyperSwitch with your Braintree account:
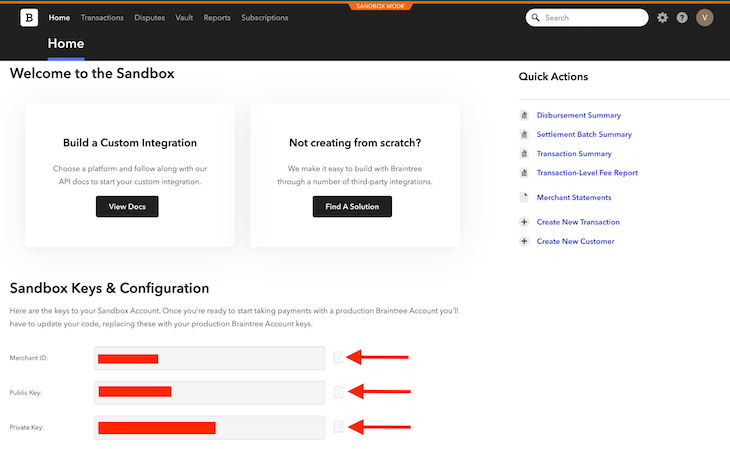
Navigate back to the Processors page within the HyperSwitch control center to continue the connection.
Click the Connect button within the Braintree card to provide your Merchant ID, Public Key, and Private Key details for your Braintree sandbox account:
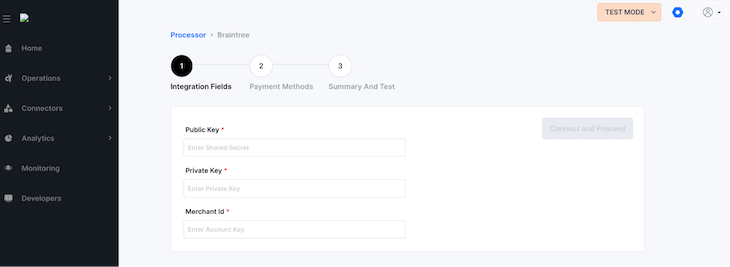
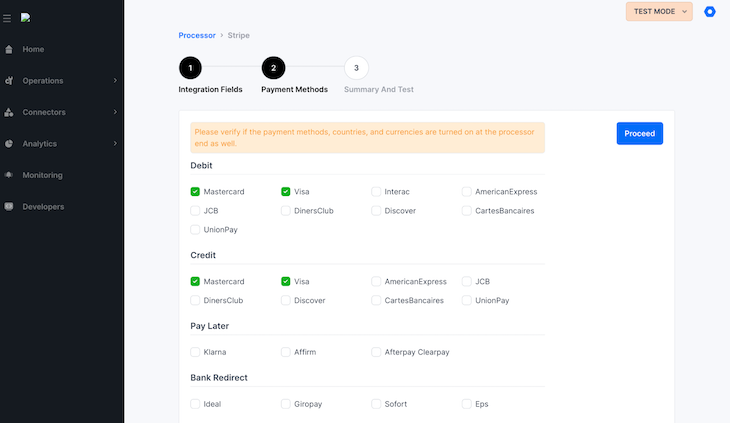
Next, you need to enable the supported payment methods through which you want to receive payments with the service. For this example, MasterCard and Visa are the payment methods used:
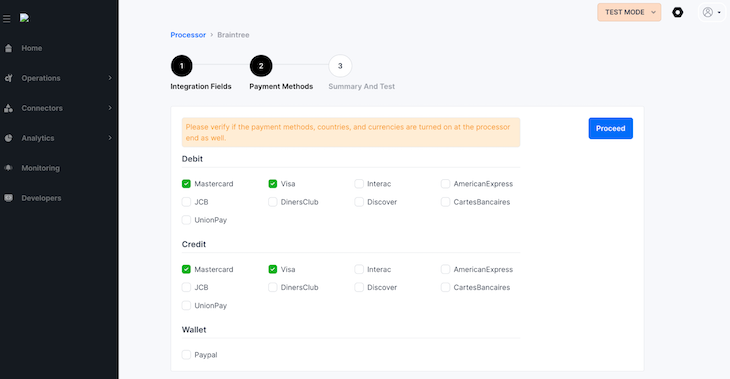
Click the Proceed button to save the payment methods and complete the connection:
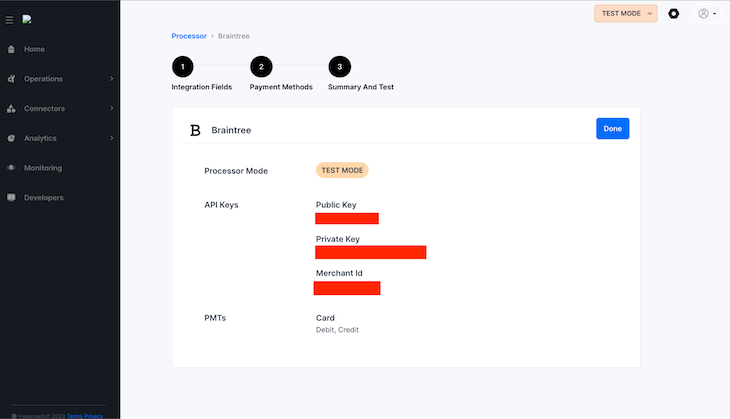
Stripe is one of the world’s leading payment companies that focuses on providing payment APIs. Similar to Braintree, Stripe also provides a sandbox environment for developers to safely test out the service. You will need to provide a Stripe key to use the Stripe processor for HyperSwitch.
Navigate to the Developers section of your Stripe dashboard and then select the “API keys” tab to view your secret key credential:
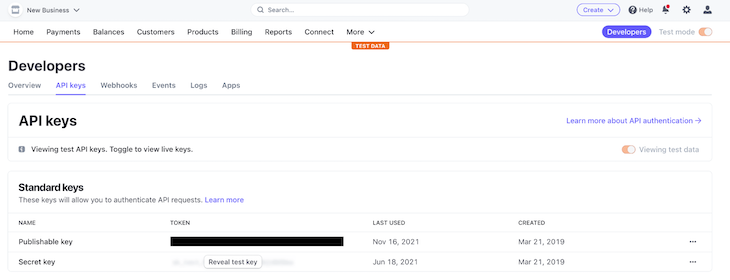
Note that to improve your account’s security and follow the least privilege principle, Stripe has a restricted keys feature. A restricted key allows you to generate a key similar to the secret key but with the ability to streamline the key’s scopes to only what is needed by the consumer.
Next, you need to adjust your integration settings on Stripe to enable you to handle card information through a third-party service such as HyperSwitch. HyperSwitch abides by its PCI compliance agreement within the Terms of Use to handle credit card information in the best way possible.
Navigate to the Integration page within your Stripe settings and toggle the “Handle Card information directly” switch:

The Stripe dashboard will launch an additional consent modal for you to confirm the action:
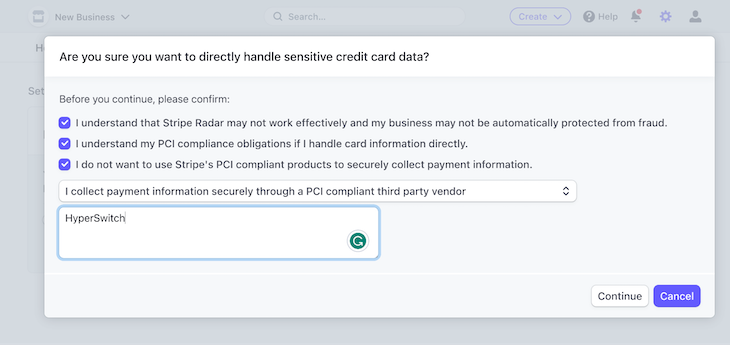
Navigate back to the Processors page and click on Stripe to begin the second processor connection:

Select the Mastercard and Visa methods for debit and credit payments within the “Payment Methods” step:
As shown in the below image, you will find the processors you have configured within the “Previously Connected” section of the Processors page. You can always edit the details for the connected processors wherever they change at a later time:

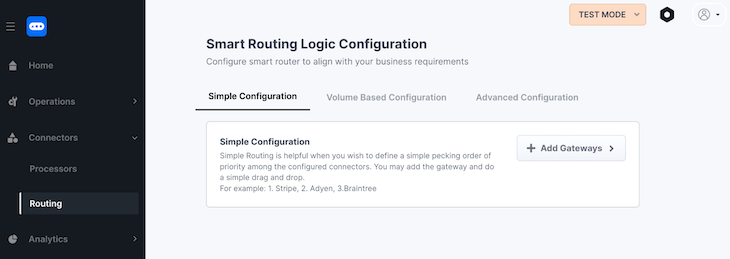
Hyperswitch provides simple, volume-based, and advanced configuration options for designing how payments are routed amongst your connected processors:
Navigate to the Connectors > Routing page of the control center to define the simple routing configuration.
Click the Add Gateways button to add the processors you want to use in a linear order:
Select the Braintree and Stripe processors as gateways for the configuration:
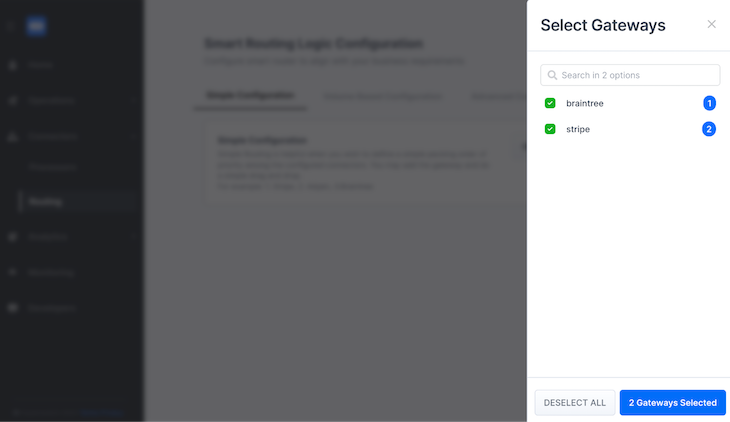
After selecting the gateways, the configuration interface allows you to drag and drop them to set the order of priority:
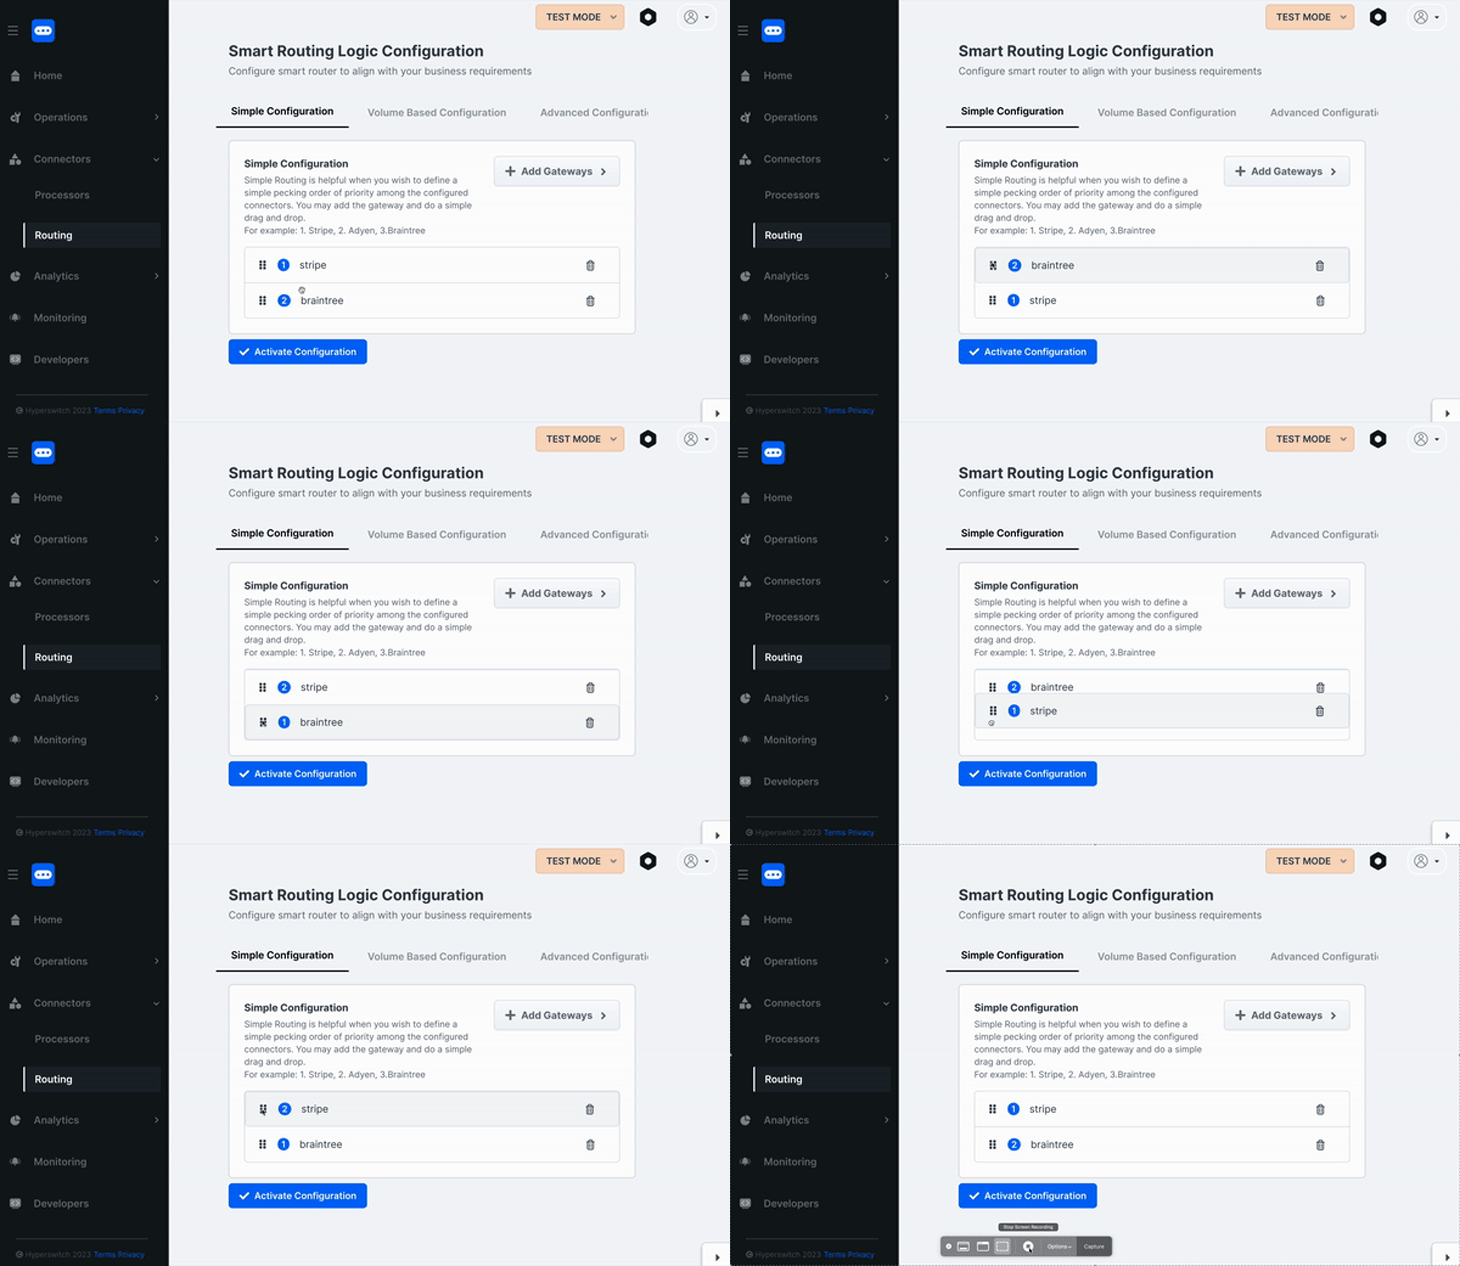
Click the Activate Configuration button to save and apply the configuration.
To provide a better developer experience while connecting processors through the control center, HyperSwitch enables you to test the connected processors and confirm that the configuration details you provided were correct.
In test mode, you can test the connected processors by entering dummy card details into the demo checkout component. Using a dummy card will ensure that you are not charged for the test transaction.
Navigate to the homepage of the control center and click the Preview Checkout button to launch a modal with a demo checkout component. You will make a test payment for a sweatshirt at the cost of $654 using a Visa debit card:

Enter the sample test card details highlighted at the left of the checkout component to the card fields:
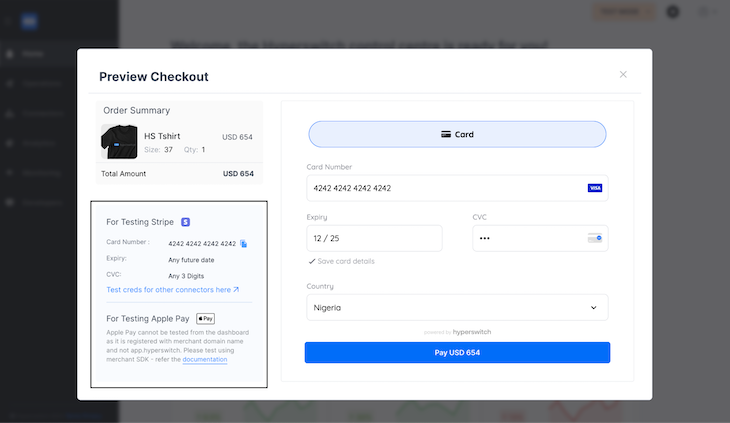
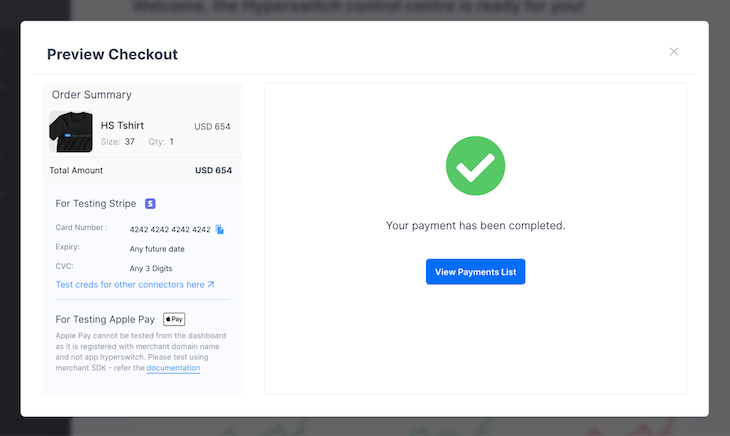
Click the Pay button. The test payment will succeed if your Stripe processor credentials are correct:
All pending, successful, and unsuccessful transactions conducted within your HyperSwitch account are listed on the Operations > Payments page of the control center.
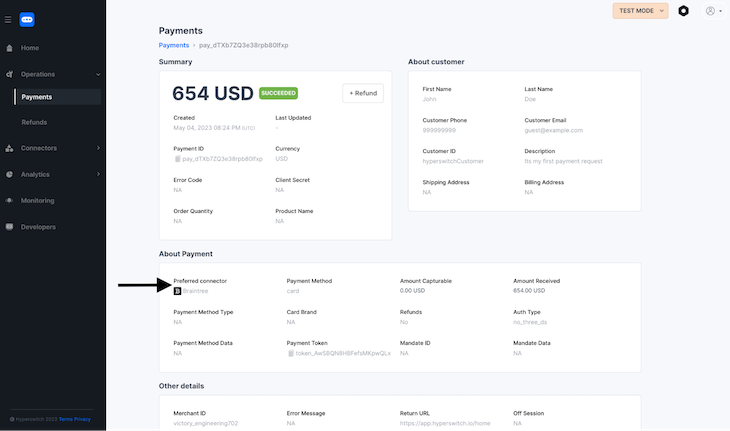
As shown in the image below, the previous demo payment of $654 made through the checkout component was captured with the full payment details:

Click a payment within the list to view its full details.
As highlighted in the image below, HyperSwitch used the Braintree connector to process the payment from the demo checkout component:
At this point, you have set up and configured HyperSwitch to route payments between the Braintree and Stripe services.
Congratulations on completing your HyperSwitch setup!
In this tutorial, we covered how to set up a HyperSwitch account and configure it to use two payment processors. Using sandbox accounts, we were able to connect to the Braintree and Stripe payment processing services. Then, we performed a demo checkout using a dummy card from Stripe.
This article focused on interacting with HyperSwitch via the web control center. You can further consume your HyperSwitch payment methods via its single API endpoint or client SDKs to process payments within your frontend application.
HyperSwitch provides developer-friendly unified components for frontend applications built with Node.js, React, and cross-platform React Native applications. If you have any further questions about how to use it within your application, leave a comment below.
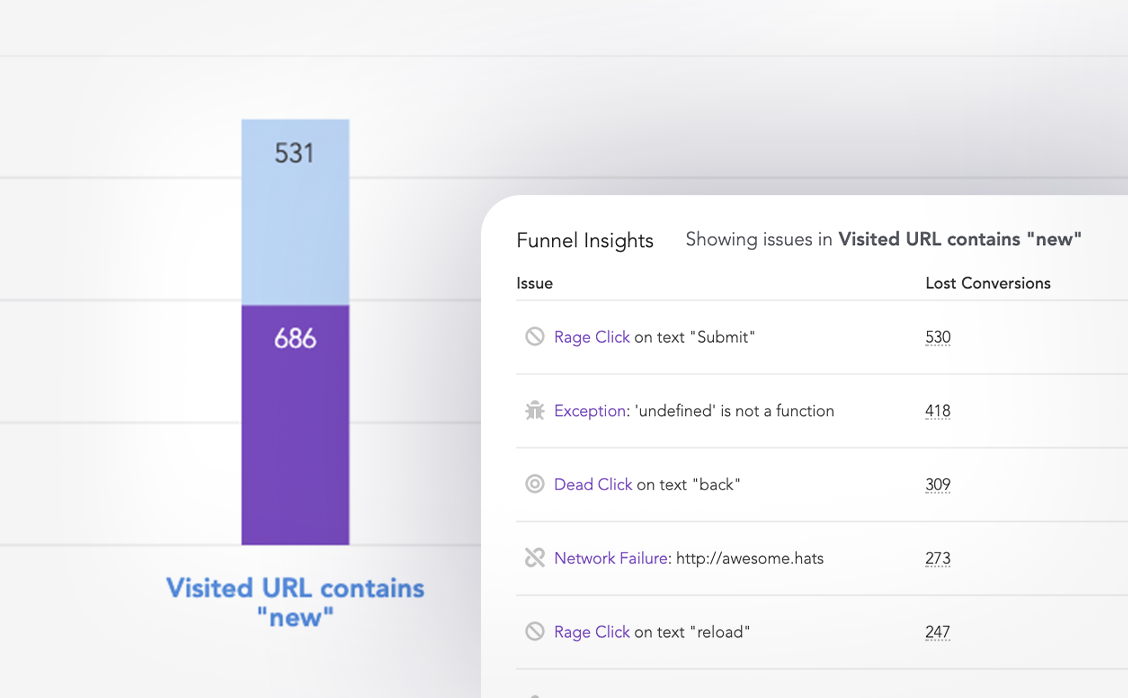
LogRocket lets you replay user sessions, eliminating guesswork around why users don't convert by showing exactly what users experienced. It captures console logs, errors, network requests, and pixel-perfect DOM recordings — compatible with all frameworks.
LogRocket's Galileo AI watches sessions for you, instantly identifying and explaining user struggles with automated monitoring of your entire product experience.
Start proactively monitoring your ecommerce apps — try LogRocket for free.

@container scroll-state: Replace JS scroll listeners nowCSS @container scroll-state lets you build sticky headers, snapping carousels, and scroll indicators without JavaScript. Here’s how to replace scroll listeners with clean, declarative state queries.

Explore 10 Web APIs that replace common JavaScript libraries and reduce npm dependencies, bundle size, and performance overhead.

Russ Miles, a software development expert and educator, joins the show to unpack why “developer productivity” platforms so often disappoint.

Discover what’s new in The Replay, LogRocket’s newsletter for dev and engineering leaders, in the February 18th issue.
Would you be interested in joining LogRocket's developer community?
Join LogRocket’s Content Advisory Board. You’ll help inform the type of content we create and get access to exclusive meetups, social accreditation, and swag.
Sign up now