FlatListEditor’s note: This guide to the React Native FlatList component was last updated on 23 May 2023 to include new sections on the benefits of the FlatList component and a new section on implementing pull to refresh. To learn more about creating better React Native apps, check out our guide to optimizing React Native performance.

Consider a situation where you want to display a list of items from an API. For example, the Coffee API’s response looks like this:
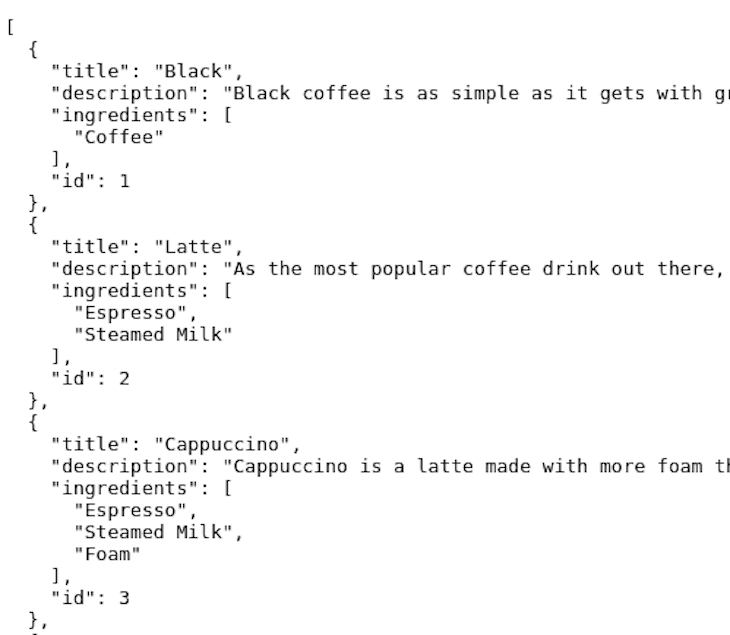
One possible way to display this to the client is to use the map method on this array like so:
const data = getDataFromAPI();
return (
  <View style={styles.container}>
    {data && (
      <View>
        <Text> Your data has loaded! Here is the result:</Text>
        {data.map((item) => (
          <Text key={item.id}> {item.name}</Text>
        ))}
      </View>
    )}
  </View>
);
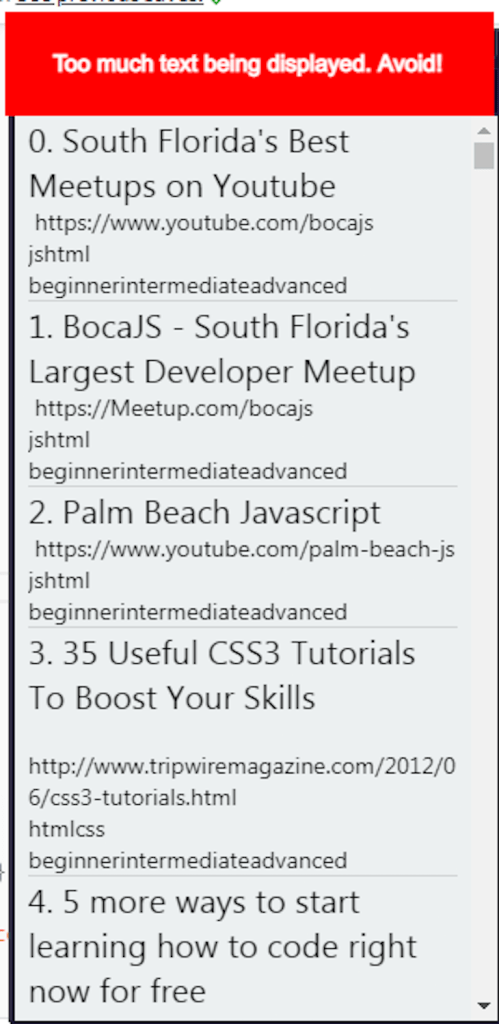
Here, we use conditional rendering to check if the data has loaded. If true, we will notify the user and display the list on the screen. This will be the output on an Android device:
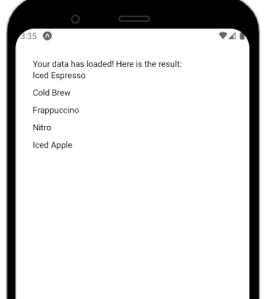
As you can see, our code works. However, there is one minor issue: if many items are on the screen, the app will cause memory leaks. Furthermore, React is not rendering this list in a scrollable format. This is where FlatList comes in to mitigate this problem.
React Native FlatList is a component that allows you to render lists with zero hassle and minimal code. In this article, we’ll take a deep dive into the FlatList component and explore how to use it.
Here’s what we’ll cover:
FlatList component?
FlatList component
FlatList customization
FlatList navigation methodsFlatList component?React Native bundles a FlatList component that lets users display lists of data in a scrollable format. FlatList allows you to display dynamic lists and is suitable for rendering items in a dynamic format. An excellent example of this is Twitter, where the app renders the user’s posts in real time:

FlatList also uses the principle of virtualization to optimize performance. It only loads the currently visible items on the screen, automatically removing items from memory when they are out of the user’s view. As a result, this approach improves performance and reduces memory consumption.
FlatList componentThis component offers several advantages that make it a preferred choice for rendering data lists. Here are some of its key benefits:
FlatList provides an onEndReached callback prop that triggers when the user reaches the end of the list. As a result, this lets the developer seamlessly load and display more items on the screen without impacting the apps’ speedrenderItem , numColumns, or inverted provides developers with the ability to customize the appearance and behavior of their listFlatList vs. ScrollViewOn the surface, both FlatList and ScrollView are similar to each other fundamentally: they both render items in a list format. However, the crucial difference between them is that unlike FlatList , the ScrollView component will render all items simultaneously, thus contributing to increased memory usage and potential performance problems.
Therefore, it’s better just to use FlatList where possible. To put it simply, FlatList implements lazy loading, whereas ScrollView does not. You can use ScrollView in cases where you’re certain that only a few items are being rendered on the screen.
FlatList componentIn this section, you will learn how to get started using React’s FlatList component. First, let’s review the FlatList syntax:
import { FlatList } from "react-native";
<FlatList
  data={
    //the array to render<View style={styles.container}>
 { /*
  {apiData && (
    <FlatList
      data={apiData}
      renderItem={renderItem}
      keyExtractor={(item) => item.id}
      onRefresh={() => console.log('refreshing')}
  }
  keyExtractor={
    // Extract keys for each item in the array
  }
  renderItem={
    //each item from the array will be rendered here
  }
/>;
You will enter the array you want to display in the data prop. This can be JSON data from an API. The keyExtractor prop will retrieve a unique key for each item in the array. However, if your array contains a key or id field, you don’t need to include this prop.
By default, FlatList will look for the key or id property, and the renderItem will tell React Native how to render the items from the list. Now that we’ve covered the syntax, let’s use it to render our list:
//the data array contains our array of items.
const data = [{id:1, title:"Iced Espresso", description:""},... ];
const Item = ({ title, description }) => (
  <View>
    <Text style={styles.title}>{title} </Text>
    <Text>{description} </Text>
  </View>
);

const renderItem = ({ item }) => (
  <Item title={item.title} description={item.description} />
);
return (
  <View style={styles.container}>
    {data && (
      <FlatList
        data={data}
        renderItem={renderItem}
        keyExtractor={(item) => item.id}
      />
    )}
  </View>
);
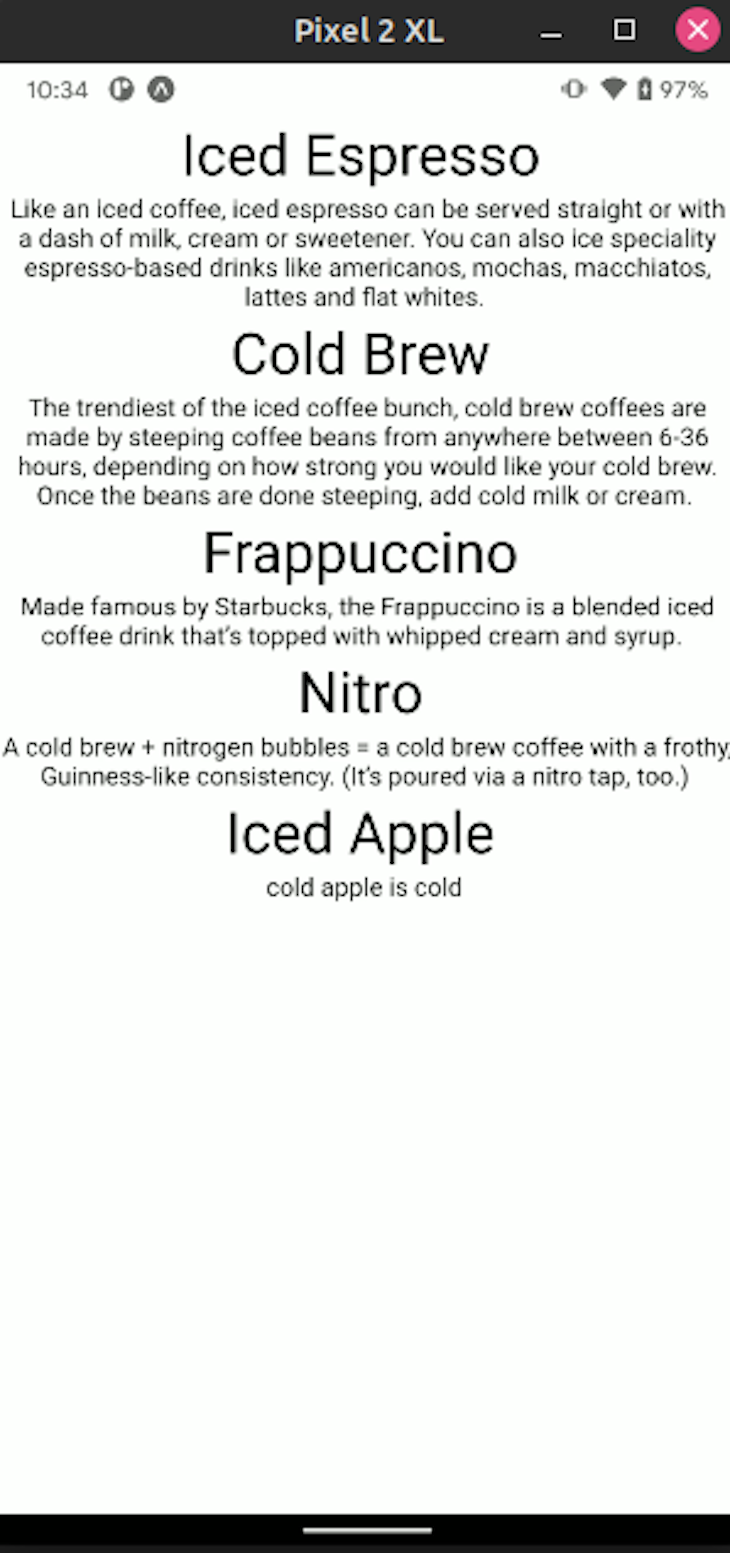
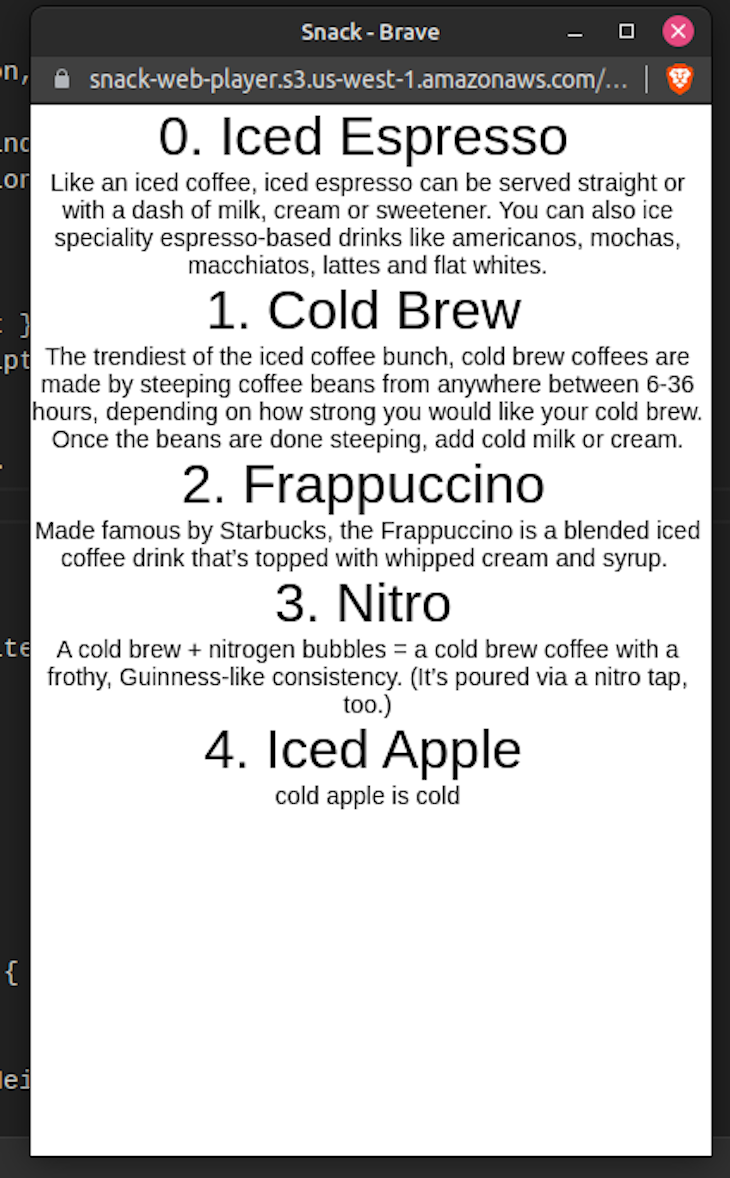
Let’s deconstruct this code piece by piece. First, the Item component will accept two props: title and description. This component will display them to the UI. Then, the renderItem function will render the Item for every item in the array. As a result, this will display the title and description fields from each object.
Moreover, the keyExtractor prop tells React Native to use the id field as a key. In the end, we used conditional rendering to render the data with the FlatList React Native element. Here’s what our app will look like:
keyExtractor propIn our code sample above, notice that we used a FlatList property called keyExtractor. This prop is useful for extracting an identifier for a given item at the specified index. By default, keyExtractor uses the item.key or the item.id key as an identifier from the array. Here are a few examples:
const shoppingList = [
  { id: 1, item: "Eggs" },
  { id: 2, item: "Milk" },
  { id: 3, item: "Bread" },
];
//here, the identifier for 'shoppingList' is 'id'. By default, keyExtractor uses 'key' or 'id' properties, therefore including the keyExtractor prop is not necessary
return <FlatList data={shoppingList} />;

const namesList = [
  { cardNumber: "1A1", name: "Hussain" },
  { cardNumber: "1A2", name: "Sabrina" },
];
//here, we need to include the keyExtractor prop. Otherwise, our code will throw an error. Here, we want to get the cardNumber property as the key.
return <FlatList data={namesList} keyExtractor={(item) => item.cardNumber} />;
data propFlatList’s data property is a required prop that accepts an array of items we want to display on the screen. Here is a brief code sample that shows its usage in detail:
const namesList = [{cardNumber: "1A1", name:"Jules"}, {cardNumber: "1A2", name: "Rue"},{cardNumber:"1A3", name:"Fezco"}];
//our data can be a simple array:
return (<FlatList data={namesList} keyExtractor={(item)=> item.cardNumber}/>)
//Alternatively, we can fetch data from an API and render it with a Hook like so:

const [applesList, setAppleList] = useState(null)
setAppleList(fetchFromAPI()); //fetch data from an API and store it into the 'applesList' Hook
return (<FlatList data={applesList} keyExtractor={(item)=> item.key}/>)
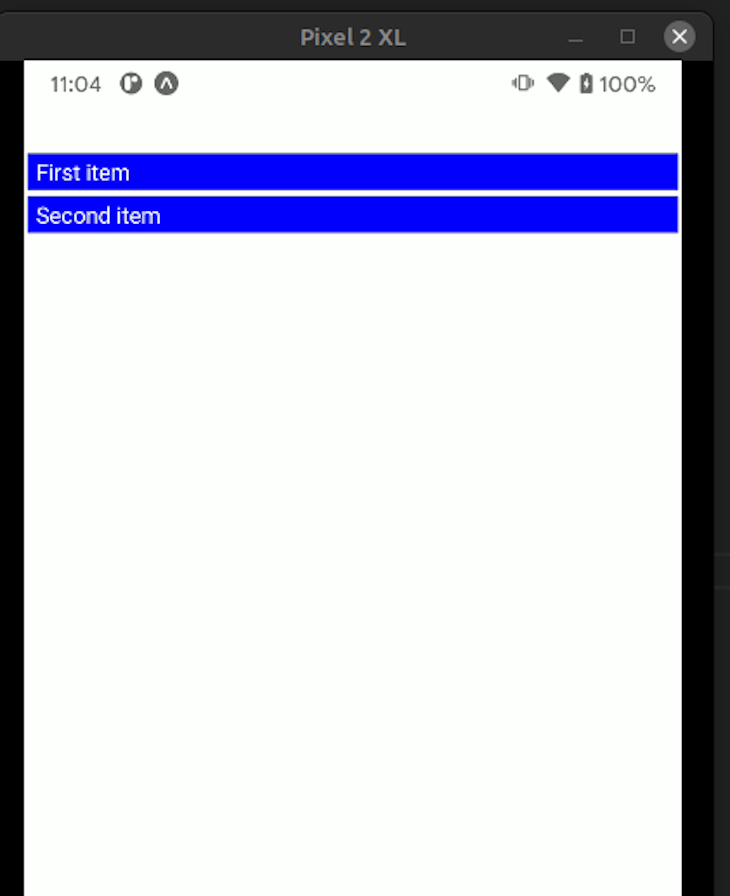
renderItem propThe renderItem prop is a callback function that is responsible for the design of our list view. This allows us to use CSS code to enhance our FlatList’s appearance. Here is an example for renderItem:
const data = [
  { id: 1, title: "First item" },
  { id: 2, title: "Second item" },
];

const renderItem = ({ item }) => {
  //the app will represent each list item via a Text component
  return <Text style={styles.item}> {item.title}</Text>;
};

<FlatList
  data={data} //pass in our data array
  renderItem={renderItem} //tell React to use our renderItem function that we defined earlier
/>;
//use CSS to decorate our list
const styles = StyleSheet.create({
  item: {
    backgroundColor: "blue",
    color: "white",
    padding: 2,
    margin: 2,
  },
});
In the real world, React Native developers might have to deal with rendering API data into lists. In the code below, we are fetching data from the Coffee API and plugging it into our FlatList component:
export default function App() {
  const [data, setData] = useState(null);

  const getData = async () => {
    const resp = await fetch("https://api.sampleapis.com/coffee/iced");
    const data = await resp.json();
    setData(data);
  };

  //on first mount, fetch data.
  useEffect(() => {
    getData();
  }, []);

  const Item = ({ title, description, index }) => (
    <View>
      <Text style={styles.title}>
        {index}. {title}
      </Text>
      <Text> {description} </Text>
    </View>
  );

  const renderItem = ({ item, index }) => (
    <Item description={item.description} title={item.title} index={index} />
  );

  return (
    <View style={styles.container}>
      {data && (
        <FlatList
          data={data}
          renderItem={renderItem}
        />
      )}
    </View>
  );
}
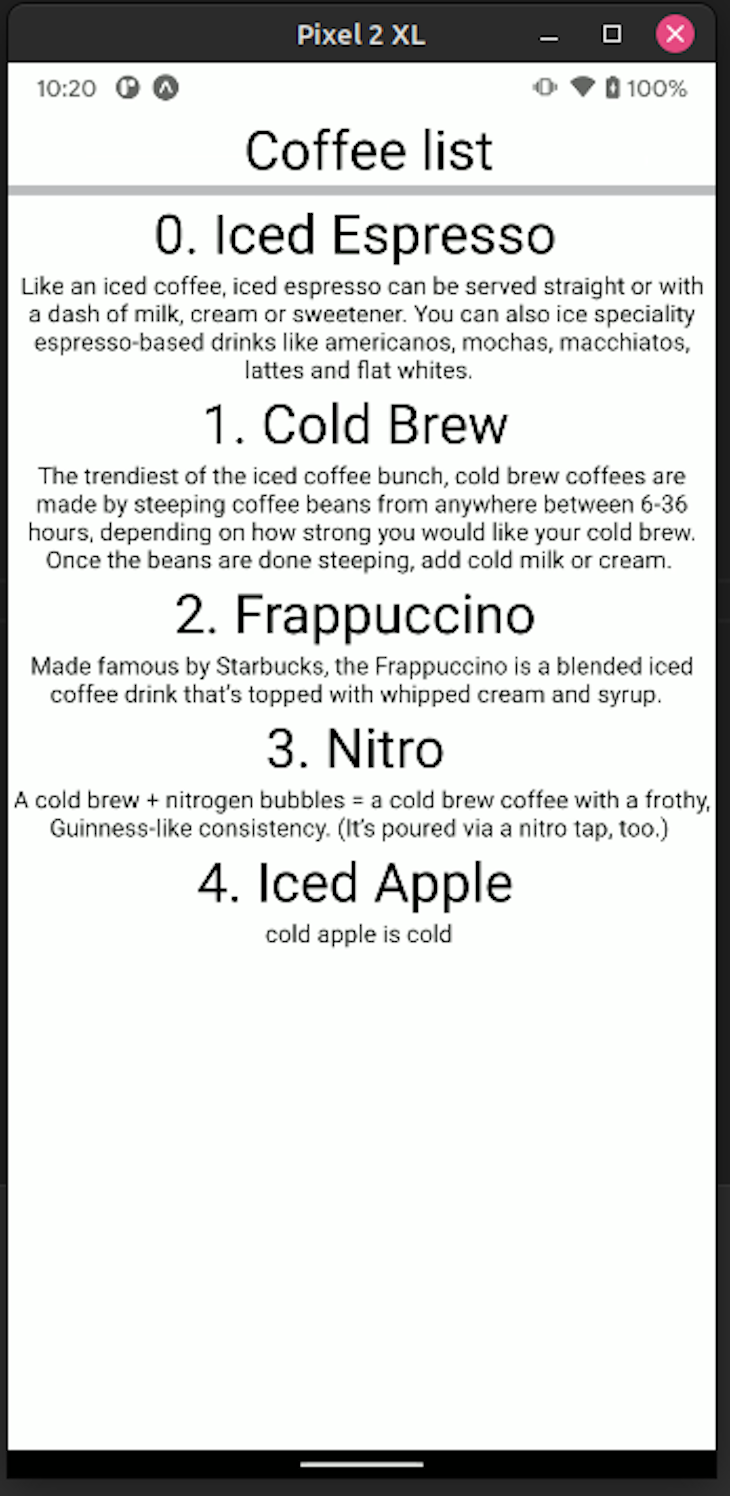
When the App component is first rendered, React invokes the getData method. This will make a GET request to the API. In the renderItem function, we also use the index argument — the index corresponding to the current item in the array.
Notice that we aren’t using the keyExtractor prop. Because an id field is already present, FlatList will use this as the key. So, now our app will look like this:
FlatList customizationIn this part of the article, you will learn how to change the appearance of your list component. This is useful in situations where you might want to personalize your FlatList to suit the app’s theme. Luckily, FlatList is highly customizable and has several useful properties to change its appearance and functionality.
FlatList also has support for header components. This can be handy in cases where you want to display a search bar on the top of an inventory of contacts. The ListHeaderComponent prop can help you do that. Refer to the following code:
//importing the rneui/themed package
//before running, please run this in the terminal:
// npm install @rneui/themed @rneui/base react-native-safe-area-context
import { Divider } from "@rneui/themed";
i sthis i
const header = () => {
  return (
    <View>
      <Text style={styles.title}> Coffee list</Text>
      <Divider orientation="vertical" width={6} />
    </View>
  );
};

return (
  <View style={styles.container}>
    {data && (
      <FlatList
        ListHeaderComponent={header}
        data={data}
        renderItem={renderItem}
      />
    )}
  </View>
);
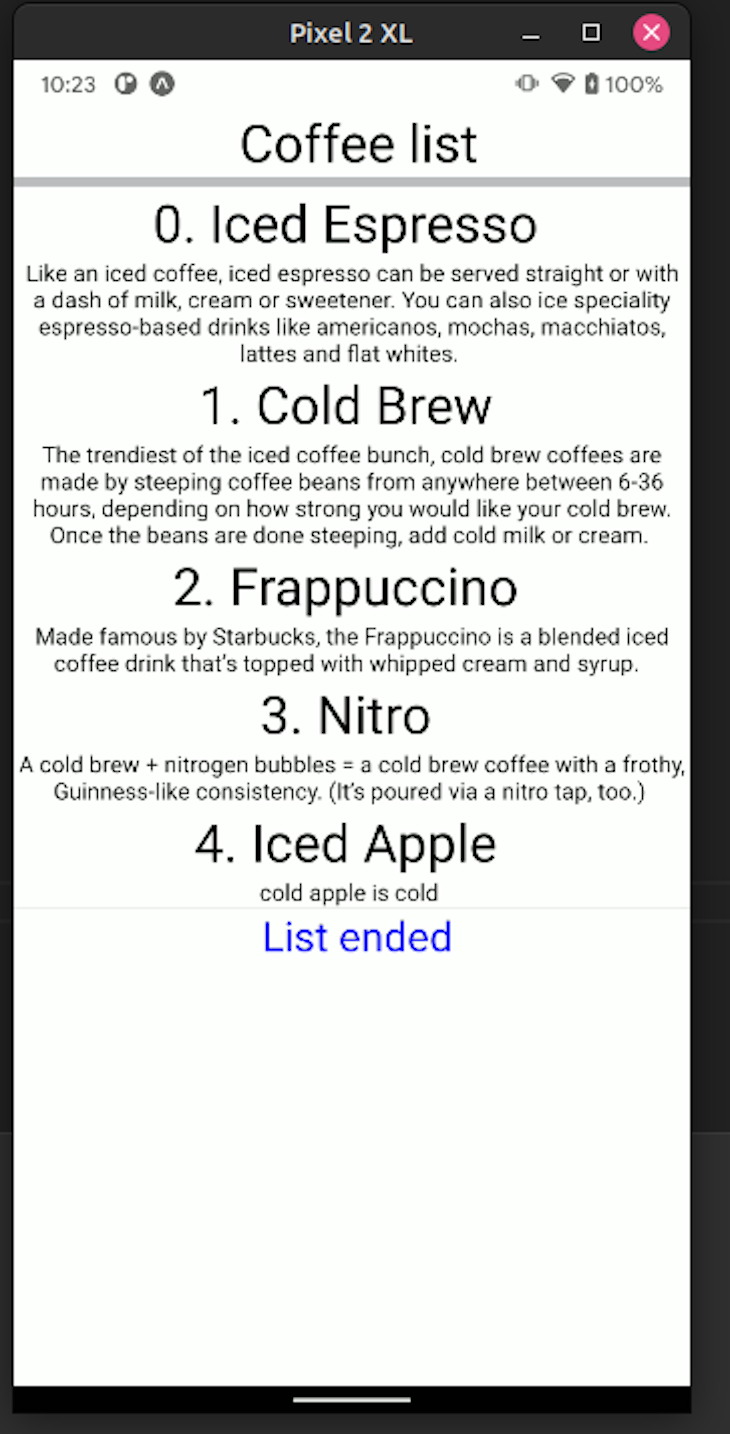
In the above code block, we created a header function and passed it into our ListHeaderComponent prop. This will output a simple Text and Divider component at the top of the FlatList component. Here’s what our app will look like:
Consider a situation where the user has scrolled all the way down and wants to go back up. Here, it would be sensible to show a button that would take the client back up automatically. In this case, you could append a footer component for your list. This will indicate that the list has concluded. You can do it via the ListFooterComponent prop like so:
//This will be our footer component
const endComponent = () => {
  return (
    <View>
      <Divider orientation="horizontal" />
      <Text style={styles.text}> List ended</Text>
    </View>
  );
};

return (
  <View style={styles.container}>
    {data && (
      <FlatList
        ListFooterComponent={endComponent}
        data={data}
        renderItem={renderItem}
      />
    )}
  </View>
);
Separator components help the user distinguish each element in the list. This contributes to a better UX and UI. To achieve this, use the ItemSeparatorComponent prop like so:
const separator = () => {
  //add a seperator component for each item with green color:
  return <Divider width={2} color="green"  />;
};

return (
  <View style={styles.container}>
    {data && (
      <FlatList
        //add our seperator component here
        ItemSeparatorComponent={separator}
        data={data}
        renderItem={renderItem}
      />
    )}
  </View>
);

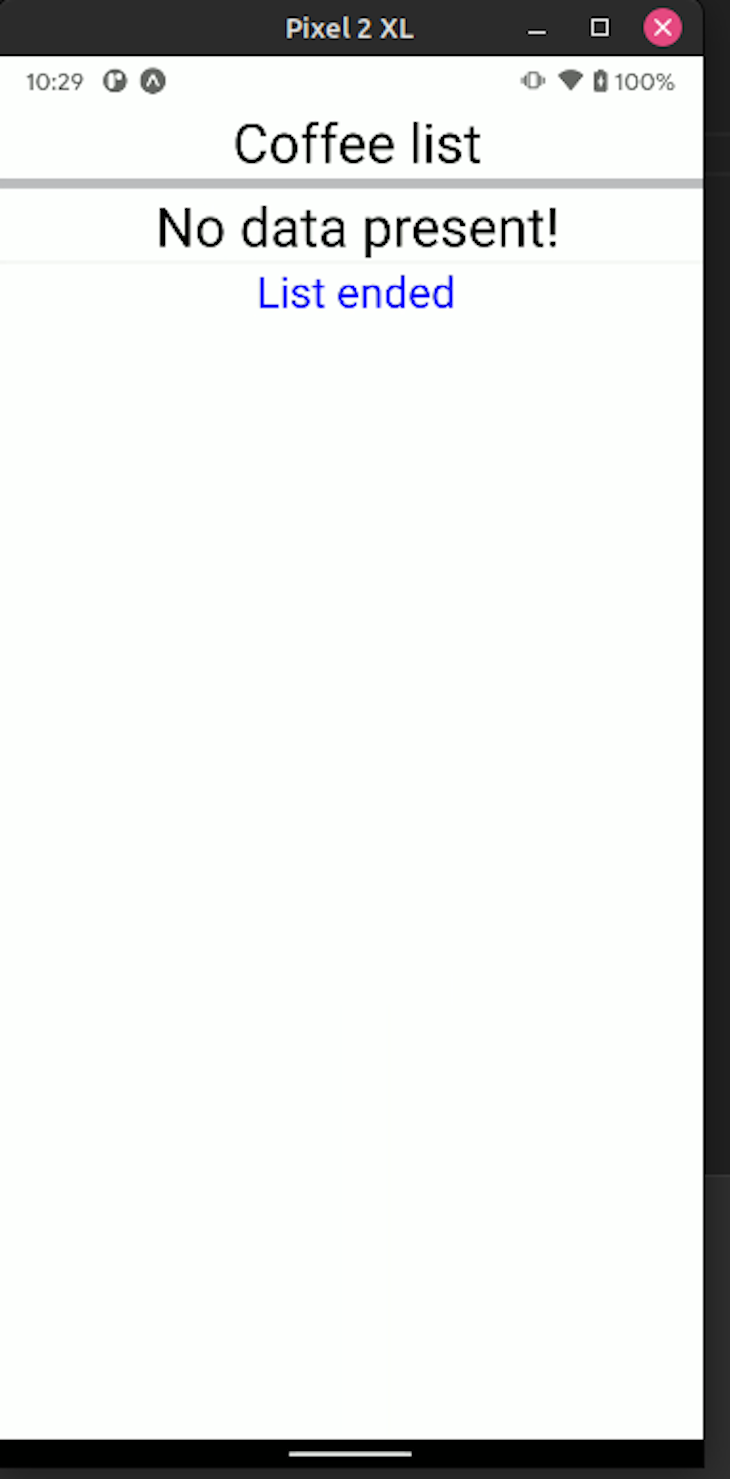
Let’s say that you have built a note-taking app in React Native. If the user has no records, it would be suitable to show a No notes found message. For this, the ListEmptyComponent prop is useful:
const data = []; //empty array

const handleEmpty = () => {
  return <Text style={styles.title}> No data present!</Text>;
};
return (
  <View style={styles.container}>
    {!data && <Text> Loading</Text>}
    {data && (
      <FlatList
        ListEmptyComponent={handleEmpty}
        data={data}
        renderItem={renderItem}
      />
    )}
  </View>
);
The React Native team also provides two props: onRefresh and refreshing. They tell the FlatList component to update itself whenever the user performs the pull gesture. Here’s the code:
<FlatList
  data={apiData}
  renderItem={renderItem}
  keyExtractor={(item) => item.id}
  //if the user pulls from the top of the screen, log out to the console:
  onRefresh={() => console.log("refreshing")}
  //if set to true, the UI will show a loading indicator
  refreshing={false}
/>
FlatList navigation methodsFlatList also includes a few utility functions for scroll-related operations. Assume that you have a list containing hundreds of items. Here, it would be good to display a button that lets the user go all the way down. This will result in a better UX since the user doesn’t have to manually scroll to the bottom, thus saving time. To make this possible, you can use the scrollToEnd method like so:
const list = useRef(null);

const press = () => {
  list.current.scrollToEnd({ animated: true });
};
const header = () => {
  return <Button onPress={() => press()} title="Go to end" />;
};

return (
  <View style={styles.container}>
    {!data && <Text> Loading</Text>}
    {data && (
      <FlatList
        ref={list}
        ListHeaderComponent={header}
        data={data}
        renderItem={renderItem}
      />
    )}
  </View>
);
In this piece of code, we created a useRef Hook that will grant us access to FlatList’s utility functions. When the user clicks the Button element, the app will execute the scrollToEnd method, as shown below:
FlatList also allows us to navigate to a specific index item by calling the scrollToIndex method like so:
const list = useRef(null);

const press = () => {
  //scroll to the 12th item in the index.
  list.current.scrollToIndex({ animated: true, index: 12 });
};

const header = () => {
  return <Button onPress={() => press()} title="Go to 12th index" />;
};

return (
  <View style={styles.container}>
    {!data && <Text> Loading</Text>}
    {data && (
      <FlatList
        ref={list}
        ListHeaderComponent={header}
        data={data}
        renderItem={renderItem}
      />
    )}
  </View>
);
In this code snippet, we told React that if the user clicks the button, then it should redirect the user to the twelfth item in the array, like so:

In this section, we’ll go over some of the best practices when using FlatList. First, try to avoid using anonymous functions in your FlatList. The React Native team suggests this so the function won’t recreate itself every time your list is displayed. This saves memory and CPU resources:
//correct way: no anonymous functions
const renderItem = ({ item, index }) => (
  <Text>
    {index}. {item.title}
  </Text>
);
{
  data && (
    <FlatList
      data={data}
      keyExtractor={(item) => item.id}
      renderItem={renderItem}
    />
  );
}
//the wrong way. Steer clear from this:
{
  data && (
    <FlatList
      data={data}
      keyExtractor={(item) => item.id}
      renderItem={({ item, index }) => (
        <Text>
          {index}.{item.title}
        </Text>
      )}
    />
  );
}
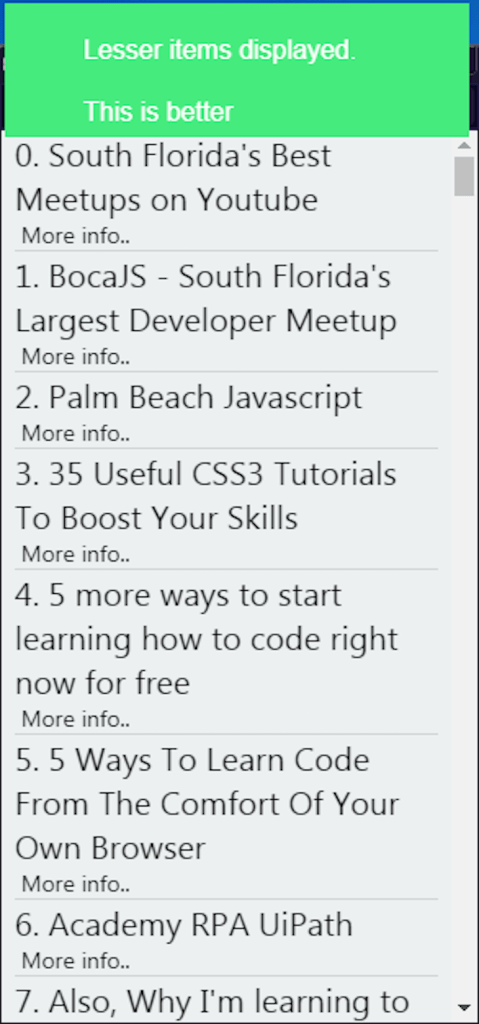
Secondly, try to keep your components light. The heavier your components are, the more memory they take. So, display as little information as you can on your list item. As a bonus, this makes your UI look cleaner.
Even if you have items that need to display a lot of text, you can use React Navigation. If the user taps on any item, React will direct them to a separate page that will show the remaining details. Here is an example:
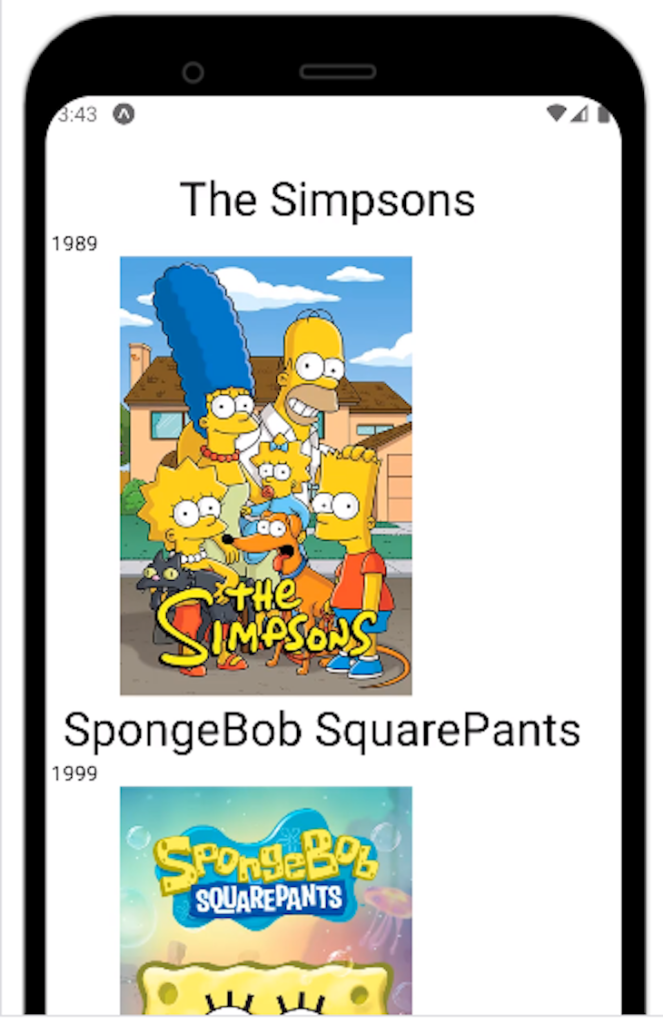
The first common problem you may run into is the images not rendering. To solve this problem, check if you are loading images from the local storage or from the network (an API). React Native’s Image module has a slightly different syntax for each use case. The code sample below renders images from the file system:
const apiData = [
  {
    id: 1,
    title: "The Simpsons",
    year: 1989,
    image: require("./simpson.jpg"),
  },
  {
    id: 2,
    title: "SpongeBob SquarePants ",
    year: 1999,
    image: require("./spongebob.jpg"),
  },
];

const renderItem = ({ item, index }) => (
  <View>
    <Text style={styles.title}>{item.title} </Text>
    <Text> {item.year}</Text>
    <Image
      style={{ height: 300, width: 300}}
      source={item.image}
      resizeMode="contain"
    />
  </View>
);
return (
  <View style={styles.container}>
    <FlatList
      data={apiData}
      keyExtractor={(item) => item.id.toString()}
      renderItem={renderItem}
    />
  </View>
);
Notice that we are using the require method. This tells React Native to fetch images from the local file system, like so:
To display images from the network, use the URI property for your prop like so:
const apiData = [
  {
    id: 1,
    title: "The Simpsons",
    year: 1989,
    //url for image
    image:
      "https://m.media-amazon.com/images/M/MV5BYjFkMTlkYWUtZWFhNy00M2FmLThiOTYtYTRiYjVlZWYxNmJkXkEyXkFqcGdeQXVyNTAyODkwOQ@@._V1_SY1000_CR0,0,666,1000_AL_.jpg",
  },
  {
    id: 2,
    title: "SpongeBob SquarePants ",
    year: 1999,
    image:
      "https://nick.mtvnimages.com/uri/mgid:arc:content:nick.com:9cd2df6e-63c7-43da-8bde-8d77af9169c7?quality=0.7",
  },
];
const renderItem = ({ item, index }) => (
  <View>
    <Text style={styles.title}>{item.title} </Text>
    <Text> {item.year}</Text>
    <Image
      style={{ height: 300, width: 300 }}
      source={{ uri: item.image }} //using uri property
      resizeMode="contain"
    />
  </View>
);
return (
  <View style={styles.container}>
      <FlatList
        data={apiData}
        keyExtractor={(item) => item.id.toString()}
        renderItem={renderItem}
      />
  </View>
);
You may also run into the problem of FlatList Inverting the list. To reverse the item order, simply use the inverted prop:
return (
  <View style={styles.container}>
    <FlatList
      data={apiData}
      keyExtractor={(item) => item.id}
      renderItem={renderItem}
      inverted //reverses the list
    />
  </View>
);
Another issue is seen when the list should re-render when a variable changes. To solve this issue, use the extraData prop. This will tell FlatList to render whenever the chosen variable updates:
var changedData = 0;
//other logic-related code..
 return (
    <View style={styles.container}>
        <FlatList
          data={apiData}
          extraData={changedData}
          keyExtractor={(item) => item.id}
          renderItem={renderItem}
        />
    </View>
  );
This will now tell React Native to listen for changes in the changedData variable. When a change is detected, React will re-render the list. FlatList may also present some performance issues when you’re rendering a large number of items.
You can use the maxToRenderPerBatch prop to solve this. This specifies the number of items rendered per batch, which is the next group of items displayed on every scroll:
return (
  <FlatList
    data={data}
    extraData={changedData}
    keyExtractor={(item) => item.id}
    renderItem={renderItem}
    maxToRenderPerBatch={5} //render only 5 items per scroll.
)
In this article, we covered React Native’s FlatList usage, its useful functions, and customization options. It is a crucial component if you want to render lists in your React Native app. It is an absolute breeze to use and is rock solid. Thank you for reading! Happy coding.

LogRocket's Galileo AI watches sessions for you and and surfaces the technical and usability issues holding back your React Native apps.
LogRocket also helps you increase conversion rates and product usage by showing you exactly how users are interacting with your app. LogRocket's product analytics features surface the reasons why users don't complete a particular flow or don't adopt a new feature.
Start proactively monitoring your React Native apps — try LogRocket for free.

Learn how to set up Meilisearch, index documents, and build keyword, semantic, and hybrid search with AI-powered retrieval.

Compare pnpm and npm across security defaults, disk usage, dependency strictness, and workspace policy to decide which package manager fits your project.

I migrated 20 production-style components from Tailwind to StyleX. Here’s what the data showed about LOC, CSS bundle size, build time, and type safety.

A guide for using JWT authentication to prevent basic security issues while understanding the shortcomings of JWTs.
Would you be interested in joining LogRocket's developer community?
Join LogRocket’s Content Advisory Board. You’ll help inform the type of content we create and get access to exclusive meetups, social accreditation, and swag.
Sign up now
