Editor’s note: The content of this tutorial was restructured and updated on 10 January 2024. Information was updated to reflect changes made in React v18.2.0, and code blocks were also revised.

Conditional rendering in React refers to the process of delivering elements and components based on certain conditions. Often, you encounter scenarios where the visual representation of your UI components needs to be adjusted using JSX, depending on varying circumstances. This is where conditional rendering comes in.
There are several ways you can implement conditional rendering in React. This tutorial covers the most popular options, while also reviewing some tips and best practices. You can fork all the examples in JSFiddle to follow along.
N.B., Although class components are still supported by React and the examples below illustrate their use, I suggest that you tweak the code examples with functions instead of classes.
if...else in ReactAn if...else block is one of the most basic selection constructs in most programming languages. It’s one of the simplest methods to implement conditional rendering in React.
Let’s take a look at code that illustrates its use:
class App extends React.Component {
constructor(props) {
    super(props);
    this.state = {text: '', inputText: '', mode:'view'};

    this.handleChange = this.handleChange.bind(this);
    this.handleSave = this.handleSave.bind(this);
    this.handleEdit = this.handleEdit.bind(this);
  }

  handleChange(e) {
    this.setState({ inputText: e.target.value });
  }

  handleSave() {
    this.setState({text: this.state.inputText, mode: 'view'});
  }

  handleEdit() {
    this.setState({mode: 'edit'});
  }

  render () {
    if(this.state.mode === 'view') {
      return (
        <div>
          <p>Text: {this.state.text}</p>
          <button onClick={this.handleEdit}>
            Edit
          </button>
        </div>
      );
    } else {
      return (
        <div>
          <p>Text: {this.state.text}</p>
            <input
              onChange={this.handleChange}
              value={this.state.inputText}
            />
          <button onClick={this.handleSave}>
            Save
          </button>
        </div>
      );
    }
  }
}

ReactDOM.render(
    <App />,
  document.getElementById('root')
);
Here, we first began by creating a component with the following state:
class App extends React.Component {
constructor(props) {
    super(props);
    this.state = {
      text: "",
      inputText: "",
      mode: "view",
    };
  }
}
We used one property for the saved text and another for the text that is being edited. A third property indicated if you were in edit or view mode. Next, we added methods for handling input text, and then Save and Edit events.
As for the render method, we checked the mode state property to either render an edit button or a text input and a save button, in addition to the saved text (observe the use of if...else here):
class App extends React.Component {
// …
  render () {
    if(this.state.mode === 'view') {
      return (
        <div>
          <p>Text: {this.state.text}</p>
          <button onClick={this.handleEdit}>
            Edit
          </button>
        </div>
      );
    } else {
      return (
        <div>
          <p>Text: {this.state.text}</p>
            <input
              onChange={this.handleChange}
              value={this.state.inputText}
            />
          <button onClick={this.handleSave}>
            Save
          </button>
        </div>
      );
    }
}
Here’s the complete Fiddle to try it out:
The render method here looks crowded, so let’s simplify it by extracting all the conditional logic into two render methods: one to render the input box and another to render the button:
class App extends React.Component {
// …

  renderInputField() {
    if(this.state.mode === 'view') {
      return <div></div>;
    } else {
      return (
          <p>
            <input
              onChange={this.handleChange}
              value={this.state.inputText}
            />
          </p>
      );
    }
  }

  renderButton() {
    if(this.state.mode === 'view') {
      return (
          <button onClick={this.handleEdit}>
            Edit
          </button>
      );
    } else {
      return (
          <button onClick={this.handleSave}>
            Save
          </button>
      );
    }
  }

  render () {
    return (
      <div>
        <p>Text: {this.state.text}</p>
        {this.renderInputField()}
        {this.renderButton()}
      </div>
    );
  }
}
Here’s the Fiddle to try it out:
Let’s imagine that we have more than two branches that depend on the same variable to evaluate the condition. A large if...else block might make your code clunky.
Instead, you can use a switch statement as follows:
switch(this.state.mode) {
case 'a':
    // ...
  case 'b':
    // ...
  case 'c':
    // ...
  default:
    // equivalent to the last else clause ...
}
if…elseYou can’t use a if...else statement or a switch statement inside of a return statement with JSX (unless you use immediately invoked functions, which we’ll cover later). Also, the switch statement doesn’t work with multiple or different conditions.
Let’s look at some additional methods for conditional rendering to improve this code.
The ternary conditional operator provides a cleaner and more concise alternative to an if...else block:
condition ? expr_if_true : expr_if_false
The operator is wrapped in curly braces, and the expressions can contain JSX, which you can wrap in parentheses to improve readability. The operator can also be applied to different parts of the component.
Let’s apply it to this example to see it in action:
class App extends React.Component {
constructor(props) {
    super(props);
    this.state = {text: '', inputText: '', mode:'view'};

    this.handleChange = this.handleChange.bind(this);
    this.handleSave = this.handleSave.bind(this);
    this.handleEdit = this.handleEdit.bind(this);
  }

  handleChange(e) {
    this.setState({ inputText: e.target.value });
  }

  handleSave() {
    this.setState({text: this.state.inputText, mode: 'view'});
  }

  handleEdit() {
    this.setState({mode: 'edit'});
  }

  render () {
    const view = this.state.mode === 'view';

    return (
      <div>
        <p>Text: {this.state.text}</p>

        {
          view
          ? null
          : (
            <p>
              <input
                onChange={this.handleChange}
                value={this.state.inputText} />
            </p>
          )
        }

        <button
          onClick={
            view
              ? this.handleEdit
              : this.handleSave
          }
        >
          {view ? 'Edit' : 'Save'}
        </button>
      </div>
    );
  }
}

ReactDOM.render(
  <App />,
  document.getElementById('root')
);
In this code, we removed renderInputField and renderButton, which were added to the if…else example. In the render method, we added a variable to know if the component is in view or edit mode.
Then, we used the ternary operator to return null if the view mode is set, or to set the input field otherwise:
  // ...
  return (
      <div>
        <p>Text: {this.state.text}</p>

        {
          view
          ? null
          : (
            <p>
              <input
                onChange={this.handleChange}
                value={this.state.inputText} />
            </p>
          )
        }

      </div>
  );
Using a ternary operator, you can declare one component to render either a Save or Edit button by changing its handler and label correspondingly:
 // ...
   return (
      <div>
        <p>Text: {this.state.text}</p>

        {
          ...
        }

        <button
          onClick={
            view
              ? this.handleEdit
              : this.handleSave
          } >
              {view ? 'Edit' : 'Save'}
        </button>

      </div>
  );
Here’s the Fiddle to try it out:
As mentioned before, the ternary operator can be applied in different parts of the component, even inside return statements and JSX, acting as a one-line if...else statement. However, for this reason, things can get messy pretty quickly.
For example, consider a complex, nested set with the following conditions:
return (
  <div>
    { condition1
      ? <Component1 />
      : ( condition2
        ? <Component2 />
        : ( condition3
          ? <Component3 />
          : <Component 4 />
        )
      )
    }
  </div>
);
This can soon lead to a mess. Let’s review another technique that can help improve the code.
&&The && operator is also called the logical AND operator. When it is supplied with two expressions, this operator returns the value of the second expression if both expressions are evaluated as true. But if either expression evaluates to false, && returns the value of the first expression.
You can only use the && operator when you want to generate either a specific outcome or no outcome at all. Unlike the & operator, && doesn’t evaluate the right-hand expression if only the left-hand expression can decide the final result.
For example, if the first expression evaluates to false, it’s not necessary to evaluate the next expression because the result will always be false.
Consider the following expression:
{
  view
  ? null
  : (
    <p>
      <input
        onChange={this.handleChange}
        value={this.state.inputText} />
    </p>
  )
}
The code that uses a ternary operator above can be turned into the following code snippet:
!view && (
<p>
    <input
      onChange={this.handleChange}
      value={this.state.inputText} />
  </p>
)
Here’s the complete Fiddle:
&& operatorThere are several limitations to this operator. It can:
nullNotice that in an earlier code with if...else, the method renderInputField returned an empty <div> element when the app was in view mode. However, this is not necessary.
If you want to hide a component, you can make its render method return null, so there’s no need to render a different, empty element as a placeholder. This is another way to implement conditional rendering in React.
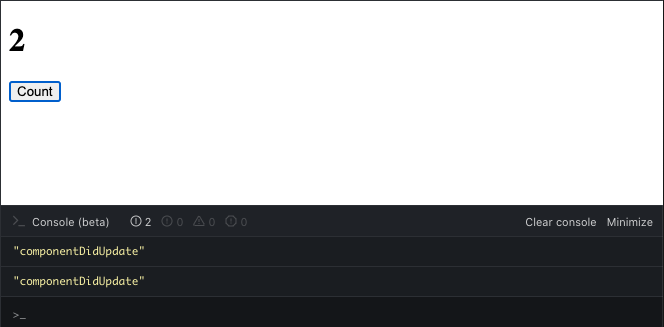
One important thing to keep in mind when returning null, however, is that even though the component doesn’t show up, its lifecycle methods are still fired. Take, for example, the following Fiddle, which implements a counter with two components:
The Number component only renders the counter for even values. Otherwise, it returns null. When you look at the console, however, you’ll see that componentDidUpdate is always called regardless of the value returned by render:
In our example, change the renderInputField method to look like the following code:
  renderInputField() {
  if(this.state.mode === 'view') {
      return null;
    } else {
      return (
          <p>
            <input
              onChange={this.handleChange}
              value={this.state.inputText}
            />
          </p>
      );
    }
  }
The complete Fiddle is below:
One advantage of returning null instead of an empty element is that you’ll improve the performance of your app a bit because React won’t have to unmount the component to replace it.
For example, if you open the Inspector tab from the Fiddle that renders the empty <div> element, you’ll see how the <div> element under the root is always updated:
This differs from when null is returned to hide the component and the <div> element is not updated when the Edit button is clicked:
You can check out the React docs to learn more about how React preserves and resets states.
Although the performance improvement is insignificant in this simple example, when you are working with big components, the difference is more noticeable. Later, we’ll cover more of the performance implications of conditional rendering. For now, let’s continue to improve our example.
Another method to implement conditional rendering in React is by using variables to store elements. Through this approach, you can conditionally render a part of the component while the rest of the output remains unchanged.
For example, I’ll use a variable to store the JSX elements and only initialize it when the condition is true:
renderInputField() {
let input;

    if(this.state.mode !== 'view') {
      input =
        <p>
          <input
            onChange={this.handleChange}
            value={this.state.inputText} />
        </p>;
    }

      return input;
  }

  renderButton() {
    let button;

    if(this.state.mode === 'view') {
      button =
          <button onClick={this.handleEdit}>
            Edit
          </button>;
    } else {
      button =
          <button onClick={this.handleSave}>
            Save
          </button>;
    }

    return button;
  }
The code above gives the same result as returning null from those methods. Here’s the Fiddle to try it out:
Note that the if...else blocks in this code can be replaced by the ternary operator for conciseness.
As the name implies, immediately invoked function expressions (IIFEs) are functions that are executed immediately after they are defined, so there is no need to call them explicitly.
Generally, you’d define and execute a function at a later point. But if you want to execute the function immediately after it is defined, you have to wrap the whole declaration in parentheses to convert it to an expression. You’d execute it by adding two more parentheses and passing any arguments that the function may take.
Because the function won’t be called in any other place, you can drop the name or even use arrow functions in the definition. In React, you use curly braces to wrap an IIFE, and put all the logic you want inside it, like an if...else, switch, ternary operators, etc., and return whatever you want to render.
In other words, inside an IIFE, we can use any type of conditional logic. This allows us to use if...else and switch statements inside return statements, as well as JSX if you consider it to improve the readability of the code.
For example, the logic to render the save or edit button could look like the following with an IIFE:
{
  (() => {
    const handler = view
                ? this.handleEdit
                : this.handleSave;
    const label = view ? 'Edit' : 'Save';

    return (
      <button onClick={handler}>
        {label}
      </button>
    );
  })()
}
Here’s the complete Fiddle:
When your code tends to become more complex, the code inside an IIFE can become large and difficult to read and maintain.
IIFEs are better suited for single-use scenarios as they can lead to unnecessary code complexity, especially in large-volume codes.
Sometimes, an IFFE might seem like a hacky solution. After all, we’re using React. The recommended approach is to split up the logic of your app into as many components as possible and to use functional programming instead of imperative programming.
Moving the conditional rendering logic to a subcomponent that renders different things based on its props would be a good option. But, in this example, I’m going to do something a bit different to show how you can go from an imperative solution to a more declarative and functional solution.
I’ll start by creating a SaveComponent and an EditComponent:
const SaveComponent = (props) => {
  return (
    <div>
      <p>
        <input
          onChange={props.handleChange}
          value={props.text}
        />
      </p>
      <button onClick={props.handleSave}>
        Save
      </button>
    </div>
  );
};

EditComponent:
const EditComponent = (props) => {
  return (
    <button onClick={props.handleEdit}>
      Edit
    </button>
  );
};
Now, the render method can look like the code below:
render () {
    const view = this.state.mode === 'view';

    return (
      <div>
        <p>Text: {this.state.text}</p>

        {
          view
            ? <EditComponent handleEdit={this.handleEdit}  />
            : (
              <SaveComponent
               handleChange={this.handleChange}
               handleSave={this.handleSave}
               text={this.state.inputText}
             />
            )
        }
      </div>
    );
}
Here’s the complete Fiddle:
Libraries like JSX Control Statements (which is actually a Babel plugin) extend JSX to add conditional statements.
These libraries provide more advanced components, but if we need something like a simple if...else, we can use a solution similar to Michael J. Ryan’s in the comments for this issue:
const If = (props) => {
const condition = props.condition || false;
  const positive = props.then || null;
  const negative = props.else || null;

  return condition ? positive : negative;
};

// …

render () {
    const view = this.state.mode === 'view';
    const editComponent = <EditComponent handleEdit={this.handleEdit}  />;
    const saveComponent = <SaveComponent
               handleChange={this.handleChange}
               handleSave={this.handleSave}
               text={this.state.inputText}
             />;

    return (
      <div>
        <p>Text: {this.state.text}</p>
        <If
          condition={ view }
          then={ editComponent }
          else={ saveComponent }
        />
      </div>
    );
}
Here’s the complete Fiddle:
The syntax of React subcomponents is complex, which might prove to be a hindrance during learning.
An enum is a type that groups constant values. JavaScript doesn’t support enums natively, but we can use an object to group all the properties of the enum and freeze that object to avoid accidental changes.
You might be wondering why we’re not using constants. The main benefit is that we can use a dynamically generated key to access the property of the object.
Enum objects are a great option when you want to use or return a value based on multiple conditions, making them a great replacement for if...else and switch statements in many cases.
Applying this to our example, we can declare an enum object with the two components for saving and editing:
const Components = Object.freeze({
view: <EditComponent handleEdit={this.handleEdit} />,
  edit: <SaveComponent
          handleChange={this.handleChange}
          handleSave={this.handleSave}
          text={this.state.inputText}
        />
});

...
const key = this.state.mode;
return (
  <div>
    <p>Text: {this.state.text}</p>
    {
      Components[key]
    }
  </div>
);
Here, we used the mode state variable to indicate which component to show.
You can see the complete code in the following Fiddle:
Type safety can be a potential issue when working with enum objects.
A higher-order component (HOC) is a function that takes an existing component and returns a new one with some added functionality.
Applied to conditional rendering, a HOC could return a different component than the one passed based on some condition. However, this conditional rendering approach is now legacy and not commonly used in newer versions of React.
For this article, I’m going to borrow the concepts of the EitherComponent from Robin Wieruch.
In functional programming, the Either type is commonly used as a wrapper to return two different values. Let’s begin by creating a function that accepts two arguments: the first is a function that yields a Boolean value as a result of a conditional evaluation, and the second is a component that will be returned if the Boolean value is true.
It’s a convention to start the name of the HOC with the word “with.” This function will return another function that will take the original component to return a new one.
The component or function returned by this inner function is the one you’ll use in your app, so it will take an object with all the properties that it will need to work.
The inner functions have access to the outer functions’ parameters. Now, based on the value returned by the conditionalRenderingFn function, you either return EitherComponent or the original Component. Alternatively, you could use arrow functions.
Thus, the code for the HOC will be:
function withEither(conditionalRenderingFn, EitherComponent) {
return function buildNewComponent(Component) {
        return function FinalComponent(props) {
            return conditionalRenderingFn(props)
                ? <EitherComponent { ...props } />
                 : <Component { ...props } />;
        }
    }
}
Using the previously defined SaveComponent and EditComponent, you can create a withEditConditionalRendering HOC and, with this, create an EditSaveWithConditionalRendering component:
const isViewConditionFn = (props) => props.mode === 'view';
const withEditContionalRendering = withEither(isViewConditionFn, EditComponent);
const EditSaveWithConditionalRendering = withEditContionalRendering(SaveComponent);
You can now use the HOC in the render method, passing it all the necessary properties:
render () {
return (
      <div>
        <p>Text: {this.state.text}</p>
        <EditSaveWithConditionalRendering
               mode={this.state.mode}
               handleEdit={this.handleEdit}
               handleChange={this.handleChange}
               handleSave={this.handleSave}
               text={this.state.inputText}
             />
      </div>
    );
}
Here’s the complete Fiddle:
HOCs wrap a component and potentially alter its behavior. This process, however, can result in “wrapper hell,” a situation where multiple HOCs wrap around a single component, complicating the code structure.
Additionally, the likelihood of prop collisions is another cause for concern. As HOCs introduce new props to a component, there’s a possibility of collisions between these injected props and the component’s existing props.
The outcome of this may result in harder-to-identify bugs. If the component that is wrapped by a HOC includes static methods, they must be copied over to the returned component so that they can be preserved. Failing this, they could be lost when the component is wrapped.
How do you render multiple child components depending on a certain condition? The answer is by using Fragments. Fragments allow you to return multiple elements by grouping them without adding an extra node to the DOM.
You can use Fragments with their traditional syntax:
return (
<React.Fragment>
    <Button />
    <Button />
    <Button />
  </React.Fragment>
);
You can also use them with their shorter syntax:
return (
<>
    <Button />
    <Button />
    <Button />
  </>
);
When it comes to rendering multiple elements with Fragments depending on a condition, you can use any of the techniques described in this article. For example, you could use a short-circuit && operator:
{
condition &&
  <React.Fragment>
    <Button />
    <Button />
    <Button />
  </React.Fragment>
}
You could also encapsulate the rendering of the child elements in a method and use an if or switch statement to decide what to return:
render() {
return <div>{ this.renderChildren() }</div>;
}

renderChildren() {
  if (this.state.children.length === 0) {
    return <p>Nothing to show</p>;
  } else {
    return (
      <React.Fragment>
        {this.state.children.map(child => (
          <p>{child}</p>
        ))}
      </React.Fragment>
    );
 }
}
Fragments should contain more than one child. Failing to meet this criterion will not allow a Fragment to be created. Fragment only supports one attribute — the key attribute that is used when mapping a collection to an array of components.
Nowadays, most experienced React developers use Hooks to write components. So, instead of having a class like the following:
import React, { Component } from 'react';
class Doubler extends Component {
  constructor(props) {
    super(props);

    this.state = {
      num: 1,
    };
  }

  render() {
    return (
      <div>
        <p>{this.state.num}</p>
        <button onClick={() =>
            this.setState({ num: this.state.num * 2 })
        }>
          Double
        </button>
      </div>
    );
  }
}
You can write the component with a function using the useState Hook:
import React from 'react';
function Doubler() {
  const [num, setNum] = React.useState(1);

  return (
    <div>
      <p>{num}</p>
      <button onClick={() => setNum(num * 2)}>
        Double
      </button>
    </div>
  );
}
Just like Fragments, you can use any of the techniques described in this article to conditionally render a component that uses Hooks:
function Doubler() {
const [num, setNum] = React.useState(1);
  const showButton = num <= 8;
  const button = <button onClick={() => setNum(num * 2)}>Double</button>;

  return (
    <div>
      <p>{num}</p>
      {showButton && button}
    </div>
  );
}
The only caveat is that you can’t conditionally call a Hook so it isn’t always executed. According to the modern React documentation, you shouldn’t call Hooks inside loops, conditions, or nested functions. Instead, always use Hooks at the top level of your React function.
By following this rule, you ensure that Hooks are called in the same order each time a component renders. That’s what allows React to correctly preserve the state of Hooks between multiple useState and useEffect calls.
With the useEffect Hook, you can’t put a condition that could prevent the Hook from being called every time the component is rendered, like this:
if (shouldExecute) {
  useEffect(() => {
    // ...
  }
}
You have to put the condition inside the Hook:
useEffect(() => {
  if (shouldExecute) {
    // ...
  }
}, [shouldExecute])
With this, we are done exploring different methods to achieve conditional rendering in React. Now let’s look at how performance is impacted.
Conditional rendering can be tricky. In many cases, the performance impact achieved by different conditional rendering options may not be significant. But, in scenarios where performance is crucial, you’ll need a good understanding of how React works with the virtual DOM and strategies to optimize performance.
The essential idea is that changing the position of the components due to conditional rendering can cause a reflow that will unmount/mount the components of the app. Based on the example of the article, I created two JSFiddles.
The first one uses an if...else block to show/hide the Subheader component:
The second one uses the short-circuit && operator to do the same:
Open the Inspector and click on the button. Then, repeat the click operation a few more times. You’ll see how the Content component is treated differently by each implementation.
The if...else block treats the component with the code below:
The short-circuit operator uses the following approach:

With inline conditional expressions in React, we can write the condition in a single line, eliminating verbose statements featuring if…else, ternary operators, or other conditional rendering methods. Inline conditional expressions lead to cleaner code (JSX) while increasing code readability. They make it easier to generate dynamic UIs conditionally. Eliminate unnecessary nesting by making use of inline conditional expressions.
A simple example of inline conditional expression is shown below:
<button
  onClick={
            view
              ? this.handleEdit
              : this.handleSave
          }
 >
As with most things in programming, there are many ways to implement conditional rendering in React. It’s generally recommended to use any of the methods discussed, except for a if…else block that involves multiple return statements. This specific approach is typically less favored due to potential complexities in readability and maintainability.
Some factors to include in your decision are your programming style, how complex the conditional logic is, and how comfortable you are with JavaScript, JSX, and advanced React concepts like HOCs.
And you should always favor simplicity and readability. I hope you enjoyed this article, and be sure to leave a comment if you have any questions.

Learn how Storybook MCP enables AI agents to understand your component library, generate accurate UI, and validate code using documentation, stories, and automated tests.

Debug RSC hydration mismatches in production with Next.js instrumentation, Suspense isolation, HTML diffing, and CI smoke tests.

Explore why npm dependencies are a major supply chain security risk and how to protect JavaScript apps from compromised packages and transitive threats.

Enabled React Compiler v1.0 on a production Next.js app. Here’s every warning, breakage, and silent opt-out I documented — and what actually worked.
Hey there, want to help make our blog better?
Join LogRocket’s Content Advisory Board. You’ll help inform the type of content we create and get access to exclusive meetups, social accreditation, and swag.
Sign up now

