Editor’s note: This guide to creating a React context menu was last updated on 5 December 2022 to update the information for React Router v6. This update also includes new sections about disabling the right-click context menu and creating a custom context menu Hook in React.
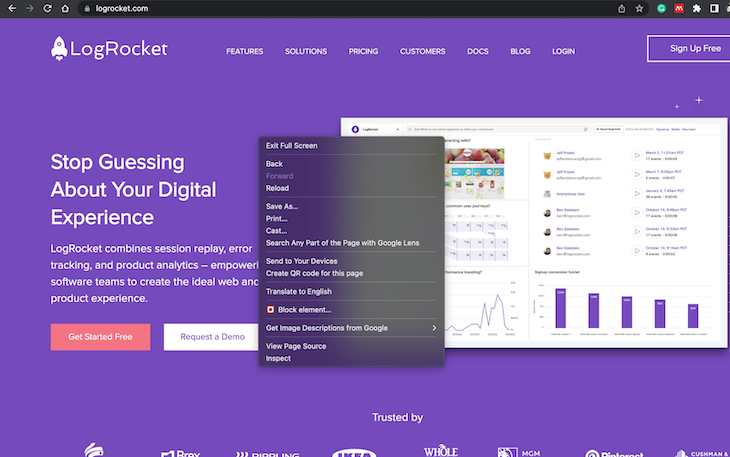
If you right-click your browser while visiting a website, you can see your OS’s native context menu. From there, you can save, print, create a QR code for the page, and much more. You can see options like copy, paste, and cut if you highlight text. You may also see customized context menus on email or list applications and collaboration apps like Trello and Notion. These right-click menus (also known as context menus) give users more options while they are using the app.
This post will explore how to create a React context menu, the shortcuts to activate right-click menus, and how to create a custom context menu Hook.
You can see the project demo below and check out the complete code on GitHub or the deployed website.
Jump ahead:
useEffect HookA context menu (also called right-click menu) is a graphical user interface (GUI) menu that appears upon a user interaction, such as a right-click mouse operation. Context menus offer a limited set of choices available in the current state, or context, of the OS or application to which the menus belong.
To start creating a custom right-click menu in React, we will initialize a React project using the npx create-react-app react-context-menu command, then go into the project folder using the command cd react-context-menu. For this tutorial, we will be using styled-components for the styling:
In our src file, we will create four folders:
components: This will house all the components we will be using throughout the projectdata: This will store the data information that will be rendered on the webpagehooks: This is where we will create the Hook for the right-click context menustyles: This folder will contain a file for all of our styles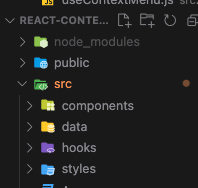
If you go to your Chrome or Mozilla browser and right-click anywhere, you will see the default browser context menu like this:
We will use the onContextMenu prop to disable this default behavior in our App.js file. It will look like this:
src/App.js

 import "./App.css";
function App() {
  return (
    <div
      className="App"
      onContextMenu={(e) => {
        e.preventDefault(); // prevent the default behaviour when right clicked
        console.log("Right Click");
      }}
    >
      Context Menu
      </div>
  );
}
export default App;
Now, let’s see what we have in the browser:
As you can see, when any other part of the browser is right-clicked, the default menu shows up, but when Context is right-clicked, it does not show up, and a text is logged in the console.
To get started, we will create a data.js file in the data folder and populate it with the data that we will be using for the project:
src/data.js

export const data = [
  {
    id: 1,
    title: "Message 1",
  },
  {
    id: 2,
    title: "Message 2",
  },
  {
    id: 3,
    title: "Message 3",
  },
  {
    id: 4,
    title: "Message 4",
  },
];
Then, we will create a new component inside the component folder called MenuContext.js and use this component in our App.js:
src/App.js

import "./App.css";
import MenuContext from "./components/MenuContext";
import { data } from "./data/data";
function App() {
  return (
    <div className="App">
      <MenuContext  />
    </div>
  );
}
export default App;

src/component/MenuContext.js

import React, { useState, useEffect } from "react";
const MenuContext = () => {
  return (
    <div>
      MenuContext
    </div>
  );
};
export default MenuContext;
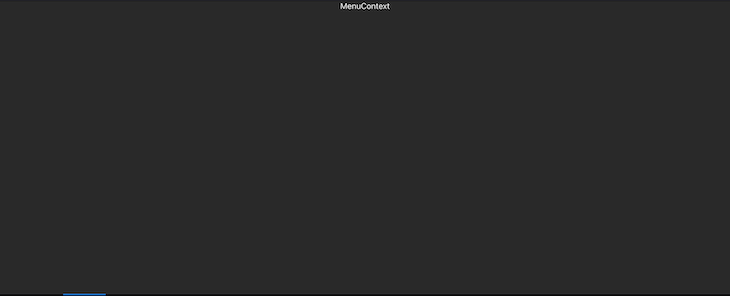
Now, we should have something like this in our browser:
In our previous section, we mentioned that we need to disable the default right-click context menu of the browser. We will use the onContextMenu prop, as it has been mentioned before:
src/component/MenuContext.js

    <div
      onContextMenu={(e) => {
        e.preventDefault();
        console.log("Right Click");
      }}
    >
      MenuContext
    </div>
Here, we use the onContextMenu to prevent the default browser context menu behavior and take the event method to prevent the browser’s default behavior. A console log was specified to display a text in our console when we right-click in the browser, as we cannot see the browser’s default context menu again:
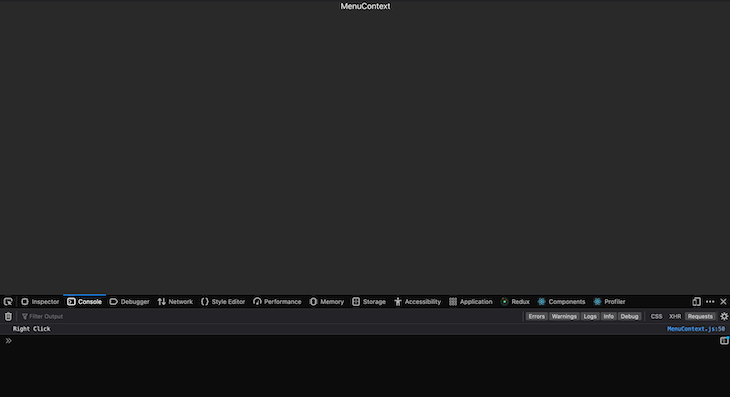
After right-clicking and preventing the default browser behavior, a text was logged into the console (Right Click) to show we right-clicked.
Now that the default right-click custom menu has been disabled, we can proceed to the custom right-click menu implementation.
First, we import our data into App.js and pass it as a prop to the MenuContext component. In MenuContext, we will destructure this prop (data) and map over it to render our data to the browser UI:
src/App.js

import "./App.css";
import MenuContext from "./components/MenuContext";
import { data } from "./data/data";
function App() {
  return (
    <div className="App">
      <MenuContext data={data} />
    </div>
  );
}
export default App;

src/components/MenuContext.js

import React, { useState, useEffect } from "react";
import Menu from "./Menu";
const MenuContext = ({ data }) => {
   return (
    <div>
      {data.map((item) => (
        <div
          onContextMenu={(e) => {
            e.preventDefault();
            console.log("Right Click", e.pageX, e.pageY);
          }}
        >
          <Menu key={item.id} title={item.title} />
        </div>
      ))}
    </div>
  );
};
export default MenuContext;
Here, we are mapping over the data array, returning a Menu component, and passing in the ID and title. In the Menu.js file, we will use these two props as follows:
src/components/Menu.js

import React from "react";
import { MenuContextContainer } from "../styles/styles";
const Menu = ({ title, key }) => {
  return (
    <>
      <MenuContextContainer key={key}>{title}</MenuContextContainer>
    </>
  );
};
export default Menu;
The MenuContextContainer is a styled-component coming from the styles file:
src/styles/styles.js

import styled, { css } from "styled-components";
export const MenuContextContainer = styled.div`
  border: 1px solid #ffffff2d;
  border-radius: 4px;
  padding: 18px;
  margin: 5px 0;
  box-sizing: border-box;
`;
Now, we can check what we have in our browser:
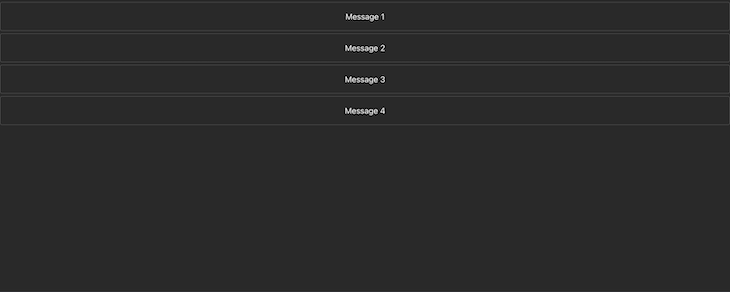
When we click any message boxes, a console text "Right Click" will be logged. Now, we need to implement it so the right-click context menu displays once when any of the boxes are right-clicked and not four times. This is because we are rendering four items on the UI, and the menu is displayed wherever the mouse is pointed:
src/compoennts/MenuContext.js

import React, { useState, useEffect } from "react";
import { ContextMenu } from "../styles/styles";
import Menu from "./Menu";
const MenuContext = ({ data }) => {
  const [clicked, setClicked] = useState(false);
  const [points, setPoints] = useState({
    x: 0,
    y: 0,
  });
  useEffect(() => {
    const handleClick = () => setClicked(false);
    window.addEventListener("click", handleClick);
    return () => {
      window.removeEventListener("click", handleClick);
    };
  }, []);
  return (
    <div>
      {data.map((item) => (
        <div
          onContextMenu={(e) => {
            e.preventDefault();
            setClicked(true);
            setPoints({
              x: e.pageX,
              y: e.pageY,
            });
            console.log("Right Click", e.pageX, e.pageY);
          }}
        >
          <Menu id={item.id} title={item.title} />
        </div>
      ))}
      {clicked && (
        <ContextMenu top={points.y} left={points.x}>
          <ul>
            <li>Edit</li>
            <li>Copy</li>
            <li>Delete</li>
          </ul>
        </ContextMenu>
      )}
    </div>
  );
};
export default MenuContext;
In the MenuContext.js file, we create two states: clicked and points. The clicked state (with a Boolean value) will monitor when the mouse is right-clicked. The points (with an object state) will be used to get the x and y coordinates of where the mouse was clicked.
useEffect HookThe value of x and y will be set at default to 0. Then, we have to make it so that when we click anywhere on the page, the context menu disappears just as it works for the default custom right-click menu text. To achieve that, we will register an event listener on the window by calling the useEffect Hook and creating a function called handleClick. We will also set the clicked state to false to not show it.
Then, we will reference the window, call the addEventListener method, and register a click event so that whenever we click anywhere in the window or browser, the document will call handle click. Lastly, we will attach a cleanup function to remove the event listener to avoid memory leaks.
The event object contains the values of the present coordinates being clicked. To make it clearer, we can log e.x and e.y in the onContextMenu prop:
src/MenuContext.js

  <div>
      {data.map((item) => (
        <div
          onContextMenu={(e) => {
            e.preventDefault();
            setClicked(true);
            setPoints({
              x: e.pageX,
              y: e.pageY,
            });
            console.log("Right Click", e.pageX, e.pageY);
          }}
        >
          <Menu id={item.id} title={item.title} />
        </div>
      ))}
      {clicked && (
        <ContextMenu top={points.y} left={points.x}>
          <ul>
            <li>Edit</li>
            <li>Copy</li>
            <li>Delete</li>
          </ul>
        </ContextMenu>
      )}
    </div>
Now, we can check the console to see what is logged when we click different places on the browser:

I clicked four places where we were rendering our items and the x and y coordinate values were logged or returned.
In the div wrapping and our Menu items (where we already initiate the onCotextMenu prop), we will set the clicked state to true and the points to the x and y coordinates that are clicked.
ContextMenu is a div styled in the styles.js file. It will only be displayed when clicked is true. For example, only when any of the message boxes are clicked because we set the click to be true in the div wrapping the message boxes element.
Remember, the default value of our clicked state is false. The values for x and y are passed to the ContextMenu div as props and used to style the position where the context menu should be displayed. Lastly, an unordered list was created in the ContextMenu, which will be displayed when any item (Message 1- 4) is right-clicked:
src/styles/styles.js

import styled, { css } from "styled-components";
export const MenuContextContainer = styled.div`
  border: 1px solid #ffffff2d;
  border-radius: 4px;
  padding: 18px;
  margin: 5px 0;
  box-sizing: border-box;
`;
export const ContextMenu = styled.div`
  position: absolute;
  width: 200px;
  background-color: #383838;
  border-radius: 5px;
  box-sizing: border-box;
  ${({ top, left }) => css`
    top: ${top}px;
    left: ${left}px;
  `}
  ul {
    box-sizing: border-box;
    padding: 10px;
    margin: 0;
    list-style: none;
  }
  ul li {
    padding: 18px 12px;
  }
  /* hover */
  ul li:hover {
    cursor: pointer;
    background-color: #000000;
  }
`;
Now, we can check what we have in the browser:

To create a custom right-click context menu Hook, we will create a file named useContextMenu.js, where we will create the Hook function. Also, we will create an additional file in the components folder called MenuContextHook.js:
src/hooks/useContextMenu

import { useState, useEffect } from "react";
const useContextMenu = () => {
  const [clicked, setClicked] = useState(false);
  const [points, setPoints] = useState({
    x: 0,
    y: 0,
  });
  useEffect(() => {
    const handleClick = () => setClicked(false);
    document.addEventListener("click", handleClick);
    return () => {
      document.removeEventListener("click", handleClick);
    };
  }, []);
  return {
    clicked,
    setClicked,
    points,
    setPoints,
  };
};
export default useContextMenu;
In the useContexMenu Hook, we declare two states: clicked and points — just like in the previous section. Then, we use the useEffect Hook to register an event listener and clean up the event with the cleanup function. Lastly, clicked, setClicked, points, and setPoints are returned.
In the MenuContextHook.js file, we will make use of this Hook as follows:
src/components/MenuContextHook.js

import React from "react";
import useContextMenu from "../hooks/useContextMenu";
import { ContextMenu } from "../styles/styles";
import Menu from "./Menu";
const MenuContextHook = ({ data }) => {
  const { clicked, setClicked, points, setPoints } = useContextMenu();
  return (
    <div>
      {data.map((item) => (
        <div
          onContextMenu={(e) => {
            e.preventDefault();
            setClicked(true);
            setPoints({
              x: e.pageX,
              y: e.pageY,
            });
            console.log("Right Click", e.pageX, e.pageY);
          }}
        >
          <Menu key={item.id} title={item.title} />
        </div>
      ))}
      {clicked && (
        <ContextMenu top={points.y} left={points.x}>
          <ul>
            <li>Edit</li>
            <li>Copy</li>
            <li>Delete</li>
          </ul>
        </ContextMenu>
      )}
    </div>
  );
};
export default MenuContextHook;
Basically, in this file, we are restructuring clicked, setClicked, points, and setPoints from the useContextMenu Hook and using it to create the custom right-click menu, as was explained in the previous section.
This article covered the many ways to create a custom context menu in React applications. Keep in mind if you are creating your custom context menu in React, consider mobile interaction. Users may be unable to right-click if they use a mobile phone.
Because of this, you may need to think twice about why you need a custom context menu. It can cause bad experiences if the user wants to see the default menu.
Install LogRocket via npm or script tag. LogRocket.init() must be called client-side, not
server-side
$ npm i --save logrocket

// Code:

import LogRocket from 'logrocket';
LogRocket.init('app/id');
// Add to your HTML:

<script src="https://cdn.lr-ingest.com/LogRocket.min.js"></script>
<script>window.LogRocket && window.LogRocket.init('app/id');</script>

Debug RSC hydration mismatches in production with Next.js instrumentation, Suspense isolation, HTML diffing, and CI smoke tests.

Explore why npm dependencies are a major supply chain security risk and how to protect JavaScript apps from compromised packages and transitive threats.

Enabled React Compiler v1.0 on a production Next.js app. Here’s every warning, breakage, and silent opt-out I documented — and what actually worked.

We built the same app in TanStack Start RSC and Next.js RSC. TanStack shipped 40% less JS and built 4x faster — but Next.js is still the safer production bet.
Would you be interested in joining LogRocket's developer community?
Join LogRocket’s Content Advisory Board. You’ll help inform the type of content we create and get access to exclusive meetups, social accreditation, and swag.
Sign up now
