Svelte Native is a framework for developing native iOS and Android applications with Svelte and NativeScript, providing the layer needed to connect Svelte to NativeScript.

By pairing two powerful technologies in the JavaScript ecosystem, developers can write mobile application logic with Svelte while building a UI with custom Svelte Native components, which, under the hood, are NativeScript components.
Unlike mobile application development frameworks like Ionic that use web technologies and WebView to render an application, NativeScript communicates directly with native APIs, making UI rendering faster and giving mobile apps a truly native look and feel.
In this post, we’ll learn what Svelte Native is, how to work with its components, and building a simple Svelte Native iOS app.
Because Svelte Native uses NativeScript, run the following command to install NativeScript globally:
npm i -g nativescript
To create a Svelte Native starter app, run the following command in your terminal:
npx degit halfnelson/svelte-native-template svelte-native-app
cd svelte-native-app
npm i
Now that we’ve installed the dependencies, let’s run our app.
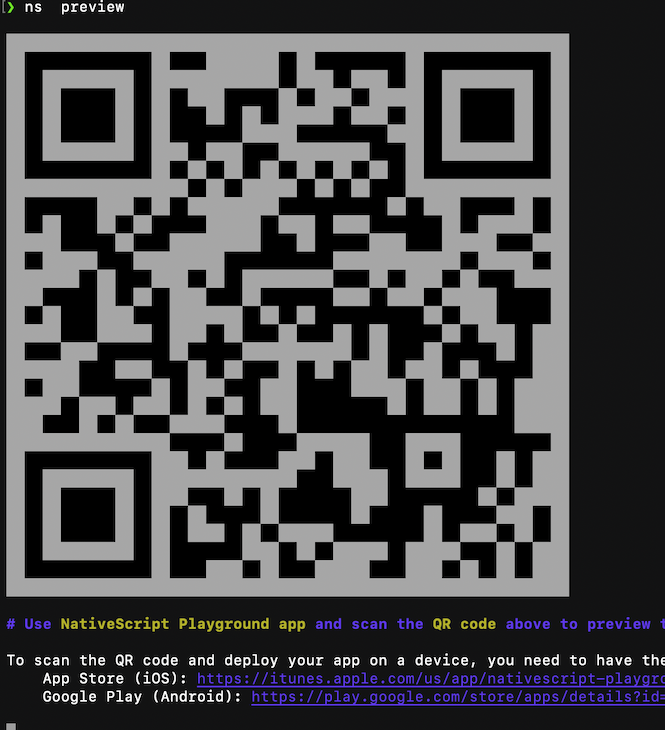
To run the app on a physical device, we need two apps from the NativeScript team installed on our mobile device: NativeScript Playground and NativeScript Preview.
After installing both of these apps, run ns preview in the root of the Svelte Native app and scan the QR code in the terminal with the NativeScript Playground you just installed:
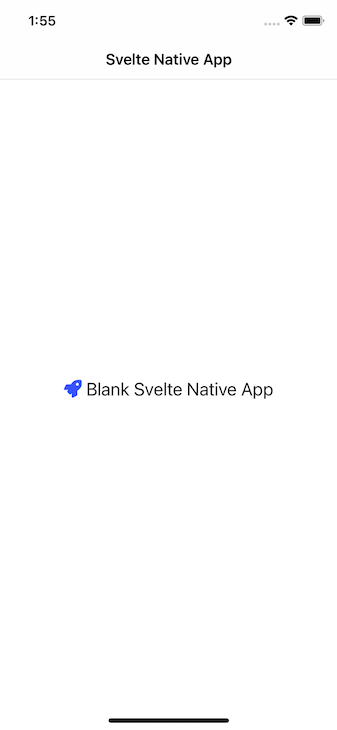
To run your app on any iOS simulator, run ns run ios. After building and compiling, the app launches on your default iOS simulator:
An important thing to note is that Svelte Native uses TypeScript by default.
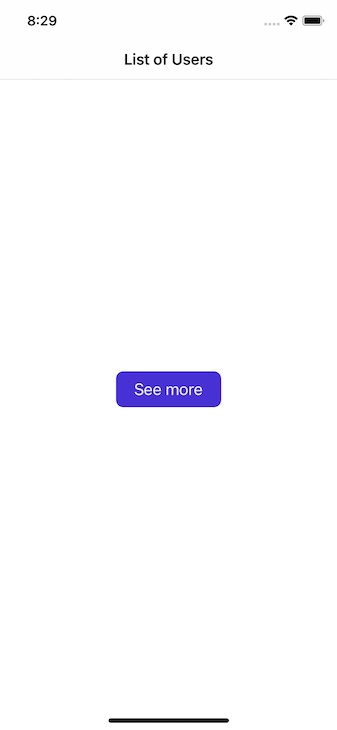
Svelte Native has a lot of built–in components that are actually NativeScript components under the hood. To demonstrate how they can work in an app, let’s see how the button component works.
button component in Svelte NativeTo add and use a button component, add the following:
<button text="See more" on:tap="{onButtonTap}" />
Notice how we have the on:tap event to handle clicking as opposed to the on:click event in a Svelte app. This follows the NativeScript implementation of event handlers rather than Svelte.
Also, the Svelte Native button differs from the HTML button element. The Svelte Native button is a self-closing tag, and the rendered text on the UI is placed with the text props.
Here’s how the button looks with a bit of styling applied:
An important thing to note when working in a Svelte Native project is how to render NativeScript and Svelte components.
When rendering NativeScript components, the tags must start with a lowercase letter:
<actionBar title="Hello World" />
However, Svelte components are capitalized, like in <ChildComponent />. This difference between components lets the compiler differentiate Svelte components from NativeScript components.
page component in Svelte NativeThe page component is the top-level parent component that wraps all other components within our app screens. This implies there should be only one page component per screen:
<page>
  <actionBar title="List of Users" />
  <flexboxLayout justifyContent="center" alignItems="center">
    <button text="See more" on:tap={onItemTap} />
  </flexboxLayout>
</page>
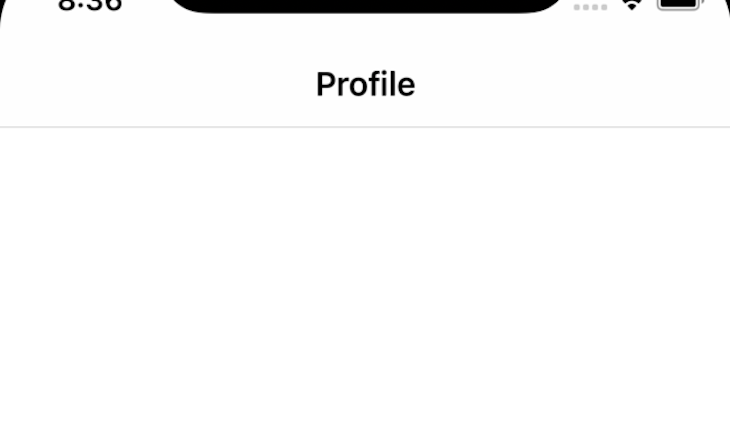
actionBar component in Svelte NativeThe <actionBar /> component represents a toolbar at the top of an activity window and provides a dedicated space for a title that lets users know where they are in the app. actionBar accepts a title props, as seen below:
<page>
  <actionBar title="Profile" />
</page>
The code then renders a page with the actionBar title, “Profile,” below:
listView component in Svelte NativeThe listView component provides a way for us to list out items that are typically an array, and it works like the ul tag in HTML.
listView accepts a prop called item, which accepts a JavaScript array, and on:itemTap handles the click event of each listView item. Finally, we can use the Template component from Svelte Native to render each of the array items:
<script>
  import { Template } from "svelte-native/components";
  let fruits = ["orange", "pineapple", "apple", "banana"];

const onItemTap = (args) => {
       console.log(args);
  }
</script>


<page>
  <listView items={fruits} on:itemTap={onItemTap} row="1" colSpan="2">
      <Template let:item>
        <flexboxLayout>
          <label text={item} textWrap="true" />
        </flexboxLayout>
      </Template>
    </listView>
</page>
The code above then renders the following list of fruits on our app page:
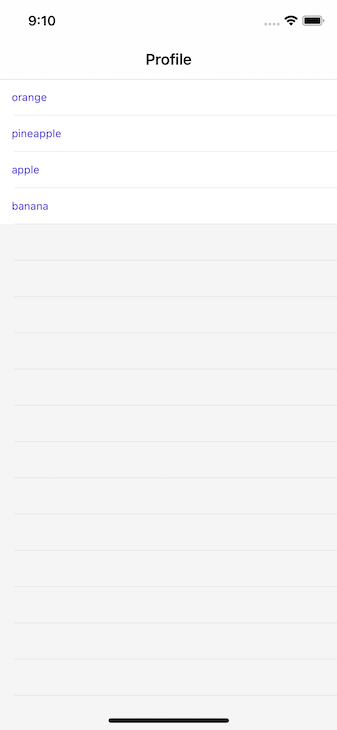
An important thing to note is that the {#each...} directive in Svelte cannot iterate over lists of items in the ListView component. Instead, we must use the <Template let:item>, as seen above.
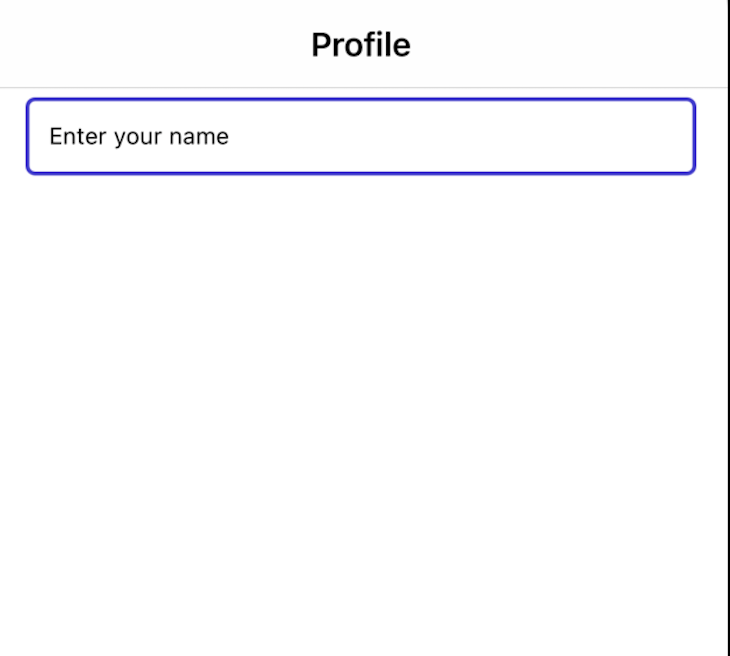
textField component in Svelte NativeThe textField component provides an input field interface similar to the input element in HTML.
It accepts the text props, which sets the value of the component, the hint props, which sets the placeholder text, and the editable props, which sets the component to readonly.
We can activate two-way data binding using the bind:text directive:
<textField bind:text={textFieldValue} hint="Enter your name" />
The code above then renders a field for users to provide their names in our app:
tab component in Svelte NativeThe tab component displays a tab interface at the top of a window by default. This allows users to select and move through different screens while supporting gestures and transitions between each view.
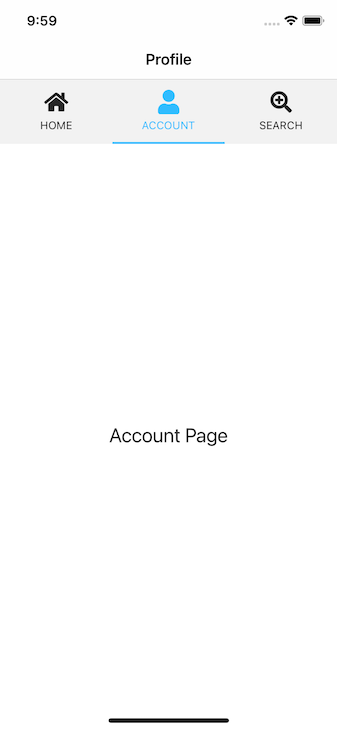
As a bonus, adding tabContentItem allows users to switch between views by swiping.
In this section, we’ll build a simple mobile app with Svelte Native. We’ll also use listView, flexboxLayout, and navigate.
navigate will helps us learn how to pass and receive props from the navigate function. To show how to use the listView, we’ll fetch data from an external API and render it with the listView component.
Below is the finalized version of the app we will create:
We must first build the parent component of our app in our root component, App.svelte. To begin, we must first import Svelte to create our Svelte app:
<script lang="javascript">
  import { onMount } from "svelte";
  import { Template } from "svelte-native/components";
  import Details from "./pages/Details.svelte";
  import { navigate } from "svelte-native";
  let users = [];
  const getUsers = async () => {
    try {
      let res = await fetch("https://jsonplaceholder.typicode.com/users");
      let data = await res.json();
      users = data;
    } catch (err) {
      console.log(err);
    }
  };
  function onItemTap(args) {
    navigate({
      page: Details,
      props: { user: users[args.index] },
    });
  }
  onMount(async () => {
    await getUsers();
  });
</script>
By using the getUser function, we can make an asynchronous call to an API using the fetch API and saving the result to the users array we created by setting users = data.
We can then call the getUsers() on the onMount lifecycle Hook, which loads the page.
The onItemTap function uses the navigate function we imported from svelte-native at the top. We are programmatically navigating the user to a Details page (we will create this page later) and passing the clicked item in the props option.
Now that we have our logic set up, let’s work on our app’s UI:
<page>
  <actionBar title="List of Users" />
  <flexboxLayout>
    <listView items={users} on:itemTap={onItemTap} row="1" colSpan="2">
      <Template let:item>
        <flexboxLayout>
          <label text="Name:" textWrap="true" class="first" />
          <label text={item.name} textWrap="true" class="name" />
        </flexboxLayout>
        <flexboxLayout>
          <label text="Username:" textWrap="true" class="first" />
          <label
            text={"@" + item.username.toLowerCase()}
            textWrap="true"
            class="last"
          />
        </flexboxLayout>
        <flexboxLayout>
          <label text="Email:" textWrap="true" class="first" />
          <label text={item.email} textWrap="true" class="first" />
        </flexboxLayout>
      </Template>
    </listView>
  </flexboxLayout>
</page>
Notice how we use the flexboxLayout to align our content. This works similarly to how flexbox in CSS works. By default, the flexboxLayout aligns our content in a row.
Note that <Template let:item> here must be called item; any other name throws an error.
Remember when we passed the click item in the props to our navigate function earlier? Now we need to receive that data. To do that, use the export let user; prop in the Details.svelte component we must navigate to.
This means we can now access the data via user; it’s called user because that is what we used in our navigate function:
function onItemTap(args) {
 navigate({
      page: Details,
      props: { user: users[args.index] },
    });
  }
Now, we can navigate to the pages/Details.svelte component:
<script>
  export let user;
</script>
<page>
  <stackLayout>
    <flexboxLayout>
      <label text={user.name} textWrap="true" class="name" />
    </flexboxLayout>
    <flexboxLayout>
      <label
        text={"@" + user.username.toLowerCase()}
        textWrap="true"
        class="last"
      />
    </flexboxLayout>
    <flexboxLayout>
      <label text="Email:" textWrap="true" class="first" />
      <label text={user.email} textWrap="true" class="first" />
    </flexboxLayout>
    <label text={user.address.city} textWrap="true" class="first" />
    <label text={user.address.street} textWrap="true" class="first" />
    <label text={user.phone} textWrap="true" class="first" />
  </stackLayout>
</page>
Although Svelte Native is a community project without official support from Svelte and NativeScript yet, the framework shows great promise. It comes with the basic components that most mobile apps have and has efficient performance.
All the code for this demo is available on GitHub. Feel free to drop a comment to let me know what you thought of this article. You can also find me on Twitter and LinkedIn. Thank you for reading!
Install LogRocket via npm or script tag. LogRocket.init() must be called client-side, not
server-side
$ npm i --save logrocket

// Code:

import LogRocket from 'logrocket';
LogRocket.init('app/id');
// Add to your HTML:

<script src="https://cdn.lr-ingest.com/LogRocket.min.js"></script>
<script>window.LogRocket && window.LogRocket.init('app/id');</script>

Explore 15 essential MCP servers for web developers to enhance AI workflows with tools, data, and automation.

Learn how contrast-color() automatically picks accessible text colors using native CSS, without JavaScript.

Learn how to build a harness-style AI workflow using Claude Code with specialized Dev, QE, and Ops subagents, gated handoffs, MCP telemetry, and LEARNING.md.

Learn how to build smooth staggered animations in CSS using modern features like sibling-index(), complete with practical examples, fallbacks, and accessibility tips.
Hey there, want to help make our blog better?
Join LogRocket’s Content Advisory Board. You’ll help inform the type of content we create and get access to exclusive meetups, social accreditation, and swag.
Sign up now

