A micro frontend is an application that is part of a larger architecture, as opposed to a standalone app. Basically, this is a composite application made of smaller applications (or micro frontends), and each micro frontend can be owned, developed, and maintained by separate, individual teams.
This approach is usually used for complex applications, such as Ikea’s and Upwork’s websites as well as Spotify’s desktop app, that have a tendency to grow too big and become too messy and difficult to maintain.
In this tutorial, we’ll create two different basic Svelte applications and compile the individual fragments into one application using Podium to learn about micro frontends.
For this tutorial, ensure you have a basic understanding of Svelte and Node.js.
To begin creating the Svelte applications, we must first create a new folder called svelte-app-one and run the following command inside to clone Svelte’s GitHub template:
npx degit sveltejs/template
To create the second app, repeat the same process in another folder named svelte-app-two.
Next, let’s make some small changes to these apps. Since both apps will be combined and each app has its own body element, we must differentiate between the two body elements by adding unique IDs to them.
For the first app, navigate to public/index.html, add a div inside the body tags, and give it a unique ID:
<body>
        <div id="svelte-app-one"></div>
</body>
Next, navigate to the folder’s src/main.js file and ensure that the querySelector function targets the ID that you just added:
import App from './App.svelte';

const app = new App({
        target: document.querySelector( '#svelte-app-one' )
});

export default app;
Repeat this same process for the second app in public/index.html:
<body>
        <div id="svelte-app-two"></div>
</body>
And then again in src/main.js:
import App from './App.svelte';

const app = new App({
        target: document.querySelector("#svelte-app-two")
});

export default app;
In both apps, we’ll display very simple messages and proceed to combine them together with Podium. For app one, navigate to App.svelte, add a heading tag with a simple message and give it some styling:
<script>
</script>

<main>
        <h1>This is the first app!</h1>
</main>

<style>
        main {
                text-align: center;
                padding: 1em;
                max-width: 300px;
                margin: 0 auto;
                padding: 20px 5px;
        }
        h1 {
                color: #000;
                font-size: 5em;
                font-weight: 150;
        }
</style>
Next, do the same for the second app:
<script>
</script>

<main>
        <h1>This is the second app!</h1>
</main>

<style>
        main {
                text-align: center;
                padding: 1em;
                max-width: 300px;
                margin: 0 auto;
                padding: 20px 5px;
                background-color: #000;
                color:#fff;
        }
        h1 {
                color: #fff;
                font-size: 5em;
                font-weight: 150;
        }
</style>
For Podium to combine these two apps together, it needs to know the location of the apps’ HTML, CSS, and JavaScript files. This can be achieved with the help of a manifest.json file and a tool called podlet to generate this manifest.json file.
We can install podlet’s package in the svelte-app-one folder with the following command:
npm install express @podium/podlet
Next, we’ll use the podlet tool to make the CSS, JavaScript, and HTML files for both apps available to Podium. In the root folder for svelte-app-one, create a file called podlet.js and add the following code:
const express = require("express");
const Podlet = require("@podium/podlet");
const fs = require("fs");

const app = express();

const podlet = new Podlet({
  name: "svelte-app-one",
  version: "0.1.0",
  pathname: "/",
  manifest: "/manifest.json",
  development: true,
});


podlet.css({ value: "http://localhost:3100/css/global.css" });
app.use("/css", express.static("public/css/"));

let buildfiles = fs.readdirSync('public/build');
buildfiles.forEach((element, index) => {
  if(element.indexOf('.css') !== -1 && element.indexOf('.css.map') === -1){
    podlet.css({ value: "http://localhost:3100/build/" + element });
  }else if(element.indexOf('.js') !== -1 && element.indexOf('.js.map') === -1) {
    podlet.js({ value: "http://localhost:3100/build/" + element, defer: true });
  }
});
app.use("/build", express.static("public/build/"));


app.use(podlet.middleware());

app.get(podlet.content(), (req, res) => {
  res.status(200).podiumSend('<div id="svelte-app-one"></div>');
});

app.get(podlet.manifest(), (req, res) => {
  res.status(200).send(podlet);
});

app.listen(3100);
Here, we first import the podlet and file system packages and create a podlet instance, giving it a name, version, and path to be served at. We also specify the manifest file it will create.
Next, we add the JavaScript and CSS files in our app to our podlet (these files are in our public/build folder), and we use the readdirSync function to access the public/build folder and a foreach statement to loop through it.
Using an if statement, we specify that every file that has a .css extension should be added to the podlet using the podlet.css function.
Then, using an else if statement, we specify that every file that has a .js extension should be added to the podlet using the podlet.js function.
For production, the local host URL should be changed to the URL at which the files are hosted.
Next, we can create static links to these files using express.static to make the files publicly available. For the routes in our app to work and for the podlet to operate correctly, we must mount middleware using the middleware function.
Having specified our CSS and JavaScript files, we can point the podlet to our HTML– the div we added inside the body tags earlier–using the podiumSend function.
Now that our podlet knows where our CSS, JavaScript, and HTML files are located, we can create a manifest.json file for Podium using the manifest function and we specify the port that our app should be served at.
Finally, we’ll create a podlet for our second Svelte app following the exact same process.
const express = require("express");
const Podlet = require("@podium/podlet");
const fs = require("fs");

const app = express();

const podlet = new Podlet({
  name: "svelte-app-two",
  version: "0.1.0",
  pathname: "/",
  manifest: "/manifest.json",
  development: true,
});


podlet.css({ value: "http://localhost:3101/css/global.css" });
app.use("/css", express.static("public/css/"));

let buildfiles = fs.readdirSync('public/build');
buildfiles.forEach((element, index) => {
  if(element.indexOf('.css') !== -1 && element.indexOf('.css.map') === -1){
    podlet.css({ value: "http://localhost:3101/build/" + element });
  }else if(element.indexOf('.js') !== -1 && element.indexOf('.js.map') === -1) {
    podlet.js({ value: "http://localhost:3101/build/" + element, defer: true });
  }
});
app.use("/build", express.static("public/build/"));


app.use(podlet.middleware());

app.get(podlet.content(), (req, res) => {
  res.status(200).podiumSend('<div id="svelte-app-two"></div>');
});

app.get(podlet.manifest(), (req, res) => {
  res.status(200).send(podlet);
});

app.listen(3101);
To begin combining the two Svelte apps, let’s first create a folder called podium-merger and run the following command inside it to create a package.json file:
npm init
Next, navigate into the folder and create a file called layout.js. In this file, we’ll assess the two podlets we created earlier, get the HTML, CSS, and JavaScript files specified in those podlets, and combine them into a single app.
In Podium, we can arrange the apps we are combining however we want them to appear. This arrangement is called a layout:
const express = require("express");
const app = express();

const Layout = require("@podium/layout");

const layout = new Layout({
  name: "podiumLayout",
  pathname: "/",
});

const svelteAppOne = layout.client.register({
  name: "svelte-app-one",
  uri: "http://localhost:3100/manifest.json",
});
const svelteAppTwo = layout.client.register({
  name: "svelte-app-two",
  uri: "http://localhost:3101/manifest.json",
});

app.use(layout.middleware());

app.get("/", async (req, res) => {
  const podiumLayout = res.locals.podium;

  const data = await Promise.all([
    svelteAppOne.fetch(podiumLayout),
    svelteAppTwo.fetch(podiumLayout),
  ]);

  podiumLayout.podlets = data;
  podiumLayout.view.title = "Composite App";

  res.podiumSend(`<div>
    ${data[0]}
    ${data[1]}
  </div>
  `);
});


app.listen(3000);
Let’s break down the code: first, we import the layout package and create an instance of it, giving it a name and a path to be served at.
Next, we register our Svelte apps to the layout using the client.register function. Take note of how we point the layout to the manifest.json files. This is how it finds the CSS, HTML, and JavaScript files that it will combine.
We then mount the middleware function from our layout package to ensure all the routes in our app function properly.
Next, we specify that the Podium layout should be returned when the root URL of our app is accessed. We then fetch the data from both apps using the fetch function and save the data in a constant named data, and bind the data to our layout with podiumLayout.podlets = data;.
By using the podiumSend function, we specify the app display arrangement in the div tags. Note that data[0] is the data from our first app and data[1] is the data from our second app.
Finally, we specify the port to serve our app at.
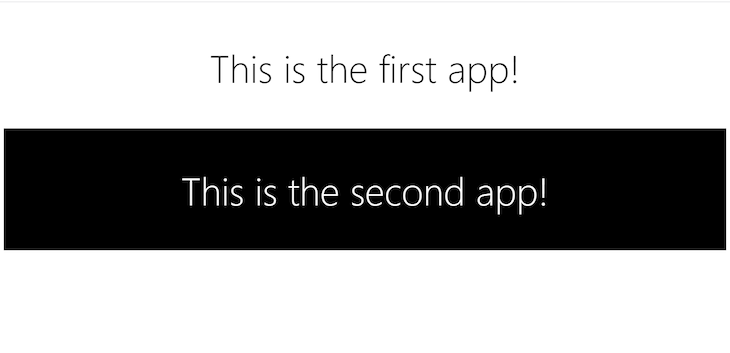
And this is our final app:
Micro frontends help you achieve with your frontend what microservices do for your backend, which is giving you the opportunity to streamline the development process in a large organization.
With micro frontends, you can have small teams developing specific functionalities independent of one another, thereby eliminating drag on progress and bottlenecks.
Install LogRocket via npm or script tag. LogRocket.init() must be called client-side, not
server-side
$ npm i --save logrocket

// Code:

import LogRocket from 'logrocket';
LogRocket.init('app/id');
// Add to your HTML:

<script src="https://cdn.lr-ingest.com/LogRocket.min.js"></script>
<script>window.LogRocket && window.LogRocket.init('app/id');</script>
Would you be interested in joining LogRocket's developer community?
Join LogRocket’s Content Advisory Board. You’ll help inform the type of content we create and get access to exclusive meetups, social accreditation, and swag.
Sign up now
Learn how OpenAPI can automate API client generation to save time, reduce bugs, and streamline how your frontend app talks to backend APIs.

Discover how the Interface Segregation Principle (ISP) keeps your code lean, modular, and maintainable using real-world analogies and practical examples.

<selectedcontent> element improves dropdowns

Learn how to implement an advanced caching layer in a Node.js app using Valkey, a high-performance, Redis-compatible in-memory datastore.


2 Replies to "Building Svelte micro frontends with Podium"
Thanks for the article. This would be much more relevant in 2022 if it showed how to use svelte apps with single-spa however, which is better maintained and offers more features for micro frontends from and E2E perspective.
Thanks for reading and for the comment. We’ll take that into consideration for future articles. In the meantime, you might find what you’re looking for here: https://blog.logrocket.com/micro-frontend-apps-single-spa/