
Next.js, the React framework by Vercel, has continued to grow in popularity as more React developers pursue server-side rendering, static site generation, and incremental static regeneration, among other SEO and optimization benefits.

With the gentle learning curve that comes with Next.js, building applications within the framework is easy, even if you’ve only used React previously.
To learn how to build a Next.js application, this tutorial details how to build a shopping cart web app for a fictional game store with the ability to add or remove items from the cart, view all products, view products by category, and more.
The Replay is a weekly newsletter for dev and engineering leaders.
Delivered once a week, it's your curated guide to the most important conversations around frontend dev, emerging AI tools, and the state of modern software.
When building the app, we’ll cover the following features:
create-next-app<Image> componentgetStaticProps(), getStaticPaths, and getServerSideProps()You can find the source code for the completed project in this GitHub repository and the live demo deployed on Vercel.
create-next-appTo create a new Next.js app using create-next-app, run the following command on the terminal and wait for the installation process to finish:
npx create-next-app shopping-cart
Once done, start the development server by running the npm run dev script. By default, the Next.js app’s folder structure looks like the following:
|-- node_modules
|-- package.json
|-- package-lock.json
|-- pages
|   |-- api
|   |   |-- hello.js
|   |-- _app.js
|   |-- index.js
|-- public
|   |-- favicon.ico
|   |-- vercel.svg
|-- README.md
|-- styles
    |-- globals.css
    |-- Home.module.css
To begin without any existing styles, we can clean up the initial boilerplate code by removing the styles from styles/globals.css and styles/Home.module.css and replacing the code inside pages/index.js with a simple React functional component, like this:
const HomePage = () => {
  return (
    <main>
      <h1>Shopping Cart</h1>
    </main>
  );
};
export default HomePage;
Furthermore, we can put all global styles inside the styles/global.css file. These styles will be applied across the entire application. For now, let’s add some basic styles, and import the Open Sans font from Google Fonts:
@import url('https://fonts.googleapis.com/css2?family=Open+Sans:wght@300;400;600;700&display=swap');

*, *::before, *::after {
  margin: 0;
  padding: 0;
  box-sizing: border-box;
}

body {
  font-family: 'Open Sans', sans-serif;
}
Throughout this project, we’ll be building four different pages:
But, before building these pages, let’s build some common components like the navigation bar and the footer.
Navbar and Footer componentsTo begin adding the Navbar and Footer components, create a new folder named components inside the project’s root folder. This keeps all our components in one place and keeps our code organized.
Inside the folder, create a new file named Navbar.js or Navbar.jsx, per your preference:
import Link from 'next/link';

const Navbar = () => {
  return (
    <nav>
      <h6>GamesKart</h6>
      <ul>
        <li>
          <Link href="/">Home</Link>
        </li>
        <li>
          <Link href="/shop">Shop</Link>
        </li>
        <li>
          <Link href="/cart">Cart</Link>
        </li>
      </ul>
    </nav>
  );
};

export default Navbar;
The <Link> tag from next/link lets users navigate across different pages of the application. This is similar to the <Link> tag from react-router-dom used in React apps.
But, instead of using the to prop, the Next.js <Link> tag requires us to pass the href prop.
Navbar and FooterTo style the Navbar, create a new file named Navbar.module.css inside the styles folder, and paste the following styles inside the file. Feel free to change the styles to your liking:
.navbar {
  display: flex;
  justify-content: space-between;
  align-items: center;
  padding: 2rem;
}
.logo {
  font-size: 1.2rem;
  font-weight: 600;
  text-transform: uppercase;
}
.links {
  display: flex;
}
.navlink {
  list-style: none;
  margin: 0 0.75rem;
  text-transform: uppercase;
}
.navlink a {
  text-decoration: none;
  color: black;
}
.navlink a:hover {
  color: #f9826c;
}
Now, to use the styles inside the component, import the CSS module, and add className to the JSX. Modify the code inside Navbar.jsx, and make these changes:
import Link from 'next/link';
import styles from '../styles/Navbar.module.css';

const Navbar = () => {
  return (
    <nav className={styles.navbar}>
      <h6 className={styles.logo}>GamesKart</h6>
      <ul className={styles.links}>
        <li className={styles.navlink}>
          <Link href="/">Home</Link>
        </li>
        <li className={styles.navlink}>
          <Link href="/shop">Shop</Link>
        </li>
        <li className={styles.navlink}>
          <Link href="/cart">Cart</Link>
        </li>
      </ul>
    </nav>
  );
};

export default Navbar;
With the Navbar component completed, let’s move on and build the Footer component.
Create a new file named Footer.jsx inside the components folder:
import styles from 'Footer.module.css';

const Footer = () => {
  return (
    <footer className={styles.footer}>
      Copyright <span className={styles.brand}>GamesKart</span>{' '}
      {new Date().getFullYear()}
    </footer>
  );
};
Then, add Footer.module.css inside the styles folder:
.footer {
  padding: 1rem 0;
  color: black;
  text-align: center;
}
.brand {
  color: #f9826c;
}
Finally, import the Navbar and Footer components inside pages/_app.js so they are visible on all the app’s pages. Alternatively, we can import these components to each page individually that we want to display them on:
import Navbar from '../components/Navbar';
import Footer from '../components/Footer';
import '../styles/globals.css';

function MyApp({ Component, pageProps }) {
  return (
    <div>
      <Navbar />
      <Component {...pageProps} />
      <Footer />
    </div>
  );
}

export default MyApp;
To view our components in action, go to http://localhost:3000 after running the npm run dev script. However, all the components are squished together to the top of the page.
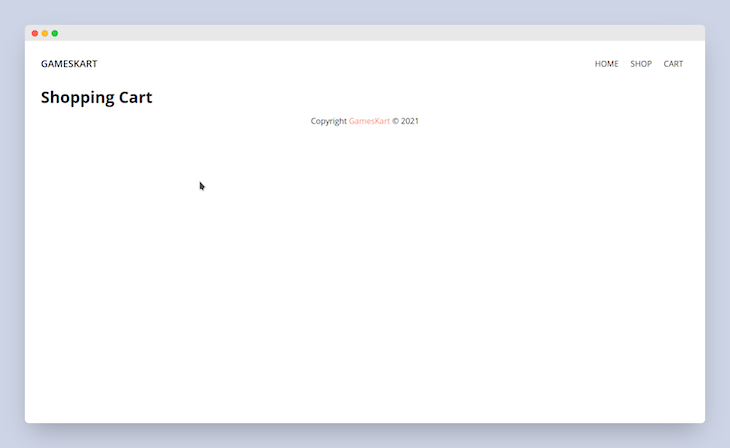
This can be fixed by wrapping our content inside a flex container set to column and justifying the content across the main axis in a space-between fashion. Just add a new class to the div on line 7 of _app.js:
<div className="wrapper"> // Line 7
Then, style it globally inside globals.css:
// Add this code at the bottom of globals.css
.wrapper {
  min-height: 100vh;
  display: flex;
  flex-direction: column;
  justify-content: space-between;
}
And that’s it, we’ve fixed the issue.
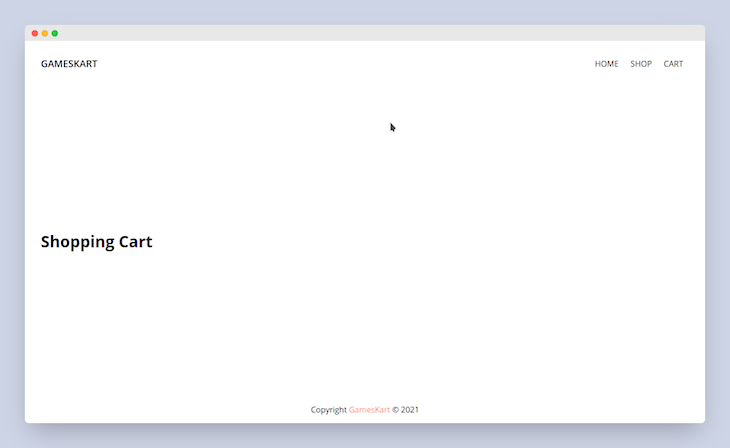
Let’s move onto building the home page.
On the home page, there will be five cards displaying for the Xbox, PS5, Switch, PC, and accessories product categories. Let’s start by creating a CategoryCard component.
Create two new files named CategoryCard.jsx inside the components folder and CategoryCard.module.css inside the styles folder.
Paste the following code inside the CategoryCard.jsx file:
import Link from 'next/link';
import Image from 'next/image';
import styles from '../styles/CategoryCard.module.css';

const CategoryCard = ({ image, name }) => {
  return (
    <div className={styles.card}>
      <Image className={styles.image} src={image} height={700} width={1300} />
      <Link href={`/category/${name.toLowerCase()}`}>
        <div className={styles.info}>
          <h3>{name}</h3>
          <p>SHOP NOW</p>
        </div>
      </Link>
    </div>
  );
};
export default CategoryCard;
This component takes two props: the image that displays and the name of the category. The <Image> component is built into Next.js to provide image optimization.
Paste the next code sequence inside the CategoryCard.module.css file:
.card {
  margin: 0.5rem;
  flex: 1 1 auto;
  position: relative;
}
.image {
  object-fit: cover;
  border: 2px solid black;
  transition: all 5s cubic-bezier(0.14, 0.96, 0.91, 0.6);
}
.info {
  position: absolute;
  top: 50%;
  left: 50%;
  background: white;
  padding: 1.5rem;
  text-align: center;
  transform: translate(-50%, -50%);
  opacity: 0.8;
  border: 1px solid black;
  cursor: pointer;
}
.card:hover .image {
  transform: scale(1.2);
}
.card:hover .info {
  opacity: 0.9;
}
Import the CategoryCard component inside the index.js page, which is our home page, to test our newly created component:
import CategoryCard from '../components/CategoryCard';
import styles from '../styles/Home.module.css';

const HomePage = () => {
  return (
    <main className={styles.container}>
      <div className={styles.small}>
        <CategoryCard image="https://imgur.com/uKQqsuA.png" name="Xbox" />
        <CategoryCard image="https://imgur.com/3Y1DLYC.png" name="PS5" />
        <CategoryCard image="https://imgur.com/Dm212HS.png" name="Switch" />
      </div>
      <div className={styles.large}>
        <CategoryCard image="https://imgur.com/qb6IW1f.png" name="PC" />
        <CategoryCard
          image="https://imgur.com/HsUfuRU.png"
          name="Accessories"
        />
      </div>
    </main>
  );
};

export default HomePage;
For styling, add the CSS code to Home.module.css in the styles folder:
.container {
  padding: 0 2rem;
}
.small {
  display: grid;
  grid-template-columns: 1fr 1fr 1fr;
}
.large {
  display: grid;
  grid-template-columns: 1fr 1fr;
}
Although we added the styling, we are greeted by an error:
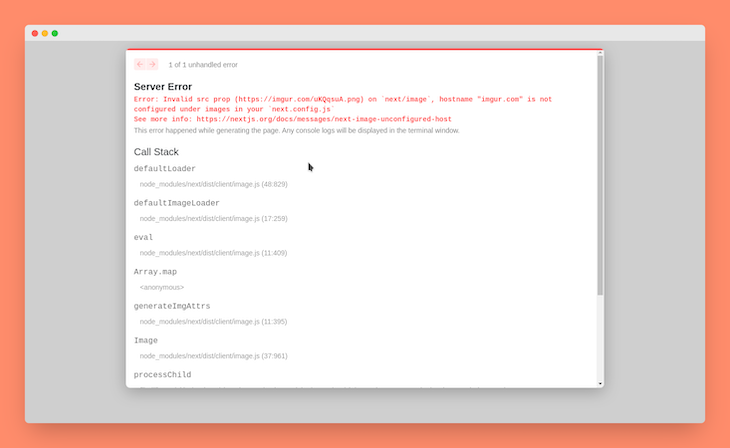
Fixing this issue is simple, and the error message contains a link to the Next.js documentation to explain and fix the error.
However, for this tutorial, create a new file named next.config.js inside the project’s root folder and add the following code:
module.exports = {
  images: {
    domains: ['imgur.com'],
  },
};
Since we’re using imgur.com to host our images, we must add them to the domains array to be optimized, ensuring external URLs can’t be abused.
Once finished, restart the development server to initiate the changes. With that, we have successfully built the home page.
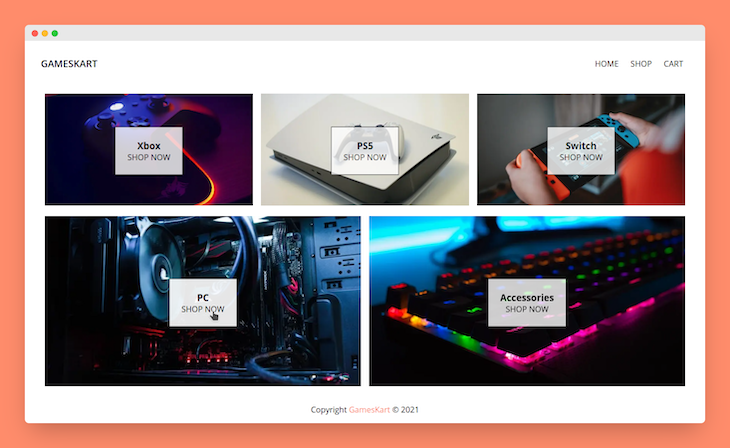
Before proceeding to the other pages, we must build an API to fetch the products from. While Next.js is a React framework, we can take advantage of its built-in API routes feature to build a simple API.
We’ll need two API routes for this project:
/api/products to fetch the products from/api/products/<category> to fetch products belonging to a particular categoryWithin the folder structure of our Next.js app, there is a folder named api inside the pages folder. Delete all the existing files inside the api folder since we’ll be building ours from scratch.
To keep things simple, we’ll be storing all the store’s products in a JSON file called data.json.
However, you can use a database or a headless CMS with Next.js to add, edit, or delete products without a JSON file.
Create a new folder named products inside the api folder, then go to the products folder and create three files: index.js, [category].js, and data.json.
index.jsThe first file we’ll work in is index.js, which corresponds to the /api/products route and fetches all products across all categories:
import data from './data.json';

export function getProducts() {
  return data;
}

export default function handler(req, res) {
  if (req.method !== 'GET') {
    res.setHeader('Allow', ['GET']);
    res.status(405).json({ message: `Method ${req.method} is not allowed` });
  } else {
    const products = getProducts();
    res.status(200).json(products);
  }
}
In this API route, we’re just importing the data.json file and checking the request’s HTTP method.
Since we only want to allow GET requests, we can use an if statement to check the method property on the request object. For GET requests, we can respond with the product’s data in JSON format.
We can access this API route by visiting http://localhost:3000/api/products.
[category].jsThe second file is [category].js, which corresponds to the /api/products/<category> route, and fetches all products of a category chosen by the user. The square brackets in the file name denote that this is a dynamic route:
import data from './data.json';

export function getProductsByCategory(category) {
  const products = data.filter((product) => product.category === category);
  return products;
}

export default function handler(req, res) {
  if (req.method !== 'GET') {
    res.setHeader('Allow', ['GET']);
    res.status(405).json({ message: `Method ${req.method} is not allowed` });
  } else {
    const products = getProductsByCategory(req.query.category);
    res.status(200).json(products);
  }
}
This API route is similar to the previous route but with one major change. Since we only want products of a particular category, we can use the filter() JavaScript array method to check whether the product’s category matches the category of the query, req.query.category, or not.
We can access this API route by visiting http://localhost:3000/api/products/xbox or any of the other categories, ps5, switch, pc, or accessories.
data.jsonAnd finally, we’ll add data.json, which is a simple JSON file that contains an array of all the available products and their details:
[
  {
    "id": 1,
    "product": "Cyberpunk 2077",
    "category": "xbox",
    "image": "https://imgur.com/3CF1UhY.png",
    "price": 36.49
  },
  {
    "id": 2,
    "product": "Grand Theft Auto 5",
    "category": "xbox",
    "image": "https://imgur.com/BqNWnDB.png",
    "price": 21.99
  },
  {
    "id": 3,
    "product": "Minecraft",
    "category": "xbox",
    "image": "https://imgur.com/LXnUnd2.png",
    "price": 49.99
  },
  {
    "id": 4,
    "product": "PUBG",
    "category": "xbox",
    "image": "https://imgur.com/Ondg3Jn.png",
    "price": 5.09
  },
  {
    "id": 5,
    "product": "FIFA 21",
    "category": "xbox",
    "image": "https://imgur.com/AzT9YMP.png",
    "price": 17.49
  },
  {
    "id": 6,
    "product": "Battlefield 5",
    "category": "xbox",
    "image": "https://imgur.com/X3MQNVs.png",
    "price": 29.35
  },
  {
    "id": 7,
    "product": "Watch Dogs 2",
    "category": "xbox",
    "image": "https://imgur.com/v3lqCEb.png",
    "price": 18.99
  },
  {
    "id": 8,
    "product": "Fortnite",
    "category": "ps5",
    "image": "https://imgur.com/3lTxDpl.png",
    "price": 29.99
  },
  {
    "id": 9,
    "product": "Call of Duty: Black Ops",
    "category": "ps5",
    "image": "https://imgur.com/4GvUw3G.png",
    "price": 69.99
  },
  {
    "id": 10,
    "product": "NBA2K21 Next Generation",
    "category": "ps5",
    "image": "https://imgur.com/Mxjvkws.png",
    "price": 69.99
  },
  {
    "id": 11,
    "product": "Spider-Man Miles Morales",
    "category": "ps5",
    "image": "https://imgur.com/guV5cUF.png",
    "price": 29.99
  },
  {
    "id": 12,
    "product": "Resident Evil Village",
    "category": "ps5",
    "image": "https://imgur.com/1CxJz8E.png",
    "price": 59.99
  },
  {
    "id": 13,
    "product": "Assassin's Creed Valhalla",
    "category": "ps5",
    "image": "https://imgur.com/xJD093X.png",
    "price": 59.99
  },
  {
    "id": 14,
    "product": "Animal Crossing",
    "category": "switch",
    "image": "https://imgur.com/1SVaEBk.png",
    "price": 59.99
  },
  {
    "id": 15,
    "product": "The Legend of Zelda",
    "category": "switch",
    "image": "https://imgur.com/IX5eunc.png",
    "price": 59.99
  },
  {
    "id": 16,
    "product": "Stardew Valley",
    "category": "switch",
    "image": "https://imgur.com/aL3nj5t.png",
    "price": 14.99
  },
  {
    "id": 17,
    "product": "Mario Golf Super Rush",
    "category": "switch",
    "image": "https://imgur.com/CPxlyEg.png",
    "price": 59.99
  },
  {
    "id": 18,
    "product": "Super Smash Bros",
    "category": "switch",
    "image": "https://imgur.com/ZuLatzs.png",
    "price": 59.99
  },
  {
    "id": 19,
    "product": "Grand Theft Auto 5",
    "category": "pc",
    "image": "https://imgur.com/9LRil4N.png",
    "price": 29.99
  },
  {
    "id": 20,
    "product": "Battlefield V",
    "category": "pc",
    "image": "https://imgur.com/T3v629h.png",
    "price": 39.99
  },
  {
    "id": 21,
    "product": "Red Dead Redemption 2",
    "category": "pc",
    "image": "https://imgur.com/aLObdQK.png",
    "price": 39.99
  },
  {
    "id": 22,
    "product": "Flight Simulator 2020",
    "category": "pc",
    "image": "https://imgur.com/2IeocI8.png",
    "price": 59.99
  },
  {
    "id": 23,
    "product": "Forza Horizon 4",
    "category": "pc",
    "image": "https://imgur.com/gLQsp6N.png",
    "price": 59.99
  },
  {
    "id": 24,
    "product": "Minecraft",
    "category": "pc",
    "image": "https://imgur.com/qm1gaGD.png",
    "price": 29.99
  },
  {
    "id": 25,
    "product": "Rainbow Six Seige",
    "category": "pc",
    "image": "https://imgur.com/JIgzykM.png",
    "price": 7.99
  },
  {
    "id": 26,
    "product": "Xbox Controller",
    "category": "accessories",
    "image": "https://imgur.com/a964vBm.png",
    "price": 59.0
  },
  {
    "id": 27,
    "product": "Xbox Controller",
    "category": "accessories",
    "image": "https://imgur.com/ntrEPb1.png",
    "price": 69.0
  },
  {
    "id": 28,
    "product": "Gaming Keyboard",
    "category": "accessories",
    "image": "https://imgur.com/VMe3WBk.png",
    "price": 49.99
  },
  {
    "id": 29,
    "product": "Gaming Mouse",
    "category": "accessories",
    "image": "https://imgur.com/wvpHOCm.png",
    "price": 29.99
  },
  {
    "id": 30,
    "product": "Switch Joy-Con",
    "category": "accessories",
    "image": "https://imgur.com/faQ0IXH.png",
    "price": 13.99
  }
]
It is important to note that we’ll only be reading from this JSON file and not writing or modifying any information via the API routes.
Using a database would be more suitable if writing or modifying the information.
Here’s how the folder structure looks like after these changes:
|-- api
|   |-- products
|       |-- [category].js
|       |-- data.json
|       |-- index.js
|-- _app.js
|-- index.js
Now that we have our simple API set up, let’s build two more pages: the shop page and the category page, which use our API routes.
The shop page hosts all the store’s products, whereas the category page is dynamic, only showcasing products of a particular category.
On these pages, we’ll use our custom ProductCard component. Let’s get started by creating a new file named ProductCard.jsx in the components folder:
import Image from 'next/image';
import styles from '../styles/ProductCard.module.css';

const ProductCard = ({ product }) => {
  return (
    <div className={styles}>
      <Image src={product.image} height={300} width={220} />
      <h4 className={styles.title}>{product.product}</h4>
      <h5 className={styles.category}>{product.category}</h5>
      <p>$ {product.price}</p>
      <button className={styles.button}>Add to Cart</button>
    </div>
  );
};

export default ProductCard;
This simple component displays the product image, name, category, and price with a simple Add to Cart button. This button won’t have any functionality at the moment, but that’ll change once we integrate Redux into our app.
Paste the styles given below into a new file named ProductCard.module.css inside the styles folder:
.card {
  display: flex;
  flex-direction: column;
}

.title {
  font-size: 1rem;
  font-weight: 600;
}

.category {
  font-size: 0.8rem;
  text-transform: uppercase;
}
.button {
  width: 100%;
  margin-top: 0.5rem;
  padding: 0.75rem 0;
  background: transparent;
  text-transform: uppercase;
  border: 2px solid black;
  cursor: pointer;
}
.button:hover {
  background: black;
  color: white;
}
Now, we’re ready to build the actual pages.
shop.jsxLet’s start with the shop page. Create a new file named shop.jsx in the pages folder:
import ProductCard from '../components/ProductCard';
import styles from '../styles/ShopPage.module.css';
import { getProducts } from './api/products/index';

const ShopPage = ({ products }) => {
  return (
    <div className={styles.container}>
      <h1 className={styles.title}>All Results</h1>
      <div className={styles.cards}>
        {products.map((product) => (
          <ProductCard key={product.id} product={product} />
        ))}
      </div>
    </div>
  );
};

export default ShopPage;

export async function getStaticProps() {
  const products = await getProducts();
  return { props: { products } };
}
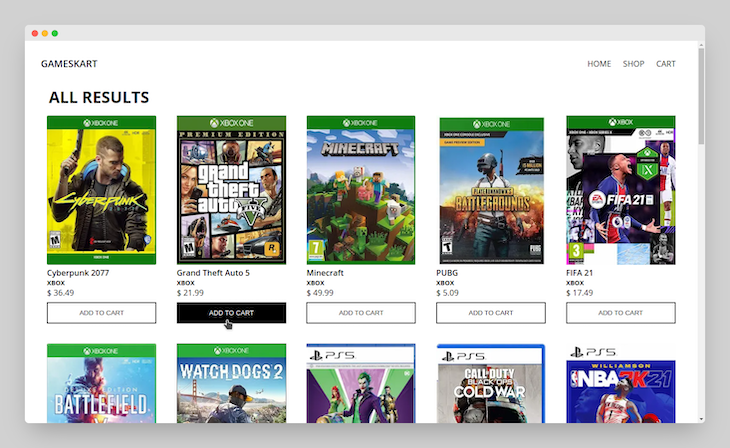
getStaticProps()For this page, we’ll fetch all the products and pre-render the page at build time using a Next.js data fetching method, getStaticProps().
Once the products are fetched, they are sent as a prop to the page component where we can map through the products array and render the ProductCard component for each product.
If using a database and expect the products’ data to change over time, using the incremental static regeneration feature with the revalidate property dynamically updates the products’ data, ensuring it remains up-to-date.
[category].jsxLet’s proceed to build the category page that uses dynamic routing. Create a new folder named category inside the pages folder. Now, inside this folder, create a new file named [category].jsx:
import { useRouter } from 'next/router';
import ProductCard from '../../components/ProductCard';
import styles from '../../styles/ShopPage.module.css';
import { getProductsByCategory } from '../api/products/[category]';

const CategoryPage = ({ products }) => {
  const router = useRouter();
  return (
    <div className={styles.container}>
      <h1 className={styles.title}>Results for {router.query.category}</h1>
      <div className={styles.cards}>
        {products.map((product) => (
          <ProductCard key={product.id} product={product} />
        ))}
      </div>
    </div>
  );
};

export default CategoryPage;

export async function getServerSideProps(ctx) {
  const category = ctx.query.category;
  const products = await getProductsByCategory(category);
  return { props: { products } };
}
To view this page, visit http://localhost:3000/category/xyz, and replace “xyz” with any category we have specified.
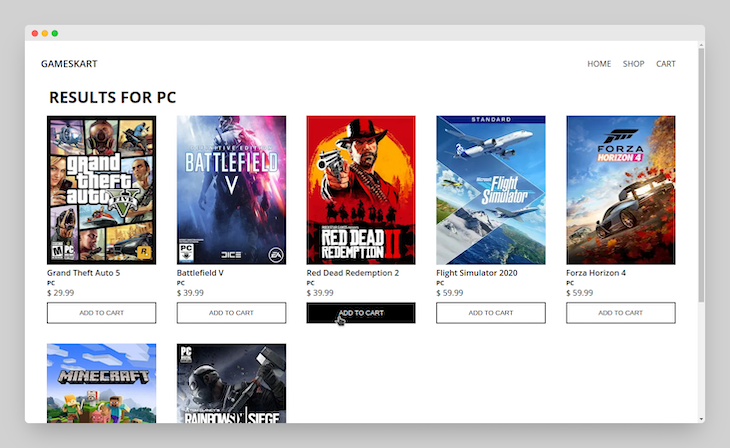
getServerSideProps()On the category page, we’ll use a different data fetching method called getServerSideProps(), which uses server-side rendering.
Unlike the previous data-fetching method, getServerSideProps() fetches the data at request time and pre-renders the page, instead of at build time. This method runs on each request, meaning the product data won’t be outdated.
Finally, here’s the stylesheet for both product and category pages that we just built:
.title {
  font-size: 2rem;
  text-transform: uppercase;
  margin: 0 1rem 1rem;
}
.container {
  padding: 0 2rem;
  margin-bottom: 2rem;
}
.cards {
  display: grid;
  grid-template-columns: repeat(auto-fit, minmax(220px, 1fr));
  gap: 2.5rem 1rem;
  place-items: center;
}
While our application does not require a global state management system because of its limited functionality, if we add more features and subsequently handle more state, we will need a management system.
Therefore, let’s integrate Redux into our Next.js app with Redux Toolkit. Redux Toolkit is the modern and recommended way to integrate Redux.
To add Redux, stop the Next.js development server and install Redux Toolkit with the following command:
npm install @reduxjs/toolkit react-redux
Once the installation finishes, we can restart the Next.js development server and configure Redux.
createSlice()To keep things organized and separate the Redux logic from the rest of our application, create a new folder named redux in the root of the project directory.
With this, we’ll perform four actions:
Let’s create a Redux slice to handle these actions and the cart reducer. Create a new file named cart.slice.js inside the redux folder. It is not necessary to name the file in this manner, but it can keep everything organized:
import { createSlice } from '@reduxjs/toolkit';

const cartSlice = createSlice({
  name: 'cart',
  initialState: [],
  reducers: {
    addToCart: (state, action) => {
      const itemExists = state.find((item) => item.id === action.payload.id);
      if (itemExists) {
        itemExists.quantity++;
      } else {
        state.push({ ...action.payload, quantity: 1 });
      }
    },
    incrementQuantity: (state, action) => {
      const item = state.find((item) => item.id === action.payload);
      item.quantity++;
    },
    decrementQuantity: (state, action) => {
      const item = state.find((item) => item.id === action.payload);
      if (item.quantity === 1) {
        const index = state.findIndex((item) => item.id === action.payload);
        state.splice(index, 1);
      } else {
        item.quantity--;
      }
    },
    removeFromCart: (state, action) => {
      const index = state.findIndex((item) => item.id === action.payload);
      state.splice(index, 1);
    },
  },
});

export const cartReducer = cartSlice.reducer;

export const {
  addToCart,
  incrementQuantity,
  decrementQuantity,
  removeFromCart,
} = cartSlice.actions;
The createSlice() method from Redux Toolkit accepts the name of the slice, its initial state, and the reducer functions to automatically generate action creators and action types that correspond to the reducers and state.
addToCart reducer functionThe addToCart reducer function receives the product object as the payload and checks if a product already exists in the cart using the JavaScript find() array method.
If it does exist, we can increment a product’s quantity in the cart by 1. If not, we can use the push() array method to add it to the cart and set the quantity to 1.
incrementQuantity reducer functionincrementQuantity a simple reducer function that receives a product ID as the payload, and uses it to find the item in the cart. The quantity of the item is then incremented by 1.
decrementQuantity reducer functiondecrementQuantity is similar to the incrementQuantity reducer function, but we must check whether the quantity of the product is 1 or not before decrementing.
If it is 1, we can clear the product from the cart using the splice() method, since it cannot have 0 quantity. However, if its quantity is not 1, we can simply decrement it by 1.
removeFromCart reducer functionThe removeFromCart reducer function receives the product ID as the payload and uses the find() and splice() method to remove the product from the cart.
Finally, we can export the reducer from cartSlice.reducer, and pass it to our Redux store and the actions from cartSlice.actions to use in our components.
Configuring the Redux store is a straightforward process thanks to the configureStore() method in Redux Toolkit. Create a new file named store.js inside the redux folder to hold all logic related to the Redux store:
import { configureStore } from '@reduxjs/toolkit';
import { cartReducer } from './cart.slice';

const reducer = {
  cart: cartReducer,
};

const store = configureStore({
  reducer,
});

export default store;
Now, go to the _app.js file to wrap our component with <Provider> from react-redux, which takes our Redux store as a prop so all the components in our app can use the global state:
import { Provider } from 'react-redux';       // Importing Provider
import Navbar from '../components/Navbar';
import Footer from '../components/Footer';
import store from '../redux/store';           // Importing redux store
import '../styles/globals.css';

function MyApp({ Component, pageProps }) {
  return (
    <Provider store={store}>
      <div className="wrapper">
        <Navbar />
        <Component {...pageProps} />
        <Footer />
      </div>
    </Provider>
  );
}

export default MyApp;
And voila, we’re done integrating Redux into our Next.js app for global state management.
addToCart functionalityNow, let’s use the addToCart action in our ProductCard component to add a product to the cart. Open the ProductCard.jsx component and import the useDispatch Hook from react-redux, as well as the addToCart action from the cart.slice.js file.
At the moment, the Add to Cart button doesn’t do anything, but we can dispatch the addToCart action when a user clicks the button. To do this, add the following to ProductCard.jsx:
import Image from 'next/image';
import { useDispatch } from 'react-redux';
import { addToCart } from '../redux/cart.slice';
import styles from '../styles/ProductCard.module.css';

const ProductCard = ({ product }) => {

  const dispatch = useDispatch();

  return (
    <div className={styles}>
      <Image src={product.image} height={300} width={220} />
      <h4 className={styles.title}>{product.product}</h4>
      <h5 className={styles.category}>{product.category}</h5>
      <p>$ {product.price}</p>
      <button
        onClick={() => dispatch(addToCart(product))}
        className={styles.button}
      >
        Add to Cart
      </button>
    </div>
  );
};

export default ProductCard;
Now, each time we click the button, a product adds to the cart. However, we haven’t built the cart page yet, so we cannot confirm this behavior.
If you have the Redux Devtools extension installed on your browser, you can use it to monitor state.
Finally, let’s build the last page of our shopping cart application: the cart page. As always, create a new file named cart.jsx inside the pages folder.
Subsequently, create a new file named CartPage.styles.css inside the styles folder for the stylesheet.
First, import the useSelector and useDispatch Hooks from react-redux.
The useSelector Hook extracts data from the Redux store using a selector function. Then, the useDispatch Hook dispatches the action creators:
import Image from 'next/image';
// Importing hooks from react-redux
import { useSelector, useDispatch } from 'react-redux';
import styles from '../styles/CartPage.module.css';

const CartPage = () => {

  // Extracting cart state from redux store
  const cart = useSelector((state) => state.cart);

  // Reference to the dispatch function from redux store
  const dispatch = useDispatch();

  return (
    <div className={styles.container}>
      {cart.length === 0 ? (
        <h1>Your Cart is Empty!</h1>
      ) : (
        <>
          <div className={styles.header}>
            <div>Image</div>
            <div>Product</div>
            <div>Price</div>
            <div>Quantity</div>
            <div>Actions</div>
            <div>Total Price</div>
          </div>
          {cart.map((item) => (
            <div className={styles.body}>
              <div className={styles.image}>
                <Image src={item.image} height="90" width="65" />
              </div>
              <p>{item.product}</p>
              <p>$ {item.price}</p>
              <p>{item.quantity}</p>
              <div className={styles.buttons}></div>
              <p>$ {item.quantity * item.price}</p>
            </div>
          ))}
          <h2>Grand Total: $ {getTotalPrice()}</h2>
        </>
      )}
    </div>
  );
};

export default CartPage;
We must also add the three buttons for incrementing, decrementing, and removing an item from the cart. So, let’s go ahead and import incrementQuantity, decrementQuantity, and removeFromCart from the cart slice:
import Image from 'next/image';
import { useSelector, useDispatch } from 'react-redux';
// Importing actions from  cart.slice.js
import {
  incrementQuantity,
  decrementQuantity,
  removeFromCart,
} from '../redux/cart.slice';
import styles from '../styles/CartPage.module.css';

const CartPage = () => {

  const cart = useSelector((state) => state.cart);
  const dispatch = useDispatch();

  const getTotalPrice = () => {
    return cart.reduce(
      (accumulator, item) => accumulator + item.quantity * item.price,
      0
    );
  };

  return (
    <div className={styles.container}>
      {cart.length === 0 ? (
        <h1>Your Cart is Empty!</h1>
      ) : (
        <>
          <div className={styles.header}>
            <div>Image</div>
            <div>Product</div>
            <div>Price</div>
            <div>Quantity</div>
            <div>Actions</div>
            <div>Total Price</div>
          </div>
          {cart.map((item) => (
            <div className={styles.body}>
              <div className={styles.image}>
                <Image src={item.image} height="90" width="65" />
              </div>
              <p>{item.product}</p>
              <p>$ {item.price}</p>
              <p>{item.quantity}</p>
              <div className={styles.buttons}>
                <button onClick={() => dispatch(incrementQuantity(item.id))}>
                  +
                </button>
                <button onClick={() => dispatch(decrementQuantity(item.id))}>
                  -
                </button>
                <button onClick={() => dispatch(removeFromCart(item.id))}>
                  x
                </button>
              </div>
              <p>$ {item.quantity * item.price}</p>
            </div>
          ))}
          <h2>Grand Total: $ {getTotalPrice()}</h2>
        </>
      )}
    </div>
  );
};

export default CartPage;
The getTotalPrice function uses the reduce() array method to calculate the cost of all items in the cart.
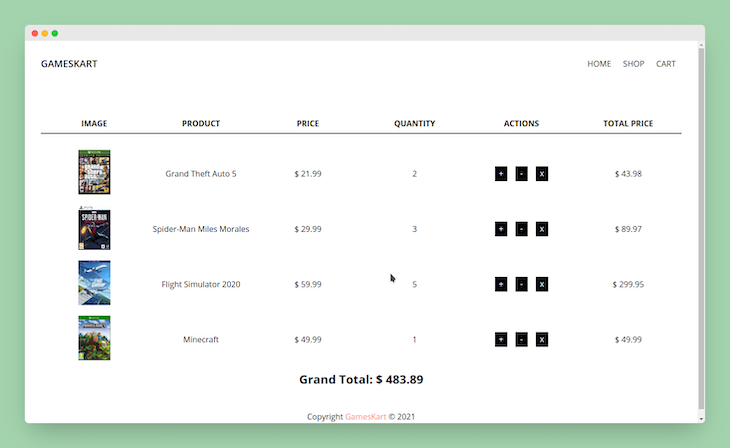
For the JSX part, we check whether the cart is empty or not by accessing the cart.length property. If it is empty, we can display text notifying the user the cart is empty.
Otherwise, we can use the map() array method to render a div with all the product details. Notice that we also have three buttons with onClick to dispatch the respective cart actions when clicked.
To style the cart page, add the following to CartPage.module.css:
.container {
  padding: 2rem;
  text-align: center;
}
.header {
  margin-top: 2rem;
  display: flex;
  justify-content: space-between;
}
.header div {
  flex: 1;
  text-align: center;
  font-size: 1rem;
  font-weight: bold;
  padding-bottom: 0.5rem;
  text-transform: uppercase;
  border-bottom: 2px solid black;
  margin-bottom: 2rem;
}
.body {
  display: flex;
  justify-content: space-between;
  align-items: center;
  text-align: center;
  margin-bottom: 1rem;
}
.body > * {
  flex: 1;
}
.image {
  width: 100px;
}
.buttons > * {
  width: 25px;
  height: 30px;
  background-color: black;
  color: white;
  border: none;
  margin: 0.5rem;
  font-size: 1rem;
}
And, we have our final cart page!
NavbarAt the moment, there’s no feedback or notification to confirm whether a product has been added to the cart or not when clicking the Add to Cart button.
Therefore, let’s add the cart items count to the Navbar component so it increments every time we add a product. Go to Navbar.jsx and modify the code to select the cart from the global state and create a custom function to get the item count:
import Link from 'next/link';
import { useSelector } from 'react-redux';
import styles from '../styles/Navbar.module.css';
const Navbar = () => {

  // Selecting cart from global state
  const cart = useSelector((state) => state.cart);

  // Getting the count of items
  const getItemsCount = () => {
    return cart.reduce((accumulator, item) => accumulator + item.quantity, 0);
  };

  return (
    <nav className={styles.navbar}>
      <h6 className={styles.logo}>GamesKart</h6>
      <ul className={styles.links}>
        <li className={styles.navlink}>
          <Link href="/">Home</Link>
        </li>
        <li className={styles.navlink}>
          <Link href="/shop">Shop</Link>
        </li>
        <li className={styles.navlink}>
          <Link href="/cart">
            <p>Cart ({getItemsCount()})</p>
          </Link>
        </li>
      </ul>
    </nav>
  );
};

export default Navbar;
That’s it for this project! I hope this gives you a solid understanding of the Next.js basics with Redux integration. Feel free to add more features to this project like authentication, a single product page, or payment integration.
If you face any difficulties while building this project, visit this GitHub repository to compare your code with mine.
Debugging Next applications can be difficult, especially when users experience issues that are difficult to reproduce. If you’re interested in monitoring and tracking state, automatically surfacing JavaScript errors, and tracking slow network requests and component load time, try LogRocket.
LogRocket captures console logs, errors, network requests, and pixel-perfect DOM recordings from user sessions and lets you replay them as users saw it, eliminating guesswork around why bugs happen — compatible with all frameworks.
LogRocket's Galileo AI watches sessions for you, instantly identifying and explaining user struggles with automated monitoring of your entire product experience.
The LogRocket Redux middleware package adds an extra layer of visibility into your user sessions. LogRocket logs all actions and state from your Redux stores.


Modernize how you debug your Next.js apps — start monitoring for free.

@container scroll-state: Replace JS scroll listeners nowCSS @container scroll-state lets you build sticky headers, snapping carousels, and scroll indicators without JavaScript. Here’s how to replace scroll listeners with clean, declarative state queries.

Explore 10 Web APIs that replace common JavaScript libraries and reduce npm dependencies, bundle size, and performance overhead.

Russ Miles, a software development expert and educator, joins the show to unpack why “developer productivity” platforms so often disappoint.

Discover what’s new in The Replay, LogRocket’s newsletter for dev and engineering leaders, in the February 18th issue.
Hey there, want to help make our blog better?
Join LogRocket’s Content Advisory Board. You’ll help inform the type of content we create and get access to exclusive meetups, social accreditation, and swag.
Sign up now
2 Replies to "Building a Next.js shopping cart app"
This is helpful. Can you update the github link? It sound like it is pointing to the vercel app
On refresh the page, the state will goes to the initial-state and therefore removes all the products from the cart.So how we can overcome this problem?? Any answer??