A key aspect of Web3 is that blockchain wallets and public-key encryption can be used for identifying accounts. In this article, we’ll explore how to create a one-click, cryptographically-secure login flow using a blockchain wallet, using the Ether.js library to interact with the blockchain, through the following steps:

As stated above, cryptographically-secure blockchains prove the ownership of an account by signing a piece of data using a private key as a result of their very nature. These cryptographic signatures can also be used to write transactions to a blockchain.
We’ll proceed to build a message-signing-based authentication mechanism with a user’s public address as their identifier.
Web3 wallets are used for authentication in Web3 environments. There are three leading Web3 wallet options at the time of writing this article:
We’ll be using MetaMask for this tutorial. Now that we’ve laid out the project, let’s get started.
To use Ceramic, we’ll need Node.js ≥ v14 and npm ≥ v6, and we’ll create a new React application with Next.js.
yarn create next-app --typescript web3-auth
Install dependencies:
yarn add web3modal ethers @ceramicnetwork/http-client key-did-resolver @ceramicnetwork/3id-did-resolver key-did-provider-ed25519 @stablelib/random
@ceramicnetwork/stream-tile dids
Ceramic relies on the decentralized identifier (DID) standard for user accounts, which are compatible with all blockchain wallets. DIDs are useful as they serve to unbundle Ceramic accounts from any Web3 wallet address or public key as a way of confirming the true owner of an account.
Our application will rely on the Ceramic data network to store, modify, and retrieve data. Relying on Ceramic’s data models, we’ll create a basic user registry, and user accounts in the registry will conform to the standard DID specification. The Ceramic client enables authenticated accounts to perform transactions on the network.
Below is the necessary code for creating a Ceramic user registry. The http-client allows our application to connect to a remote Ceramic node over HTTP to read and write streams. Throughout this project, TypeScript will be used.
mkdir utils
touch client.tsx

import { CeramicClient } from "@ceramicnetwork/http-client";
import KeyDidResolver from "key-did-resolver";
import ThreeIdResolver from "@ceramicnetwork/3id-did-resolver";
import { Ed25519Provider } from "key-did-provider-ed25519";
import { randomBytes } from "@stablelib/random";
import { TileDocument } from "@ceramicnetwork/stream-tile";
import { DID } from "dids";

// set ceramic node URL
const API_URL = "https://ceramic-clay.3boxlabs.com";

// generate seed
const seed = randomBytes(32);

// create provider
const provider = new Ed25519Provider(seed);

// create ceramic instance
const ceramic = new CeramicClient(API_URL);

// set provider to ceramic
ceramic.did?.setProvider(provider);

await ceramic.did?.authenticate();

// DID methods to authenticate writes
const resolver = {
  ...KeyDidResolver.getResolver(),
  ...ThreeIdResolver.getResolver(ceramic),
};

// create a DID instance
const did = new DID({ resolver });

// set DID instance
ceramic.did = did;

const doc = await TileDocument.create(ceramic, { broadcast: "Hello" });

export const users: any = { doc };
The auth API checks if the user’s account exists in the user registry. If no such user has been created, a new user is created and a cryptographic nonce is assigned to them.
touch src/pages/api/auth.tsx
code src/pages/api/auth.tsx
import type { NextApiRequest, NextApiResponse } from "next";

import { users } from "../../utils/client";
export default async function auth(req: NextApiRequest, res: NextApiResponse) {
  const { address } = req.query;
  let user = users[address as string];

  // check if user exists in register
  if (!user) {
    user = {
      address,
      // update user nonce
      nonce: Math.floor(Math.random() * 10000000),
    };
    users[address as string] = user;
  } else {
    // create nonce for new user
    const nonce = Math.floor(Math.random() * 10000000);
    // assign nonce to new user
    user.nonce = nonce;
    users[address as string] = user;
  }
  res.status(200).json(user);
}
The nonce that was generated in our auth file is used as a unique string to sign the request from the client. This enables the authentication of transactions on the server. Once the signature is created, it is sent along with the request.
touch pages/api/confirm.tsx
code pages/api/confirm.tsx
The nonce is extremely important because it’s used to decode the transaction on the server. Once it confirms that the decoded string matches the address of the caller, the system can confirm that the transaction was sent by the same user.
In the confirm.tsx file, the decoded string is checked, to make sure it matches the address of the caller.
import type { NextApiRequest, NextApiResponse } from "next";
import { ethers } from "ethers";
import { users } from "../../utils/client";

export default function transactionCheck(
  req: NextApiRequest,
  res: NextApiResponse
) {
  let authenticated = false;

  const { address1, signature } = req.query;
  const user = users[address1 as string];
  const address = address1 as string;
  const decodedAddress = ethers.utils.verifyMessage(
    user.nonce.toString(),
    signature as string
  );
  if (address.toLowerCase() === decodedAddress.toLowerCase())
    authenticated = true;
  res.status(200).json({ authenticated });
}
The Web3Modal library is a simple Web3/Ethereum provider solution, which enables the addition of support for multiple providers in the application. The Web3Modal library supports the injected providers that we’ll rely on in this project, MetaMask and Tor.us.
In the Home.module.css file, create the styling for the application container and login button.
touch styles/Home.module.css
.container {
  width: 30rem;
  margin: 100px auto;
}

.button {
  width: 100%;
  margin: 0.2rem;
  padding: 0.8rem;
  border: none;
  background-color: purple;
  color: white;
  font-size: 16;
  cursor: pointer;
}
touch pages/index.tsx
import type { NextPage } from "next";
import React, { useState } from "react";
import { ethers } from "ethers";
import Web3Modal from "web3modal";
import styles from "../styles/Home.module.css";
const Home: NextPage = () => {
const [account, setAccount] = useState("");
const [connection, setConnection] = useState(false);
const [loggedIn, setLoggedIn] = useState(false);
async function getWeb3Modal() {
let Torus = (await import("@toruslabs/torus-embed")).default;
const web3modal = new Web3Modal({
network: "mainnet",
cacheProvider: false,
providerOptions: {
torus: {
package: Torus,
},
},
});
return web3modal;
}
async function connect() {
const web3modal = await getWeb3Modal();
const connection = await web3modal.connect();
const provider = new ethers.providers.Web3Provider(connection);
const accounts = await provider.listAccounts();
setConnection(connection);
setAccount(accounts[0]);
}
async function Login() {
const authData = await fetch(`/api/authenticate?address=${account}`);
const user = await authData.json();
const provider = new ethers.providers.Web3Provider(connection as any);
const signer = provider.getSigner();
const signature = await signer.signMessage(user.nonce.toString());
const response = await fetch(
`/api/verify?address=${account}&signature=${signature}`
);
const data = await response.json();
setLoggedIn(data.authenticated);
}
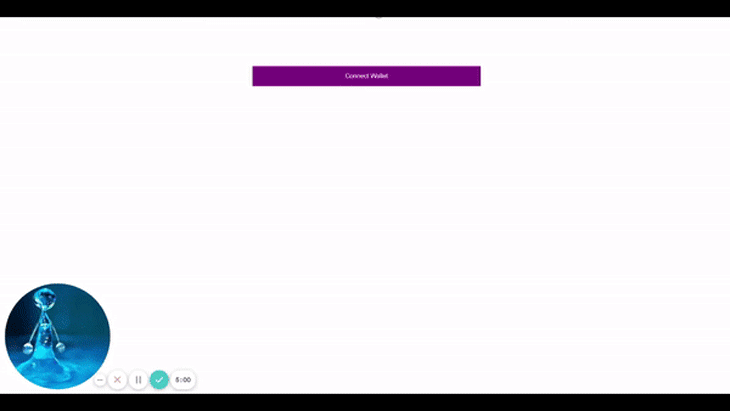
return (
<div className={styles.container}>
{!connection && (
<button className={styles.button} onClick={connect}>
Connect Wallet
</button>
)}
{connection && !loggedIn && (
<>
<button className={styles.button} onClick={Login}>
Login
</button>
</>
)}
{loggedIn && <h2>Let's get started, {account}</h2>}
</div>
);
};
export default Home;
The connect function prompts the user with the Web3Modal to login with the available injected Tor.us Web3 wallet that has been specified in the application.
The login function connects the user registry and updates the user’s nonce. Once the nonce is verified on the server from the signature, the UI updates.
In this article, we built a cryptographically-secure login flow and explained how a digital signature can be confirmed with the user’s nonce. We also demonstrated how the nonce can be used to prove ownership of an account, and therefore provide authentication.
Install LogRocket via npm or script tag. LogRocket.init() must be called client-side, not
server-side
$ npm i --save logrocket

// Code:

import LogRocket from 'logrocket';
LogRocket.init('app/id');
// Add to your HTML:

<script src="https://cdn.lr-ingest.com/LogRocket.min.js"></script>
<script>window.LogRocket && window.LogRocket.init('app/id');</script>
Hey there, want to help make our blog better?
Join LogRocket’s Content Advisory Board. You’ll help inform the type of content we create and get access to exclusive meetups, social accreditation, and swag.
Sign up now
Learn how OpenAPI can automate API client generation to save time, reduce bugs, and streamline how your frontend app talks to backend APIs.

Discover how the Interface Segregation Principle (ISP) keeps your code lean, modular, and maintainable using real-world analogies and practical examples.

<selectedcontent> element improves dropdowns

Learn how to implement an advanced caching layer in a Node.js app using Valkey, a high-performance, Redis-compatible in-memory datastore.


