In this article, we will guide you through the process of building a job hosting website using Next.js and Appwrite.
First, we will give a short overview of Next.js and Appwrite. Next, we will go through the steps of setting up Appwrite and integrating it into our Next.js project.
By the end of this article, you’ll have a solid understanding of how to use Next.js and Appwrite to create a job hosting website from scratch. You can find the complete source code for this project in this GitHub repo.
Jump ahead:
The Replay is a weekly newsletter for dev and engineering leaders.
Delivered once a week, it's your curated guide to the most important conversations around frontend dev, emerging AI tools, and the state of modern software.
Next.js is a React framework for creating server-side-rendered web applications. This allows for faster page loads and improved SEO. Next.js provides built-in features such as automatic code splitting, optimized image loading, automatic routing, and more.
To create our Next.js app, open the terminal and run the following command for an automatic setup:
npx create-next-app@latest
    # or
    yarn create next-app
Now, change the directory to our project and start our development server on port 3000:
cd <our project>
npm run dev
To see if it works, you can open http://localhost:3000 in your browser.
Appwrite is an open source backend server that provides developers with a set of easy-to-use tools to build and manage serverless web and mobile applications. With Appwrite, developers can focus on building frontend applications without actually coding the backend infrastructure.
Appwrite offers features such as authentication, database, storage, and functions, which can be used individually or combined to build powerful serverless applications. It is packaged as a set of Docker containers, which allows you to install and run on any operating system that can run a Docker CLI.
The first step is to install Docker Desktop for macOS, for Windows, or for Linux.
To set up Appwrite manually, you have to download the Appwrite base docker-compose.yml and .env files and move both inside a directory named appwrite within your Next.js project. After the download completes, you can update the different environment variables in the .env file and start Appwrite by running the following Docker command:
docker compose up -d --remove-orphans
This may take a few seconds. Note that you can only execute this command if you change the directory to appwrite beforehand. You can run Appwrite without modifying the .env file and proceed with the default settings.
To stop your Appwrite containers, you can use the following command executed from the same directory:
docker compose stop
Once the Docker installation completes, open your web browser and navigate to http://localhost or http://localhost:80 to access the Appwrite console. Here, you can create a new account by clicking the Register button and following the prompts.
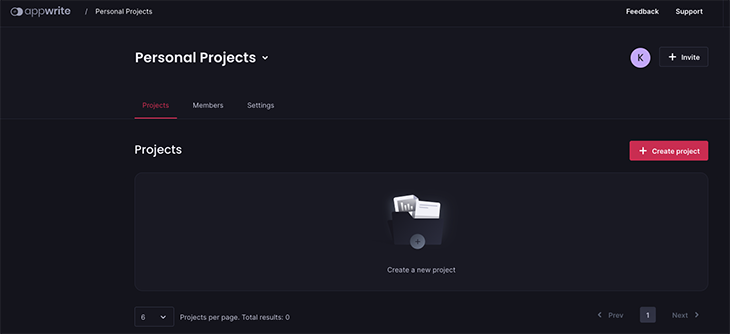
Once you’ve created an account, login to the dashboard:
To start a new project, click the Create project button and enter its name:
The next step is to add a web platform to your project to initialize your SDK and interact with Appwrite services:
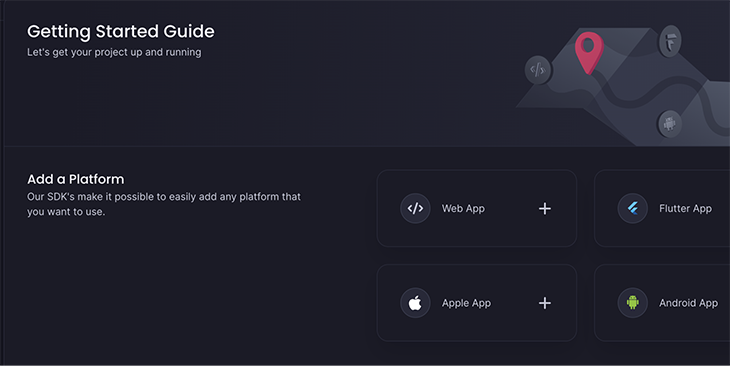
Choose your new project and add the platform Web App and enter its name and hostname:
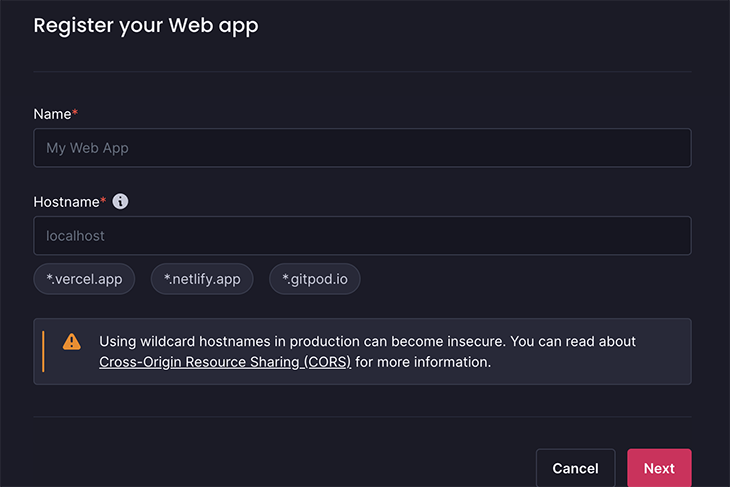
In a production environment, it is recommended to update the hostname from * for security purposes, although we initially defined it as * for simplicity.
After you add the platform, you need to select your preferred installation method. You can choose between npm and CDN.
We have opted for npm, so we need switch to our Next.js project and run the following command to add the Appwrite SDK to our project:
npm install appwrite
For sake of simplicity, we’ll insert the project ID and API endpoint directly in the code, but you should use environment variables in a production environment.
Create a new file in your project directory called .env.local. This file will contain your Appwrite API endpoint and project ID.
Add the following lines to the file and replace <your_appwrite_endpoint> with your API endpoint and <your_appwrite_project_id> with your Appwrite project ID. Your project ID can be found in your project settings page:
NEXT_PUBLIC_APPWRITE_ENDPOINT=https://<your_appwrite_endpoint>
NEXT_PUBLIC_APPWRITE_PROJECT_ID=<your_appwrite_project_id>
In order to initialize the downloaded SDK, you need to import the Appwrite module. To do this, you can add the necessary code to your pages/index.js file, which will display your home page:
//pages/index.js

import { Client} from 'appwrite';


export function getServerSideProps() {

   const client = new Client();
   client
     .setEndpoint(process.env.NEXT_PUBLIC_APPWRITE_ENDPOINT)
     .setProject(process.env.NEXT_PUBLIC_APPWRITE_PROJECT_ID);
}
You need to import the Client class from the appwrite module to interact with the Appwrite API. This will create a new instance of the Client class, which is used to communicate with the Appwrite API.
The client instance is configured by setting the API endpoint and project ID. The API endpoint is the URL through which the client communicates with the Appwrite server, and the project ID identifies the specific project being accessed.
You have now successfully added a platform to your project and connected Appwrite to your Next.js application!
To display data in your application, you will need to create a database in the Appwrite console. To do this, navigate to the left side of the Appwrite dashboard, select Databases, click the Create Database button, and enter the name of your database.
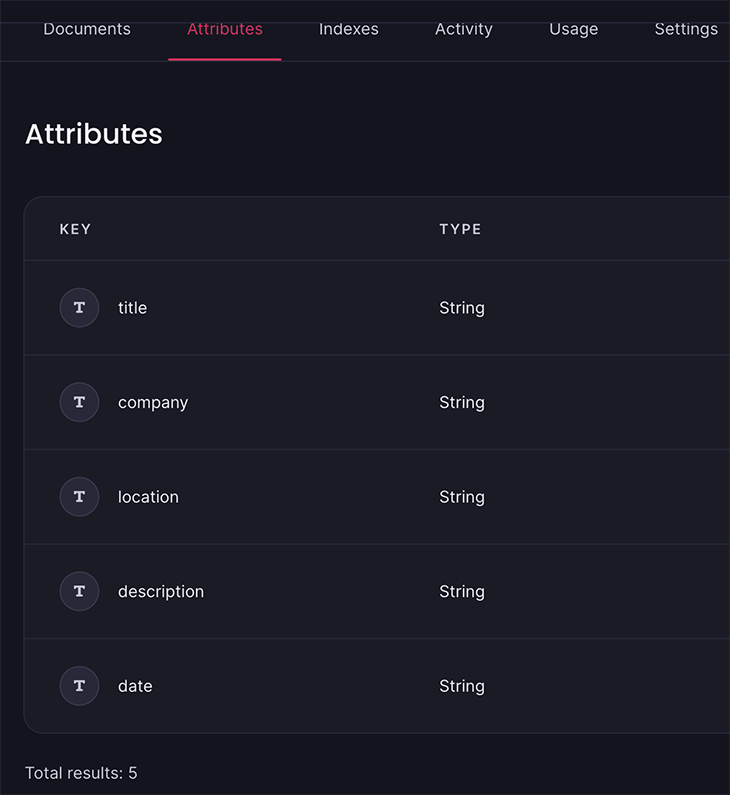
You can create a collection in Appwrite by providing a name and adding attributes with various data types, including strings, integers, booleans, and more. We have selected the following:
After selecting your attributes, you can fill them with data by clicking the Create Document button.
In your collection, you can manage access to specific resources within your documents by assigning read and write access to individual collections or documents using Appwrite’s permission architecture. This allows you to grant access to specific users, teams, user roles, or even provide public access, using Any.
You can set permissions individually by navigating to your collections and choosing the Settings menu. From there, under Permissions, you can define your own access settings:
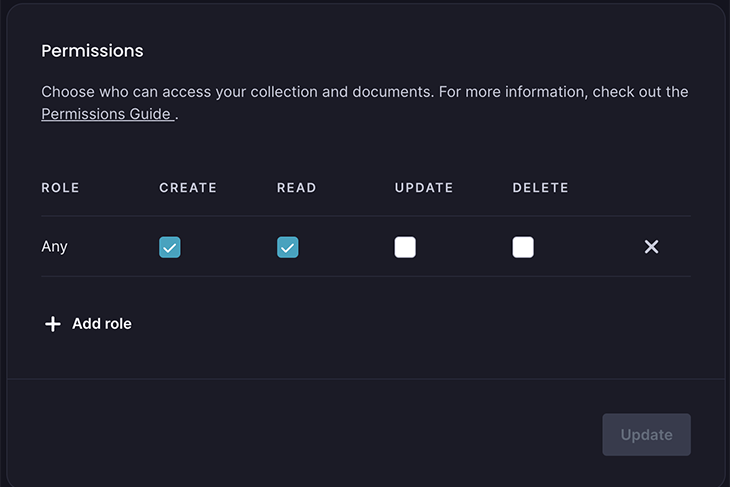
To keep things simple, we set the role to Any and granted public access to create and read our collections and documents.
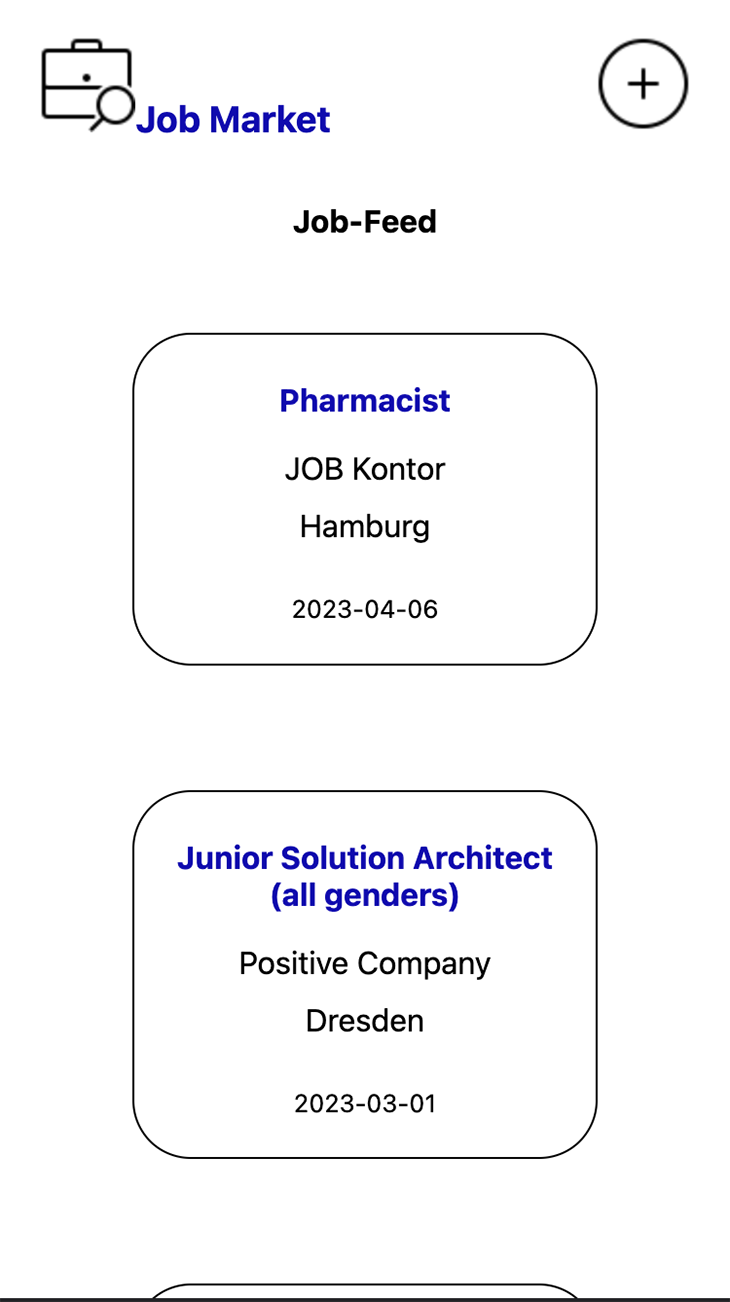
Now that your database is complete, you need to be able to read and create the data.
As seen in the following screenshot, we want all jobs we added to our collection to be displayed on our landing page:
To read the data, you’ll need to fetch them first. To do this, modify your getServerSideProps function to become an async function with a try…catch block:
//pages/index.js

import { Client, Databases} from 'appwrite';

export async function getServerSideProps() {
 try {
   const client = new Client();
   client
     .setEndpoint(process.env.NEXT_PUBLIC_APPWRITE_ENDPOINT)
     .setProject(process.env.NEXT_PUBLIC_APPWRITE_PROJECT_ID);

   const databases = new Databases(client);

   const data2 = await databases.listDocuments('[DATABASE_ID]', '[COLLECTION_ID]');

   return {props: { data2 } }; //Success
 } catch (error) {
   console.log(error);
   return { props: { data2: null } }; //Failure
 }
}
Import Databases from appwrite module to interact with the databases in your Appwrite project; this will create a new instance of the Databases class.
Here, the previously created client instance is passed as an argument. The listDocuments method of the database instance is called to fetch a list of all documents from the specified database and collection. The placeholders [DATABASE_ID] and [COLLECTION_ID] should be replaced with the actual IDs of your database and collection.
If the code in the try block is executed successfully, the function returns an object with the fetched data in the data2 property. Next.js will then pass this data as props to the React component of the page.
If not, the execution is passed to the catch block. The error is logged to the console, and the function returns an object with the data2 property set to null. In this case, the failed data is passed as props to the React component.
In order to display a details page for each listing, we require a function that can load server-side data based on the id parameter from the URL query and pass it as props to a React component.
We can use the getDocument method provided by Appwrite to retrieve a document by its unique ID:
export async function getServerSideProps(context) {
 const { id } = context.query;

 try {
   const client = new Client();
   client
     .setEndpoint(process.env.NEXT_PUBLIC_APPWRITE_ENDPOINT)
     .setProject(process.env.NEXT_PUBLIC_APPWRITE_PROJECT_ID);

   const databases = new Databases(client);
   const promise = databases.getDocument('[DATABASE_ID]', '[COLLECTION_ID]', id);

   return {
     props: { data2: await promise },
   };
 } catch (error) {
   console.log(error);

   return {
     props: { data2: null },
   };
 }
}
The getServerSideProps function is defined and exported as an asynchronous function. Next.js automatically calls this function to load server-side data for a particular page. The context parameter contains information about the current request, such as URL query parameters and cookies.
We extract the ID from the query object within the context and use the value of the ID parameter in the URL. The getDocument method of the database instance allows you to retrieve a document from your specified database ('[DATABASE_ID]'), collection ('[COLLECTION_ID]'), and ID.
Here is what our job details page looks like:

To add new jobs to our database using the following form, we require the createDocument function provided:
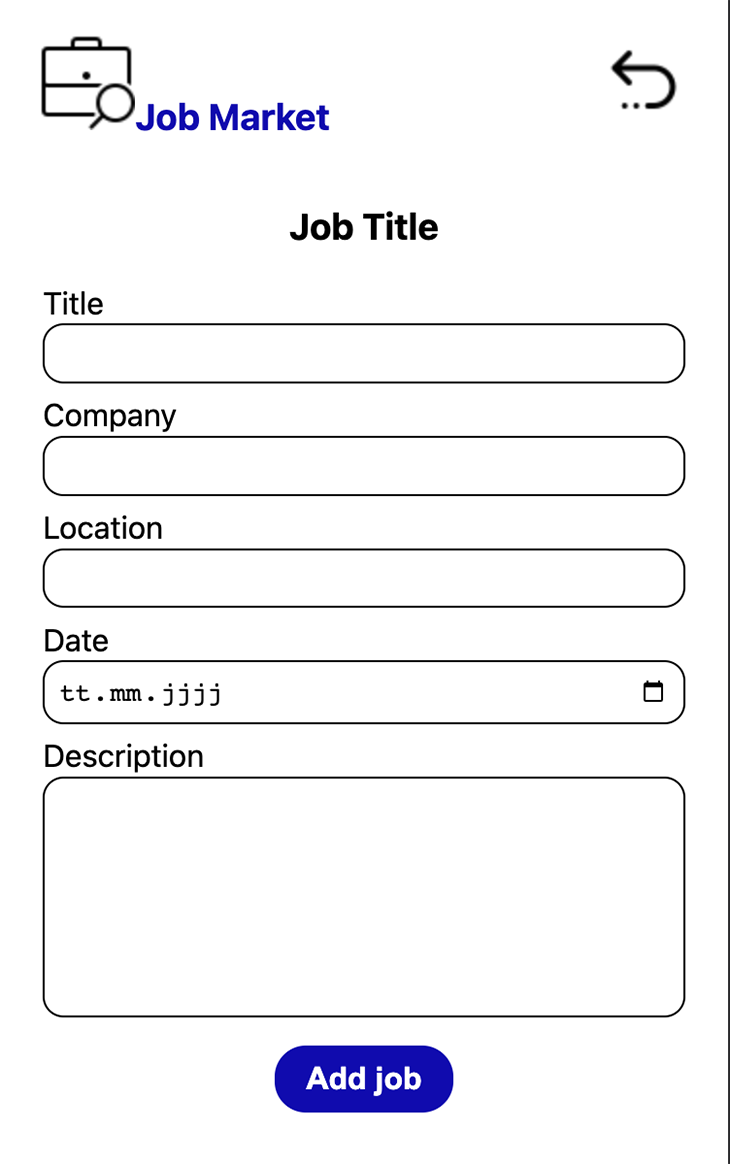
The AddNewJob function handles the process of adding a new job element to the database:
export default function AddNewJobs() {
 const [object, setObject] = useState();

 async function addNewElementToDatabase() {
   try {
     const client = new Client();
     const databases = new Databases(client);

     client
       .setEndpoint(process.env.NEXT_PUBLIC_APPWRITE_ENDPOINT)
       .setProject(process.env.NEXT_PUBLIC_APPWRITE_PROJECT_ID);

     const promise = databases.createDocument(
       '[DATABASE_ID]',
       '[COLLECTION_ID]',
       ID.unique(),
       object
     );

     promise.then(
       function (response) {
         console.log(response);
       },
       function (error) {
         console.log(error);
       }
     );
   } catch (error) {
     console.log(error);

     return {
       props: { data2: null },
     };
   }
 }
 useEffect(() => {
   if (object === undefined) return;
   else {
     console.log(object);
     addNewElementToDatabase(object);
   }
 }, [object]);
The asynchronous function addNewElementToDatabase is responsible for interacting with the Appwrite backend to add a new document. To create a new document in the specified database and collection, we need the createDocument method of the database instance.
The method takes four arguments:
'[DATABASE_ID]''[COLLECTION_ID]'ID.unique()object state variable, which contains the data for the new documentInside the AddNewJob component, the state variable is declared using the useState Hook. The setObject function will be used to update the object state. The useEffect Hook triggers the addNewElementToDatabase function whenever the object state variable changes. If the object is not undefined, it logs the object to the console and calls the addNewElementToDatabase function with the object as an argument.
This article provided a step-by-step guide on how to build a job hosting website using Next.js and Appwrite. We introduced Next.js and Appwrite and highlighted their benefits and features. Then, we walked through the process of setting up Appwrite and integrating it into a Next.js project.
We also covered topics such as installing and configuring Appwrite, creating a database and collection, and fetching and displaying data from the database. Additionally, we explored how to add new jobs to the database using a form.
By following the instructions in this article, you will have gained the knowledge and skills to create a fully functional job hosting website. You can find the complete source code for this project in this GitHub repo.
Debugging Next applications can be difficult, especially when users experience issues that are difficult to reproduce. If you’re interested in monitoring and tracking state, automatically surfacing JavaScript errors, and tracking slow network requests and component load time, try LogRocket.
LogRocket captures console logs, errors, network requests, and pixel-perfect DOM recordings from user sessions and lets you replay them as users saw it, eliminating guesswork around why bugs happen — compatible with all frameworks.
LogRocket's Galileo AI watches sessions for you, instantly identifying and explaining user struggles with automated monitoring of your entire product experience.
The LogRocket Redux middleware package adds an extra layer of visibility into your user sessions. LogRocket logs all actions and state from your Redux stores.


Modernize how you debug your Next.js apps — start monitoring for free.

Local AI proxy tutorial for detecting, masking, and rehydrating PII before prompts reach cloud LLMs.

Learn how Graph RAG uses connected knowledge structures to improve retrieval beyond simple text similarity.

Learn how sibling-index() enables clean, JavaScript-free stagger animations using native CSS.

useEffect breaks AI streaming responses in ReactSee why useEffect breaks AI streaming in React, and how moving stream state outside React fixes flicker and stale updates.
Hey there, want to help make our blog better?
Join LogRocket’s Content Advisory Board. You’ll help inform the type of content we create and get access to exclusive meetups, social accreditation, and swag.
Sign up now

