Editor’s note: This article was last updated on 14 September 2023 to add information about styling components and testing error behavior.

Next.js is well known for its file system-based routing. With the addition of the App Router, however, Next.js 13 has changed the way developers must perform many tasks.
While it still supports file system-based routing, which uses the Pages Router, the new App Router introduces the concepts of layouts, error components, and loading components, while also leveraging React Server Components for building the UI.
In this article, we’ll explore these new features by building a simple app. You can follow along with the source code on GitHub. Let’s get started!
Before we start working on our project, we’ll review the new features and concepts introduced in Next.js 13.
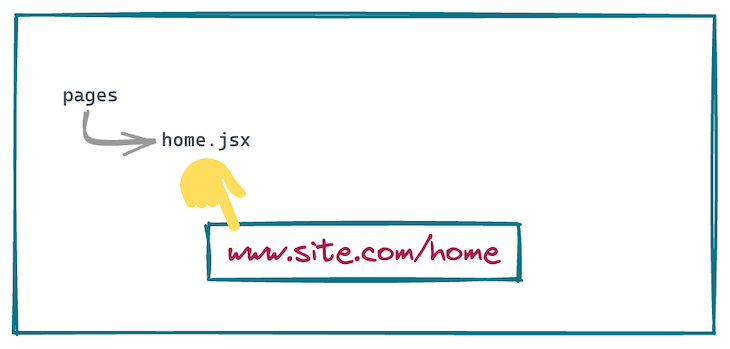
If you’ve worked with previous versions of Next.js, you might already be familiar with the Pages Router. Any file created inside the pages directory would act as a route in the UI. For example, pages/home.jsx would take care of the /home route:
The new App Router works alongside the Pages Router to support incremental adoption and provide other new features like server-side rendering and static site generation.
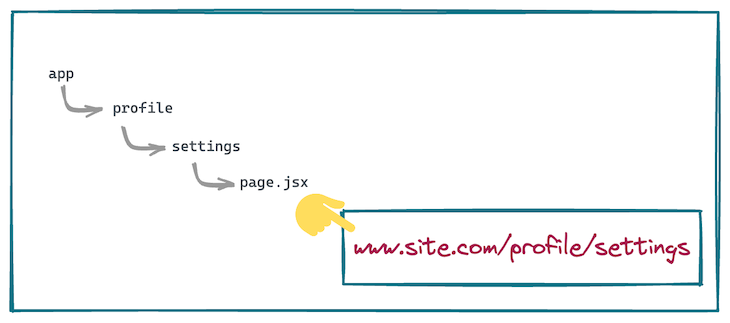
Just like files in the pages directory, routing with the App Router is controlled via folders inside the app directory. The UI for a particular route is defined by a page.jsx file inside of the folder.
Therefore, a folder structure that looks like app/profile/settings/page.jsx will take care of rendering the /profile/settings route:
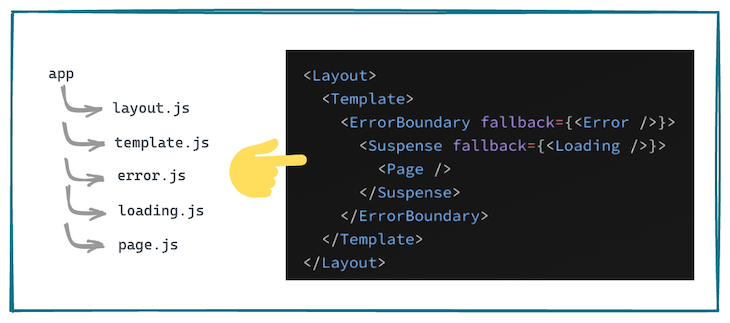
loading.tsx fileloading.tsx is an optional file that you can create within any directory inside of the app directory. It automatically wraps the page inside a React Suspense boundary. The component will be shown immediately on the first load as well as when you’re navigating between the sibling routes.
error.tsx fileerror.tsx is an optional file that isolates the error to the smallest possible subsection of the app. Creating the error.tsx file automatically wraps the page inside a React error boundary. Whenever any error occurs inside the folder where this file is placed, the component will be replaced with the contents of the error.tsx file.
layout.tsx fileYou can use the layout.tsx file to define a UI that is shared across multiple pages. A layout can render another layout or a page inside of it. Whenever a route changes to any component that is within the layout, its state is preserved because the layout component is not unmounted.
template.tsx filetemplate.tsx is similar to the layout.tsx file, but upon navigation, a new instance of the component is mounted and the state is not preserved.
Using layouts and templates allows us to take advantage of a concept known as partial rendering. While moving between routes inside of the same folder, only the layouts and pages inside of that folder are fetched and rendered:
With so many changes having been introduced in Next.js 13, there are some things that we need to keep in mind when moving to the app directory from the pages directory.
There must be a file that defines the root layout at the top level of the app directory. This layout is applicable to all the routes in the app. In addition, the root layout must define the <html> and the <body> tags because Next.js doesn’t automatically add them.
<head> tagInside any folder in the app directory, we’ll create a head.js file that will define the contents of the <head> tag for that folder. The component returned from this head.js file can only return certain limited tags like <title>, <meta>, <link>, and <script>.
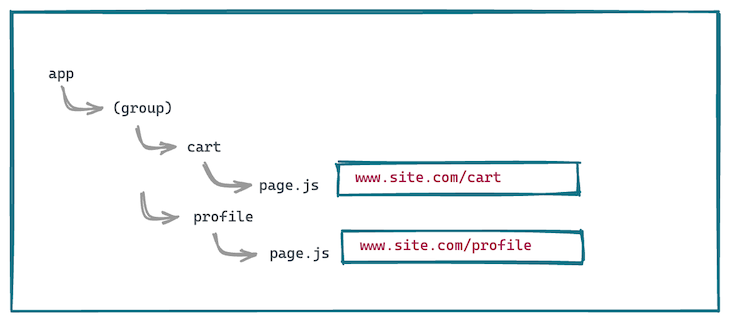
Every folder inside the app directory contributes to the URL path. But it is possible to opt out of it by wrapping the folder name inside of parentheses. All of the files and folders inside of this special folder are said to be a part of that route group:
By default, all of the components created inside of the app directory are React Server Components, leading to better performance due to a smaller bundle size. But if we want to switch to the client component, we need to specify that with the React 'use client' directive at the top of the file.
Now that we’re familiar with the new features in Next.js 13, let’s experiment by running through an example. First, we create a new Next.js project using Create Next App:
npx create-next-app next-13
cd next-13
Let’s run the bootstrapped code as is:
npm run dev
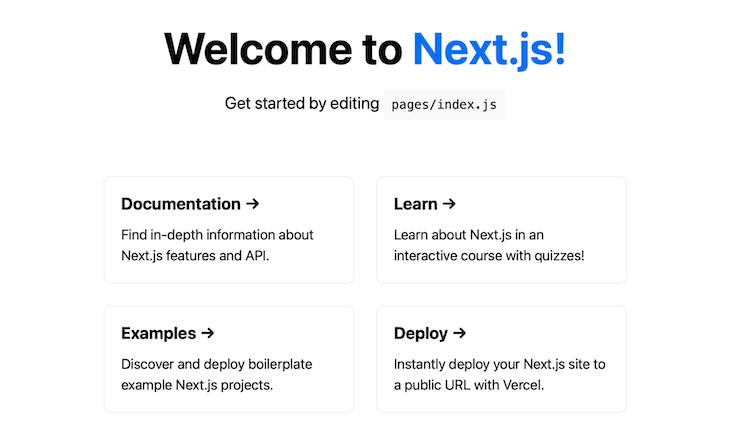
We’re greeted with the familiar homepage:
page and layout filesLet’s create a folder parallel to the pages directory and name it app. Create a layout.js file inside the app directory with the code below:
export default function Layout({ children }) {
  return (
    <html lang="en">
      <head>
        <title>Next.js</title>
      </head>
      <body>
        {children}
      </body>
    </html>)
}
Then, create a page.js file with the following code:
import '../styles/globals.css'
export default function Page() {
  return <h1>Hello, Next.js!</h1>;
}
We’ve also imported the global.css file to use the global styles that are already defined. The app directory is still an experimental feature at the time of writing, so we need to set a flag in the next.config.js file to use it:
module.exports = {
  reactStrictMode: true,
  experimental:{appDir: true}
}
Finally, we need to delete the pages/index.js file, which will conflict with the file in the app directory. With that in place, we can now run the dev server:
npm run dev
We see that the root route / now shows the UI corresponding to the app/page.js file:

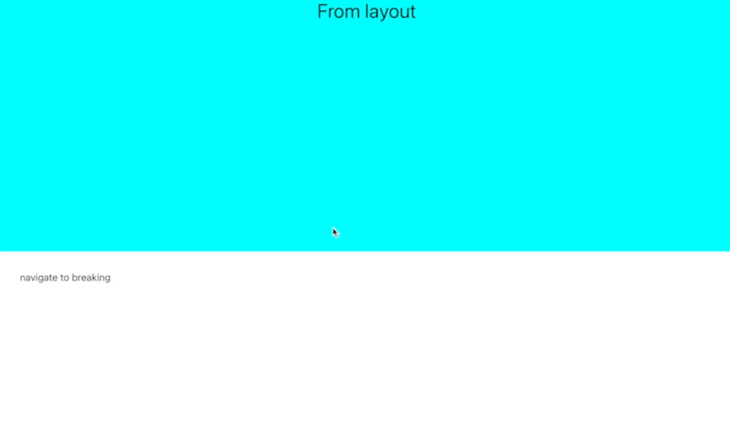
Now, let’s test how the layout file impacts the overall UI. First, we’ll write some CSS styles in a layout.module.css file in the same directory:
.header {
  width: 100%;
  height: 50vh;
  background-color: cyan;
  text-align: center;
  font-size: 2rem;
}
Next, we import those styles in the layout.js file and add them to a div inside the body just above the children:
import styles from ./layout.module.css

export default function Layout({ children }) {
  return (
    <html lang="en">
      <head>
        <title>Next.js</title>
      </head>
      <body>
        <div
          className={styles.header}
        >From layout</div>
        <div>
          {children}
        </div>
      </body>
    </html>)
}
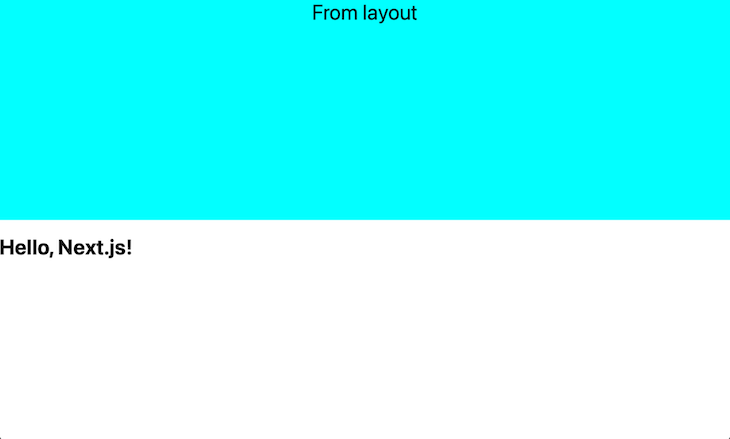
The UI now looks like this:
Let’s add a new folder in the app directory called second. Create a file inside it named page.js with the following code:
import '../../styles/globals.css'

export default function Page() {
  return <h1>Second route!</h1>;
}
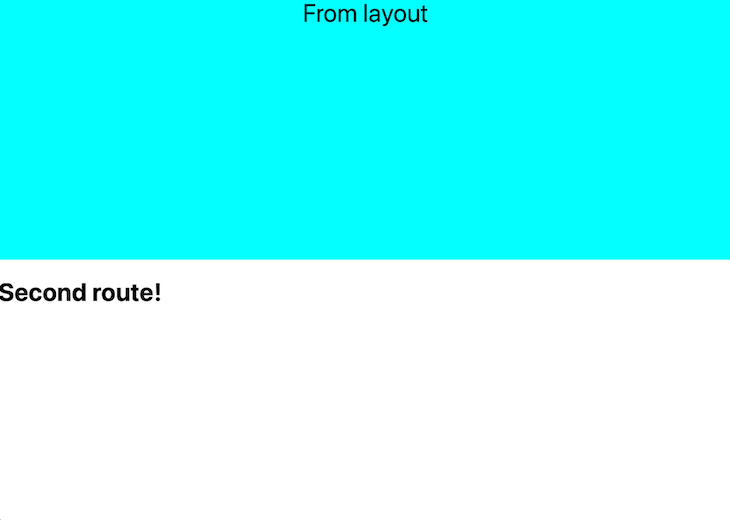
Navigating to the second route http://localhost:3000/second loads the following UI:
The layout file placed inside the app directory is being shared by the page.js file in the same directory as well as the page.js file inside of the second folder. You can accomplish any common changes that deal with the layout via the layout file.
Creating the layout file is not only supported at the root, but also at each folder level. Therefore, we can create a layout.js file inside of the subfolder as well.
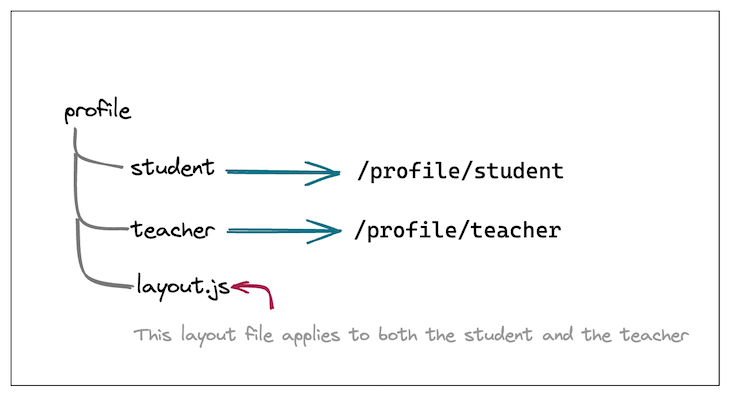
Let’s name the second folder profile. We‘ll create two routes inside of this folder, which will manage the /student and /teacher profiles for a school’s web app. For example:
layout.js fileInside the profile folder, let’s create the layout.js file and place the following code inside it:
import React from `react`;

import styles from './layout.module.css'

export default function Layout({ children }) {
  return (
    <div className={styles.innerLayout}>
      <div>
        Announcements: Tomorrow is a holiday!
      </div>
      <div>
        {children}
      </div>
    </div>)
}
The layout above has a div with Announcement, which will be common for both the /student and the /teacher profile. Just below that, we have the div that renders the {childen}, where we’ll plug the actual component that we build.
To differentiate this inner layout with the outer one, let’s add some CSS styles to it in the layout.module.css file that is imported above:
.innerLayout {
  width: 50%;
  height: auto;
  background-color: tomato;
  padding: 1rem;
}

.children {
  padding: 1rem;
}
With that set, let’s create the student folder first. Inside the student folder, we’ll create a page.js file with the following code:
import React from 'react';
import '../../../styles/globals.css'

const students = {
  1: {
    name: 'John',
    age: 10,
    subjects: ['Math', 'English'],
  }
}

export default function Page() {
  const student = students[1];

  return (
    <React.Fragment>
      <h1>Student profile</h1>
      <div>Name: {student.name}</div>
      <div>Age: {student.age}</div>
      <div>Studies: {student.subjects.join(', ')}</div>
    </React.Fragment>
  )
}
We select a student from a list of students, which could come from a student database. We then render that as the profile of the student.
Upon navigating to the /profile/student route, we see the following:
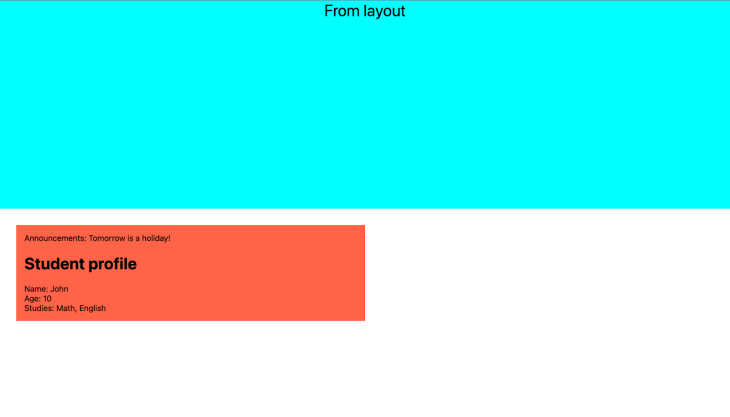
On the top, the cyan colored section comes from the root layout file. Below that, we have the tomato colored section from the nested layout. Inside of that, we see the common announcement on top and the student profile where the placeholder for {children} was provided in the nested layout.
We can create a similar page.js in the teacher sub-folder inside the profile folder:
import React from 'react';
import '../../../styles/globals.css'

const teachers = {
  1: {
    name: 'Mr Smith',
    age: 30,
    subjects: ['Math', 'English'],
  },
}

export default function Page() {
  const teacher = teachers[1];

  return (
    <React.Fragment>
      <h1>Teacher profile</h1>
      <div>Name: {teacher.name}</div>
      <div>Age: {teacher.age}</div>
      <div>Teaches: {teacher.subjects.join(', ')}</div>
    </React.Fragment>
  )
}
We’ll also make some modifications to the root layout file so it’s easier to navigate between these two routes:
<div className={styles.header}>
  <div>
    <h1 style={{ marginTop: 0 }}>From layout</h1>
  </div>
  <div>
    <Link href="/profile/teacher">navigate to teacher profile</Link>
  </div>
  <div>
    <Link href="/profile/student">navigate to student profile</Link>
  </div>
</div>
With that in place, we can navigate between the /profile/student route and the /profile/teacher route and see that they both use the profile nested layout:

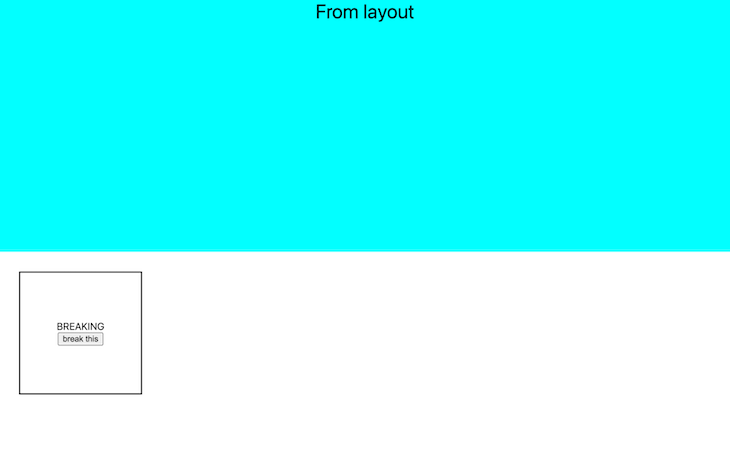
Next, let’s check out the error.js file. We’ll create a folder inside the app directory named breaking, and we’ll create separate page.js and breaking.module.css files:
import '../../styles/globals.css'
import styles from './breaking.module.css';
import { useState } from 'react';

export default function Page() {
  const [state, setState] = useState({ a: { b: { c: 'BREAKING' } } });
  return (
    <div className={styles.component}>
      <div>{state.a.b.c}</div>
      <div>
        <button onClick={(e) => setState({})}>
          Break this
        </button>
      </div>
    </div>
  );
}
At the top of the page, use client tells Next.js to render this component as a client component, not a server component, which is the default. We’re initializing the state with a nested object and reading a nested property on the first render.
When the button is clicked, we are setting the state to an empty object. When the button is clicked and the component is re-rendered, we will run into a rendering error because we are trying to access nested properties from an empty object during rendering. This should trigger the error component to come into the picture.
These are the styles we set on the breaking page component:
.component {
  width: 200px;
  height: 200px;
  display: flex;
  align-items: center;
  justify-content: center;
  border: 2px solid black;
  flex-direction: column;
}
With this CSS in place, the component looks something like the image below:
Now, let’s create an error.js file in the breaking folder. error.js will act as an error boundary in case any rendering error occurs either inside of this component or any components in its subtree:
'use client';

import '../../styles/globals.css'
import { useEffect } from 'react';
import styles from './breaking.module.css';

export default function Error({
  error,
  reset,
}) {
  useEffect(() => {
    // Log the error to an error reporting service
    console.error(error);
  }, [error]);

  return (
    <div className={styles.error}>
      <div>ERROR</div>
      <p>Something went wrong!</p>
      <button onClick={() => reset()}>Reset error boundary</button>
    </div>
  );
}
Notice that this is also a client component. Two props are passed to this component: the error prop provides more details about the error, and the reset function resets the error boundary. This should be enough to contain the error only to the component and preserve the UI as well as the state of the rest of the application.
Here is the CSS with which we are styling the error component:
.error {
  background-color: tomato;
  color: white;
}
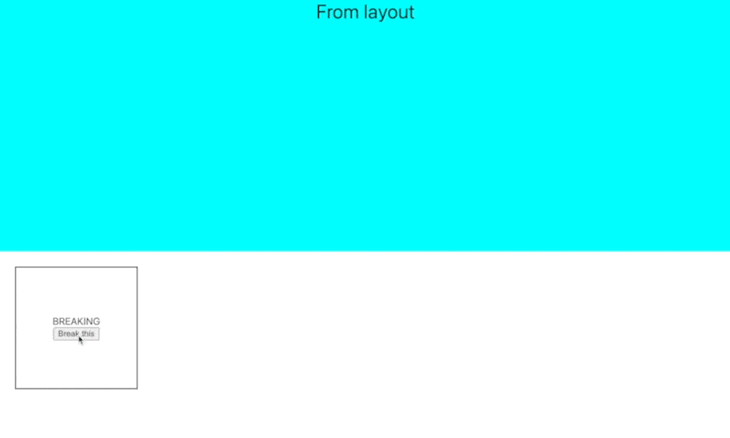
We are all set to test the error behavior. When we click the button that says “Break this,” we introduce the rendering error. But, instead of the whole application crashing, we see that only the Breaking component gets replaced with its error component and the rest of the app stays functional.
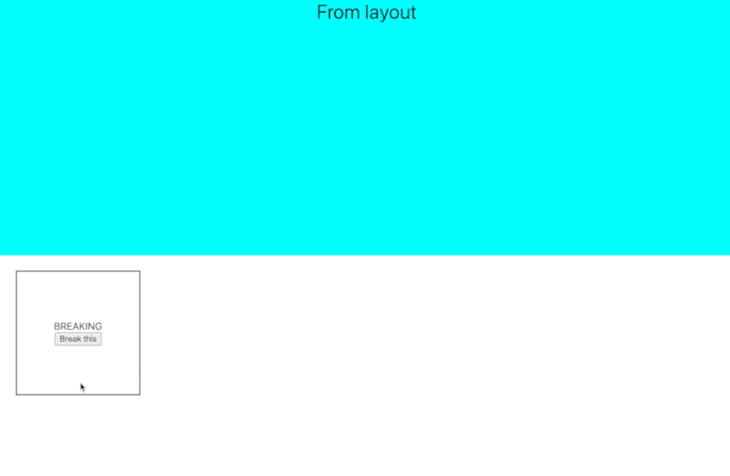
We can also reset the error boundary and get the component back as it was before the error was triggered:
To test out the impact of having the error boundary vs. not having it, we can delete the error.js file from the Breaking folder and try clicking the button once again. This time, we will see that the entire app crashes, showing us the reason for the crash:
Next, we’ll test the functionality of the loading.js file. Let’s create one inside of the same folder with the following code:
export default function Loading() {
  return <h1>Loading...</h1>
}
With that in place, we need to set up some navigation. Inside the second/page.js, we place a link to navigate to the /breaking route:
export default function Page() {
  return (<Link href="/breaking">navigate to breaking</Link>);
}
Upon clicking this link, we’ll see that before the breaking component gets mounted, the UI from the loading.js file will appear for a split second:
Lastly, we’ll explore how data fetching in Next.js 13 differs from earlier versions. All of the components inside the app directory are server components by default.
Let’s make the changes to the second.js component to fetch random cat facts from the Cat facts API:
async function getData() {
  const res = await fetch(`https://catfact.ninja/fact`);
  return res.json();
}
We’ll call this function directly inside of our React component by making it async:
export default async function Page() {
  const data = await getData();
  return (
    <p>
      {data[0].fact}
    </p>
  );
}
The code above fetches the cat fact on the server side and displays it in our component:

Do note that all this happens on the server-side and only the rendered HTML is sent to the browser.
Using the Fetch API natively inside the component provides us with the ability to cache and revalidate the requests as per our requirement.
Therefore, the previous utils like getStaticProps and getServerSideProps can be implemented via a single API, as seen below:
// Generates statically like getStaticProps.
fetch(URL, { cache: 'force-cache' });

// Generates server-side upon every request like getServerSideProps.
fetch(URL, { cache: 'no-store' });

// Generates statically but revalidates every 20 seconds
fetch(URL, { next: { revalidate: 20 } });
In this article, we covered almost all he changes that were introduced with the Next.js 13 App Router. The App Router, also known as the app directory, will slowly become the new standard of writing code with Next.js.
The official docs recommend using it for any new applications you create. For other apps that use the Pages Router, Next.js recommends incrementally migrating to the App Router.
These new features provide much more flexibility to configure our UI through the loading, error, and layout components. The simplicity of the native Fetch API on Server Components is also a great addition.
Debugging Next applications can be difficult, especially when users experience issues that are difficult to reproduce. If you’re interested in monitoring and tracking state, automatically surfacing JavaScript errors, and tracking slow network requests and component load time, try LogRocket.
LogRocket captures console logs, errors, network requests, and pixel-perfect DOM recordings from user sessions and lets you replay them as users saw it, eliminating guesswork around why bugs happen — compatible with all frameworks.
LogRocket's Galileo AI watches sessions for you, instantly identifying and explaining user struggles with automated monitoring of your entire product experience.
The LogRocket Redux middleware package adds an extra layer of visibility into your user sessions. LogRocket logs all actions and state from your Redux stores.


Modernize how you debug your Next.js apps — start monitoring for free.

Learn how to use Fallow to analyze AI-generated code, detect dead code, duplicate logic, and complexity issues, and integrate automated code quality checks into your AI-assisted development workflow.

Learn how to protect full-stack projects from NPM supply chain attacks with a practical security checklist.

Explore 15 essential MCP servers for web developers to enhance AI workflows with tools, data, and automation.

Learn how contrast-color() automatically picks accessible text colors using native CSS, without JavaScript.
Hey there, want to help make our blog better?
Join LogRocket’s Content Advisory Board. You’ll help inform the type of content we create and get access to exclusive meetups, social accreditation, and swag.
Sign up now

