One of the best capabilities of modern Web apps is providing smooth and responsive user interactions. Some common examples of such interactions are switching between tabs, loading paginated data, and filtering or sorting dynamic content.

React makes these interactions easier with its built-in and third-party state management solutions such as the useState Hook, the Context API, Redux, and more.
However, some cases demand that states persist in support of the app’s overall UX. In such scenarios, using client-side storage or databases doesn’t make much sense, as this persistence has more to do with the app’s universal usability than personalization.
This tutorial will explore handling such state changes with URL and search parameters. By the end, you’ll understand the importance of URL-based state management in React with its SEO, performance, and accessibility considerations.
N.B., As a prerequisite, you should have a general idea of working with React, React Hooks, and TypeScript. The code examples in this guide use Tailwind CSS for UI styling, but we won’t focus on it too much. You can find the source code in this GitHub repo.
When an app’s views depend on the URL for state changes, it is said to be managing states via URL. These changes in views range from small, interactive updates to huge ones that decide the core nature of a page.
Consider the following example where a URL determines the data for a Google search page with a search query and a filter:
https://www.google.com/search?q=hello&udm=7
The structure of the URL shared above contains the following elements:
/search)?) in the URL (q=hello&udm=7)q=hello and udm=7), separated by an ampersand sign (&)With their data, these URL units communicate with a backend behind the scenes to populate the frontend with relevant information. Google follows the same URL pattern for all search pages, where only the search parameters change to filter a search or perform another search operation.
Since the URL here contains all the triggers controlling the crucial information on the page, you can save or bookmark it and revisit it to access the expected data, which is a big plus from a UX perspective.
On the other hand, React apps do the exact opposite of the example above. By default, they can’t control the state from the URL unless we tell them to.
Managing states with the URL should establish a bidirectional data flow between the application states and the URL. This is important to keep the states synchronized and fresh and avoid using stale data.
Here’s what URL-based state management setup using React (with React Router DOM library) brings to the table:
Managing states with URLs is largely a client-side concern, which makes client-side rendering the key focus of this article.
It’s worth noting that URL-based state management is not a replacement for traditional state management. These two work together to enable the utilization of URLs to persist views, making the overall app more accessible and user-friendly.
Building a store-like utility is perfect for demonstrating the implementation of state management using URLs in React, as it poses some complex challenges, such as paging and filtering data.
Let’s create an app that uses a mock JSON API to fetch dummy product data in a paged fashion, as we might see on ecommerce apps. We’ll add more features later, such as filtering products on a categorical, price, and rating basis.
Setting up a React app with TypeScript is fairly simple with pnpm and Vite:
pnpm create vite@latest url-based-react-state -- --template react
Pick TypeScript as the core language, and you are good to go.
After cd-ing into the project directory and installing the required dependencies, you may add Tailwind CSS to the app or skip it if you are considering a different UI solution.
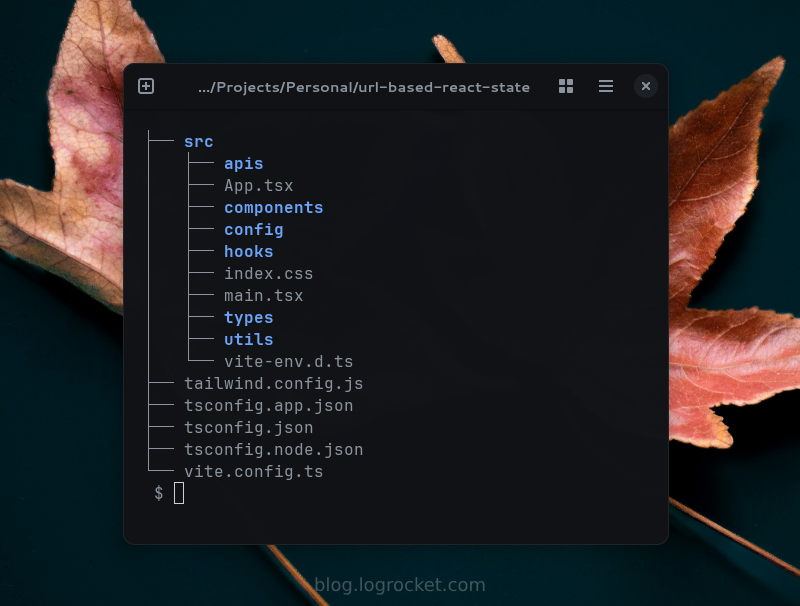
Creating dedicated directories to organize things is a best practice at the start of any project. I’m considering separating the API logic from the components and will provide them with the data they need with some custom React Hooks.
Following the same approach with the types, utilities, and configuration data, the final project folder looks something like the following:
To work with routes and the browser URL, we should install the React Router DOM package, a library built on top of the core React router for handling routing smoothly.
At this point, we should also install the TanStack Query to avoid the repeating usage of state boilerplate in our hooks and handle errors and data caching more efficiently:
pnpm add react-router-dom @tanstack/react-query
For the TanStack Query and routing to work properly, our App component should be wrapped within QueryClientProvider, which should be placed inside the BrowserRouter component as shown below:
// src/Main.tsx
import { BrowserRouter } from "react-router-dom";
import { QueryClient, QueryClientProvider } from "@tanstack/react-query";
/* Other imports... */

const queryClient = new QueryClient();

createRoot(document.getElementById("root")!).render(
  <StrictMode>
    <BrowserRouter>
      <QueryClientProvider client={queryClient}>
        <App />
      </QueryClientProvider>
    </BrowserRouter>
  </StrictMode>
);
We can now add routes to the App component according to our requirements and hand them the components they are supposed to show:
// src/App.tsx

export default function App() {
  return (
    <>
      <Navbar />
      <Routes>
        <Route path="/" element={ /* HomePage component */ } />
        <Route path="*" element={ /* NotFoundPage component */ } />
      </Routes>
    </>
  );
}
As discussed, we are using the DummyJSON API to populate views in our app. If you have a backend API of your own, you may use it instead with the required changes in types and URL endpoints.
Here’s the URL the API provides us to fetch a list of products:
https://dummyjson.com/products/?limit=10&skip=0
The limit and skip keys in the API URL determine the number of products to load and skip respectively. Both these search parameters work together to achieve different sets of data. The structure of the response we receive upon requesting this URL looks something like this:
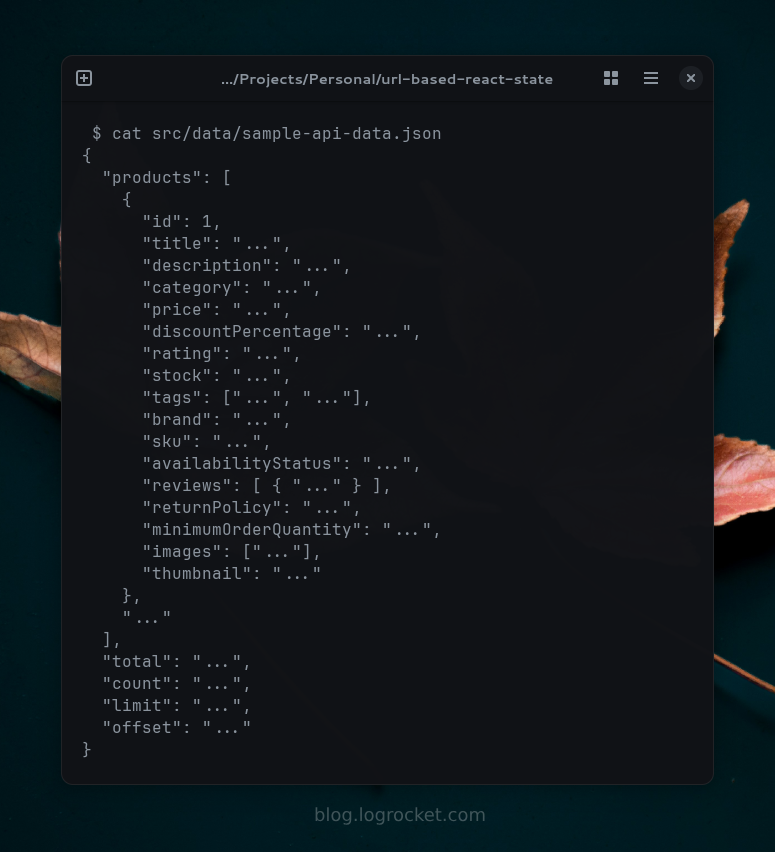
Based on this JSON schema, we can construct types to handle different kinds of data in our app. You can also use tools like JSON2TS to convert the JSON schema instantly into TypeScript types:
// src/types/product.ts

// A single product
export interface Product {
  id: number;
  title: string;
  description: string;
  price: number;
  ...
}

// A collection of products with additional response info
export interface ProductsResponse {
  products: Product[];
  total: number;
  skip: number;
  limit: number;
}

// Types for Query params
export ProductQueryParams {
  limit?: string;
  skip?: string;
}
Some types will be used repeatedly throughout the project. We should group such types based on relevance and maintain them separately for better organization.
Let’s declare some configuration options before moving to the API logic part. These values should go right into the api.ts and pagination.ts files of the config folder:
// src/config/api.ts

export const API_CONFIG = {
  BASE_URL: "https://dummyjson.com",
  ENDPOINTS: {
    PRODUCTS: "/products",
    PRODUCTS_BY_CATEGORY: "/products/cateogry",
    PRODUCT_CATEGORIES: "/products/categories",
  },
  buildUrl: (endpoint: string) => `${API_CONFIG.BASE_URL}${endpoint}`,
};

// src/config/pagination.ts
export const PAGINATION_CONFIG = {
  ITEMS_PER_PAGE: 9,
  INITIAL_ITEMS_TO_SKIP: 0,
};
The above definitions are self-explanatory and will provide crucial data like API URLs, the number of products per page, and more. The value 9 for ITEMS_PER_PAGE will facilitate the construction of a 3×3 product card grid later.
Using these configuration options, we can set up utility functions to neatly construct our API URLs:
// src/utils/getApiUrls.ts

export const getProductsUrl = () =>
  API_CONFIG.buildUrl(API_CONFIG.ENDPOINTS.PRODUCTS);
After declaring types, we should create a new file in the apis directory, name it productApi.ts, and define an object called productApi in it. This object will act as an abstraction layer over the underlying DummyJSON API.
Since this object will contain endpoint functions that communicate with the API to bring us the data we need to show on the frontend, we can call it the API wrapper or API client. We may now define separate methods inside it to load a list of products, an individual product, categories, etc.
Let’s define getProducts, which takes an optional object (params) of type ProductQueryParams as an argument. With the limit and skip properties of params, we can construct a query string and attach it to the API URLs for loading the data in a paged fashion:
// src/apis/productApi.ts

export const productApi = {
  async getProducts(params?: ProductsQueryParams) {
    const queryParams = new URLSearchParams();

    // Add pagination params
    queryParams.append(
      "limit",
      (params?.limit ?? PAGINATION_CONFIG.ITEMS_PER_PAGE).toString()
    );
    queryParams.append(
      "skip",
      (params?.skip ?? PAGINATION_CONFIG.INITIAL_ITEMS_TO_SKIP).toString()
    );

    const response = await fetch(`${getProductsUrl()}?${queryParams}`);
    if (!response.ok) {
      throw new Error(
        `API Error: ${response.status} - failed to load products.`
      );
    }

    return response.json() as Promise<ProductResponse>;
  }
};
The above definition of the getProduct method illustrates the use of native JavaScript’s URLSearchParams object for constructing a query string (queryParams) with the limit and skip values.
It then constructs the required API URL with queryParams, uses the fetch API to get a response from the DummyJSON server, and returns the JSON data as a promise after the basic error checking.
We have a choice to use this API method directly in our components. However, using a custom hook to construct the data and paging logic is a better approach.
This custom hook communicates with our API client using certain search parameters of our app URL and generates loading, error, and data states accordingly.
With the useSearchParams Hook from the React Router DOM library, we can grab the value of search parameters from the query string of the app URL. In this case, we need the value of the page parameter, which, if not found, defaults to 1. This means the first page is always shown when the page search parameter is not found:
// src/hooks/useProducts.ts

export function useProducts(limit: number) {
  const [searchParams, setSearchParams] = useSearchParams();
  const currentPage = Number(searchParams.get("page")) || 1;
}
When managing data, loading, and error states, the first thing that comes to mind is a big pile of useState Hooks. With TanStack Query, we don’t need all that boilerplate code to manage states. On top of that, we can add caching, conditional loading, error handling, and prefetching support right out of the box:
// src/hooks/useProducts.ts

export function useProducts(limit: number) {
  // Previously declared states...

  const { data, isLoading, error } = useQuery({
    queryKey: ["products", { limit, skip }],
    queryFn: () => productsApi.getProducts({ limit, skip })
  });
}
When setting up a TanStack query, we provided an identity to the query with queryKey. We then gave queryFn a reference to our getProducts API function to load the data. If limit or skip values change, the query will automatically re-call the API function. You may specify other properties to the query to optimize it your way.
We can then calculate the total number of pages (totalPages) by dividing the total value available through the API response by limit we are using as a parameter for the useProducts Hook.
Defining a function to facilitate pagination is apt here, as we have all the info we need to control the paging and navigation between pages. The totalPages and currentPage values will help us formulate a pagination logic:
// src/hooks/useProducts.ts

export function useProducts(limit: number) {
  // Previously declared states...

  const totalPages = Math.ceil((data?.total || 0) / limit);

  const goToPage = useCallback(
    (page: number) => {
      if (page >= 1 && page <= totalPages) {
        setSearchParams((prev) => {
          const params = new URLSearchParams(prev);
          params.set("page", page.toString());
          return params;
        });
      }
    }, [totalPages, setSearchParams]
  );
}
The useProducts Hook returns a long list of states, values, and methods that we can later access in a component:
// src/hooks/useProducts.ts

export function useProducts(limit: number) {
  // ...

  return {
    products: data?.products || [],
    total: data?.total || 0,
    isLoading,
    error,
    currentPage,
    totalPages,
    goToPage,
    hasNext: currentPage < totalPages,
    hasPrevious: currentPage > 1,
    goToNext: () => currentPage < totalPages && goToPage(currentPage + 1),
    goToPrevious: () => currentPage > 1 && goToPage(currentPage - 1),
  };
}
With the API client and useProducts Hook to do all the heavy lifting, the structure and functioning of components will be pretty straightforward.
Let’s create three components in the components/product directory that handle the rendering of individual cards, a grid of such cards, and the pagination of the card grid.
The ProductCard component takes the product data as a prop and uses its properties, such as title, name, price, thumbnail, etc., to give the card some identity. Note that this component will be part of the ProductGrid component, which we will define in the next segment:
// src/components/product/ProductCard.tsx

export function ProductCard({ product }: { product: Product }) {
  return (
    <article className="...">
      <div className="...">
        <h2 className="...">
          {product.title}
        </h2>

        <div className="...">
          <p className="...">
            ${product.price}
          </p>
        </div>
      </div>
    </article>
  );
}
Next, define a ProductGrid component that uses a collection of product data, allowing us to loop over it and assign the required data from each item to the ProductCard component:
// src/components/product/ProductGrid.tsx

export default function ProductGrid({ products }: { products: Product[] }) {
  return (
    <div className="...">
      {products.map((product) => (
        <ProductCard key={product.id} product={product} />
      ))}
    </div>
  );
}
The ProductPagination component efficiently controls the paged navigation using several props. It will receive all values for these props later in the ProductPage component through the useProducts Hook:
// src/components/product/ProductPagination.tsx

interface PaginationProps {
  currentPage: number;
  totalPages: number;
  onNext: () => void;
  onPrevious: () => void;
  hasNext: boolean;
  hasPrevious: boolean;
  isLoading: boolean;
}

export default function Pagination({
  currentPage,
  ...
  isLoading,
}: PaginationProps) {
  return (
    <nav
      className="..."
      aria-label="Pagination"
    >
      <button
        onClick={onPrevious}
        disabled={!hasPrevious || isLoading}
        aria-label="Previous page"
      >
        Previous
      </button>

      <span className="text-sm text-gray-700">
        Page {currentPage} of {totalPages}
      </span>

      <button
        onClick={onNext}
        disabled={!hasNext || isLoading}
        aria-label="Next page"
      >
        Next
      </button>
    </nav>
  );
}
Let’s put all these pieces together in the ProductsPage component. We grab all the necessities using the useProducts Hook first, and then provide these values appropriately to the ProductGrid and ProductPagination components as shown below:
// src/components/pages/ProductPage.tsx

export default function ProductsPage() {
  const {
    products,
    currentPage,
    ...
    isLoading
  } = useProducts(PRODUCTS_PER_PAGE);

  if (error) {
    return <div>{error.message}</div>;
  }

  return (
    <main>
      <div className="...">
        {loading ? (
          <div>Loading...</div>
        ) : (
          <>
            <ProductGrid products={products} />
            <Pagination
              currentPage={currentPage}
              ...
              isLoading={loading}
            />
          </>
        )}
      </section>
    </main>
  );
}
One last thing remaining is to add a route in the App component and point it to the ProductsPage component. You may also set it to the main path, but I’m using the /products path because I’m using the main page to explain what this app does. You should also use a fallback component when the requested path doesn’t match any routes we have set up here:
// src/App.tsx

export default function App() {
  return (
    <>
      <Navbar />
      <Routes>
        <Route path="/" element={<HomePage />} />
        <Route path="/products" element={<ProductsPage />} />
        <Route path="*" element={<NotFoundPage />} />
      </Routes>
    </>
  );
}
After running the app, if you navigate to the /products route, you should see several products and a nice pagination that allows you to move between different product pages. You can now bookmark any of these pages and visit them later to continue navigating from exactly where you left off.
The product pagination part was pretty straightforward. We checked for the page query and worked around it. However, things get more complex when you also want to utilize multiple queries in the query string, which should also yield the expected results.
One such case is filtering data based on multiple parameters. The API we are using offers many options to request filtered data. Let’s implement two features to filter our products based on:
ProductsGrid component based on these categoriesImplementing these two filters and making them work together while respecting pagination can be a challenging task.
The sorting can be achieved using the API URL with sortBy and order query parameters as shown in the URL below:
https://dummyjson.com/products?sortBy=price&order=asc
The DummyJSON provides sorting in three forms, title, pricing, and rating. The order query is supported only by pricing and title-based sorting.
This also requires adding sortBy, order, and category keys in the ProdcutParams type. You may make it stricter by specifying values for sortBy. For now, I’m keeping it a string only:
// src/types/product.ts
/* Previously added types... */

export type ProductsQueryParams = {
  limit?: number;
  skip?: number;
  sortBy?: string | null;
  order?: "asc" | "desc" | null;
  category?: string | null;
};
If the sortBy and order search parameters are provided to the getProducts method, we will add them to the existing queryParams object.
Also, the loading of products according to the category is possible from the following URL structure:
https://dummyjson.com/products/category/smartphones
We can easily form a separate URL for the category-based loading of products by grabbing the category slug from the query string. The modified getProducts method would look something like this:
// src/apis/productApi.ts

export const productsApi = {
  async getProducts(params?: ProductsQueryParams) {
    const queryParams = new URLSearchParams();

    // Add pagination params
    queryParams.append(
      "limit",
      (params?.limit ?? PAGINATION_CONFIG.ITEMS_PER_PAGE).toString()
    );
    queryParams.append(
      "skip",
      (params?.skip ?? PAGINATION_CONFIG.INITIAL_ITEMS_TO_SKIP).toString()
    );

    // Add optional sort params
    if (params?.sortBy && params?.order) {
      queryParams.append("sortBy", params.sortBy);
      queryParams.append("order", params.order);
    }

    // Pick the right URL
    const url = params?.category
      ? getCategoryProductsUrl(params.category)
      : getProductsUrl();

    const response = await fetch(`${url}?${queryParams}`);

    if (!response.ok) {
      throw new Error(
        `API Error: ${response.status}; failed to load products.`
      );
    }

    return response.json() as Promise<ProductsResponse>;
  },
};
Getting a list of all the categories with labels and slugs is possible with the following API URL:
https://dummyjson.com/products/cateogories/
Adding a method (getCategories) to load these categories is simple compared to the getProducts method:
// src/apis/productApi.ts

export const productsApi = {
  async getProducts(params?: ProductsParams) { ... },
  async getCategories() {
    const response = await fetch(`${PRODUCTS_URL}/categories`);

    if (!response.ok) {
      throw new Error(
        `API Error: ${response.status}; failed to load categories.`
      );
    }

    return response.json() as Promise<ProductCategory[]>;
  }
};
We have to optimize the useProducts Hook to include sorting and category-based loading of products:
// src/hooks/useProducts.ts

export function useProducts(limit: number) {
  const [searchParams, setSearchParams] = useSearchParams();

  const currentPage = Number(searchParams.get("page")) || 1;
  const skip = (currentPage - 1) * limit;
  const sortBy = searchParams.get("sortBy");
  const order = searchParams.get("order") as "asc" | "desc" | null;
  const category = searchParams.get("category");

  const { data, isLoading, error } = useQuery({
    queryKey: ["products", { limit, skip, sortBy, order, category }],
    queryFn: () =>
      productsApi.getProducts({
        limit,
        skip,
        sortBy: sortBy || null,
        order,
        category,
      }),
  });

  // Pagination logic...

  return { ... };
}
Also, we should add a new useCategories Hook that delivers a list of categories in a label-slug key-value pair, which is pretty simple:
// src/hooks/useCategories.ts

export function useCategories() {
  return useQuery({
    queryKey: ["categories"],
    queryFn: () => productsApi.getAllCategories(),
  });
}
Let’s set up a Sidebar component that uses a select combo box to trigger the sorting logic we just established. Adding some configuration for our sort options is a good starting point here. We can iterate through these options to form a select combo box later:
// src/config/sorting.js

export const SORT_OPTIONS = [
  { label: "Title (A-Z)", value: "title-asc" },
  { label: "Title (Z-A)", value: "title-desc" },
  { label: "Price (Low to High)", value: "price-asc" },
  { label: "Price (High to Low)", value: "price-desc" },
  { label: "Rating (High to Low)", value: "rating-desc" },
];
In the Sidebar.tsx file, we can get the sortBy and order search parameters from our app URL with the help of the useSearchParams Hook provided by React Router DOM and use them to prepare the selected value for the select box dedicated to sorting the products:
// src/components/layout/Sidebar.ts

export default function Sidebar() {
  const [searchParams, setSearchParams] = useSearchParams();

  const sortBy = searchParams.get("sortBy");
  const order = searchParams.get("order");

  const currentSortValue = sortBy && order ? `${sortBy}-${order}` : "";
}
We can then set up a handler function for the sorting select box to get the input value and set sortBy and order query parameters in the app URL using it:
// src/components/layout/Sidebar.ts

export default function Sidebar() {
  // ...

  const handleSortChange = (event: React.ChangeEvent<HTMLSelectElement>) => {
    setSearchParams((prev) => {
      const params = new URLSearchParams(prev);
      const [sortBy, order] = event.target.value.split("-");
      if (sortBy && order) {
        params.set("sortBy", sortBy);
        params.set("order", order);
      } else {
        params.delete("sortBy");
        params.delete("order");
      }
      params.set("page", "1");
      return params;
    });
  };
}
We can then use the SORT_OPTIONS to construct our select combo and provide it with the right values we just established above:
// src/components/layout/Sidebar.ts

export default function Sidebar() {
  // ...

  return (
    <aside className={`hidden md:block w-60 flex-shrink-0 ${className}`}>
      <h2>Sort products</h2>
      <label htmlFor="sort">
        Sort By
      </label>
      <select
        id="sort"
        value={currentSortValue}
        onChange={handleSortChange}
        className={selectClassName}
      >
        <option value="">Default Sorting</option>
        {SORT_OPTIONS.map((option) => (
          <option key={option.value} value={option.value}>
            {option.label}
          </option>
        ))}
      </select>
    </aside>
  );
}
Sidebar componentFinally, let’s add the Sidebar component to the ProductPage component:
// components/pages/ProductPage.tsx

export default function ProductsPage() {
  const { ... } = useProducts(PRODUCTS_PER_PAGE);

  if (error) {
    return <div>{error.message}</div>;
  }

  return (
    <main>
      <Sidebar />
      <div className="...">
        {loading ? (
          <div>Loading...</div>
        ) : (
          <>
            <ProductGrid products={products} />
            <Pagination
              currentPage={currentPage}
              totalPages={totalPages}
              onNext={goToNext}
              onPrevious={goToPrevious}
              hasNext={hasNext}
              hasPrevious={hasPrevious}
              isLoading={loading}
            />
          </>
        )}
      </section>
    </main>
  );
}
Running the app and visiting the /products path should show you something like the following, where loading and filtering are managed through the URL:
I’ve also implemented the loading of individual products when clicking corresponding card titles in the grid. You should also consider implementing it as an assignment.
You typically don’t need useCallback or useMemo Hooks with TanStack Query, which is highly optimized and handles memoization pretty well by default.
If you choose not to use it, always consider using useCallback in your hooks to cache a function between re-renders and avoid unnecessary API calls. Also, implement useMemo if you want to cache a response for some time.
The examples we saw in this tutorial maintain browser history, which can be expensive memory-wise with frequent URL updates. Consider using the useNavigate Hook and replacing history entries instead of pushing them to the browser history:
import { useNavigate } from "react-router-dom";
const navigate = useNavigate();
// ...

navigate(`?${newParams.toString()}`, { replace: true });
If you expand the app further and implement a product search feature, an API call is made whenever something is typed in the search box. To avoid such frequent updates and rapid URL updates, you should use a pattern like this with Lodash’s debounce method:
import debounce from 'lodash.debounce';
import { useSearchParams } from 'react-router-dom';

export default function Sidebar() {
  const [searchParams, setSearchParams] = useSearchParams();

  const updateSearchFilter = useCallback(
    debounce((searchTerm: string) => {
      setSearchParams(prev => {
        const params = new URLSearchParams(prev);
        params.set('search', searchTerm);
        return params;
      });
    }, 300),
    [setSearchParams]
  );

  return (
    { /* ... */ }
    <input
      type="text"
      onChange={(e) => updateSearchFilter(e.target.value)}
      placeholder="Search products..."
    />
  );
}
This will keep URL states and API calls in sync, avoiding additional load on your app’s frontend as well as its backend.
The React Router DOM library solves browser accessibility by allowing users to use backward/forward browser navigation, which is absent in React apps by default.
General accessibility is pretty much the same as what we usually do with our React apps; we use ARIA to make the app accessible for screen readers and follow general accessibility practices.
For URL-based state management, always focus on providing the most commonly used information through the URL. Avoid exposing information you don’t want to provide publicly through the API, which mostly depends on how your backend and its API are built. Keep an eye on API security and its correct implementation.
URLs with different parameters are treated as separate pages by search engines, which is great from an SEO point of view. Search crawlers grab important pages on your app through internal links on your site, therefore consider implementing hyperlinks over input buttons for internal linking.
You should also consider creating a dynamic XML sitemap for such unique pages and submit it to major search engines for better visibility.
If a URL parameter doesn’t make any significant or unique change to the content of the rendered page, consider implementing URL canonicalization to avoid duplicate content problems. Here’s an example to add the right canonical URL to the paginated or filtered products using the React Helmet Async package for React:
import { Helmet } from 'react-helmet-async';
import { getCategoryProductsUrl, getProductsUrl } from '@/utils/getApiUrls';

export default function ProductPage() {
  const [searchParams] = useSearchParams();
  const category = searchParams.get('category');

  return (
    <>
      <Helmet>
        <link
          rel="canonical"
          href={`${category ? getCategoryProductsUrl(category) : getProductsUrls()}`}
        />
      </Helmet>

      {/* ... */}
    </>
  );
}
In this guide, we explored managing state with URL and search parameters in React. We covered both simple and complex patterns through a store-like application, the source code of which you can find in this GitHub repo.
We also briefly examined some SEO, accessibility, and performance considerations for URL-based states.
I hope this tutorial helped you learn something new! If you got stuck anywhere, feel free to share your suggestions and questions in the comment section.
Install LogRocket via npm or script tag. LogRocket.init() must be called client-side, not
server-side
$ npm i --save logrocket

// Code:

import LogRocket from 'logrocket';
LogRocket.init('app/id');
// Add to your HTML:

<script src="https://cdn.lr-ingest.com/LogRocket.min.js"></script>
<script>window.LogRocket && window.LogRocket.init('app/id');</script>

Learn how to set up Meilisearch, index documents, and build keyword, semantic, and hybrid search with AI-powered retrieval.

Compare pnpm and npm across security defaults, disk usage, dependency strictness, and workspace policy to decide which package manager fits your project.

I migrated 20 production-style components from Tailwind to StyleX. Here’s what the data showed about LOC, CSS bundle size, build time, and type safety.

A guide for using JWT authentication to prevent basic security issues while understanding the shortcomings of JWTs.
Would you be interested in joining LogRocket's developer community?
Join LogRocket’s Content Advisory Board. You’ll help inform the type of content we create and get access to exclusive meetups, social accreditation, and swag.
Sign up now

