Editor’s note: This post was updated by Timonwa Akintokun on 14 October 2024 to cover deployment automation using GitHub Actions.
There are many ways to deploy a React app for free such as using:
In this guide, we’ll explore these processes in more detail, discussing each of their unique features, when to use them, and how they compare to each other. We will also demonstrate how to use GitHub Actions to automatically deploy our applications using said platforms.
All the services described in this post are free with no hidden credit card requirements until you pass a certain limit, which is usually based on view counts or bandwidth. I’ve also included a brief list of some other platforms that are worth checking out but didn’t quite make the list.
![]()
Vercel is a popular choice for deploying React applications due to its seamless integration with Next.js, a framework created by the same team behind Vercel. Vercel offers the following features and benefits:
Vercel also integrates well with Git repositories, allowing you to deploy your applications automatically when you push your code to your repository. This makes it a great choice for developers who want to automate their deployment process. It provides preview URLs for each deployment from pull requests and supports custom domains for production deployments.
Although it doesn’t offer a backend-as-a-service like platforms like Firebase, Vercel does provide easy-to-manage serverless functions without needing a full backend solution. This makes it a great choice for projects that require serverless functions or static site generation.
So, if your project is built with Next.js or if you’re planning to use serverless functions, Vercel is an excellent choice. However, if your project requires a complex backend, you might need to consider other options. Vercel offers a free hobby plan, and its Pro plan starts at $20 per user per month.
You can deploy on Vercel using their dashboard as well as CLI. We will briefly touch on the Vercel CLI deployment. The first step is to install Vercel globally:
npm i -g vercel
Once Vercel is installed, run the following command:
vercel login
You’ll be prompted to choose a login option:
Vercel CLI 37.12.0
? Log in to Vercel (Use arrow keys)
❯ Continue with GitHub
  Continue with GitLab
  Continue with Bitbucket
  Continue with Email
  Continue with SAML Single Sign-On
 ─────────────────────────────────
  Cancel
After selecting an option and logging in, go to your project root directory and run the following command:
vercel
You’ll be prompted to answer a few questions. First, confirm that this is the project you want to deploy:
? Set up and deploy “path to your project”? [Y/n] y
Next, you’ll be asked in which account you want to deploy this app. It’ll offer you a default option; just hit Enter.
After this, you’ll be asked whether to link this to the existing project. Answer N:
? Which scope do you want to deploy to? Your Vercel Account
? Link to existing project? [y/N] n
The next step is to name your project and specify the path. Because we’re already in the project directory, it’ll be the same as the default option, ./:
? What’s your project’s name? project-name
? In which directory is your code located? ./
It will autodetect whether your project was initialized using Create React App and configure the settings accordingly. Otherwise, it will ask you to set them. Answer No if you’re asked to override the settings:
Auto-detected Project Settings (Create React App):
- Build Command: `npm run build` or `react-scripts build`
- Output Directory: build
- Development Command: react-scripts start
? Want to override the settings? [y/N] n
Your project will now be deployed:
� Deployed to production. Run `vercel --prod` to overwrite later (https://vercel.link/2F).

Firebase is a complete backend-as-a-service platform created by Google that offers more than just hosting. It allows you to integrate with other Google products and provides you with a wide range of tools like authentication, machine learning, analytics, and crash reporting, to name a few.
Firebase offers a free Spark plan, and its Blaze plan follows a pay-as-you-go pricing model. Its real-time database, which it is popularly known for, can be used to provide real-time synchronization across all users in your applications, which other platforms do not offer.
Unlike other platforms that focus more on frontend and serverless deployment, Firebase provides you with everything you need to build a full-stack application, from hosting to database, analytics, and authentication.
If you are looking for a platform that provides all the tools you need for a full-stack application, provides you with real-time data synchronization, or offers seamless integration with other Google services, Firebase is the tool for you.
But if all you want to do is host your application or build a static website, then Firebase might not be the right one for you. In that case, you might want to consider other platforms like Vercel, GitHub Pages, or Netlify.
First, install the Firebase CLI globally to make it easier to use in different projects:
npm install -g firebase-tools
Log in with your Firebase or Google account:
firebase login
Next, go to your project root directory and run the following command to initialize a Firebase project:
firebase init
Choose the hosting option by clicking Space on Hosting, and then hit Enter:
? Which Firebase features do you want to set up for this directory? Press Space to select features, then Enter to confirm your choices.
(Press <space> to select, <a> to toggle all, <i> to invert selection, and <enter> to proceed)
❯◯ Realtime Database: Configure a security rules file for Realtime Database and (optionally) provision default instance
 ◯ Firestore: Configure security rules and indexes files for Firestore
 ◯ Functions: Configure a Cloud Functions directory and its files
 ◯ Hosting: Configure files for Firebase Hosting and (optionally) set up GitHub Action deploys
 ◯ Storage: Configure a security rules file for Cloud Storage
 ◯ Emulators: Set up local emulators for Firebase products
 ◯ Remote Config: Configure a template file for Remote Config
(Move up and down to reveal more choices)
Because you already created a project in the first step, choose Use an existing project when asked to choose the Firebase project associated with your application. Otherwise, you can select Create a new project:
=== Project Setup

First, let's associate this project directory with a Firebase project.
You can create multiple project aliases by running firebase use --add,
but for now we'll just set up a default project.

? Please select an option: (Use arrow keys)
❯ Use an existing project
  Create a new project
  Add Firebase to an existing Google Cloud Platform project
  Don't set up a default project
If you’ve already built the project, you’ll be asked whether to overwrite or not. Answer No:
? File public/index.html already exists. Overwrite? No
With this, firebase init is complete.
Before proceeding to the next step, build your React project with the command npm run build. The next and final step is to deploy the project. To do so, run the command firebase deploy. Once the process completes, you’ll see the deployed links in the terminal:
+  Deploy complete!

Project Console: https://console.firebase.google.com/project/react-project/overview
Hosting URL: https://react-project.web.app
![]()
Netlify is a robust platform offering a modern workflow for building and deploying web applications. It supports continuous and automated deployment from Git repositories like Vercel and offers a range of features like:
With its form-handling feature, you do not need to rely on third-party services to collect form data, which isn’t available on other platforms. It is also a great option for static site generation (SSG) and Jamstack deployments, as it provides a seamless integration with popular static site generators like Gatsby, Hugo, and Jekyll.
Netlify’s split testing feature allows you to test different versions of your site with a percentage of your users, which can be useful for A/B testing or feature rollouts. It also provides a global content delivery network (CDN) that ensures your applications load quickly regardless of where your users are located.
Netlify offers a free tier with essential features, and its paid plans start at $19 per month. It is an excellent choice for developers who want to deploy their applications quickly and easily without worrying about the infrastructure or server setup.
Netlify might not be the best choice for projects that require a full backend solution, as it does not provide a built-in database like Firebase. However, it does offer seamless integration with third-party services like FaunaDB, which can be used as a database for your applications.
To deploy the latest build, run npm run build beforehand and install netlify-cli globally:
npm install netlify-cli -g
Then log in to Netlify by running the command:
netlify login
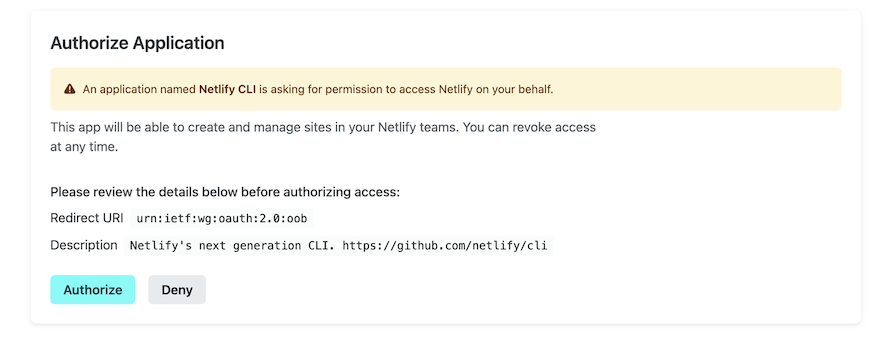
You will be redirected to the browser and prompted to log into your account and grant access to Netlify CLI. Click Authorize:
Then go to the root directory of your project and run the following command to deploy it on Netlify:
netlify deploy
Follow through the prompts that come after authentication. First, you’ll be asked to link this project to a site, as this is the first time you’re deploying this app. Select Create configure a new site:
This folder isn't linked to a site yet
? What would you like to do?
❯ Link this directory to an existing site
  +  Create & configure a new site
Then, you’ll be asked for the Team. Unless you’re already using Netlify on your local machine, chances are you will see only one option with your name; select it:
? Team:
ASHUTOSH KUMAR SINGH's team
The next prompt is Site name. This is an optional field. If you already have a name in mind, type that and hit Enter. If you leave this blank, Netlify will give this site a random name that you can change later:
Site name (leave blank for a random name; you can change it later):
After this step, your site will be created, and you’ll be asked for a Publish directory. Type “public” or “dist” or “.” to select the where the publish directory entry is:
Site Created

Admin URL: ...
URL:       ...
Site ID:   ...


Adding local .netlify folder to .gitignore file...
Linked to serene-fermi-6d50a8
Please provide a publish directory (e.g. "public" or "dist" or "."):
? Publish directory (.)
With this, your site will be published, and you will be provided with a draft URL:
...
Edge function logs: https://app.netlify.com/sites/serene-fermi-6d50a8/deploys/5f1194c3b903cadb238eabb4
Website draft URL: https://5f1194c3b903cadb238eabb4--serene-fermi-6d50a8.netlify.app
...
Go to this draft URL. If everything checks out, you can deploy the website to the main site URL. Run the following command to deploy to production:
netlify deploy --prod
It will ask for the Publish directory one final time. Type “public” or “dist” or “.” and hit Enter. You’ll be provided with two URLs:
Unique Deploy URL: https://5f11977085ef8fafe7535ff9--serene-fermi-6d50a8.netlify.app
Website URL:       https://serene-fermi-6d50a8.netlify.app
The difference between these two URLs is that the Unique Deploy URL points to a specific version of your application. For example, if you make a change in your application and deploy again, you’ll get another Unique Deploy URL that is specific to that change. Your Website URL is the main URL, which corresponds to the latest version of your application.
![]()
GitHub Pages is a static site hosting service directly integrated into the GitHub platform. It’s a great choice for hosting simple static websites directly from a GitHub repository. It is free, has unlimited bandwidth and storage for public repositories, allows for custom domains to your sites, provides free SSL certificates for your sites, and requires minimal setup. However, it lacks the flexibility that other hosting platforms provide.
If you need to host private repositories or have more advanced features, you should consider other hosting platforms, as Github Pages allows you to host private repos on its paid plans and is not suitable for dynamic web applications.
To deploy a website on GitHub, create a repository for it on GitHub if it doesn’t exist yet. On the repo page, click on the Settings tab, navigate to the Code and Automation section in the sidebar, and click on Pages.
Under the Build and deployment section, go to the Source dropdown and select Deploy from a branch. In the Branch section, select the branch you want to deploy and select the site’s entry file. GitHub will then build the site for you and provide you with its URL once it is completed. After the first deployment, it may take up to 60 minutes for the site to be available:

![]()
Surge is a simple command-line interface tool for publishing web applications. It has the simplest command-line deployment process compared to all other options, making it straightforward to use. With just one command, you can deploy your static site to Surge.
Surge allows you to add custom domains to your static sites and provides free SSL certificates. However, it doesn’t require Git integration like GitHub pages and GitLab Pages. It also automatically handles cache invalidation, which is usually a manual step on platforms like AWS Amplify or GitHub Pages.
Surge is a solid choice for developers looking for fast, simple static site deployment with zero overhead and CLI-first workflow. However, because it only supports static webpages, it might not be suitable for applications with server-side rendering or backend logic. Surge offers a free basic plan, and its Professional plan is priced at $30 per month.
To deploy the latest build of the project, run the command npm run build in the project root directory to build the project:
npm run build
Then, install Surge CLI globally:
npm install --global surge
Run surge inside the build folder:
cd build
surge
First, you’ll be asked for an email and password:
Welcome to surge! (surge.sh)
Login (or create surge account) by entering email & password.
      email: [email protected]
      password:
Then, in the terminal, you’ll be asked to confirm your project directory. Hit Enter. You’ll see a suggested domain for your project. You can either use the suggested domain or enter your preferred domain, then hit Enter:
    project: D:\code\react-example-deploy\build\
    domain: tremendous-person.surge.sh
This will publish your application:
Success! - Published to tremendous-person.surge.sh
You might want to rename index.html to 200.html in your build folder before surging to support the HTML5 pushState API, which is used by React libraries for routing. If you run into an aborted error, try to run the surge command again.
![]()
Render, the winner of Startup Battlefield at Disrupt SF 2019, offers a fully managed cloud platform where you can auto-deploy web applications directly from your Git repositories. It simplifies continuous deployment and provides pull request previews similar to Netlify or Vercel. It also includes support for monorepos and more complex infrastructure and offers easier database integration.
Like Firebase, Render supports full-stack applications, but it allows you to deploy more traditional backends (Node.js, Python, Ruby) alongside frontend React apps and supports server-side rendering. Its interface is also less complicated than Firebase or AWS Amplify.
If you need a middle ground between simple static hosting and complex cloud platforms, Render might be the one for you. It offers more flexibility than GitHub Pages but less complexity than AWS Amplify. However, if you’re looking for a platform with a broader range of services like machine learning or IoT, you might need to consider other options. Render offers a free individual plan, and its paid plans start from $19 per user per month.
Before you deploy, make sure your project is stored in a Git repository, and then move on to creating an account on Render.
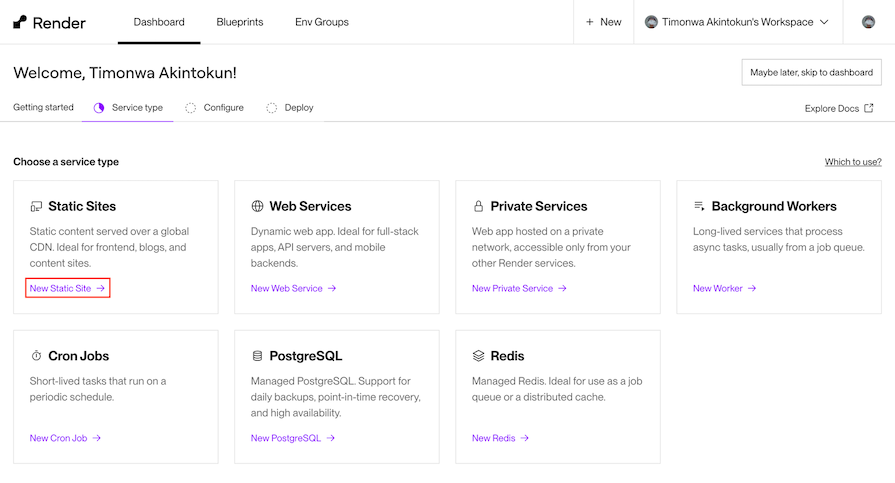
Next, click New Static Site on the dashboard:
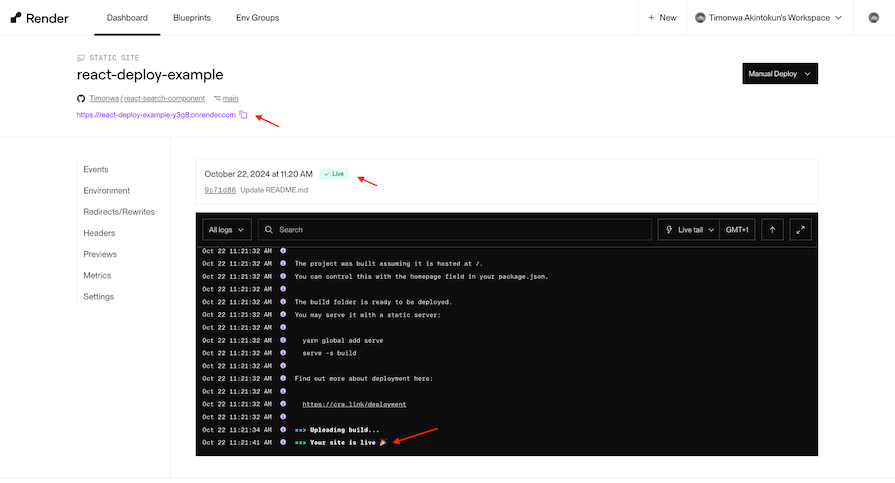
Connect your GitHub or GitLab account. Once connected, search for your project repository and select it. After this, you’ll need to give your web service a unique name. Render will auto-detect if your application is bootstrapped with Create React App and fill the configuration accordingly.
Click Create Static Site, after which your project will be deployed:
![]()
GitLab Pages is a feature in GitLab that allows you to build, test, and deploy static websites directly from a GitLab project/repository. GitLab Pages:
However, similar to GitHub Pages or Surge, it doesn’t support server-side languages.
Unlike GitHub Pages, it provides free hosting for private repositories and has DevOps-oriented features that provide tighter integration with CI/CD pipelines than GitHub Pages. It also offers a simpler setup for GitLab users than external services like Vercel or Netlify.
If you already use GitLab for version control and CI/CD and you want to host a static website without using an external hosting service, then GitLab Pages might be the right choice for you.
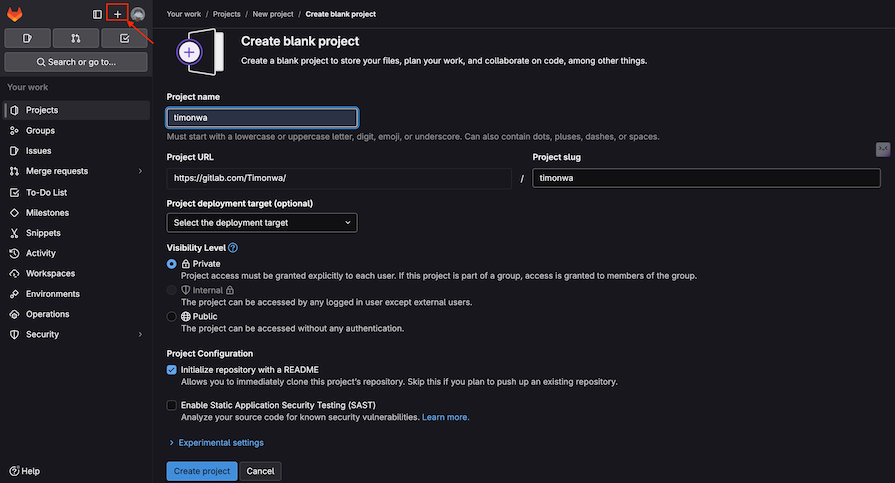
To host a React application in GitLab, log in to your account, click on the plus icon, select Create blank project and create an empty project. Give your project a name and click Create project:
On the next page, you’ll see various commands to add your React project, configured according to your credentials.
In your terminal, initialize the local directory as a Git repository, commit all the changes, and push it remotely on GitLab by running the following command in the project root:
git init
git remote add origin [email protected]:<username/project-name>.git
git add .
git commit -m "Initial commit"
git push -u origin main
Be sure to replace <username/project-name> with your username and project name. In your project’s package.json, add a homepage field:
"homepage": "https://myusername.gitlab.io/my-app"
myusername is your username and my-app is the name of your project. For example:
"homepage":"https://lelouchB.gitlab.io/react-material-ui/"
Create a new file named .gitlab-ci.yml and add the following code to it:
image: node:18 # change to match your node version

cache:
  paths:
    - node_modules/

before_script:
  - rm -rf build
  - npm install

pages:
  stage: deploy
  script:
    - npm run build
    - rm -rf public
    - mv build public
  artifacts:
    paths:
      - public
  only:
    - master
After committing this file, a pipeline will start. This will deploy your React app to GitLab Pages. You can see this pipeline under the CI/CD tab. After the pipeline has passed successfully, it may take up to 30 minutes before the site is available after the first deployment. Your app will be deployed to the same URL, as mentioned in the homepage field in package.json.

AWS Amplify is a development platform from Amazon Web Services (AWS) that enables you to build and deploy mobile and web applications quickly. It offers many features, including:
It is a complete suite of tools for building and deploying full-stack applications and allows you to have a deeper integration with AWS services than all other options.
Netlify provides more scalable backend options than Firebase or Render and supports server-side rendering, which static hosts like GitHub Pages or Surge don’t offer. However, AWS Amplify might be more complex and costly than other platforms if you only want to host a simple static website.
If you want to build a full-stack application that scales easily and integrates with AWS services, then AWS Amplify might be the hosting platform for you. It offers more comprehensive services than simpler options like Netlify or Vercel. Its support for serverless architectures rivals that of Firebase and allows you to scale full-stack applications quickly. However, its user interface might take some time to get used to.
AWS Ampily offers a free tier and pay-as-you-use plan, just like Firebase.
To deploy your React app on AWS Amplify, we first have to install its CLI:
npm install -g @aws-amplify/cli
Once installed, we need to configure the project by running the following command:
amplify configure
It will prompt you to sign in with your AWS account and configure your default region.
Once configured, you will need to initialize the AWS Amplify project by running the following command:
amplify init
Follow the prompts to initialize Amplify. Finally, run the following command to deploy your React app:
amplify publish
This will build and deploy your app to the specified environment. Once the deployment is complete, it will provide you with a URL where you can access your live React app.
![]()
Cloudflare Pages is a Jamstack platform for frontend developers. It offers seamless integration with a GitHub repository, allowing for easy deployment of your web applications. It provides unmetered bandwidth on its global CDN, unlike other hosting platforms. It also offers better built-in security features compared to GitHub Pages or Surge.
Cloudflare Pages is built on top of Cloudflare’s powerful edge network, providing incredibly fast static site delivery, which allows for faster load times, especially for static assets; with built-in DDoS protection and security features, it gives it an edge over simpler platforms like Surge or Netlify.
It also integrates better with serverless functions than AWS Amplify or Firebase. It is another excellent option for static websites; however, if your application requires a backend or server-side rendering, you should look for other options.
Cloudflare Pages offers a free plan, and its Pro plan starts at $20 per month.
To deploy your react app for free on Cloudflare Pages, install the create-cloudflare package globally:
npm install -g create-cloudflare@latest
Once installed, configure your project using the command:
create-cloudflare
Choose Deploy existing project and select your framework (React) when prompted. This will handle dependencies and configure your project for Cloudflare. It may ask you to log in to your Cloudflare account. And finally, it will deploy your React app.
You can also use -p flag to pre-build the app, leading to faster deployments. The command should look like this:
create-cloudflare -p
| Feature | Vercel | Firebase | Netlify | GitHub Pages | Surge | Render | GitLab Pages | AWS Amplify | Cloudflare Pages |
|---|---|---|---|---|---|---|---|---|---|
| Serverless deployment | ✅ | ✅ | ✅ | ❌ | ✅ | ✅ | ❌ | ✅ | ✅ |
| Global CDN | ✅ | ❌ | ❌ | ❌ | ❌ | ❌ | ❌ | ❌ | ✅ |
| Edge functions | ✅ | ✅ | ❌ | ❌ | ❌ | ❌ | ❌ | ❌ | ✅ |
| Built-in Git integration | ✅ | ❌ | ✅ | ❌ | ❌ | ❌ | ✅ | ❌ | ❌ |
| Continuous deployment | ✅ | ✅ | ✅ | ❌ | ❌ | ✅ | ❌ | ✅ | ✅ |
| Rollback support | ✅ | ✅ | ✅ | ❌ | ❌ | ✅ | ❌ | ✅ | ✅ |
| Static site hosting | ✅ | ❌ | ✅ | ✅ | ✅ | ✅ | ✅ | ❌ | ✅ |
| BaaS (Backend as a Service) | ❌ | ✅ | ❌ | ❌ | ❌ | ❌ | ❌ | ✅ | ❌ |
| Authentication and authorization | ❌ | ✅ | ❌ | ❌ | ❌ | ❌ | ❌ | ✅ | ❌ |
| Realtime database | ❌ | ✅ | ❌ | ❌ | ❌ | ❌ | ❌ | ❌ | ❌ |
| Cloud storage | ❌ | ✅ | ❌ | ❌ | ❌ | ❌ | ❌ | ✅ | ❌ |
| Best for | Performant and scalable React applications | Comprehensive platform for building and deploying web and mobile applications | Powerful and flexible React application deployment | Free and easy static website hosting | Easy-to-deploy static websites | Serverless hosting for all types of web applications | Free static site hosting for GitLab repositories | Serverless deployment of React applications and server-side applications | Fast and easy deployment of static websites and React applications |
The following platforms might not be the best for hosting but are well-reputed primarily for other services, like backend, databases, and storage. I’ve mentioned the hosting plans for them as well:
While manual deployments work well for small projects, as your application grows and your team expands, automating the deployment process becomes essential. Automation helps to reduce human error, ensures there is consistency across all deployments, and saves time.
Several CI/CD tools can help automate the deployment of your React applications, including GitHub Actions, GitLab CI/CD, CircleCI, Jenkins, and more. Using them, you can set up different workflows for different use cases, such as deploying to different environments or setting up a single workflow that deploys to production after successful testing, linting, and building.
In this section, we’ll focus on how we can automate deployments in our React application using Vercel and GitHub Actions.
GitHub Actions is a powerful automation tool built directly into GitHub that allows you to automate your software development workflows directly within your GitHub repository. You can easily use GitHub Actions to build, test, and deploy your React applications with hosting platforms like Firebase, GitHub Pages, AWS, and more.
Vercel automatically deploys your React applications with every push to your repository, including preview URLs for pull requests. But if you want to have full control over your CI/CD pipeline, especially for GitHub Enterprise Server users who don’t have Vercel’s built-in git integration, you can use GitHub Actions on Vercel to deploy your React applications:
name: Vercel Preview Deployment
env:
  VERCEL_ORG_ID: ${{ secrets.VERCEL_ORG_ID }}
  VERCEL_PROJECT_ID: ${{ secrets.VERCEL_PROJECT_ID }}
on:
  push:
    branches-ignore:
      - main
jobs:
  Deploy-Preview:
    runs-on: ubuntu-latest
    steps:
      - uses: actions/checkout@v2
      - name: Install Vercel CLI
        run: npm install --global vercel@latest
      - name: Pull Vercel Environment Information
        run: vercel pull --yes --environment=preview --token=${{ secrets.VERCEL_TOKEN }}
      - name: Build Project Artifacts
        run: vercel build --token=${{ secrets.VERCEL_TOKEN }}
      - name: Deploy Project Artifacts to Vercel
        run: vercel deploy --prebuilt --token=${{ secrets.VERCEL_TOKEN }}
This GitHub Actions workflow automates the deployment of your React application to Vercel. It triggers on every push to a branch other than main, pulls the Vercel environment information, builds the project artifacts, and deploys them to Vercel.
To use this workflow, you need to create a .github/workflows/preview.yaml file in the root directory or your repository with the above content.
You can get your Vercel token from your Vercel account settings and your Organization ID and Project ID from your Vercel project settings. Add these as secrets in your GitHub repository by going to the Settings tab -> Secrets and variables -> Actions.
If you want to target a specific branch for deployment, you can modify the on section of the workflow to trigger on pushes to that branch:
on:
  push:
    branches:
      - main
If want the workflow to run when a pull request is opened or updated on the main branch, you can modify the on section to trigger on pull requests:
on:
  pull_request:
    branches:
      - main
You can also have multiple workflows in your repository for different deployment scenarios, such as deploying to different environments or running different tests. All you have to do is create a new .yaml file in the .github/workflows directory with the desired workflow configuration.
When using sensitive information like API keys, tokens, and passwords in your deployment workflow, you should always:
Implementing security best practices in your deployment automation, such as regularly rotating deployment tokens and keys, limiting deployment permissions to necessary team members, and using environment-specific secrets and variables, also helps to secure your deployment pipeline and protect your application from unauthorized access.
Deploying a React application can be easy and affordable with the many different platforms and tools available. In this article, we reviewed nine of the most popular options for free React app hosting, each with its unique features and benefits. We also talked about automatically deploying our React applications and how we can use GitHub Actions, one of the popular CI/CD pipeline tools, to auto-deploy our applications.
Choose the platform that best suits your needs and get your React application up and running in no time!
Hey there, want to help make our blog better?
Join LogRocket’s Content Advisory Board. You’ll help inform the type of content we create and get access to exclusive meetups, social accreditation, and swag.
Sign up now
Learn how OpenAPI can automate API client generation to save time, reduce bugs, and streamline how your frontend app talks to backend APIs.

Discover how the Interface Segregation Principle (ISP) keeps your code lean, modular, and maintainable using real-world analogies and practical examples.

<selectedcontent> element improves dropdowns

Learn how to implement an advanced caching layer in a Node.js app using Valkey, a high-performance, Redis-compatible in-memory datastore.


11 Replies to "9 ways to deploy a React app for free"
Thanks for such a great article!!!
Any reason why AWS S3 is not mentioned in the list? We can use the free tier for an year.
Thanks. Glad you like it. 🙂
I guess I didn’t include services like AWS and Azure because the complete step-by-step process of configuring and deploying a React app with AWS or Azure is too big to include in this article. Separate articles for them will be great to explain everything adequately.
Thanks for sharing above article.
Thanks for this, it has helped me beat my capstone deadline. So thankful!
Thanks! Glad you liked it 🙂
Thanks a lot. I used Surge to host my app. Honestly I had never heard of Surge until I read this article and I was having trouble hosting my app everywhere from Netlify, GitHub Pages, and Heroku! I this really helped me.
Hi, I’ve created a CI configuration file on the GitLab like this but GitLab throws error with `mv: cannot stat ‘build’: No such file or directory` (full CI job log is here).
Where am I doing wrong?
Hey Fatih,
Seeing the CI Job log, I guess you are using the above `.yml` file to deploy a Next.js project which is causing an error because unlike a React project which creates a production build in a folder named `build`, Next.js creates a folder named `.next` . The above .yml file works for React project.
Vercel would be best for a Next.js project.
Let me know if you have any other questions.
Thank you so much for this article! It was very helpful
I did as per your instructions for deployment on github. But my local hosting doesn’t show css styling though it’s working perfectly on the github pages.. please let me know what I can do to fix it. My local react-application is mirrored/linked with github repository.
Thank you for the article. Just update – there is no free plan on heroku anymore.