As web applications become increasingly complex, we need to find efficient ways to optimize performance and render large datasets. When working with a large dataset in a React application, rendering all the data at once can lead to poor performance and slow loading times.

Virtualization is a technique that addresses this issue by rendering only a portion of your dataset at a time, resulting in a faster and smoother experience for your users. In this article, we will explore and compare the pros and cons of various virtualized list libraries available for React, including:
We’ll also include a feature set comparison table. Let’s get into it!
React Virtuoso is a virtualized list library for React that enables the fast and efficient rendering of large datasets. It is highly customizable and we can use it to render both simple and complex data structures.
React Virtuoso uses a windowing technique that renders only the elements visible on screen, resulting in faster load times and better performance.
Here’s how to use React Virtuoso in your app in just two steps:
First, install the Virtuoso library:
npm install react-virtuoso
Next, use the component in your application:
import * as React from 'react'
import * as ReactDOM from 'react-dom'
import { Virtuoso } from 'react-virtuoso'
const App = () => (
  <Virtuoso
    style={{ height: '600px',
    background: '#f8f8f8'
   }}
    totalCount={10000}
    itemContent={index => (
      <div style={{
        background: index % 2 === 0 ? '#ffbb00' : '#ffcc33',
        color: '#333',
        padding: '10px',
        fontSize: '16px',
        fontFamily: 'Arial, sans-serif',
        border: '1px solid #ccc',
        borderRadius: '4px',
        margin: '5px 0'
      }}>
        Item {index}
      </div>
    )}
  />
)
export default App;
ReactDOM.render(<App />, document.getElementById('root'))
In the code above, we import the Virtuoso component from the react-virtuoso library.
Next, we define a functional component called App that returns the Virtuoso component.
The Virtuoso component takes in several props:
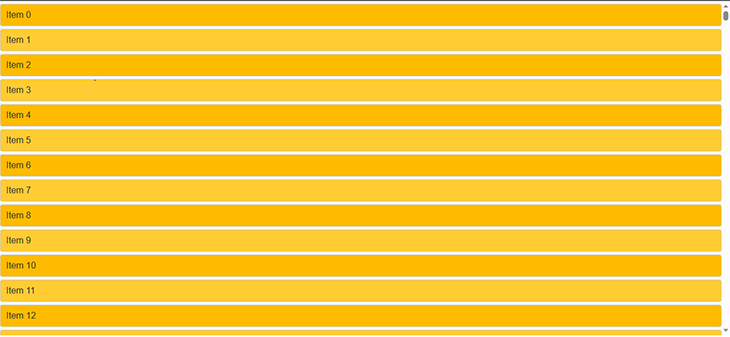
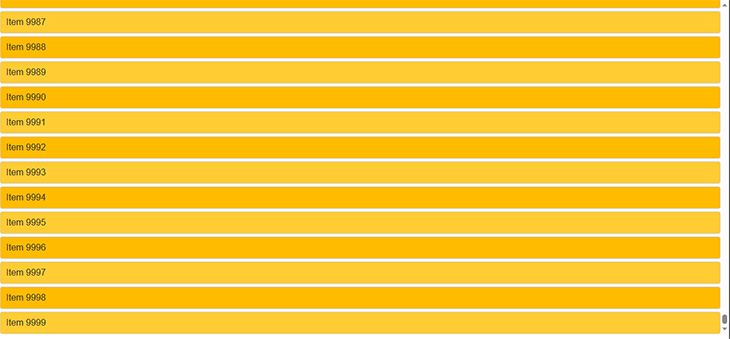
style: sets the style of the component, including its height and background colortotalCount: sets the total number of items in the list; in this case, 10,000itemContent: receives an index parameter and returns the JSX code for rendering the item at that indexIn this case, the function renders a div element containing the text “Item”, followed by the index number. The style prop sets the background color, font size, font family, border, border radius, and margin of the div element based on whether the index is odd or even.
Here’s the result of our code:
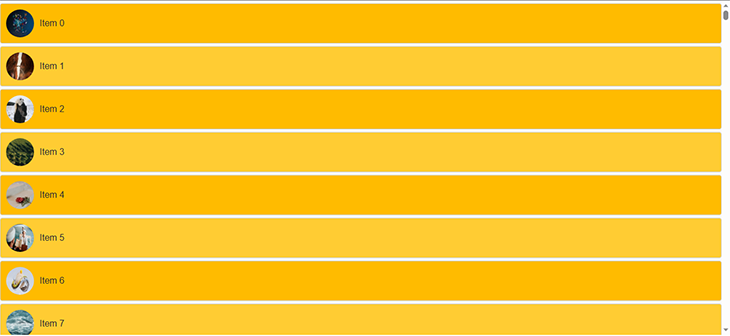
We can add images to our lists, too:
import * as React from 'react';
import * as ReactDOM from 'react-dom';
import { Virtuoso } from 'react-virtuoso';
const App = () => {
  const [images, setImages] = React.useState([]);
  // Fetch random images from Unsplash on component mount
  React.useEffect(() => {
    const fetchImages = async () => {
      const response = await fetch(
        'https://api.unsplash.com/photos/random?count=100',
        {
          headers: {
            Authorization: 'Client-ID <UNSPLASH ACCESS KEY>',
          },
        }
      );
      const data = await response.json();
      const urls = data.map(item => item.urls.thumb);
      setImages(urls);
    };
    fetchImages();
  }, []);
  return (
    <Virtuoso
      style={{
        height: '400px',
        background: '#f8f8f8'
      }}
      totalCount={10000}
      itemContent={index => (
        <div style={{
          background: index % 2 === 0 ? '#ffbb00' : '#ffcc33',
          color: '#333',
          padding: '10px',
          fontSize: '16px',
          fontFamily: 'Arial, sans-serif',
          border: '1px solid #ccc',
          borderRadius: '4px',
          margin: '5px 0',
          display: 'flex',
          alignItems: 'center'
        }}>
          <img src={images[index % 100]} alt={`Item ${index}`} style={{ marginRight: '10px', width: '50px', height: '50px', borderRadius: '50%' }} />
          Item {index}
        </div>
      )}
    />
  );
};
export default App;
ReactDOM.render(<App />, document.getElementById('root'));
You might notice that this code is not so different from our previous code. We define a functional component App using the useState and useEffect Hooks. Then, we declare a state variable called images and set its initial value to an empty array using the useState Hook.
We define a function called fetchImages that uses the fetch API to make a GET request to the Unsplash API to retrieve 100 random images. Then, we map over the response data and extract the thumb URL for each image and set the images state variable to the resulting array of URLs using the setImages function.
Next, we use the useEffect Hook to call the fetchImages function once, when the component mounts, since we only want to fetch the images once. Like before, we return a Virtuoso component that takes in the following props:
style, which is set to create a background color and height for our Virtuoso component, with a height property of 400px and a background property of #f8f8f8totalCountitemContentThis time, the JSX code we return from the itemContent function is a div element containing an img element and some text. The img element’s src attribute is set to the URL of the image corresponding to the current index value, which is retrieved from the images state variable using the modulo operator (%).
The next library we’ll take a look at is React Window, a virtualized list library for React that uses the same windowing technique as React Virtuoso.
React Window is sort of an updated version of React Virtualized. It is also highly performant and can be used to efficiently render large datasets. React Window provides us with a set of APIs that we can use to customize the behavior of our list, making it a flexible and powerful tool.
Install React Window:
npm install --save react-window
To demonstrate how it works, we will use the Faker library to generate large datasets. Faker is a library that generates fake data such as names, addresses, and phone numbers.
Install the Faker library using npm:
npm install faker
Then implement it in your code:
import React from 'react';
import { FixedSizeList } from 'react-window';
import { faker } from '@faker-js/faker';
const App = () => {
  const data = Array.from({ length: 10000 }).map(() => ({
    name: faker.name.firstName(),
    email: faker.internet.email(),
  }));
  const Row = ({ index, style }) => {
    const isEvenRow = index % 2 === 0;
    const backgroundColor = isEvenRow ? '#F9A03F' : '#FDDB3A';
    const textColor = isEvenRow ? '#FFFFFF' : '#4A4A4A';
    const rowStyle = {
      ...style,
      backgroundColor,
      color: textColor,
      display: 'flex',
      justifyContent: 'space-between',
      alignItems: 'center',
      padding: '0 16px',
    };
    return (
      <div style={rowStyle}>
        <p>{data[index].name}</p>
        <p>{data[index].email}</p>
      </div>
    );
  };
  return (
    <FixedSizeList height={600} width={1200} itemSize={50} itemCount={data.length}>
      {Row}
    </FixedSizeList>
  );
};
export default App;
We import the FixedSizeList component from the react-window library, and the faker library, which is used to generate fake data for testing purposes.
After importing the necessary libraries, we define a functional component called App that creates an array of 10,000 objects. Each object contains a name and an email property; their values are generated using the faker library.
Next, we define a new functional component called Row, which takes in an index and style prop and renders each individual row of data. It retrieves the name and email data for the corresponding index from the data array we defined earlier, and renders it within a div element using the passed-in style prop.
Finally, we return a FixedSizeList component from the react-window library, which takes in the following:
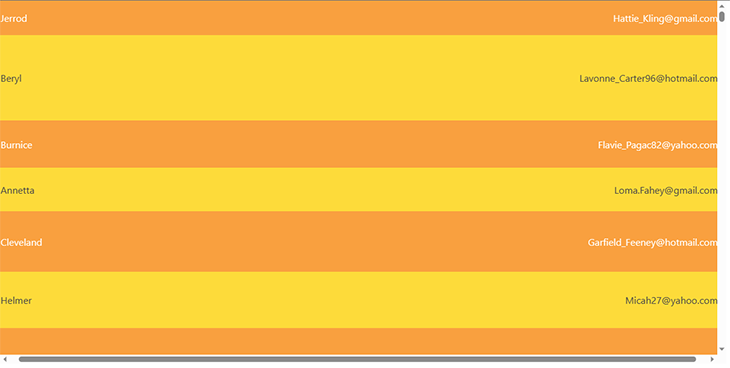
height and width props, which determine the size of the listitemSize, which sets the height of each rowitemCount, which sets the total number of items in the listRow component we defined earlier
FixedSizeList outputWe can create variable-sized lists by using the VariableSizedList component:
import React from 'react';
import { VariableSizeList } from 'react-window';
import { faker } from '@faker-js/faker';
const App = () => {
  const data = Array.from({ length: 10000 }).map(() => ({
    name: faker.name.firstName(),
    email: faker.internet.email(),
  }));
  const Row = ({ index, style }) => {
    const isEvenRow = index % 2 === 0;
    const backgroundColor = isEvenRow ? '#F9A03F' : '#FDDB3A';
    const textColor = isEvenRow ? '#FFFFFF' : '#4A4A4A';
    const rowStyle = {
      ...style,
      backgroundColor,
      color: textColor,
      display: 'flex',
      justifyContent: 'space-between',
      alignItems: 'center',
      padding: '0 16px',
    };
    return (
      <div style={rowStyle}>
        <p>{data[index].name}</p>
        <p>{data[index].email}</p>
      </div>
    );
  };
  const getItemSize = index => {
    const randomHeight = Math.floor(Math.random() * 100) + 50;
    return randomHeight;
  };
  return (
    <VariableSizeList height={600} width={1200} itemCount={data.length} itemSize={getItemSize}>
      {Row}
    </VariableSizeList>
  );
};
export default App;
VariableSizeList outputIn this example, the getItemSize function calculates a random height between 50–150px for each row. You can adjust the calculation to generate different ranges of sizes, or even to generate different sizes based on the data in each row.
Note that with very large variability in row heights, scrolling performance may be impacted, as the list component has to calculate and position each row as you scroll.
react-infinite-scroller is a library that allows you to render large datasets in a performant way. The library also uses the windowing or virtualization technique, where only the visible part of the data is rendered and the rest is loaded on-demand as the user scrolls.
We will use the Faker library to generate large datasets here, too. Install it:
npm install faker
Then install react-infinite-scroller:
npm i react-infinite-scroller
Next, we will create a component called UserList that renders a list of users generated by the Faker library.
import React, { useState } from "react";
import InfiniteScroll from "react-infinite-scroller";
import { faker } from "@faker-js/faker";
function UserList() {
  const [users, setUsers] = useState([]);
  const loadMore = (page) => {
    const newUsers = [];
    for (let i = 0; i < 20; i++) {
      newUsers.push({
        name: faker.name.findName(),
        email: faker.internet.email(),
        phone: faker.phone.phoneNumber(),
      });
    }
    setUsers([...users, ...newUsers]);
  };
  const rowStyle = {
    display: "flex",
    justifyContent: "space-between",
    alignItems: "center",
    padding: "10px",
    backgroundColor: "#f1f1f1",
    borderBottom: "1px solid #ccc",
    fontSize: "16px",
    color: "#333",
  };
  const nameStyle = {
    fontWeight: "bold",
    color: "#38a3a5",
  };
  const emailStyle = {
    fontStyle: "italic",
    color: "#ff7f50",
  };
  const phoneStyle = {
    color: "#6a5acd",
  };
  return (
    <InfiniteScroll
      pageStart={0}
      loadMore={loadMore}
      hasMore={true}
      loader={<div className="loader" key={0}>Loading ...</div>}
    >
      <ul style={{ listStyle: "none", margin: "0", padding: "0" }}>
        {users.map((user, index) => (
          <li key={index} style={rowStyle}>
            <div style={nameStyle}>{user.name}</div>
            <div style={emailStyle}>{user.email}</div>
            <div style={phoneStyle}>{user.phone}</div>
          </li>
        ))}
      </ul>
    </InfiniteScroll>
  );
}
export default UserList;
Let’s break this down. In the UserList component, we use the useState Hook to manage the state of the users array. The loadMore function generates 20 new users and appends them to the existing users array.
When the component mounts, the InfiniteScroll component is rendered. The pageStart prop indicates the page number from where the data will be loaded.
The loadMore prop is a callback function that is called when the user scrolls to the end of the list. It receives the page number as an argument, which can be used to load data from the server. In our case, we generate fake data using the Faker library.
The hasMore prop indicates whether there is more data to be loaded. In our case, we want to set it to true because we want to load more data indefinitely. The loader prop is a React element that renders while the data is being loaded. We have added a simple loader that shows a loading message.
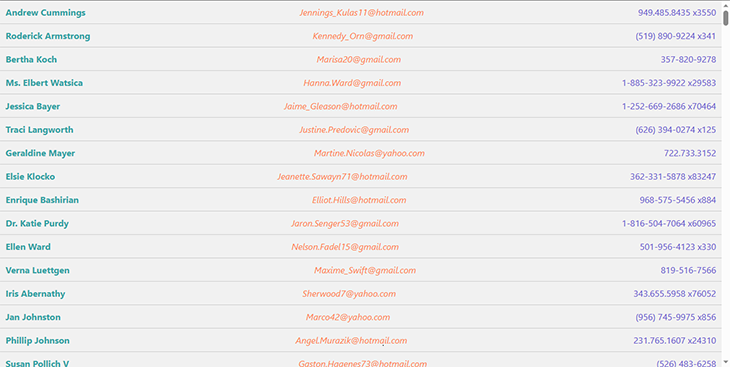
Finally, we render the list of users using the map method. Each user is rendered inside an li element and the name, email, and phone number of each user is displayed.
For styling, we define several styles using JavaScript objects and apply them to the corresponding elements using the style attribute. The rowStyle object applies a light gray background color with a darker gray border and white text color, while the nameStyle, emailStyle, and phoneStyle objects define different text colors and styles for the name, email, and phone number fields respectively.
react-infinite-scrollerreact-infinite-scroller| Feature/Tool | React Virtuoso | React Window | react-infinite-scroller |
|---|---|---|---|
| Performance | Excellent | Excellent | Good |
| API | Rich | Limited | Limited |
| Virtualization support | Yes | Yes | Yes |
| Server-side rendering support | Yes | Yes | No |
| Customization | Limited | Good | Limited |
| Ease of use | Easy | Easy | Easy |
| Inbuilt features for developers | Offers pagination and infinite loading features. The developer community implemented a developer tool GUI with Chrome and Firefox extensions. Supports persisting cache into external storage locations (i.e., localStorage). | Offers pagination and infinite loading features. It comes with an official developer tool GUI with cache manipulation support. Supports persisting cache into external storage locations (i.e., localStorage). | N/A |
| React suspense | Supported | Supported | N/A |
| Official support for other frontend libraries | No, similar community libraries available: sswr | In-progress, similar community libraries available: vue-query | N/A |
Rendering large datasets efficiently is a crucial aspect of web development. Virtualization is a technique that enables developers to render large datasets efficiently and improve the performance of web applications.
In this article, we have explored various virtualized list libraries available for React, including React Virtuoso, React Window, and react-infinite-scroll. Each library has its pros and cons, and the choice of the library depends on the specific use case. By using these virtualized list libraries, you can significantly improve the performance of your React applications and provide a smoother user experience.
Install LogRocket via npm or script tag. LogRocket.init() must be called client-side, not
server-side
$ npm i --save logrocket

// Code:

import LogRocket from 'logrocket';
LogRocket.init('app/id');
// Add to your HTML:

<script src="https://cdn.lr-ingest.com/LogRocket.min.js"></script>
<script>window.LogRocket && window.LogRocket.init('app/id');</script>

A guide for using JWT authentication to prevent basic security issues while understanding the shortcomings of JWTs.

Discover how to build, render, and automate product demo videos with Remotion, replacing traditional screen recordings with reusable React code.

Chrome’s Modern Web Guidance embeds modern web platform skills into AI coding agents, helping them choose native HTML, CSS, and browser APIs over legacy patterns.

Learn how to use Fallow to analyze AI-generated code, detect dead code, duplicate logic, and complexity issues, and integrate automated code quality checks into your AI-assisted development workflow.
Hey there, want to help make our blog better?
Join LogRocket’s Content Advisory Board. You’ll help inform the type of content we create and get access to exclusive meetups, social accreditation, and swag.
Sign up now

