Visual Studio Code (VS Code) was built with extensibility in mind. Almost every part of VS Code can be customized and enhanced through the Extension API. In fact, many core features of VS Code is built as extensions, and you can also build your own, of course!

The product development ethos of VS Code is that the editor is set up for web development by default. It covers HTML, CSS, JavaScript, TypeScript, and Markdown. These features are managed by Microsoft, and they accept community contributions. Everything outside of that is left up to the community to provide as extensions. Extensions can be made available to others by publishing them in the VS Code Marketplace.
Now, you might be wondering: how do I write one, then? Should I just follow the official docs?
You can! But VS Code is built with electron, which means you can write an extension in JavaScript, or anything that can be transpiled to JavaScript, such as TypeScript. The VS Code codebase is written in TypeScript, so the docs are oriented towards TypeScript. All the code examples provided by Microsoft are written in TypeScript. So, If you don’t know TypeScript, you will hit a few speed-bumps along the way.
In this article, I will discuss the following:
There are different types of extensions you can write, and some don’t require JavaScript at all. Broadly, they fall into the following categories:
package.json. No JavaScript is needed. You can read the article VSCode: How to create your own Extension Pack for more infoWe will focus on the “other” category in this article. From here on, when I refer to extensions, that is the type of extension that I am referring to.
You need to have a typical JavaScript environment set-up. You need to have Node and a package manager (yarn or NPM) installed.
If you have that already, you can read the Your First Extension guide set up a new project. The guide recommends using Yeoman to generate a default project for you. It gives you a wizard-like experience for creating the project on the command-line. To create a JavaScript project, you select the option New Extension (JavaScript).
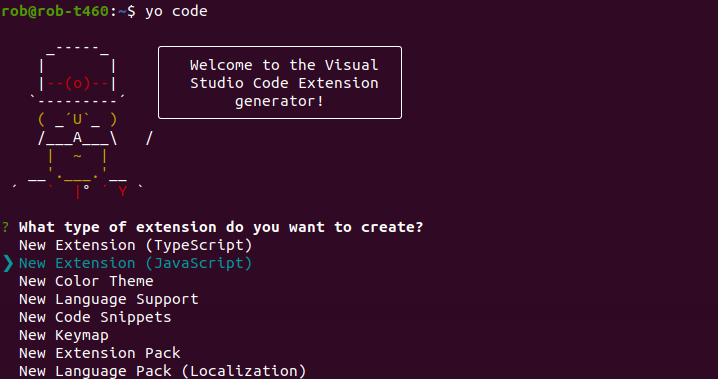
It will produce a default project with the “Hello World” command, and an empty test suite.
I think it’s better to create our first project from scratch. I will create a leaner version of the default project. This should help you have a clearer understanding of the code with fewer distractions.
Let’s create the “Hello World” example from scratch. We want to create a Hello World command that will show a pop-up message saying (drum roll), “Hello World!”
package.json)Like a typical Node project, we use NPM to handle the configuration and the dependencies of our project. The project configuration is contained in package.json. This is referred to as the Extension Manifest in the documentation. You can read this guide on package.json if you need a refresher.
Let’s create our package.json. We always need to fill out at least half a dozen fields, as below.
{
  "name": "example",
  "version": "0.0.1",
  "engines": {
    "vscode": "^1.32.0"
  },
  "main": "extension.js",
  "contributes": {
    "commands": [
      {
        "command": "example.helloWorld",
        "title": "Hello World"
      }
    ]
  },
  "activationEvents": [
    "onCommand:example.helloWorld"
  ]
}
You need to provide the properties name, version, engines, and main as you would for a typical Node project. We will create a JavaScript file in the same folder called extension.js to be our main module in a minute.
The properties specific to a VS Code that must be declared are:
contributes: This is for your Contribution Points. This is VS Code-speak for declaring what part of the application you are extending. Here is where we can expose our functionality through commands, create new views , define user settings, and so onactivationEvents: You declare Activation Events to specify the events that trigger the loading (activation) of the extension. Extensions are not always active! For example, you may specify that an extension is only active when a markdown file is open e.g. "activationEvents": ["onLanguage:markdown"]. The most commonly used are: onCommand, onLanguage, and onStartupFinishedWe want to add a new command to the command palette. We specify this in the contributes.commands property. We assign a unique ID in the command subproperty. The naming convention Microsoft seems to follow is <extension name>.<command name>, but there are no restrictions. This ID is referenced in the code to provide functionality for the command.
The title subproperty is the text that appears in the command palette for the command (as below).

We only want the extension to be active when the command is run, so we will use the onCommand Activation Event.
That’s the Extension manifest done.
You can read the VS Code reference of the Extension Manifest for more information on the properties.
Let’s create extension.js now.
const vscode = require("vscode");

module.exports = {
  activate,
  deactivate,
};

function activate(context) {
  // This must match the command property in the package.json
  const commandID = "example.helloWorld";
  let disposable = vscode.commands.registerCommand(commandID, sayHello);
  context.subscriptions.push(disposable);
}

function sayHello() {
  vscode.window.showInformationMessage("Hello World!");
}

function deactivate() {}
You can treat your files the same as you would in a typical Node.js application. Each file is treated as a separate module that follows the commonJS module syntax.
You need to import the vscode module to use the VS Code Extensibility API. It is available by default.
You must always have an activate function in your main module. The activate function is executed when one of your declared Activation Events happens. This is where you set up key initialization tasks for the extension. We link the command we declared in the package.json to our sayHello function through the commands.registerCommand function.
If you create objects and want the resources to be released when the extension is unloaded (deactivated), you can add it to the array ExtensionContext.subscriptions. VS Code refers to these as disposables.
The deactivate function gives you a chance to clean up before your extension is unloaded. We do not need to do explicit cleanup that often — you can omit the deactivate method if this is the case. If you do need to clean something up asynchronously, make sure you return a Promise from the function.
Run the extension by launching a debugging session. You can press F5 or select Run > Start Debugging in the menu to launch the session. This will compile and run the extension in a new Extension Development Host window if there is .vscode/launch.json configuration in the project.
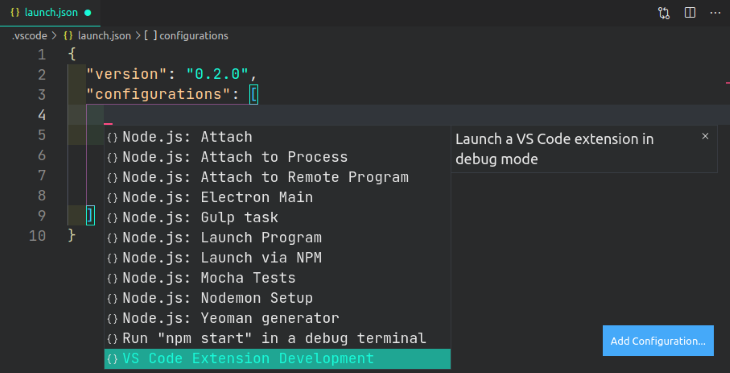
If there is no configuration, you may be prompted with a quickpick input to select an environment for the configuration if VS Code detects the type of project. Otherwise, you may have to manually create a launch.json.
You can click the Add Configuration button to give you autocompletion assistance, select VS Code Extension Development as the option, and it will fill in the properties.
Run the Hello World command from the Command Palette (Ctrl+Shift+P) and you will see a pop-up message saying “Hello World!”. Well done, you have written your first VS Code extension!
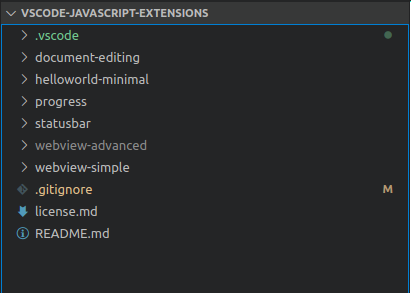
If you used the Yeoman Generator to create a project for you, it will create the folder structure as outlined below. I describe the function of each file:
.
├── .vscode
│   ├── launch.json    // Config for launching and debugging the extension. This is created by default when you run the project.
├── README.md          // Description of your extension. This is used by the VS Code Marketplace as the
├── extension.js       // Extension source code
├── test
│   └── runTest.js     // Source code to run your test suite
│   └── suite
│           └── extension.test.js    // This is where you write your test cases
│           └── index.js             // Configuration of Mocha and the test suite
├── package.json        // Extension manifest
One thing I would change is to add a src folder to put the JavaScript files into. Here, extension.js is in the root folder, and this can get disorganized quickly when you build a more substantial extension.
It takes some time to become familiar with any API. Every API has its own conventions and idiosyncrasies. I think some orientation and a good set of examples goes a long way to providing a happy learning path.
I didn’t find the VS Code API intuitive to learn. The function descriptions are short and lack context in some areas. I found myself looking through examples and the source code of published extensions, and then backtracking to the API to accomplish tasks on occasion.
What I would liked to have had at my disposal initially is an overview of the architecture and a way to learn the vocabulary of the API. This type of orientation is vital to being productive quickly. Let’s cover the architecture first.
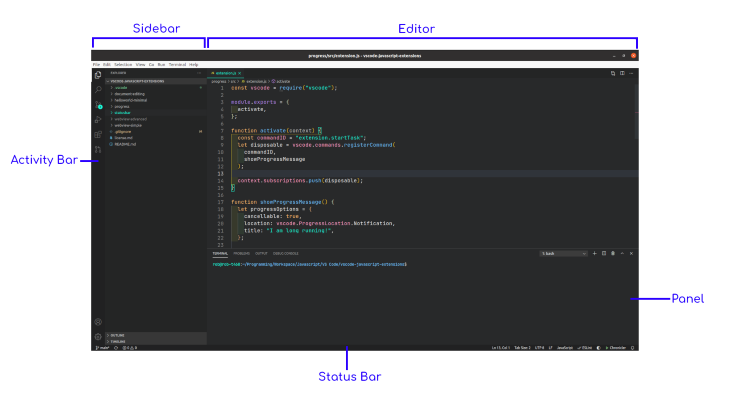
The screenshot below outlines what the major UI components of the application are referred to as. They are the Activity Bar, the Sidebar, Editor, Panel, and the Status Bar.
I found the terminology in the docs a bit incoherent about UI components beyond that.
You can consider references to views to mean a custom, atomic UI component. A view can be:
A view is placed inside a view container. A view can be added to one of the following:
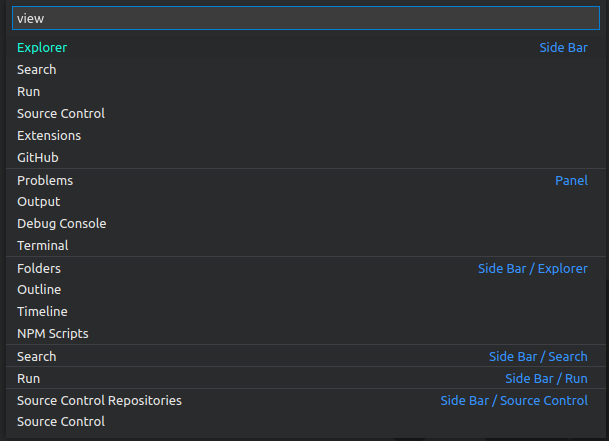
You can see all the available views by running the View: Open View command.
A view is declared with the contributes.views property in the package.json.
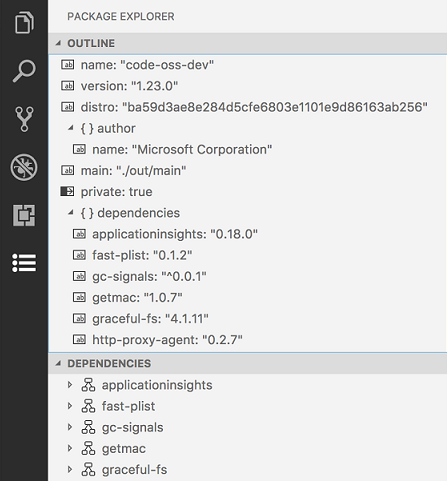
A view container can be added to the Activity Bar or the Panel. It is declared in the contributes.viewsContainers property in the package.json.
Below is an example that shows a custom “Package Explorer” view container added to the Activity Bar, which has two custom views.
The other UI components that you would like to create are usually done through functions in the window namespace, e.g., Status Bar Items. We will discuss this in the next section.
If you want to support another programming language, you can read the Language Extensions Overview that covers the architecture behind that. By now, most programming language have extensions, so you’re unlikely to venture down that road!
Let’s discuss the namespaces you will use most often.
The most important namespace for UI components is window. This refers to the current window of the application. It has functions to access and manipulate most of the UI components:
activeTextEditor is the open file that has focus or changed most recently, and activeTerminal is the terminal pane that has focus or changed most recentlycreateXXX functions such as createTreeView(..), createStatusBarItem(..), and createWebview(..)showXXX functions such as showInformationMessage(..), showQuickpick(..), and showInputBox(..). One exception to this pattern is for progress notifications, which is created with the function withProgress(..)registerXXX functions such as registerCodeLensProvider(..) for code lenses and registerHoverProvider for tooltipsYou can populate the content of a view with:
createTreeView(..) , or by registering the data provider directly through registerTreeDataProvider(..)registerWebviewViewProvider(..). WebviewViews allows rendering arbitrary HTML in the viewThe namespace to manipulate the project open in the file explorer is workspace. You can perform actions on the files and respond to file system events.
For editing a document, the namespaces are TextEditor and TextDocument. The text content is available through the TextEditor.document property. TextDocument allows you retrieve text through ranges and lines in TextEditor.
The commands namespace deals with commands, which are the units of functionality you can reference. Commands can be added to the editor using the registerCommand and registerTextEditorCommand functions. Commands can be executed in the UI through the command palette, menus, and other contribution points. You can also programmatically execute commands.
The namespace for all global, user, and workspace settings is WorkspaceConfiguration.
The ExtensionContext namespace provides contextual properties for your extension, such as the global filepath, some logging info, and storage of secrets. An instance of an ExtensionContext is provided as the first parameter to the activate function.
The docs lists a few common API patterns also.
In TypeScript, you provide types for variables, and define your own types. When you write JavaScript, you don’t need to have any types, so I guess we can just ignore the types in the API right?
No — you still need to understand what values you need to provide for parameters and as return values. You need to meet the expectations of the API. You still need to know if you should provide a number or a string. The difference is that you do not need to assign types explicitly along the way.
Let’s look at a few examples to clarify how this plays out in reality.
Let’s add an item to the status bar, as below. The code for this can be found here.

From our namespace overview, we know that window.createStatusBarItem(..) is the function we are interested in. The function definition is below.
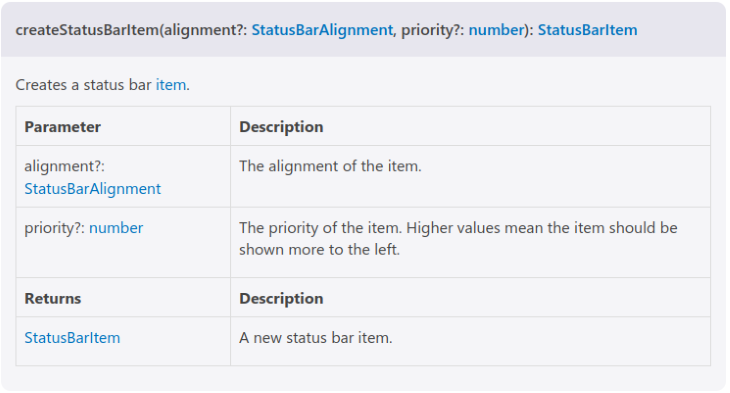
The first parameter is named alignment and has a type of StatusBarAlignment. So what value do we provide for that?
Looking at the definition, we see it is an enumeration.
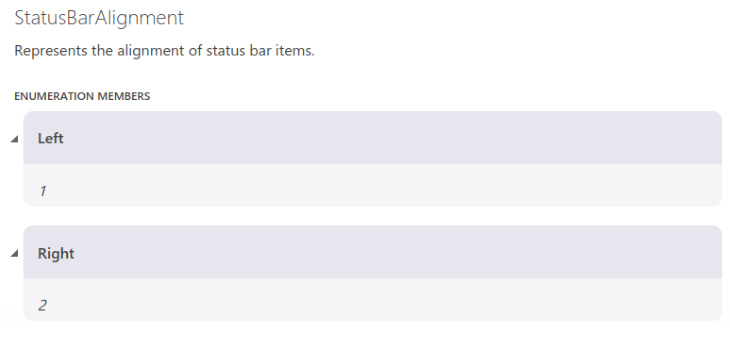
An enumeration defines a fixed list of values. The native value of the enumeration is a number. So, if we want our status bar item aligned left: we can provide a value of 1 or vscode.StatusBarAlignment.Left for this parameter. The latter is more readable.
The second parameter is a number. Simply provide a number of your choosing.
let item = vscode.window.createStatusBarItem(
      vscode.StatusBarAlignment.Left,
      1
);

item.text = `$(megaphone) 0 line(s) selected`;
item.show();
We can then consult the StatusBarItem definition to understand how to add a label and display the item. The code above is sufficient to display a status bar item.
Let’s create a progress notification, as below. The code for this can be found here.
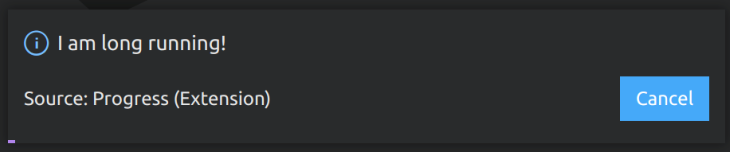
From our namespace overview, we know that window.withProgress(..) is the function we are interested in. The function definition is below.

This definition is more complicated, but don’t be intimidated.
The first parameter, options, is a type of ProgressOptions. You need to check the definition and create an object literal for it.
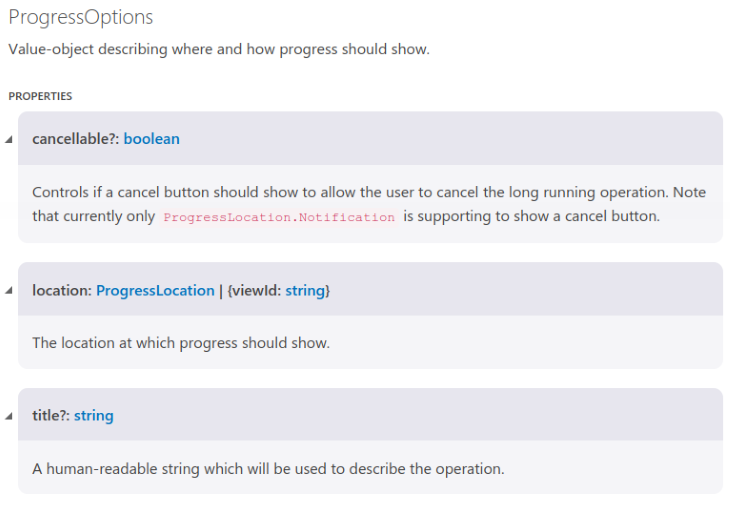
The properties cancellable and title are primitive types. The location property is an enumeration again.
let progressOptions = {
    cancellable: true,
    location: vscode.ProgressLocation.Notification,
    title: "I am long running!",
};
The second parameter is a callback with its own set of parameters. Here, I create an anonymous function with the two parameters I am interested in using. The progress parameter is what we use to report the status of our task.
The return type of this function is Thenable, which is VS Code’s type for a promise. We create some timeouts to simulate a running task and resolve a promise when we are done. We return this promise from the function to satisfy the asynchronous behavior expected.
vscode.window.withProgress(progressOptions, (progress, token) => {
    token.onCancellationRequested(() => {
      console.log("User canceled the long running operation");
    });

    progress.report({ increment: 0 });

    setTimeout(() => {
      progress.report({
        increment: 50,
        message: "Half way done!",
      });
    }, 2000);

    const p = new Promise((resolve) => {
      setTimeout(() => {
        resolve();
      }, 4000);
    });

    return p;
  });
}
I gathered a collection of example, which can be found in the GitHub repo.
You should test your extensions the same as any JavaScript code.
The Yeoman Generator creates a boilerplate test suite for you using the Mocha test framework. You can use whatever testing framework you want. If you are happy with Mocha, the testing extensions guide covers the basics.
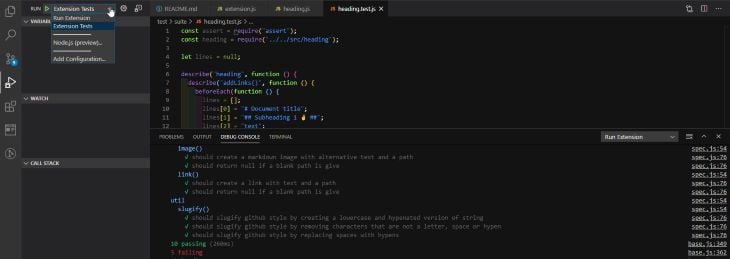
Note that if you try to run tests from the command-line, it will throw an error:
Running extension tests from the command line is currently only supported if no other instance of Code is running.
This is a limitation of running potentially different versions of VS Code concurrently. The solution is to use VS Code Insiders for development where you can run tests from the command-line. Or you can launch the extension tests from the debug launch config (as below).
If you want to share your extension with others, you can publish it to the VS Code Extension Marketplace. Alternatively, you can package an extension into the installable VSIX format, and distribute it yourself. You can read the publishing extension guide for the rundown on this.
Writing your own VS Code extension can be a fun and rewarding project. It can be incredibly satisfying to build something that you use every day to assist your workflow. It does require some time and effort to get to grips with the development environment and learn how to use the API effectively. If you have experience with Node already, it is not much of a stretch.
The key takeaway is that knowing TypeScript is not a prerequisite — anyone with some JavaScript knowledge should be able to build their own extension without headaches. I hope that this article is able to provide a smooth learning path for building extensions with plain ‘ole JavaScript.
Debugging code is always a tedious task. But the more you understand your errors, the easier it is to fix them.
LogRocket allows you to understand these errors in new and unique ways. Our frontend monitoring solution tracks user engagement with your JavaScript frontends to give you the ability to see exactly what the user did that led to an error.

LogRocket records console logs, page load times, stack traces, slow network requests/responses with headers + bodies, browser metadata, and custom logs. Understanding the impact of your JavaScript code will never be easier!

Learn how contrast-color() automatically picks accessible text colors using native CSS, without JavaScript.

Learn how to build smooth staggered animations in CSS using modern features like sibling-index(), complete with practical examples, fallbacks, and accessibility tips.

Compare the top AI development tools and models of July 2026. View updated rankings, feature breakdowns, and find the best fit for you.

Learn how to detect unused and ghost dependencies in JavaScript projects using Knip, a project-level linter that keeps your dependency graph accurate.
Would you be interested in joining LogRocket's developer community?
Join LogRocket’s Content Advisory Board. You’ll help inform the type of content we create and get access to exclusive meetups, social accreditation, and swag.
Sign up now

