In this Pug.js tutorial, we’ll show you how to integrate Vue.js into a backend application using Pug as a templating engine.

For an introduction to Pug.js, check out “Getting started with Pug.”
Pug.js, formerly known as Jade, is a templating engine designed to render HTML in server-side technologies such as Node.js. Like any JavaScript templating engine, Pug.js supports writing reusable HTML code and rendering dynamic data.
Vue.js is a progressive framework for JavaScript that is used to build web interfaces and single-page applications. Not just for web interfaces, Vue.js is also used both for desktop and mobile app development with the Electron framework.
Most backend developers choose to use Pug with Vue.js because it’s much easier to implement and read and doesn’t require a whole lot of configuration. Any valid HTML is also a valid Vue.js template. Using Pug.js as a preprocessor for your Vue.js templates makes it much easier to migrate existing projects to take advantage of Vue’s reactivity features.
Pug.js is frequently used with backend technologies such as Express.js for templating since it compiles down to HTML. Unlike backend developers, most frontend developers find Pug frustrating to write in and maintain because it’s white space-sensitive, which means it uses indentation to determine which tags are nested inside each other.
To follow along with this tutorial, you should have an understanding of JavaScript and Vue.js and experience using a text editor, such as VS Code.
When setting up a nodejs project, we need to initialize a package.json file to keep track of our application dependencies using the npm init -y command.
Next, we’ll create an index.js file, which will be our root Node.js file. We’ll use Express.js for our server, so we need to install Express, import it into our root index.js file, and create an instance of it. We’ll use the instance to listen to a port running on 3000.
To install Express.js, open up your terminal and type npm i express --``save.
let express = require('express');
let app = express();

app.get('/', (req, res) => res.json({msg:"Hello World"}))

app.listen(3000, () => console.log('Test running'))
To run the application, open your terminal and type node index.js. This command will display Test running on the terminal, which means the server is running. Now we can access our application on http://localhost:3000/ in our browser:

To set up Pug as your templating engine, first install it by running npm install pug.
After installing Pug, we need to set it as the default Express templating engine and also point to a directory where all our templates will be defined. We can modify our index.js file to this:
let express = require('express');
let pug = require("pug")
let path = require('path')
let app = express();

app.set(path.join(__dirname, './views'))
app.set('view engine', 'pug')


app.get('/', (req, res) => res.render('home'))

app.listen(3000, () => console.log('Test running'))
Notice we required the Node.js path module, which provides utilities for working with file and directory paths.
Let’s create a views directory where we’ll define all our Pug templates. We’ll use the path module to target the views directory and set it as the root directory for all our templates.
Next, create a home.pug file inside the views directory and add this:
.container
    h1 Hello World
Our application will now render Hello World in the browser because we changed the route to render the home.pug template. Notice how Pug uses indentation to work out which tags are nested inside each other.
To set up Vue.js in our Pug template, we need to install and set up webpack.
webpack is basically a module bundler. Its main purpose is to bundle JavaScript files for use in a browser.
To install webpack and its CLI, open up the terminal and type the following:
npm i -D webpack webpack-cli
After installing webpack, we need to install some other packages to help bootstrap Vue.js:
vue-loader, a loader for webpack that allows you to set up Vue.js components as a single-file componentvue-loader-plugin, which helps solve compatibility issues with Webpack5 configurations.vue-template-compiler, which is used to precompile Vue.js 2.0 templates into render functions to avoid runtime-compilation overhead and CSP restrictions.css-loader, which interprets and resolves @import and url() like import/require()To install these packages, open up your terminal and type the following:
npm i -D vue-loader vue-loader-plugin vue-template-compiler css-loader
The -D flag will install these packages as a development dependency.
Next, we have to install babel, a toolchain that is mainly used to convert ECMAScript 2015+ code into a backward-compatible version of JavaScript in current and older browsers and environments. With this installed, we can use things like import and export in our JavaScript file.
We’ll start by installing babel-watch using npm by running npm i babel-watch on our terminal and then installing babel-core and babel-loader as a development dependency:
npm i -D babel-core babel-loader
Let’s create a client directory where we’ll write our Vuejs codes. Inside the directory, create a home.js file and add the following:
import Vue from "vue";
let app = new Vue({
    el: '#home',
    data: {
        names: ['Wisdom', "Ekpot", "Ubongabasi"]
    },
    methods: {
        logSomeThing() {
            return 'Hello Wisdom Ekpot'
        }
    },
    mounted() {
        console.log(this.logSomeThing());
    }
})
If you’re familiar with Vue.js, you should recognize this as a simple Vuejs setup. Here, the root element is targeting a div with an id of home. Once the template is mounted, the logSomething method is called, which is defined in the methods object.
To include this in our Pug file, we’ll have to add some webpack configs. Let’s create a webpack.config.js file, import webpack, and write some configs for Vue.js.
We’ll start by importing webpack, path, and VueLoaderPlugin:
const webpack = require('webpack');
const path = require('path');
const VueLoaderPlugin = require('vue-loader/lib/plugin');
Our webpack config will be wrapped in a config object. We’ll start by setting the mode to development and also define our entry file.
After setting an entry file, we need to set an output where all the transcompiled code will be stored. The output property tells webpack where to emit the bundles it creates and how to name these files. Basically, webpack takes our Vue.js code and transcompiles it to vanilla JavaScript.
const config = {
    mode: 'development',
    entry: {
        'home': './client/home.js',
    },
    output: {
        path: path.resolve(__dirname, 'public/js'),
        filename: '[name].bundle.js'
    },
}
We’ll create a public directory to store our compiled code. We also need to come up with some webpack rules to be used when the rule matches. These rules are evaluated only when the parent rule condition matches. Each nested rule can contain its own conditions.
 module: {
        rules: [
            {
                test: /\.vue$/,
                loader: 'vue-loader'
            },
            {
                test: /\.js$/,
                use: 'babel-loader',
                exclude: /node_modules/
            },
            {
                test: /\.css$/,
                use: [
                    'vue-style-loader',
                    'css-loader'
                ]
            }
        ]
    },
Basically, webpack checks if there is any .vue file extension and uses the vue-loader plugin to bundle it to JavaScript.
We also need to define a resolve object to configure how modules are resolved:
 resolve: {
        alias: {
            'vue$': 'vue/dist/vue.esm.js'
        },
        extensions: [
            '.js',
            '.vue'
        ]
    },
Next, we need to define a new instance of VueLoaderPlugin to help handle some configs for Webpack 5:
 plugins: [
        new VueLoaderPlugin(),
    ],
After doing this, we have to export our config object:
module.exports = config;
To bootstrap this webpack configuration, we need to add some scripts in our package.json file to bootstrap it:
 "watch": "babel-watch  --watch -- index",
    "dev": "npm run watch & npm run client:build-dev ",
    "client:build-dev": "webpack --watch"
The client:build-dev command will start Bootstrap and watch our files for any changes. To start the application, run npm run dev on you terminal.
Now we can modify our home.pug file to this:
.container#home
    h1 Hello World
script(src="/js/home.bundle.js")
If we run npm run dev on our terminal, it creates a home.bundle.js file inside our public directory, which is our transcompiled code.
If we look at our browser console, we’ll see the logSomeThing() method printed:
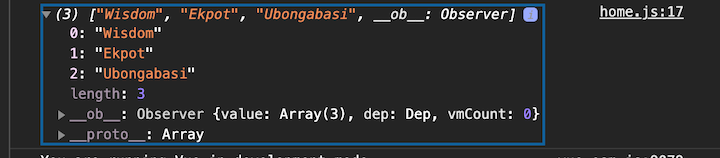
The above indicates that Vue.js is being used in our Pug template.
The last thing we have to do is create a .gitignore file and add the following:
public/js
node_modules
This will prevent the node_modules directory and the public directory from being committed in git.
When working with large and complex frontend tasks on your backend, using Pug with Vue.js is a great way to simplify and scale the development process.
The source code for the example used in this article is available on GitHub.
Debugging Vue.js applications can be difficult, especially when users experience issues that are difficult to reproduce. If you’re interested in monitoring and tracking Vue mutations and actions for all of your users in production, try LogRocket.

LogRocket lets you replay user sessions, eliminating guesswork by showing exactly what users experienced. It captures console logs, errors, network requests, and pixel-perfect DOM recordings — compatible with all frameworks.
With Galileo AI, you can instantly identify and explain user struggles with automated monitoring of your entire product experience.
Modernize how you debug your Vue apps — start monitoring for free.

Learn how to set up Meilisearch, index documents, and build keyword, semantic, and hybrid search with AI-powered retrieval.

Compare pnpm and npm across security defaults, disk usage, dependency strictness, and workspace policy to decide which package manager fits your project.

I migrated 20 production-style components from Tailwind to StyleX. Here’s what the data showed about LOC, CSS bundle size, build time, and type safety.

A guide for using JWT authentication to prevent basic security issues while understanding the shortcomings of JWTs.
Hey there, want to help make our blog better?
Join LogRocket’s Content Advisory Board. You’ll help inform the type of content we create and get access to exclusive meetups, social accreditation, and swag.
Sign up now

