POST requests: Handling errors, authentication, and best practicesSending requests to a web server is one of the most commonly performed tasks in frontend development. Creating a Facebook post, uploading a new Instagram image, sending a post on X, or signing up on a website all send requests to a server.

Axios is a free and open source promised-based HTTP library that runs both in the browser and Node.js. In this article, you’ll learn how to use the Axios POST method in vanilla JavaScript and frameworks like React. Before proceeding, you should have an understanding of React and how React form elements work.
The Replay is a weekly newsletter for dev and engineering leaders.
Delivered once a week, it's your curated guide to the most important conversations around frontend dev, emerging AI tools, and the state of modern software.
Axios is a lightweight HTTP client. You can use it to make asynchronous HTTP requests in the browser and Node.js. Because it’s promise-based, you can use promise chaining as well as JavaScript’s async/await.
Axios is also quite similar to the native JavaScript Fetch API. It offers methods like POST, PUT, PATCH, GET, DELETE, and more. In this article, we will focus on the POST method. To understand this method, let’s consider the following scenario.
Take logging into Facebook. When we start using the app, it asks us to either sign up or log in if we already have an account. We must fill in the required form details and submit them to the server.
The server then verifies the information we submitted and loads the main app or responds with an error message if the provided credentials are incorrect. POST is the Axios method that allows us to do that. Below is what an Axios POST request looks like:
axios.post(url[, data[, config]])
From the code above, the Axios POST method takes three parameters: URL, data, and config. URL is the server path to which we are sending the request (note that it is a string). data, which is an object, contains the request body that we’re sending to the server. Finally, config is the third parameter where you can specify the header content type, authorization, and more. It is also in an object format.
Now that we understand what Axios is and its POST method, let’s see how to use it.
Editor’s note: This post was last updated by Emmanuel John in April 2025 to add a troubleshooting section for common Axios POST issues and introduce advanced use cases and optimizations, including Axios interceptors for global request handling and retry logic for failed POST requests.
You might wonder why you should use Axios instead of the native JavaScript Fetch API. Comparatively, Axios has some advantages over Fetch, which we will look at shortly.
First, Axios serializes your request body into JSON string out of the box if the content-type header is set to application/json. This differs from the Fetch API, which requires you to first convert the payload to JSON string using JSON.stringify, as shown below:
// With Fetch
fetch(url, {
  method: "POST",
  body: JSON.stringify(payload),
  headers: {
    "Content-Type": "application/json",
  },
})
  .then((response) => response.json())
  .then((data) => console.log(data))
  .catch((error) => console.error(error));

// With Axios
axios
  .post(url, payload)
  .then((response) => console.log(response))
  .catch((error) => console.error(error));
Similarly, Axios also de-serializes a JSON response out of the box. With the native Fetch API, you need to parse it using JSON.parse.
Unlike the built-in Fetch API, Axios provides convenient methods for each of the HTTP request methods. To perform a POST request, you use the .post() method, and so on:
axios.post()   // to perform POST request
axios.get()    // to perform GET request
axios.put()    // to perform PUT request
axios.delete() // to perform DELETE request
axios.patch()  // to perform PATCH request
Other reasons to use Axios POST over the Fetch API include the following:
POSTEarlier in this article, we explored how to use the Axios POST method in vanilla JavaScript and React. Let’s start with the former and then proceed to the latter. Keep in mind that this article will focus on React, and we will use the reqres.in dummy API for our examples.
POST request in vanilla JavaScriptTo use Axios in vanilla JavaScript, we must first add the CDN link in the HTML before using it in the script file. Let’s start by creating two files to use: index.html and index.js:
// index.html
<!DOCTYPE html>
<html>
<head>
<title>Parcel Sandbox</title>
<meta charset="UTF-8" />
</head>
<body>
<div id="app">
<h1>Login Account</h1>
<form action="" id="login-form">
<label for="email">
Email
<input type="email" name="email" id="email" required />
</label>
<label for="password">
Password
<input type="password" name="password" id="password" required />
</label>
<button id="btn" type="submit">Login</button>
</form>
</div>
<script src="https://unpkg.com/axios/dist/axios.min.js"></script>
<script src="index.js"></script>
</body>
</html>
This HTML file has a simple login form with two input fields, the email and the password fields, and a submit button. At the bottom, just above the index.js link, we also added the Axios CDN.
Next, in the index.js file we created above, we select the form element, and email and password input elements using their IDs. We can then add a submit event handler to the form element. It is triggered whenever we submit the form:
// index.js

const emailInput = document.getElementById("email");
const passwordInput = document.getElementById("password");
const loginForm = document.getElementById("login-form");

loginForm.addEventListener("submit", (e) => {
  e.preventDefault();

  const email = emailInput.value;
  const password = passwordInput.value;

  axios
    .post("https://reqres.in/api/login", {
      email,
      password,
    })
    .then((response) => {
      console.log(response);
    });
});
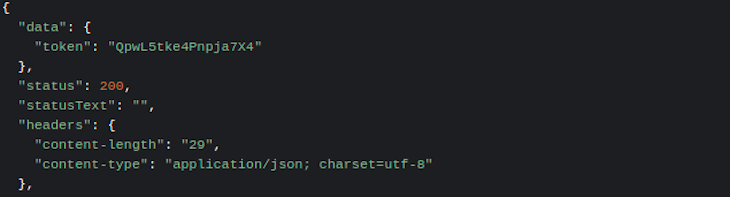
You can submit [email protected] and cityslicka as the email and password values, respectively. The reqres.in dummy API will return a response token with a 200 status code for a successful POST request:
POST request in ReactWe can now perform the same POST request in a React project. We need to first install Axios using npm or Yarn. Depending on your package manager, install Axios by running one of the commands below:
# using npm
npm install axios

# using yarn
yarn add axios
With Axios installed, let’s open our App.js file. Unlike in vanilla JavaScript, we need to import Axios before using it. In our handleSubmit function, we will invoke the Axios POST method just as we did in the vanilla example above:
import React, { useState } from "react";
import axios from "axios";

const App = () => {
  const [data, setData] = useState({
    email: "",
    password: ""
  });

  const handleChange = (e) => {
    const value = e.target.value;
    setData({
      ...data,
      [e.target.name]: value
    });
  };

  const handleSubmit = (e) => {
    e.preventDefault();
    const userData = {
      email: data.email,
      password: data.password
    };
    axios.post("https://reqres.in/api/login", userData).then((response) => {
      console.log(response.status, response.data.token);
    });
  };

  return (
    <div>
      <h1>Login Account</h1>
      <form onSubmit={handleSubmit}>
        <label htmlFor="email">
          Email
          <input
            type="email"
            name="email"
            value={data.email}
            onChange={handleChange}
            required
          />
        </label>
        <label htmlFor="password">
          Password
          <input
            type="password"
            name="password"
            value={data.password}
            onChange={handleChange}
            required
          />
        </label>
        <button type="submit">Login</button>
      </form>
    </div>
  );
};
The above code illustrates how you can make an Axios POST request in React.
POST request using Axios with React HooksLet’s look at another example where we create a new user or register as a new user. We will use the useState React Hook to manage state. Next, we set the value of our text inputs to our states (name and job) in our handleChange function.
Finally, on form submission, we make our Axios POST request with the data in our state. See the code below:
// App.js

import React, { useState } from "react";
import './styles.css';
import axios from "axios";

const App = () => {
  const [state, setState] = useState({
    name: "",
    job: ""
  });

  const handleChange = (e) => {
    const value = e.target.value;
    setState({
      ...state,
      [e.target.name]: value
    });
  };

  const handleSubmit = (e) => {
    e.preventDefault();
    const userData = {
      name: state.name,
      job: state.job
    };
    axios.post("https://reqres.in/api/users", userData).then((response) => {
      console.log(response.status, response.data);
    });
  };

  return (
    <div>
      <h1>Register or Create new account</h1>
      <hr />
      <form onSubmit={handleSubmit}>
        <label htmlFor="name">
          Name
          <input
            type="text"
            name="name"
            value={state.name}
            onChange={handleChange}
            required
          />
        </label>
        <label htmlFor="job">
          Job
          <input
            type="text"
            name="job"
            value={state.job}
            onChange={handleChange}
            required
          />
        </label>
        <button type="submit">Register</button>
      </form>
    </div>
  );
};
You can also create a styles.css file and copy the CSS styling below to style the app. It’s nothing fancy, but it improves the look of the UI:
// styles.css

body {
  padding: 0;
  margin: 0;
  box-sizing: border-box;
  font-family: sans-serif;
}
h1 {
  text-align: center;
  margin-top: 30px;
  margin-bottom: 0px;
}
hr {
  margin-bottom: 30px;
  width: 25%;
  border: 1px solid palevioletred;
  background-color: palevioletred;
}
form {
  border: 1px solid black;
  margin: 0 28%;
  padding: 30px 0;
  display: flex;
  flex-direction: column;
  align-items: center;
  justify-content: center;
}
label {
  width: 80%;
  text-transform: uppercase;
  font-size: 16px;
  font-weight: bold;
}
input {
  display: block;
  margin-bottom: 25px;
  height: 6vh;
  width: 100%;
}
button {
  padding: 10px 30px;
  text-transform: uppercase;
  cursor: pointer;
}
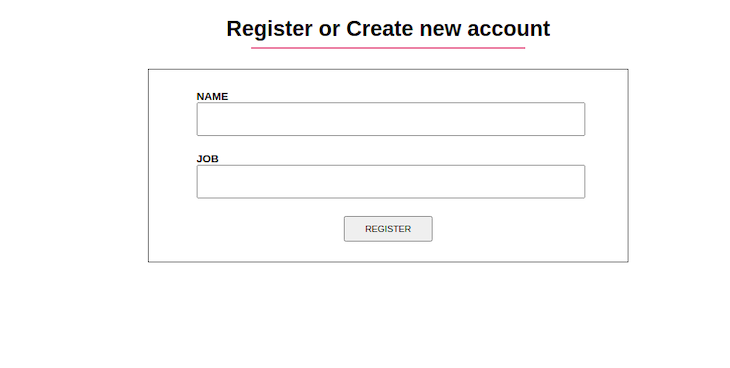
With that, we have our registration app to use our POST method:
In the previous examples, we used promise chaining throughout. Similarly, you can also use the async/await syntax with Axios. When using async and await, we need to wrap our code in a try…catch block as in the example below:
const handleSubmit = async () => {
    try {
      const response = await axios.post(url, userData);
      console.log(response);
    } catch (error) {
      console.log(error);
    }
  };
From the above example, we are awaiting a response from our POST request before we can perform an operation on the response. It works like the .then() method we saw in the previous example.
POST request errors in AxiosAs previously stated, one of the advantages of using Axios over the native Fetch API is that it allows us to handle response errors better.
With Axios, you can catch errors in the .catch() block and check for certain conditions to establish why the error occurred so that you can handle it appropriately. Let’s see how you can do that below:
const App = () => {
  const [data, setData] = useState({
    email: "",
    password: ""
  });

  const handleChange = (e) => {
    const value = e.target.value;
    setData({
      ...data,
      [e.target.name]: value
    });
  };

  const handleSubmit = (e) => {
    e.preventDefault();
    const userData = {
      email: data.email,
      password: data.password
    };
    axios
      .post("https://reqres.in/api/login", userData)
      .then((response) => {
        console.log(response);
      })
      .catch((error) => {
        if (error.response) {
          console.log(error.response);
          console.log("server responded");
        } else if (error.request) {
          console.log("network error");
        } else {
          console.log(error);
        }
      });
  };

  return (
    <div>
      <h1>Login Account</h1>
      <form onSubmit={handleSubmit}>
        <label htmlFor="email">
          Email
          <input
            type="email"
            name="email"
            value={data.email}
            onChange={handleChange}
          />
        </label>
        <label htmlFor="password">
          Password
          <input
            type="password"
            name="password"
            value={data.password}
            onChange={handleChange}
          />
        </label>
        <button type="submit">Login</button>
      </form>
    </div>
  );
};
In the if condition, we check if there is a response. In other words, if our request was sent and the server responded with an HTTP status code outside the 2xx range. The HTTP status codes we can get here range from a 400 status code telling us the user does not exist or that there are missing credentials, a 404 error code telling us the page was not found, to a 501 error code telling us the page is unavailable, etc.
In the else if condition, we checked to see if the request was made, but we received no response. This error is usually due to a network error or being offline.
Finally, if the error received does not fall under the two categories above, then the else block catches it and tells us what happened, which is most likely because an error occurred in the process of setting up the POST request. We can also use error.toJSON() to make our error response more readable.
GET requests with AxiosThis section is slightly out of the scope of this tutorial, but it covers how to perform multiple GET requests concurrently using Axios with error handling.
Because Axios returns a promise, we can perform multiple GET requests using the Promise.all() static method. Promise.all takes an iterable of promises as an argument and returns a single promise. It is fulfilled if all the input promises are fulfilled, and is rejected immediately if one of the input promises is rejected:
const BASE_URL = "https://reqres.in/api/users";
const userIds = [1, 2, 3];

Promise.all(userIds.map((userId) => axios.get(`${BASE_URL}/${userId}`)))
  .then((responses) => {
    const users = responses.map(({ data }) => data);
    console.log(users);
  })
  .catch((error) => {
    if (error.response) {
      // the request was made but the server responded with a
      // status code outside the 2xx range
      console.log(error.response);
    } else if (error.request) {
      // the request was made but no response was received
      console.log(error.request);
    } else {
      // something happened when setting up the request
      console.log(error.toJSON());
    }
  });
In the example above, we have an array of user IDs. We mapped through the array and used Axios to initiate GET requests to our API. Promise.all fulfills after all the promises have been fulfilled, and rejects immediately if one of the promises is rejected.
Additionally, Axios has the built-in axios.all and axios.spread helper functions for making concurrent requests. They have been deprecated, though they may still work. Instead, you should use Promise.all, as in the example above.
One of the benefits of using Axios over the built-in Fetch API is that Axios gives you the ability to intercept requests and responses. With Axios interceptors, you can modify requests and responses before handling them in your fulfillment and rejection handlers.
You can mount an Axios request interceptor to intercept and modify request config objects like so:
const myAxios = axios.create();

myAxios.interceptors.request.use(
  (config) => {
    //Do something with the config object
    //before sending the network request
    return config;
  },
  (error) => {
    //Do something with request error
    //e.g. Log errors for easy debugging
    console.error(error);
    return Promise.reject(error);
  }
);
You should be aware that you can only add interceptors to a custom Axios instance, as in the example above.
Similarly, you can mount a response interceptor to modify response objects like so:
const myAxios = axios.create();

myAxios.interceptors.response.use(
  (response) => {
    //Do something with this response object
    //Any HTTP status code in the 2xx range
    //will trigger this response interceptor

    console.log(response.data);
    return response;
  },
  (error) => {
    //Any HTTP reponse code outside the
    //2xx range will trigger this response
    //error interceptor

    //Do something with response error
    //e.g. Log errors for easy debugging
    console.error(error);
    return Promise.reject(error);
  }
);
There are several use cases for Axios request interceptors. One of the main use cases is to authenticate users. Instead of manually adding authentication tokens, such as JWTs, to every request, you can add the token to the config object in the request interceptor.
You can also use request interceptors to transform request data. You can format the request object or include additional information, such as the request timestamp, to the payload before sending it to the server.
Request interceptors also come in handy for monitoring and logging purposes. You can log API endpoints, request methods, and any other request data that you can use later for debugging.
There are several use cases for intercepting responses in Axios. I will highlight some of them below.
The HTTP response you get from the server may have a payload with a different data type than the data type your application expects, especially when sourcing data from a third-party API. For example, the server response may be in XML format, but your frontend code expects JSON. You can intercept the HTTP response and transform the payload into JSON.
Similarly, the server response may contain more data than your application needs. You can intercept the response and extract only the data your application needs.
You can also use response interceptors for error handling. You can get different kinds of errors from the server. Instead of having error handlers littered throughout your codebase, you can handle these errors centrally in a response interceptor. You can intercept the HTTP responses, log the errors for debugging, and handle them appropriately.
Such central error handling ensures your code is organized and maintainable. It will also ensure you provide appropriate client feedback regarding the success and failure of the POST request.
POST requestOrdinarily, when posting a simple object using Axios, you pass a plain JavaScript object to a POST request body, and by default, Axios will serialize your payload to a JSON string as in the code below.
By default, Axios will set the Content-Type header to application/json:
axios
  .post("/submit", { name: "Jane Doe", email: "[email protected]" })
  .then((response) => console.log(response))
  .catch((error) => console.error(error));
You can also submit an HTML form data as JSON. However, you need to set the Content-Type header to application/json like so:
axios
  .post("/login", document.getElementById("login-form"), {
    headers: { "Content-Type": "application/json" },
  })
  .then((response) => console.log(response))
  .catch((error) => console.error(error));
Depending on the data you want to transmit via a POST request, sometimes you may want Axios to encode your payload in a different format than JSON, such as when uploading text files, images, audio, videos, and other multimedia files.
For the latest versions, Axios can encode the request body to multi-part form data out of the box if you explicitly set the Content-Type header to multipart/form-data. It’s the encoding you use when uploading files:
const response = await axios.post(
  "/submit",
  {
    name: "Jane Doe",
    email: "[email protected]",
    avatar: document.querySelector("input[name='avatar']").files[0],
  },
  {
    headers: {
      "Content-Type": "multipart/form-data",
    },
  }
);
Similarly, with the latest versions of Axios, you can set the Content-Type header to x-www-form-urlencoded if you want Axios to URL encode your payload out of the box:
const response = await axios.post(
  "/submit",
  { name: "Jane Doe", email: "[email protected]" },
  {
    headers: {
      "Content-Type": "application/x-www-form-urlencoded",
    },
  }
);
For earlier versions of Axios, you will need to URL encode the payload using APIs such as URLSearchParams or a third-party npm package before posting it.
POST request techniquesCross-site request forgery (or XSRF for short) is a method of attacking a web-hosted app in which the attacker disguises themself as a legal and trusted user to influence the interaction between the app and the user’s browser. There are many ways to execute such an attack, including XMLHttpRequest.
Fortunately, Axios is designed to protect against XSRF by allowing you to embed additional authentication data when making requests. This enables the server to discover requests from unauthorized locations.
Here’s how this can be done with Axios:
const options = {
  method: 'post',
  url: '/login',
  xsrfCookieName: 'XSRF-TOKEN',
  xsrfHeaderName: 'X-XSRF-TOKEN',
};

// send the request
axios(options);
POST request timeouts and cancellations in AxiosFor some reason, the server can sometimes delay responding to user requests, or the network connection becomes unavailable. Therefore, you will have to timeout and cancel certain requests.
In Axios, you can set the response to timeout using the timeout property of the config object like so:
axios
  .post("/submit", {}, { timeout: 1500 })
  .then((response) => {
    console.log(response);
  })
  .catch((error) => {
    if (error.response) {
      console.log(error.response);
    } else if (error.request) {
      console.log(error.request);
      if (error.code === "ECONNABORTED") {
        console.log("Connection aborted");
      }
    } else {
      console.log('Error', error.message);
    }
  });
In the above example, Axios aborts the network connection if it fails to get a response from the server within 1.5 seconds. If the error is thrown because of a timeout, Axios will set the error code to ECONNABORTED.
Alternatively, you can also timeout using the AbortSignal API. AbortSignal is now supported both in the browser and Node.js:
axios
  .post("/submit", {}, { signal: AbortSignal.timeout(1500) })
  .then((response) => {
    console.log(response);
  })
  .catch((error) => {
    console.log(error);
  });
Instead of a timeout, you can use the AbortController API to explicitly abort the request. This is useful in situations where a user navigates away from a given page after a network request has been initiated:
const ac = new AbortController();

axios
  .post("/submit", {}, { signal: ac.signal })
  .then((response) => {
    console.log(response);
  })
  .catch((error) => {
    console.log(error);
  });

ac.abort("Request aborted");
You can use FormData to handle file uploads. Avoid setting the Content-Type header manually because if you do, the boundary required for multipart/form-data won’t be added automatically, leading to errors:
const formData = new FormData();
formData.append('file', file);
formData.append('key', 'value');

axios.post('/upload', formData).then(response => console.log(response.data));
Set timeouts to avoid hanging requests and implement retry logic for network issues or server downtime:
const apiClient = axios.create({ timeout: 5000 });

async function makeRequestWithRetry(url, data, retries = 3) {
  try {
    return await apiClient.post(url, data);
  } catch (error) {
    if (retries > 0) {
      return makeRequestWithRetry(url, data, retries - 1);
    }
    throw error;
  }
}

makeRequestWithRetry('/endpoint', { key: 'value' });
Implement throttling to limit the number of requests sent within a specific time frame:
let isThrottling = false;

async function throttledRequest(url, data) {
  if (isThrottling) {
    console.log('Throttling in effect, please wait...');
    return;
  }

  isThrottling = true;
  const response = await axios.post(url, data);
  isThrottling = false;

  return response.data;
}

throttledRequest('/endpoint', { key: 'value' });
POST request failing?Your Axios POST request might not be working due to several common issues. Ensure the API URL is correct, and check that the required headers, such as Content-Type, are properly set. CORS issues could also block the request. If you control the backend, enable CORS there, or use a proxy during development. Server-side issues or incorrect API implementation could be the cause, so test the API using tools like Postman or curl to confirm it is functioning as expected.
The real fix for CORS issues is on the server. You need to specify the methods, headers, and origins that can send requests to the server in your backend. You can also use * to make your APIs public:
const express = require('express');
const cors = require('cors');

const app = express();

app.use(cors({
  origin: '*', // for public APIs
  methods: ['GET', 'POST', 'PUT', 'DELETE'],
  allowedHeaders: ['Content-Type', 'Authorization'],
}));

app.use(express.json());
Here is what your axios config should look like:
axios.post('http://localhost:5000/api', data, {
  withCredentials: true,
  headers: {
    'Content-Type': 'application/json',
    'Authorization': 'Bearer token',
  },
});
To send a JSON payload in an Axios POST request, you simply pass the JSON data as the second argument to the axios.post method. Axios automatically sets the Content-Type header to application/json when you provide an object as the payload:
import axios from 'axios';

const payload = {
  name: 'John Doe',
  email: '[email protected]',
};

axios.post('https://test.com/api/login', payload)
  .then(response => {
    console.log('Response:', response.data);
  })
  .catch(error => {
    console.error('Error:', error);
  });
For custom headers, include a third argument containing the header config:
axios.post('https://test.com/api/login', payload, {
  headers: {
    'Authorization': 'Bearer your-token',
    'Custom-Header': 'custom-value'
  }
})
  .then(response => {
    console.log('Response:', response.data);
  })
  .catch(error => {
    console.error('Error:', error);
  });
Fixing Content-Type and JSON payload errors in HTTP requests often involves ensuring proper configuration of headers and data formatting. When sending a JSON payload, explicitly include the Content-Type: application/json header in your request:
axios.post('/api/endpoint', payload, {
  headers: { 'Content-Type': 'application/json' }
});
Also, check the API documentation to confirm if any additional headers or specific data formats are required.
When dealing with authentication failures in APIs like API keys, tokens, or OAuth, it’s important to debug the root cause to apply the appropriate fixes.
The most common causes of authentication failures are:
Handling authentication with Axios for a POST request usually requires including credentials in the request headers, depending on the API’s authentication method. Common approaches include:
Bearer ${token} in the Authorization headerx-api-key.Axios automatically stringifies the data object and sets the Content-Type header to application/json. With Fetch, you need to handle these manually.
Axios has better error handling by automatically rejecting promises for HTTP response statuses outside the 2xx range.
Fetch, on the other hand, resolves the promise even for errors, requiring additional steps to check the response status. While Fetch is a lightweight and native option for API requests, it requires more manual implementation of Axios’ built-in functionalities.
Axios is a popular promise-based HTTP library that you can use both in the browser and Node.js. You can use it to make HTTP POST, PUT, PATCH, GET, and DELETE requests both on the client and server side. In this article, our focus was on the POST method.
Unlike the built-in Fetch API, Axios has several built-in features. With Axios, you can intercept and modify request and response objects. It also provides built-in features for automatic JSON serialization and deserialization and superior error handling capabilities to the Fetch API.
Though powerful and feature-rich, you should be aware that Axios is a third-party package. Like most third-party packages, Axios has its downsides. You need to consider the extra bundle size, security, licensing requirements, and long-term maintenance before using.
Install LogRocket via npm or script tag. LogRocket.init() must be called client-side, not
server-side
$ npm i --save logrocket

// Code:

import LogRocket from 'logrocket';
LogRocket.init('app/id');
// Add to your HTML:

<script src="https://cdn.lr-ingest.com/LogRocket.min.js"></script>
<script>window.LogRocket && window.LogRocket.init('app/id');</script>

Learn how inline props break React.memo, trigger unnecessary re-renders, and hurt React performance — plus how to fix them.

This article showcases a curated list of open source mobile applications for Flutter that will make your development learning journey faster.

Discover what’s new in The Replay, LogRocket’s newsletter for dev and engineering leaders, in the April 1st issue.

This post walks through a complete six-step image optimization strategy for React apps, demonstrating how the right combination of compression, CDN delivery, modern formats, and caching can slash LCP from 8.8 seconds to just 1.22 seconds.
Hey there, want to help make our blog better?
Join LogRocket’s Content Advisory Board. You’ll help inform the type of content we create and get access to exclusive meetups, social accreditation, and swag.
Sign up now

