React uses two types of components: functional and class. The former is equivalent to JavaScript functions while the latter corresponds with JS classes.

Functional components are simpler because they are stateless, and React encourages using of this type. At the same time, React creators recommend writing functional components as pure functions, meaning that any state change should be handled outside the component itself.
You may encounter components that hold information that affects their rendering, but you don’t want that data to be available for the entire application. In other words, you want to keep the state local and manage it in isolation within that component.
If you choose to use class components, things are pretty straightforward because they have state built-in. However, if you opt for functional components due to their simplicity, the only way to add state is to use hooks.
Let’s say your application consists mostly of functional components and at a later point you realize that you need state in some components. Instead of refactoring the code, you can use a hook such as useState. Hooks don’t work inside class components.
Here’s a comparison between a functional component with the useState hook and a class component with built-in state.
Functional component:
import React, { useState } from "react";
import "./styles.scss";
export default function App() {
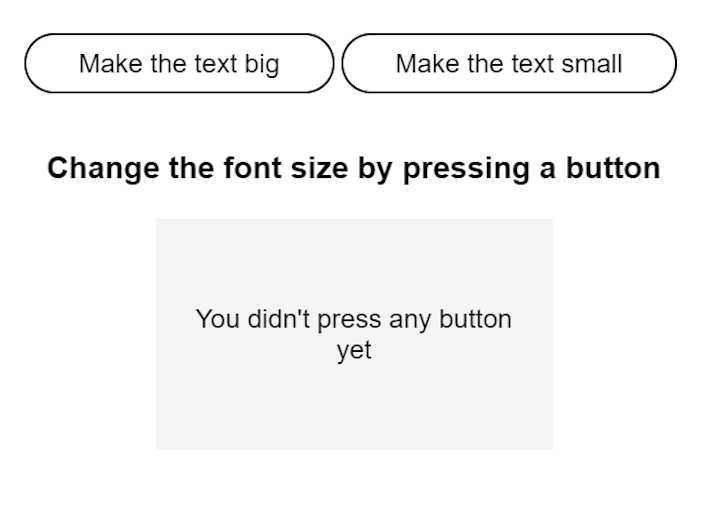
const [size, changeSize] = useState("You didn't press any button yet");
return (
<div className="App">
<p id="para1" onClick={changeSize.bind(null, "big")}>
Make the text big
</p>
<p onClick={changeSize.bind(null, "small")}>
Make the text small
</p>
<div>
<h3>Change the font size by pressing a button</h3>
</div>
<div id="result" className={`box ${size}`}>
{size}
</div>
</div>
);
}
Here’s the same component, but written as a class:
import React, { Component } from "react";
import "./styles.scss";

export default class App extends Component {
 constructor(props) {
   super(props);
   this.state = {
     size: "default",
     message: "Default font size"
   };
 }

 changeBig = () => {
   this.setState({ size: "big", message: "big" });
 };

 changeSmall = () => {
   this.setState({ size: "small", message: "small" });
 };

 render() {
   return (
     <div className="App">
       <p onClick={this.changeBig}>Make the text big</p>
       <p onClick={this.changeSmall}>Make the text small</p>

       <div>
         <h3>Change the font size by pressing a button</h3>
       </div>
       <div className={`box ${this.state.size}`}>{this.state.message}</div>
     </div>
   );
 }
}
It’s quite clear that the functional component is easier to write and handle be cause it has fewer lines of code and you can just “hook in” and add state as needed.
The challenge with this approach is that your stateless component won’t be able to mimic the state change by itself. Because the hooks are internal, you won’t be able to call them. So if you want to test the behavior of this component, you’ll need a function that triggers the state change.
This function has to meet two additional requirements: it should be available as a prop of the component and make use of a mocked event. With this in place, you can test whether the state has been updated by looking for its side effects, such as an update in the props of the rendered component.
Enough theory — let’s see this in practice! We’ll test the functional component from above with Jest and Enzyme.
We’ll render a component that changes the size of the font when you press one of the buttons.
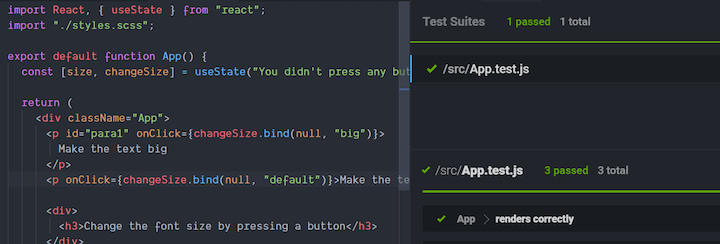
In the App.js file, add the following code.
import React, { useState } from "react";
import "./styles.scss";

export default function App() {
 const [size, changeSize] = useState("You didn't press any button yet");

 return (
   <div className="App">
     <p id="para1" onClick={changeSize.bind(null, "big")}>
       Make the text big
     </p>
     <p onClick={changeSize.bind(null, "small")}>Make the text small</p>

     <div>
       <h3>Change the font size by pressing a button</h3>
     </div>
     <div id="result" className={`box ${size}`}>
       {size}
     </div>
   </div>
 );
}
Then, in the style.scss file, add this code:
.App {
font-family: sans-serif;
text-align: center;
}
p {
background-color: transparent;
color: black;
border-radius: 2rem;
padding: 0.5rem 2rem;
border: 1px solid;
margin-right: 0.25rem;
display: inline-block;
&:hover {
background-color: black;
color: white;
}
}
.box {
background-color: rgb(245, 244, 244);
height: 100px;
width: 200px;
padding: 20px;
margin: 20px auto;
display: flex;
align-content: center;
justify-content: center;
align-items: center;
}
.default {
font-size: 18px;
color: blue;
background-color: rgb(219, 245, 255);
}
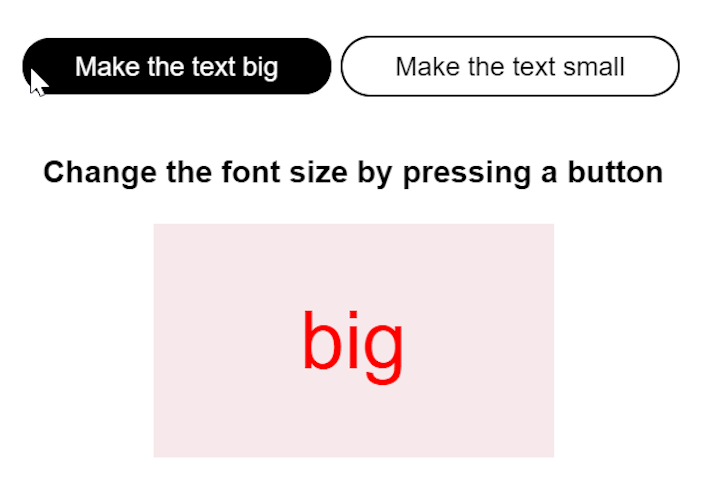
.big {
font-size: 48px;
color: red;
background-color: rgb(247, 233, 235);
}
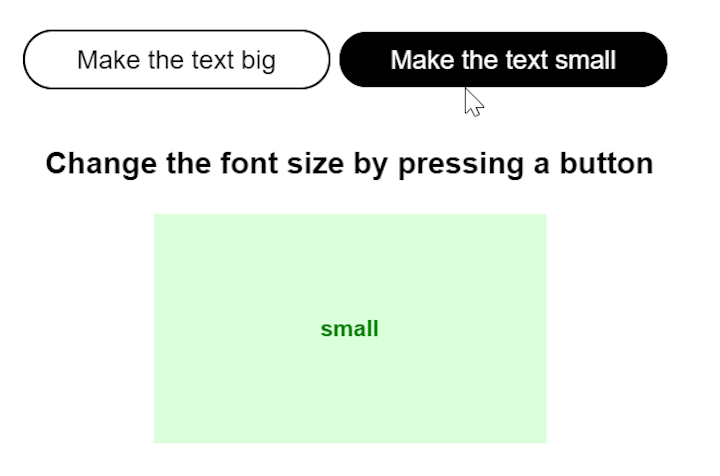
.small {
font-size: 14px;
font-weight: bold;
color: green;
background-color: rgb(219, 255, 219);
}
When you press the first button, the font size increases.
In the same way, when you press the second button, the font size decreases.
For this simple application, we want to first test that the component is rendered correctly, and then we’ll test the change in the class name that is supposed to occur after the onClick event.
Before writing the tests, let’s clarify why we need both of these tools. Jest and Enzyme are similar, but they’re used for slightly different purposes.
They can both perform unit tests, but Jest is a fully featured testing framework, meaning it provides an assertion library to help you test your entire application.
Jest tests the components mainly through snapshots, by comparing the output of a rendered component to the saved HTML snapshot. When the two correspond, the test passes, but if the rendered output is different than the snapshot, Jest raises a test failure.
The issue with snapshot testing in Jest is that whenever you change even one line of code, you need to repeat the snapshots, then compare the HTML outputs line by line to see what changed. Enzyme solves this issue by providing APIs that examine the components and return a failure or passed response.
In this exercise, we’ll use Enzyme and Jest together to keep tests simpler. We’ll create a single test file where we’ll add our configurations, but in a real-life project, it’s good practice to keep these separated.
Let’s first add Jest and Enzyme as dependencies.

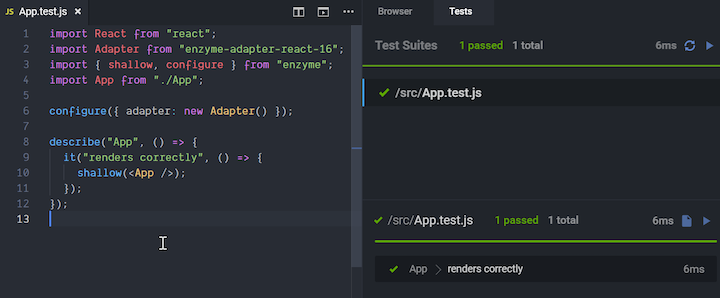
The next step is to create a new file for the test and name it App.test.js.
import React from "react";
import Adapter from "enzyme-adapter-react-16";
import { shallow, configure } from "enzyme";
import App from "./App";

configure({ adapter: new Adapter() });

describe("App", () => {
 it("renders correctly", () => {
   shallow(<App />);
 });
});
The imports are needed for Enzyme tests to work properly with React in this exercise. If we look at the syntax of the test, we see that it uses some keywords:
describe breaks down a test suite into multiple smaller tests. You can nest multiple describe statements if you want to divide the tests even moreit describes a single test. In other words, it explains what the component should do. This statement can’t be nestedshallow renders a single component, without including its children, so it’s perfect for rendering isolated components and performing pure unit testsNow let’s run this first test and see if the component renders correctly.
What if we change the class name for the small, green font and use default? Let’s see what happens when we change the code and run the test again.
The test still passes, even if the behavior is not correct, because we’re not testing the behavior with this type of test.
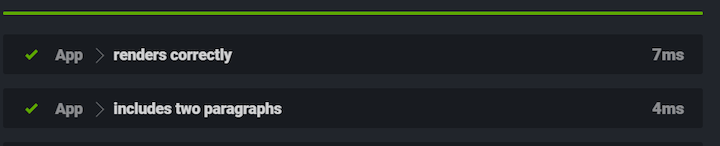
Let’s do one more exercise before testing the functionality and check whether the rendered component includes two paragraphs.
In the App.test.js file, I’ve adjusted the code as follows:
import React from "react";
import Adapter from "enzyme-adapter-react-16";
import { shallow, configure } from "enzyme";
import App from "./App";

configure({ adapter: new Adapter() });

describe("App", () => {
 it("renders correctly", () => {
   shallow(<App />);
 });

 it("includes two paragraphs", () => {
   const wrapper = shallow(<App />);
   expect(wrapper.find("p").length).toEqual(2);
 });
});
Now we’re checking whether the rendered component finds two paragraphs. Indeed, the test passes.
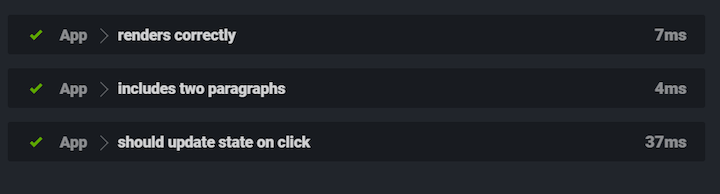
Finally, let’s test the actual functionality of the app and see if the state changes on click. We’ll mock a function for this and write the test as follows.
it("should update state on click", () => {
   const changeSize = jest.fn();
   const wrapper = mount(<App onClick={changeSize} />);
   const handleClick = jest.spyOn(React, "useState");
   handleClick.mockImplementation(size => [size, changeSize]);

   wrapper.find("#para1").simulate("click");
   expect(changeSize).toBeCalled();
 });
Here, we’re first defining a mock function, changeSize = jest.fn(). This function adjusts the state of the component and is called in the handleClick function. We’re using the jest.spyOn() function, which has the following syntax:
jest.spyOn(object, methodName)
This function creates a mock function similar to jest.fn while tracking the calls to the object’s method (methodName). So we’re testing to validate whether calling this function actually calls the useState hook (function).
If useState is called, when we simulate the click on the #para1 (first paragraph), we should get a truthy value for the changeSize function.
When we run the tests, we see that this one passes as well.
I hope this guide gives you an idea of how to test your React functional components. In particular, I hope you come away with a better understanding of the state changes for components that use hooks, with Jest and Enzyme as testing libraries.
Install LogRocket via npm or script tag. LogRocket.init() must be called client-side, not
server-side
$ npm i --save logrocket

// Code:

import LogRocket from 'logrocket';
LogRocket.init('app/id');
// Add to your HTML:

<script src="https://cdn.lr-ingest.com/LogRocket.min.js"></script>
<script>window.LogRocket && window.LogRocket.init('app/id');</script>
Would you be interested in joining LogRocket's developer community?
Join LogRocket’s Content Advisory Board. You’ll help inform the type of content we create and get access to exclusive meetups, social accreditation, and swag.
Sign up now
<selectedcontent> element improves dropdowns

Learn how to implement an advanced caching layer in a Node.js app using Valkey, a high-performance, Redis-compatible in-memory datastore.

Learn how to properly handle rejected promises in TypeScript using Angular, with tips for retry logic, typed results, and avoiding unhandled exceptions.

AI’s not just following orders anymore. If you’re building the frontend, here’s how to design interfaces that actually understand your agent’s smarts.


6 Replies to "Testing state changes in React functional components"
with this approach we need to interact with the component’s DOM and simulate the events which I feel like E2E test. I feel uncomfortable to see ‘find’ in unit tests. What do you say?
Hello, I think the approach used for “should update state on click” is not correct. jest.fn() returns a function. So changeSize is a function. So changeSize will always be truthy even if you did not simulate the click. try to expect(changeSize).toBeCalled(). You will see that the function is not called at all.
Big “No” on that last test. If you comment out the simulate(“click”) line in the testcase, the test still passes. Therefore this is not a valid test. As Omar said, jest.fn() returns a function. I’m surprised you didn’t update this article after his comment, which is clearly correct. I don’t recommend using a unit test to test internal state. Instead test external effects.
What’s the name of that vscode extension that runs the test next to the test code? It looks pretty convenient!
This test does not work correctly.
That’s a good catch! Sorry for the confusion folks! I updated the article, notified the editors and it should be published soon.