
The Replay is a weekly newsletter for dev and engineering leaders.
Delivered once a week, it's your curated guide to the most important conversations around frontend dev, emerging AI tools, and the state of modern software.
Testing and debugging are part of any good application development lifecycle. While there are a whole lot of tools and libraries out there for building Android applications, the Charles Web debugging proxy is a very impressive option when you consider the functions it performs.

Using this tool, you can cut down the time spent on debugging and solving issues. After several trials on my own, I was impressed with what I could accomplish and how easily and quickly I could debug and solve issues.
In this article, you will learn about Charles Web Proxy and how to set it up. We’ll cover the following:
According to the Charles Web Proxy website, Charles is
an HTTP proxy/HTTP monitor/Reverse Proxy that enables a developer to view all of the HTTP and SSL/HTTPS traffic between their machine and the Internet. This includes requests, responses, and the HTTP headers, which contain the cookies and caching information.
In a nutshell, the Charles Web Debugging Proxy is a software application that monitors network activities on personal computers, such as network requests and server responses. It intercepts and changes the data packets in real time.
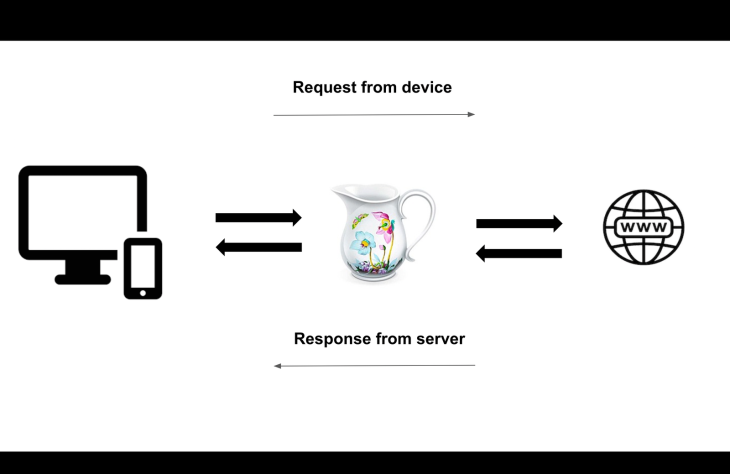
Testing and debugging can be very frustrating and exhausting. Charles exists to reduce these kinds of work-induced stresses; with Charles in your development arsenal, you can quickly diagnose problems and implement quick fixes. I will outline a few use cases where I find Charles to be handy.
A typical scenario would be where you depend on a value from the backend to determine certain behaviors on the client-side. Commonly, you may request the backend engineer to effect a change, which works. However, it’s not so fluid a process — often, you end up in a discussion about the changes needed, which reduces productivity.
With Charles, before the response gets delivered to the client-side, you can edit the network response to any data structure of your choice to meet test requirements and more effectively test the app’s response to different states.
Let’s say you’re working on a feature that requires making a request to the backend server. Chances are that you get blocked because the backend engineer has yet to deploy the API endpoints to the staging environment. In this case, the best you can do would be to make a draft PR while waiting for the backend to meet your needs. This process is not efficient and reduces productivity.
Using Charles, you can mock the network response stated in the business requirements to test the work done. Also, you can safely make a PR ready for review.
Network errors cannot be ignored when building mobile applications. They arise through network requests (i.e., internal server errors). Testing how your client-side logic responds to different network error responses can and rapid development.
You can conveniently mock these responses with Charles Web Proxy.
Summarily, from the above use cases, we can achieve the following with Charles:
Internal Server Error - 500, Bad Request (400)I will outline some steps for setting up Charles on your PC and Android device.
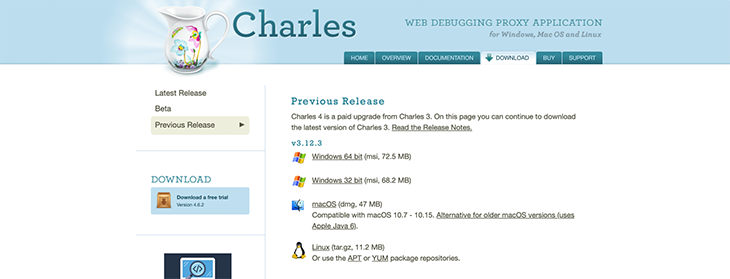
Download the latest version of Charles from the official website. As shown in the screenshot below, you should select the file that matches your PC’s specifications.
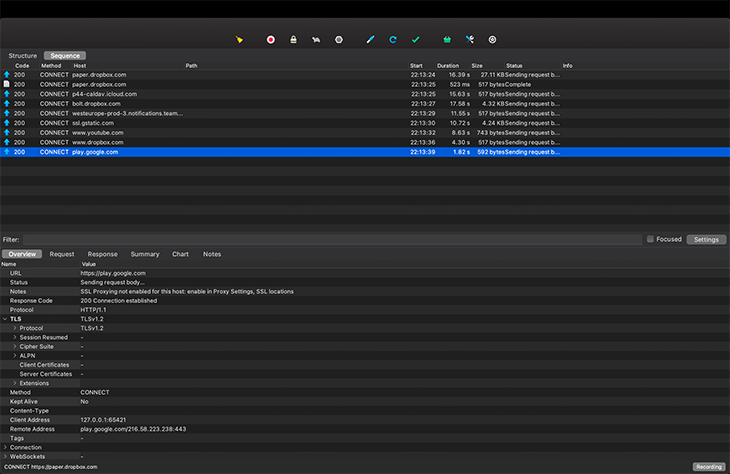
After installation, you will be presented with a window that looks like this:
SSL proxying intercepts all SSL requests and proxies them in such a way that you can view the contents of the SSL request and response in plain text, rather than just viewing the encrypted text.
Set up proxying for all HTTPS connections like so:
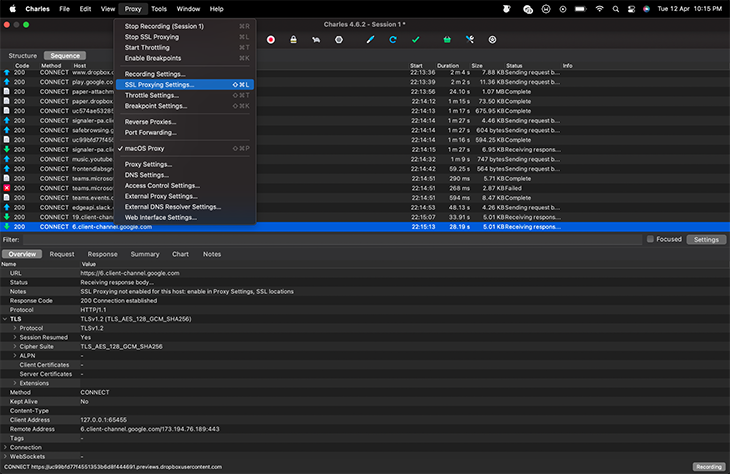
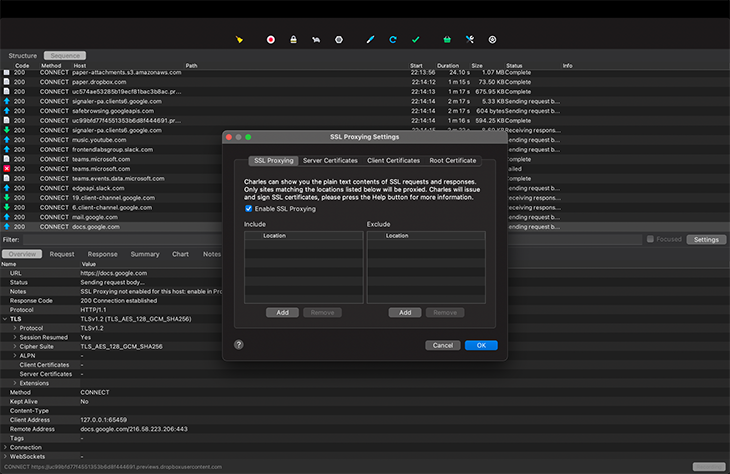
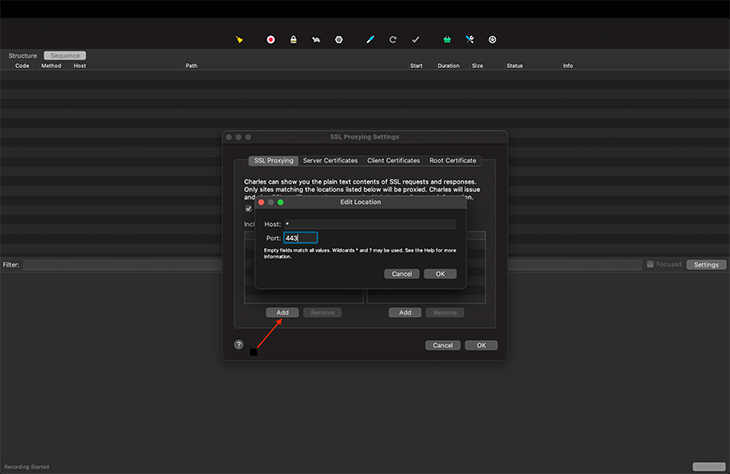
We defined the host as *, which tells Charles to intercept every network traffic event. The port is set to 443, indicating that the host is secured — HTTPS is the secure and encrypted version of HTTP, and all HTTPS web traffic goes to port 443.
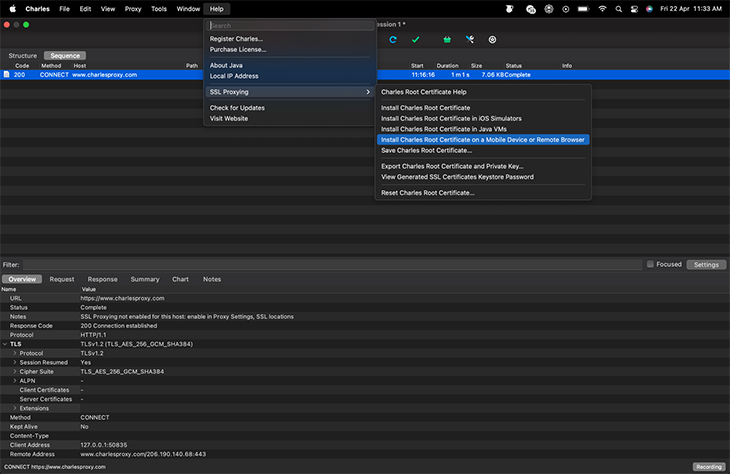
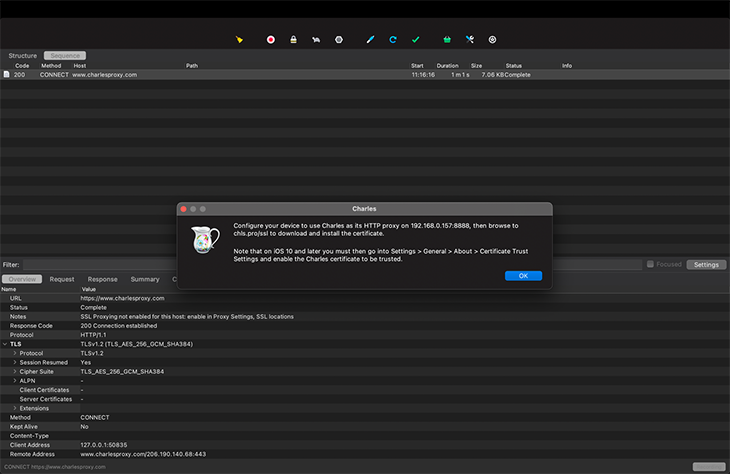
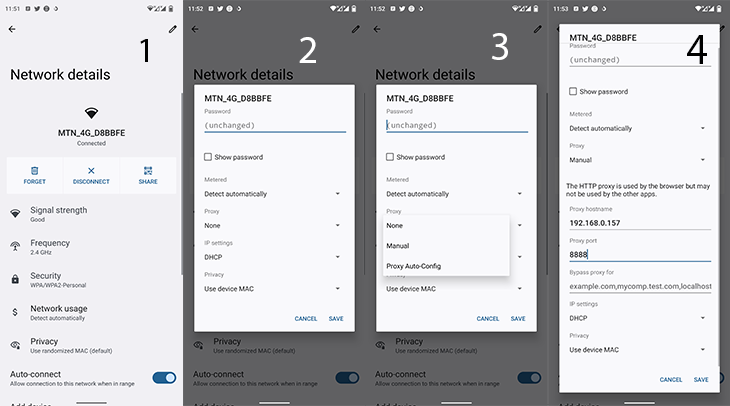
Android permits proxy configurations for each wireless network. We will connect the PC and Android device to same network with HTTP proxy settings retrieved from the Charles Help Window.
Retrieve HTTP configurations from the Charles help window, like so:
Now, set up the proxy settings on Android.
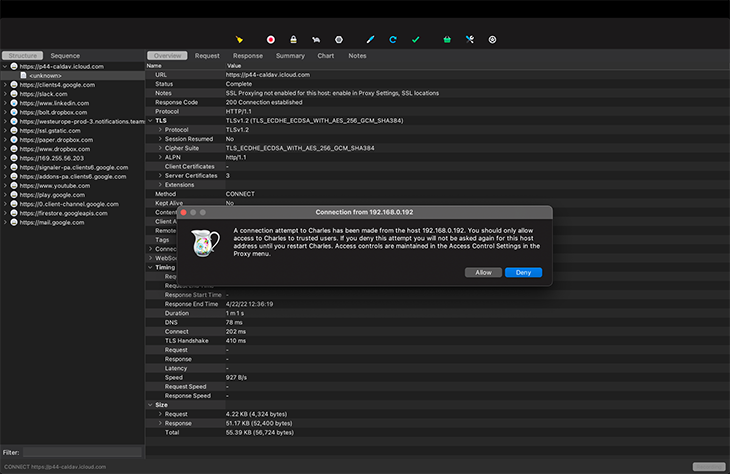
Charles will prompt you to accept a connection from your mobile device. Click Allow.
Head on to http://chls.pro/ssl to download your Charles certificate, which will be installed on your Android device.
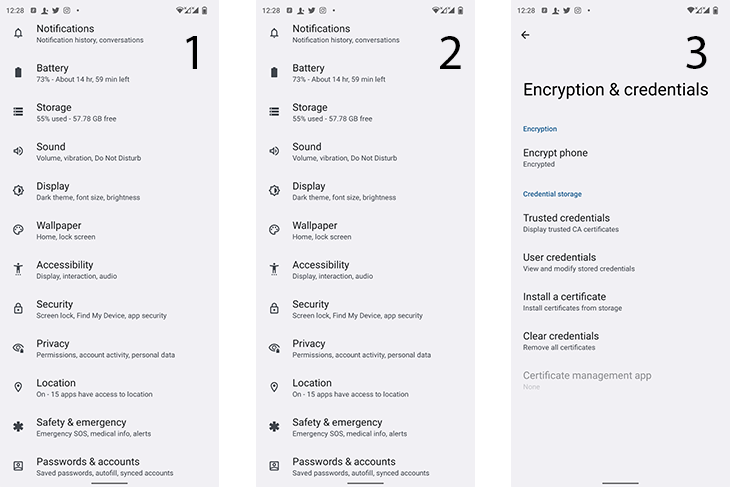
Navigate to Device Settings and follow the screenshots below for the installation guide.
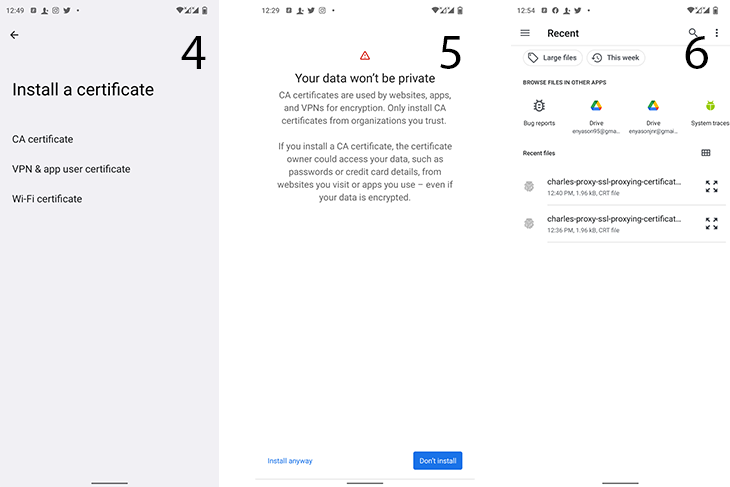
Upon completing these steps, Charles should begin intercepting network traffic from your mobile app.
The proxy we configured above will be used by web browsers, but may not be used by other apps. You need to add configuration to your app in order to have it trust the SSL certificates generated by Charles SSL proxying.
In order to configure your app to trust Charles, you need to add a network security configuration file to your app. This file can override the system default, enabling your app to trust user-installed CA certificates (e.g., the Charles Root Certificate). You can specify that this only applies in debug builds of your application, so that production builds use the default trust profile. You can read more about this on the SSL certificates section of Charles’s website.
Add a network_security_config.xml file to your res/xml/ folder in your app:
<network-security-config>
  <debug-overrides>
    <trust-anchors>
      <!-- Trust user added CAs while debuggable only -->
      <certificates src="user" />
    </trust-anchors>
  </debug-overrides>
</network-security-config>
Specify the network configuration settings in the Manifest.xml file of your application.
<?xml version="1.0" encoding="utf-8"?>
<manifest ... >
    <application android:networkSecurityConfig="@xml/network_security_config" ... >
        ...
    </application>
</manifest>
We’re all set to begin using Charles to proxy traffic from our mobile application.
For the purpose of this article, I’ll next demonstrate the use-cases we highlighted earlier, using a movie browser Android project. Clone the project from my GitHub repo.
When writing a piece of software, you want to adopt a defensive programming approach to avoid unexpected outcomes in production, such as ensuring your app can gracefully handle network errors like a 500 internal server error.
Asking your backend engineer to enforce a 500 server error on an endpoint is not a very good approach to run this test for the following reasons:
Bearing these in mind, we are going to rely on Charles and httpstat to mock a 500 internal server error for our mobile app.
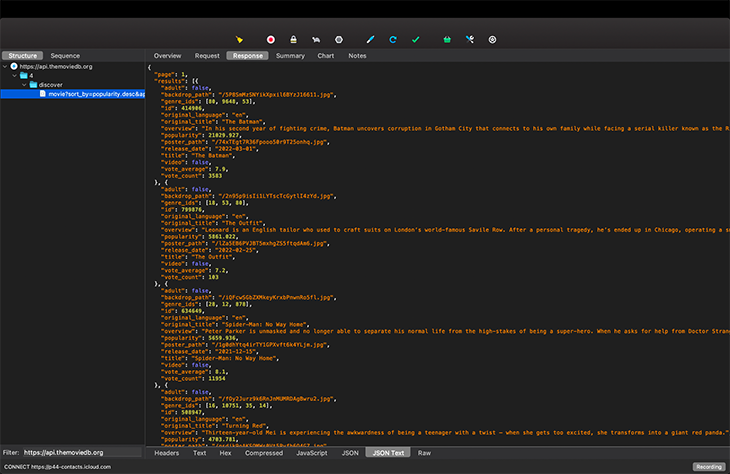
Before we proceed to mock an error response, ensure you can intercept and decrypt the response from the TMDB API. If the set up is done correctly, you should have something similar to the screenshot below:
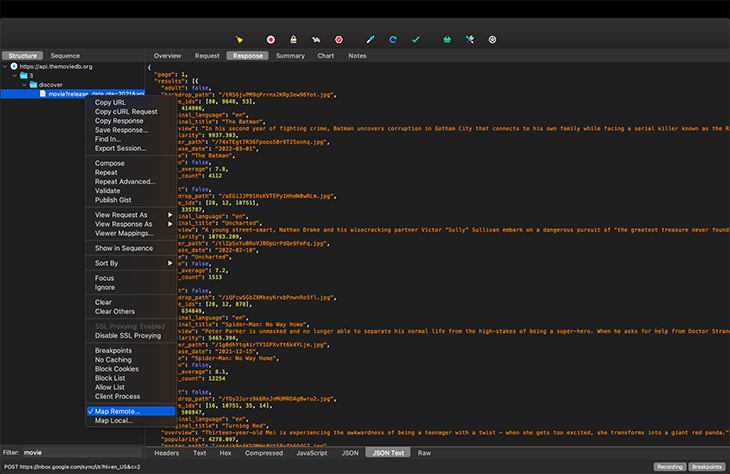
We can then map the API response to Remote, like so:
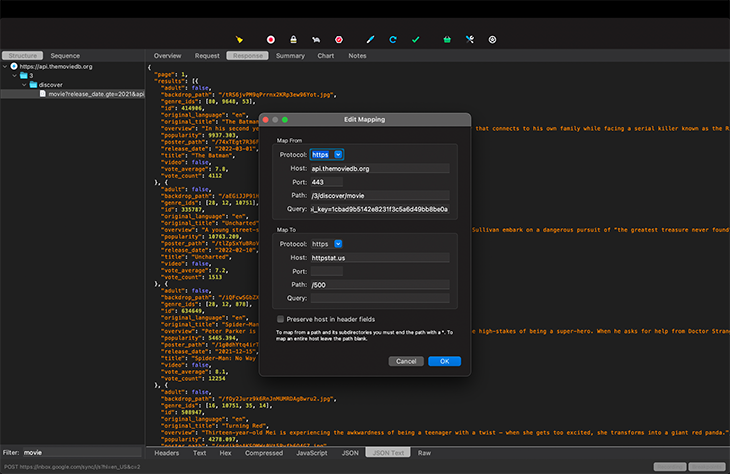
Save this setting and trigger the API call again from your app. You should see https://httpstat.us/ listed in the view structure like so:
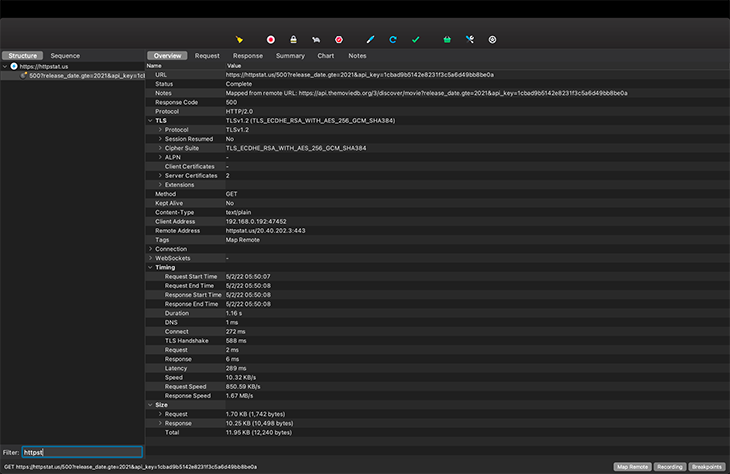
Basically, we’ve instructed Charles to intercept any request to https://api.themoviedb.org and deliver a response from https://httpstat.us/500 to the mobile device, rather than the original response from https://api.themoviedb.org/3/discover/movierelease_date.gte=2021&api_key=1cbad9b5142e8231f3c5a6d49bb8be0a.
In the screenshot below, I display a toast message to inform the user about the server error.
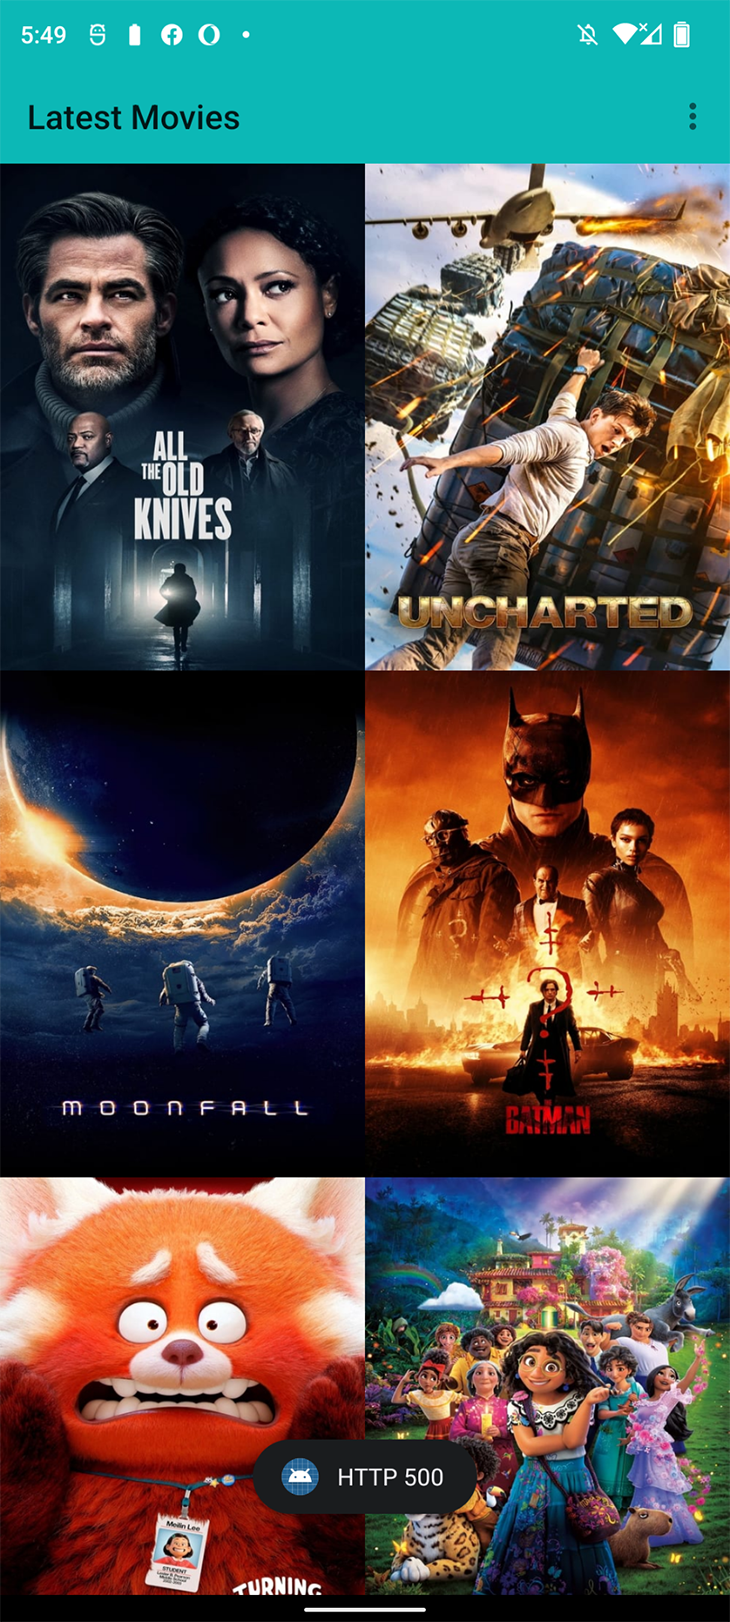
Et voilà! We have successfully mocked an internal server error, without needing to shut down the TMDB server. 😀
Aside from Map Remote, there is a corresponding function, Map Local. They have similar functions, but what differentiates them is the location from which the response is served. The former returns a response from an online server, while the latter serves the response from your local machine via a JSON file.
This function is very handy for testing client app features when endpoints are not ready for use.
The following steps outline when using Map Remote is applicable to using Map Local.
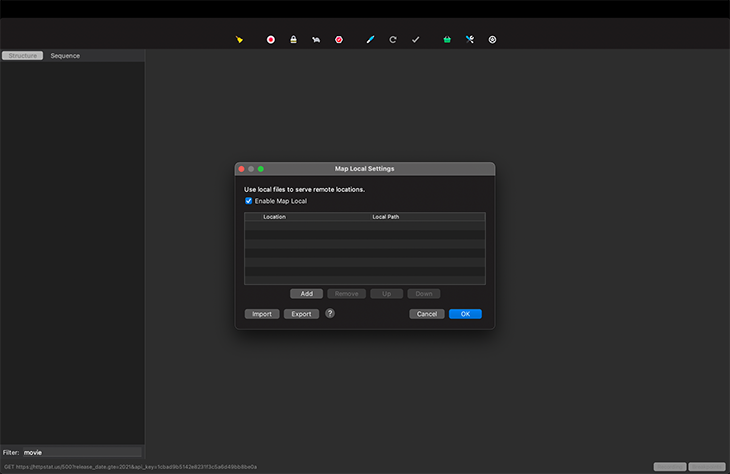
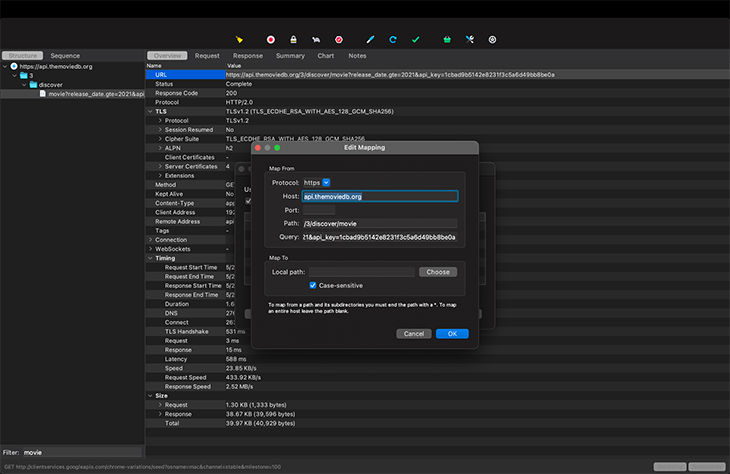
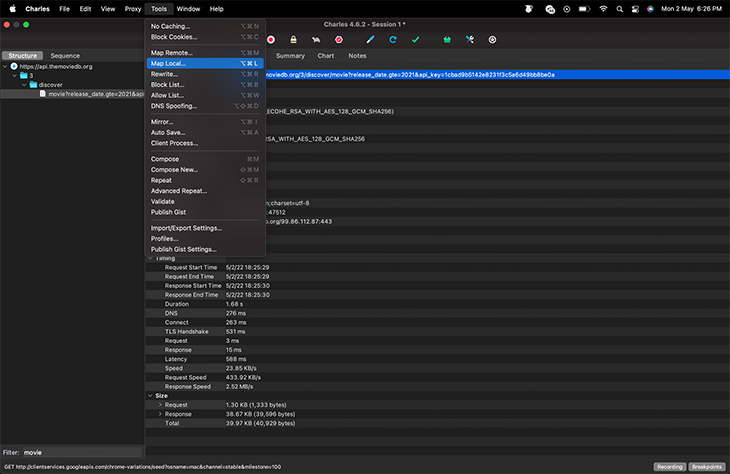
Instead of Map Remote, select Map Local and use a JSON file from your local machine. See the below screenshots for reference:
Breakpoints! Yeah, that’s right. You can literally pause the network request and response in real time and edit them. Your client app will then receive the edited response from Charles — the same way as when you put breakpoints in Android Studio, but this is even more sophisticated because you can manipulate the data.
See the screenshot below on how to set breakpoints on a network request:
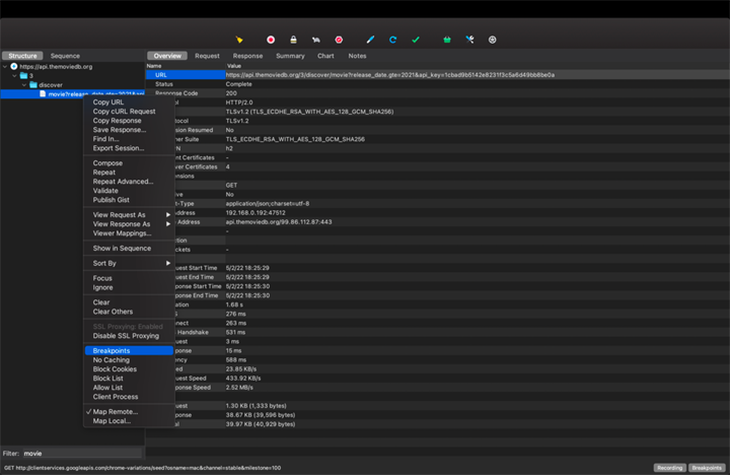
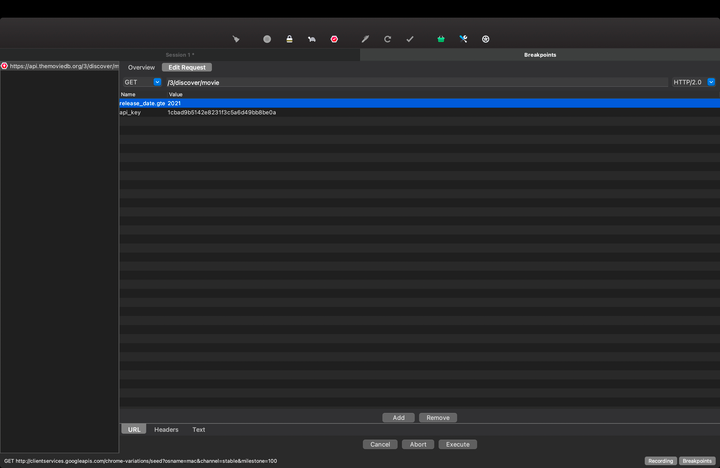
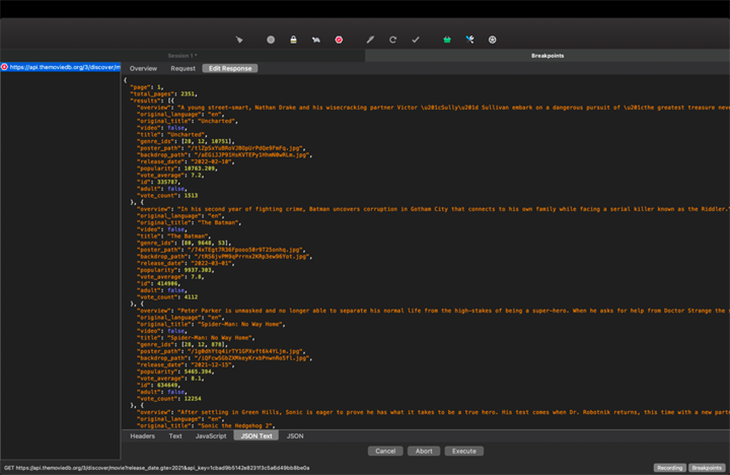
Using breakpoints on Charles will happen in the order in which the images appear.
Charles Web Proxy is a very handy tool for software development. Especially on Android, we can manipulate response data to represent different ViewStates, thus speeding up development and testing.
If you followed through to the end, well done! Let me hear you thoughts about this tool in the comments sections. Thank you!
LogRocket is an Android monitoring solution that helps you reproduce issues instantly, prioritize bugs, and understand performance in your Android apps.
LogRocket's Galileo AI watches sessions for you, instantly identifying and explaining user struggles with automated monitoring of your entire product experience.
LogRocket also helps you increase conversion rates and product usage by showing you exactly how users are interacting with your app. LogRocket's product analytics features surface the reasons why users don't complete a particular flow or don't adopt a new feature.
Start proactively monitoring your Android apps — try LogRocket for free.
Install LogRocket via npm or script tag. LogRocket.init() must be called client-side, not
server-side
$ npm i --save logrocket

// Code:

import LogRocket from 'logrocket';
LogRocket.init('app/id');
// Add to your HTML:

<script src="https://cdn.lr-ingest.com/LogRocket.min.js"></script>
<script>window.LogRocket && window.LogRocket.init('app/id');</script>

@container scroll-state: Replace JS scroll listeners nowCSS @container scroll-state lets you build sticky headers, snapping carousels, and scroll indicators without JavaScript. Here’s how to replace scroll listeners with clean, declarative state queries.

Russ Miles, a software development expert and educator, joins the show to unpack why “developer productivity” platforms so often disappoint.

Discover what’s new in The Replay, LogRocket’s newsletter for dev and engineering leaders, in the February 18th issue.

Learn how to recreate Claude Skills–style workflows in GitHub Copilot using custom instruction files and smarter context management.
Hey there, want to help make our blog better?
Join LogRocket’s Content Advisory Board. You’ll help inform the type of content we create and get access to exclusive meetups, social accreditation, and swag.
Sign up now