If you’re a React Native developer, sooner or later you’ll need the ability to run an Android emulator on your Mac. Being able to test your apps on your local computer without installing the app on a physical device drastically speeds up your development cycle.

However, after feverishly searching for Google for “macOS android emulator,” you likely found there’s not much available.
As you probably know, Android Studio comes with a great management tool for managing your emulated devices. Unfortunately, as a React Native developer, you’re not using Android Studio.
Making matters worse, Android Studio comes with all the “correct” bits that make the underlying emulators work, like the correct version of Java. Trying to get the emulator to work without having these things configured correctly won’t work, and you’ll get cryptic error messages when it doesn’t.
It’s not easy or straightforward to configure the Android Emulator on macOS without Android Studio. Even the official documentation tells you to install Android Studio and be done with it.
But, Android Studio is a fully-fledged IDE and takes up a lot of space on your computer. Plus, it has a lot of features you will never use as a React Native developer and it requires a lot of effort to install Android Studio just to use the emulator.
Don’t get me wrong, it is easier and more straightforward than trying to manually configure an emulator like we’ll do in this article.
But, you should get the Android Emulator working without installing Android Studio separately, giving you the exact functionalities you need without Android Studio’s overkill.
If you’ve hit this article, then you’ve probably been trying for a little while to get this to work.
So, let’s discuss some of the problems we’ll encounter when running an emulator without Android Studio, how we’ll move past them, and how to create a React app on an Android emulator.

The Replay is a weekly newsletter for dev and engineering leaders.
Delivered once a week, it's your curated guide to the most important conversations around frontend dev, emerging AI tools, and the state of modern software.
The Android SDK Manager depends on Java 8. That might seem really old, but it’s actually a long-term support (LTS) version of Java and is a supported version of Java until 2030.
Of course, you may have other versions of Java on your computer.
It can quickly become your undoing if you install multiple versions of Java on your computer, breaking the apps that you already have on your computer that depend on a certain version of Java.
To mitigate this, we’ll install a Java Version Manager that lets us switch between versions of Java.
Another problem we’ll face is the lack of a GUI-accessible tool that helps us install the Android Emulator and associated bits. This means that we’ll end up completing most of our installation steps in the terminal on our Mac.
And finally, the emulator depends on a specific folder setup before it can start, and it won’t start if the folders aren’t set up in a certain way.
Fortunately, I’ve done the research so you don’t have to, and I’ve managed to get it set up, and we’ll review how we can get it sorted in this post.
First, install brew. It’s technically possible to install applications on a Mac without it, but it makes the process so easy, it’s hard to understand why you wouldn’t use it.
You can get the package manager here or you can run the following command at your terminal to set it up on your computer:
/bin/bash -c "$(curl -fsSL https://raw.githubusercontent.com/Homebrew/install/HEAD/install.sh)"
After the installation completes, it’s time to install jenv. jenv lets us maintain the versions of Java that we have already installed on our Mac. To do this, run brew install jenv.
After the command completes, we must tell our system where to look so it can use jenv, so we need to add it to our path. To do this, we must run the following command in our terminal:
$ echo 'export PATH="$HOME/.jenv/bin:$PATH"' >> ~/.zshrc
$ echo 'eval "$(jenv init -)"' >> ~/.zshrc
This adds the jenv executables to our path and runs the initialization script when we start our terminal. We can either reopen our terminal window or run source ~/.zshrc at the terminal to update the PATH variable for our session.
Now, it’s time to run jenv. Type jenv doctor at the terminal and observe the output.

As we can see, it doesn’t work just yet, but that’s expected. We haven’t set up our Java installations, so let’s go ahead and do that now.
We want to install JDK8 because that’s the version that works with our Android SDK Manager. Type the following into the terminal:
brew install AdoptOpenJDK/openjdk/adoptopenjdk8
After the installation completes, we want to see what JDK environments our Mac can access. Type the following into the command line to see:
/usr/libexec/java_home -V
The output should look something like this:

This list shows the Java versions we had on our Mac previously (if applicable), and the new OpenJDK8 we just installed. Now, we must add each Java JDK to jenv so it can manage the appropriate versions of Java for us.
We can do this by typing jenv add ~path to JDK~ and using the paths that we retrieved from the command above. In the case of this post, it looks like the following, but yours will be different:
jenv add /Library/Java/JavaVirtualMachines/zulu-11.jdk/Contents/Home
jenv add /Library/Java/JavaVirtualMachines/adoptopenjdk-8.jdk/Contents/Home
After this, we want to set our Java 8 to our system-wide Java version so we can continue configuring the Android Emulator on our machine. At the time of writing, that means running the following command:
jenv global openjdk64-1.8.0.292
Note that the number on the end could change because newer LTS versions of Java 8 are available.
With our Java environment set up, it’s time to configure the Android SDK. Close and reopen the terminal window to ensure our environment variables are set up. Then, run the following command to validate the sanity of our environment:
jenv doctor
This should give the following output:

We must also check our active Java version by typing java -version, which should give us the following output:

Now that we have the right version of Java, it’s time to install the Android SDK.
This is where a lot of outdated guides tell you to install the android-sdk *brew package. Do not do this, since *it’s deprecated upstream and might stop working at any time.
Instead, we want to install the supported and up-to-date package android-commandlinetools. We can do this by typing the following into our terminal and hitting enter:
brew install --cask android-commandlinetools
This adds the sdkmanager command to our PATH, which we can use to install the core emulator by typing sdkmanager emulator and pressing enter.
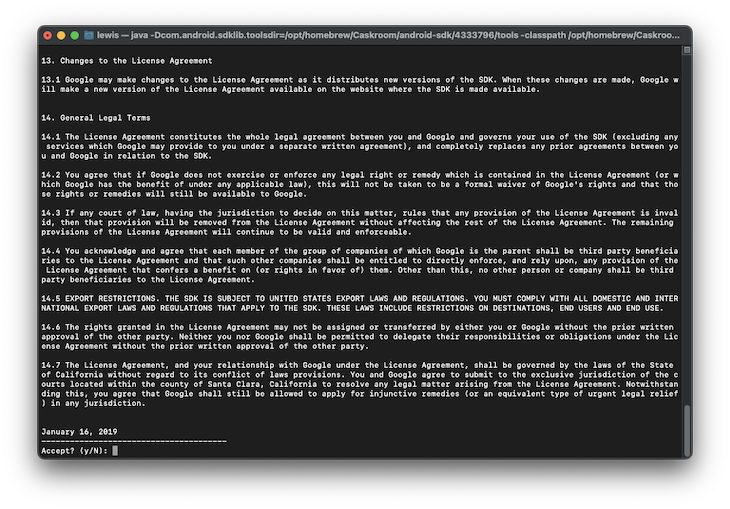
You’ll receive a page full of legalese, so once you and your lawyer have finished reviewing this (kidding), tap y to accept the appropriate licenses.

And now we need the actual emulator images themselves.
Again, we’ll get a full page of license agreements; tap y to continue. It depends on your Mac’s architecture to determine what emulator image is best, that is, choosing between the x86_64 image and the arm64-v8a image.
For M1 Macs, choose the following:
sdkmanager "system-images;android-30;google_apis_playstore;arm64-v8a" "platform-tools" "platforms;android-30"
For Intel Macs, choose the following:
sdkmanager "system-images;android-30;google_apis_playstore;x86_64" "platform-tools" "platforms;android-30"
Finally, we can create an Android Emulator based on the image we just downloaded by typing this command into the open terminal window. Again, in this case, using the M1 Mac, we use the arm64-v8a image, but on an Intel Mac, you will have a better result using the x86_64 image.
We need to ascertain where the emulator has been installed to. We can do this by typing the following command into the console:
sdkmanager emulator --verbose
This will yield the following output in the terminal
Info: Parsing legacy package: /usr/local/share/android-commandlinetools/cmdline-tools/homebrew
Info: Parsing /usr/local/share/android-commandlinetools/emulator/package.xml
Info: Parsing /usr/local/share/android-commandlinetools/patcher/v4/package.xml
Info: Parsing /usr/local/share/android-commandlinetools/platform-tools/package.xml
Info: Parsing /usr/local/share/android-commandlinetools/platforms/android-30/package.xml
Info: Parsing /usr/local/share/android-commandlinetools/system-images/android-30/google_apis_playstore/x86_64/package.xml
Info: Parsing /usr/local/share/android-commandlinetools/tools/package.xml
[=======================================] 100% Computing updates...
From the second line, we can see that the emulator is installed at /usr/local/share/android-commandlinetools/emulator/. Remember that path, because we’ll be using it later on in this guide.
Now, we can finally create our emulator by typing the following into the terminal:
# Set up the 'android_emulator', with device type 'pixel'
avdmanager create avd -n android_emulator -d pixel -k "system-images;android-30;google_apis_playstore;arm64-v8a" #Intel macs should get the x86_64 image instead!

# Enable the hardware keyboard for the emulators, so typing into the emulator via your keyboard works as expected
for f in ~/.android/avd/*.avd/config.ini; do echo 'hw.keyboard=yes' >> "$f"; done

# Add the 'emulator' binary to the system path, so we can call it from anywhere
# This is the path that we observed in the step prior; it may be different for your system!
echo 'export PATH=$PATH:/usr/local/share/android-commandlinetools/emulator/' >> ~/.zshrc

# Reload the environment variables
source ~/.zshrc
It’s critically important that your /opt/homebrew/share/android-commandlinetools/ contain the emulator, platforms, platform-tools, and system-images folders. Without them, the emulator binary fails to launch, and instead says the Android SDK configuration is corrupted.
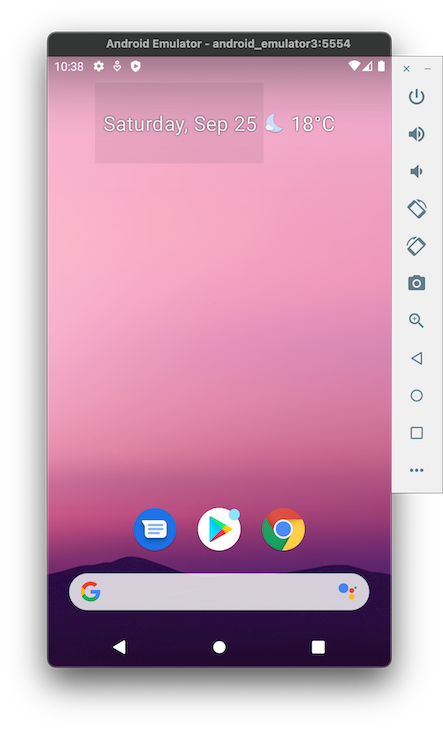
With this all set, we should be all set to run the following command and the Android emulator should start:
emulator @android_emulator

Now is a good time to add this command to a shell script and leave it on your desktop or somewhere accessible. That way, every time you want an emulator, just open that script and you’ll be good to go.
As per the documentation, you don’t actually have to install the React Native CLI. Instead, you can use npx, which you have on your system if you have Node installed, and run the following command:
npx react-native init AwesomeProject
This configures the correct version of React Native on your computer and gets you started with a sample project. From here, you can start the emulator at the terminal (if you followed this guide, that means typing emulator @android_emulator in your terminal) and deploy our sample app there.
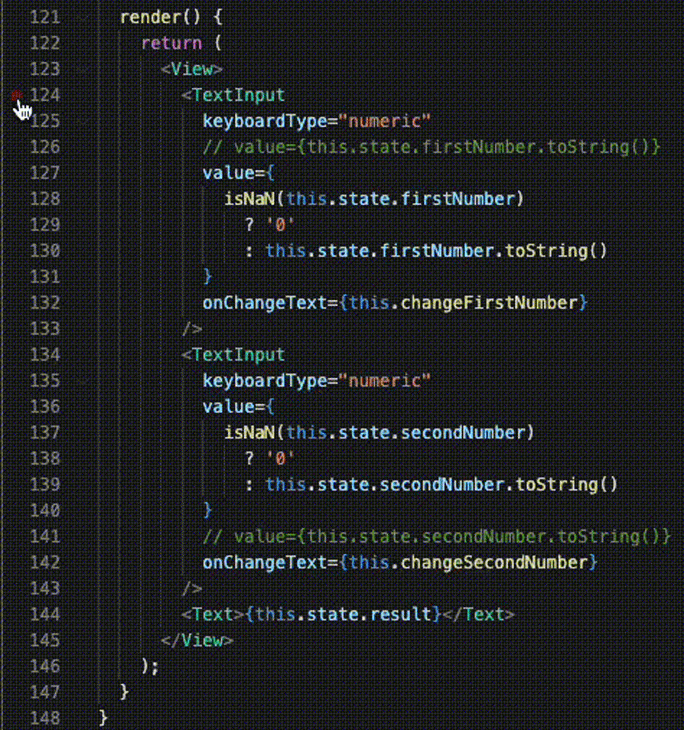
With our emulator running, we can run the React Native app on our device. It’s also a great time to set breakpoints in our code, so we can see what the variable values are set to and engage in other troubleshooting behavior.
This can change depending on what IDE you use, but normally, you should be able to click to the left of the line numbers and set an appropriate breakpoint for your app, like this:

With your emulator setup and your React Native app debuggable with breakpoints, you are good to go!
In this article, we configured the underlying components that we needed for our Android Emulator to work like the JDK and Android SDK. We also used jvm to configure our Java environment, so we could use the correct version of Java with the Android SDK, and we created a shortcut to launch our emulator.
In doing so, we avoided having to install Android Studio on our Mac. This is a good thing because as a React Native developer, you’ll never actually use Android Studio, so you can utilize that disk space for something you’d actually use.
All that’s left is to enjoy your freshly created Android Emulator! 📱👨💻

LogRocket's Galileo AI watches sessions for you and and surfaces the technical and usability issues holding back your React Native apps.
LogRocket also helps you increase conversion rates and product usage by showing you exactly how users are interacting with your app. LogRocket's product analytics features surface the reasons why users don't complete a particular flow or don't adopt a new feature.
Start proactively monitoring your React Native apps — try LogRocket for free.

React Server Components and the Next.js App Router enable streaming and smaller client bundles, but only when used correctly. This article explores six common mistakes that block streaming, bloat hydration, and create stale UI in production.

Gil Fink (SparXis CEO) joins PodRocket to break down today’s most common web rendering patterns: SSR, CSR, static rednering, and islands/resumability.

@container scroll-state: Replace JS scroll listeners nowCSS @container scroll-state lets you build sticky headers, snapping carousels, and scroll indicators without JavaScript. Here’s how to replace scroll listeners with clean, declarative state queries.

Explore 10 Web APIs that replace common JavaScript libraries and reduce npm dependencies, bundle size, and performance overhead.
Hey there, want to help make our blog better?
Join LogRocket’s Content Advisory Board. You’ll help inform the type of content we create and get access to exclusive meetups, social accreditation, and swag.
Sign up now
5 Replies to "Run React Native apps on an Android emulator for macOS"
Hi all, i have such error, after all steps
emulator @android_emulator
INFO | Android emulator version 30.9.4.0 (build_id 7759208) (CL:N/A)
PANIC: Cannot find AVD system path. Please define ANDROID_SDK_ROOT
I think the tutorial doesn’t contain the part to download the sdk itself, i’m getting the same error
sdkmanager “platform-tools” “platforms;android-30”
This needs to be fired beside the comment from the articles in order to download some sdk
Hey everyone, after I posted this article, it seems like there’s been some updates to how brew works, and how it installs the packages. The main issue is that the emulator is now installed to a completely different location and this isn’t documented anywhere (from what I can see).
From running the following command:
`sdkmanager emulator –verbose`
It gave me the new correct path to the emulator, which is `/usr/local/share/android-commandlinetools/emulator/`. After updating my .zshrc with that path, and including “platform-tools” and “platforms;android-30” in the sdkmanager call like Ede said to do, it comes up just fine.
The article will be updated with this new content 😀
Great article thanks very much
I am facing one issue after running emulator @android_emulator
INFO | Android emulator version 31.2.10.0 (build_id 8420304) (CL:N/A)
PANIC: Broken AVD system path. Check your ANDROID_SDK_ROOT value [/Users/username/Library/Android/sdk]!