use() API is about to make useContext obsoleteThe Replay is a weekly newsletter for dev and engineering leaders.
Delivered once a week, it's your curated guide to the most important conversations around frontend dev, emerging AI tools, and the state of modern software.
For years, React developers have turned to useContext to share global state without passing props through multiple components. That approach works, but the upcoming use() API introduces new capabilities that go well beyond reading context values.

With use(), you can do everything useContext does and more. That includes seamlessly working with async data like API calls and promises, right inside your components. This means fewer workarounds, cleaner code, and a whole new way to think about state and data fetching in React.
By the end of this article, you’ll have a clear understanding of how the use() API can improve your state management and data-fetching strategies in modern React.
To follow along, you will need the following:
Let’s set up a React project with Vite.
Open your terminal and run:
npm create vite@latest my-project
Next, run:
cd my-project
Then, navigate into your project directory and start the development server with:
npm run dev
We will use Tailwind CSS for styling.
useBefore the release of React’s new use() API, to fetch data from an API endpoint, you needed to import 3 React hooks like so:
 const [data, setData] = useState(null);
 const [loading, setLoading] = useState(true);
 const [error, setError] = useState(null);
This approach is verbose. You had to manage three state variables (data, loading, error) and use useEffect to trigger the fetch as shown below:
import React, { useState, useEffect } from 'react';

function DataFetcher() {
  const [data, setData] = useState(null);
  const [loading, setLoading] = useState(true);
  const [error, setError] = useState(null);

  useEffect(() => {
    const fetchData = async () => {
      try {
        const response = await fetch('https://api.example.com/data');
        if (!response.ok) {
          throw new Error('Failed to fetch data');
        }
        const result = await response.json();
        setData(result);
      } catch (e) {
        setError(e);
      } finally {
        setLoading(false);
      }
    };
    fetchData();
  }, []);

  if (loading) {
    return <div>Loading...</div>;
  }

  if (error) {
    return <div>Error: {error.message}</div>;
  }

  return (
    <div>
      {/* Render your data */}
    </div>
  );
}
This component fetches data from an API using useEffect and manages states with useState. It initializes three pieces of state: data to hold the fetched result, loading to track the loading state, and error to handle any issues during the fetch. When the component mounts, it triggers an asynchronous function to fetch data from a specified API endpoint. If the fetch is successful, the result is stored in data; if an error occurs, it’s caught and stored in error.
useNow let’s get into the next case. With use, you don’t need to manually manage the three state setter functions and trigger the fetch with useEffect.
use() lets you read a Promise’s value directly in a component, removing the need for useEffect and useState to manage loading or errors. Unlike regular Hooks, it can run inside loops and conditionals, but must still be called from a Component or Hook.
Together with Suspense, it creates a smooth loading experience with minimal setup. The syntax is like so:
const value = use(resource);
Why don’t we take a look at the power of use in action?
Setting Up An API Call
In the src folder, create api.js file and paste in the code below:
let usersPromise;

async function fetchUsers() {
  const response = await fetch('<https://jsonplaceholder.typicode.com/users>');
  if (!response.ok) {
    throw new Error('Failed to fetch users');
  }
  return response.json();
}

export function getUsersPromise() {
  if (!usersPromise) {
    usersPromise = fetchUsers();
  }
  return usersPromise;
}
In the API call above, we used getUsersPromise function to memoize the promise from the async function. This ensures that the data is fetched only once, even if the component rerenders. Let’s unwrap the promise with use.
Create a userList.jsx file and add the following imports:
import React, { use } from 'react';
import { getUsersPromise } from './api';
We import use from React and also import getUsersPromise from the api file we created earlier.
Next, paste the following:
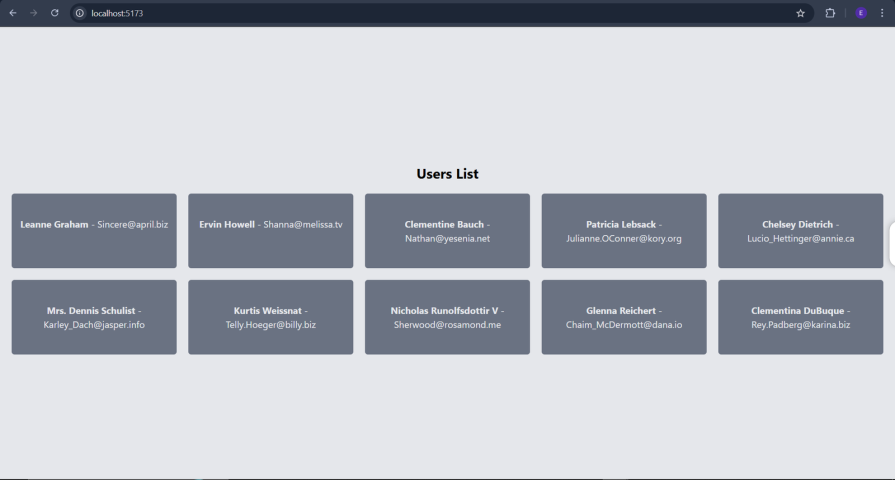
function UserList() {
  const users = use(getUsersPromise());
  return (
    <div>
      <h1 className='text-center py-5 text-2xl font-bold'>Users List</h1>
      <ul className='grid grid-cols-5 gap-5'>
        {users.map((user) => (
          <li key={user.id} className=' bg-gray-500 py-10 text-center rounded-[5px]  text-gray-200'>
            <strong>{user.name}</strong> - {user.email}
          </li>
        ))}
      </ul>
    </div>
  );
}

export default UserList;
We passed in getUsersPromise that we imported into use. This unwraps the resolved value of getUsersPromise and assigns it to the users variable
We then mapped over the users variable, displaying the response.
Did you notice the absence of useState and useEffect hooks?
Thanks to use, we can handle fetching, rendering, including loading and error handling, declaratively.
We will later implement Suspense, and ErrorBoundary to create a smooth user experience
The use API relies on Suspense and ErrorBoundary to manage different states. Since React does not have a built in ErrorBoundary component, we need to create one.
If you are feeling a bit lazy, you can use some React packages like reat-error-boundary for this. If not, get into your text editor and create ErrorBoundary.jsx file.
Thereafter, paste the following:
import React from "react";

class ErrorBoundary extends React.Component {
  constructor(props) {
    super(props);
    this.state = { hasError: false, error: null };
  }

  static getDerivedStateFromError(error) {
    return { hasError: true, error: error };
  }

  componentDidCatch(error, errorInfo) {
    console.error("Uncaught error:", error, errorInfo);
  }

  render() {
    if (this.state.hasError) {
      return (
        <div className="p-10 text-center text-red-700 font-bold border-2 border-solid border-red-800">
          <h2>Something went wrong.</h2>
          <p>{this.state.error && this.state.error.message}</p>
        </div>
      );
    }

    return this.props.children;
  }
}

export default ErrorBoundary;
The Errorboundary Component catches errors anywhere in its child component tree.
It uses 2 lifecycle methods:
static getDerivedStateFromError(error)componentDidCatch(error, errorInfo)The first lifecycle method is called after an error is thrown. The second is called after the state has been updated.
Change the content of App.jsx file to this:
import React, { Suspense } from "react";
import UserList from "./UserList";
import ErrorBoundary from "./ErrorBoundary";

const FallbackLoader = () => (
  <div className="p-10 text-center font-bold">Loading users...</div>
);

function App() {
  return (
    <div className="App bg bg-gray-200 h-screen w-screen flex flex-col items-center justify-center px-5">
      <main>
        <ErrorBoundary>
          <Suspense fallback={<FallbackLoader />}>
            <UserList />
          </Suspense>
        </ErrorBoundary>
      </main>
    </div>
  );
}
export default App;
The FallbackLoader component provides a fallback ui for our loading state.
In the App component, we wrapped <UserList /> with suspense, passing in our fallback ui, <FallbackLoader /> as a fallback. We finally wrapped Suspense with ErrorBoundary to help us display errors.
Now, run npm run dev and see the app running.
It will be nice to give our app dark mode capability. Let’s do exactly that.
To demonstrate how the use API beats useContext hook, let’s implement dark mode functionality in our app.
Before use, if you needed to implement dark mode, you’d most likely rely on the useContext hook.
You will do something like this:
export const ThemeProvider = ({ children }) => {
  const [theme, setTheme] = useState('light');
  const toggleTheme = () => setTheme(theme === 'light' ? 'dark' : 'light');

  return (
    <ThemeContext.Provider value={{ theme, toggleTheme }}>
      {children}
    </ThemeContext.Provider>
  );
};
Where the ThemeContext and ThemeProvider manage the theme state.
Then, a component imports the useContext hook and the ThemeContext object to access the theme state.
const ThemeToggle = () => {
  const { theme, toggleTheme } = useContext(ThemeContext);

  return (
    <button onClick={toggleTheme}>
      Switch to {theme === 'light' ? 'Dark' : 'Light'} Mode
    </button>
  );
};
The use API provides a more elegant syntax for consuming context. Let’s get into implementing dark theme with use
useCreate a ThemeContext.jsx file and paste the following code:
import React, { createContext, useState, useEffect } from "react";
const ThemeContext = createContext(null);

export const ThemeProvider = ({ children }) => {
  const [theme, setTheme] = useState(() => {
    const savedTheme = localStorage.getItem("theme");
    return savedTheme || "light";
  });

  useEffect(() => {
    document.body.setAttribute("data-theme", theme);

    localStorage.setItem("theme", theme);
  }, [theme]);
  const toggleTheme = () => {
    setTheme((prevTheme) => (prevTheme === "light" ? "dark" : "light"));
  };
  const themeValue = {
    theme,
    toggleTheme,
  };

  return (
    <ThemeContext.Provider value={themeValue}>{children}</ThemeContext.Provider>
  );
};
export default ThemeContext;
In the above code, we created a new context object from the context import we made from React. Next, we returned an object with a provider and a consumer property. Then, we finally exported the ThemeContext object to be used in our app.
Now, modify UserList.jsx like so:
import ThemeContext from './contexts/ThemeContext';
Pass the ThemeContext we imported above to the use API, like so:
const { theme } = use(ThemeContext);
The updated file now looks like this:
import React, { use } from 'react';
import { getUsersPromise } from './api';
import ThemeContext from './contexts/ThemeContext';

function UserList() {
  const { theme } = use(ThemeContext);
  const users = use(getUsersPromise());

  return (
    <div>
      <h1 className='text-center py-5 text-2xl font-bold text-gray-900 dark:text-gray-100 transition-colors duration-300'>
        Users List
      </h1>
      <ul className='grid grid-cols-1 sm:grid-cols-2 md:grid-cols-3 lg:grid-cols-4 xl:grid-cols-5 gap-5'>
        {users.map((user) => (
          <li
            key={user.id}
            className='py-10 text-center rounded-[5px] shadow-md
                       bg-gray-500 text-gray-200
                       dark:bg-gray-700 dark:text-gray-100
                       transition-colors duration-300 ease-in-out'
          >
            <strong>{user.name}</strong> - {user.email}
          </li>
        ))}
      </ul>
    </div>
  );
}

export default UserList;
Add the following imports to App.jsx:
import React, { Suspense, use } from "react";
import { ThemeProvider } from "./contexts/ThemeContext";
import ThemeContext from "./contexts/ThemeContext";
Then create the Themetoggle function that contains the button for switching between light and dark modes:
const ThemeToggle = () => {
  const { theme, toggleTheme } = use(ThemeContext);

  return (
    <button
      onClick={toggleTheme}
      className="absolute top-5 right-5 p-3 rounded-full bg-gray-300 dark:bg-gray-700 text-gray-800 dark:text-gray-200 shadow-md hover:scale-105 transition-transform duration-200 ease-in-out focus:outline-none focus:ring-2 focus:ring-blue-500"
      aria-label={theme === 'light' ? 'Switch to dark mode' : 'Switch to light mode'}
    >
      {theme === 'light' ? '🌞' : '🌙'}
    </button>
  );
};
Next, we wrapped the application with the ThemeProvider to make the theme context available within our app.
Our App.jsx now looks like this:
import React, { Suspense, use } from "react";
import UserList from "./UserList";
import ErrorBoundary from "./ErrorBoundary";
import { ThemeProvider } from "./contexts/ThemeContext";
import ThemeContext from "./ThemeContext";

const FallbackLoader = () => (
  <div className="p-10 text-center font-bold text-gray-700 dark:text-gray-300">
    Loading users...
  </div>
);

const ThemeToggle = () => {
  const { theme, toggleTheme } = use(ThemeContext);

  return (
    <button
      onClick={toggleTheme}
      className="absolute top-5 right-5 p-3 rounded-full bg-gray-300 dark:bg-gray-700 text-gray-800 dark:text-gray-200 shadow-md hover:scale-105 transition-transform duration-200 ease-in-out focus:outline-none focus:ring-2 focus:ring-blue-500"
      aria-label={theme === 'light' ? 'Switch to dark mode' : 'Switch to light mode'}
    >
      {theme === 'light' ? '🌞' : '🌙'}
    </button>
  );
};

function App() {
  return (

    <ThemeProvider>
      <div className="App h-screen w-screen flex flex-col items-center justify-center px-5 relative">
        <ThemeToggle />

        <main className="w-full max-w-4xl p-5 rounded-lg shadow-xl bg-white dark:bg-gray-800 transition-colors duration-300">
          <ErrorBoundary>
            <Suspense fallback={<FallbackLoader />}>
              <UserList />
            </Suspense>
          </ErrorBoundary>
        </main>
      </div>
    </ThemeProvider>
  );
}

export default App;
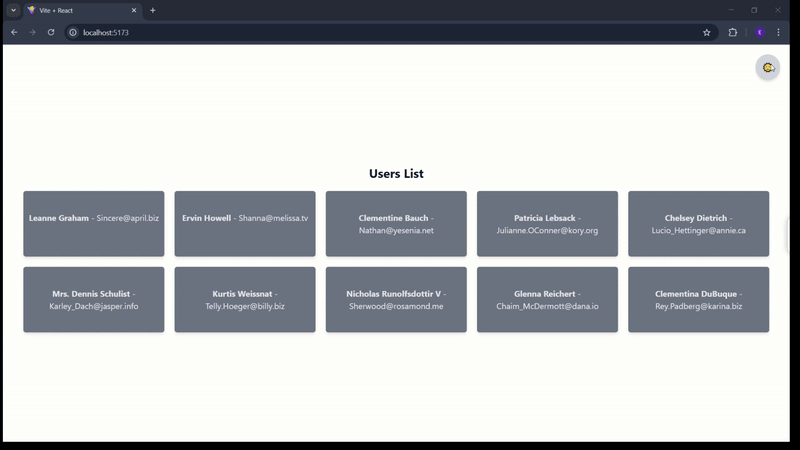
If you stopped the server, rerun it with npm run dev and you should have the following:
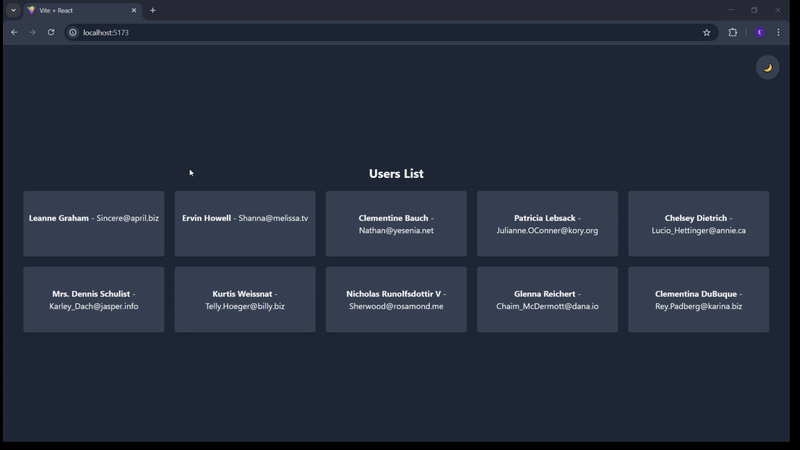
As you may have noticed, the toggle button is not yet functional.
Let’s fix it.
Go into the index.css file and add the following Tailwind CSS custom variant:
@custom-variant dark (&:where([data-theme=dark], [data-theme=dark] *));
Now, it works!
useUse has potential, but it still has some limitations:
use must be memoized, else use goes into an infinite loop.To demonstrate this, get into the api.js file and edit the getUsersPromise function to return output from the fetchUsers async function directly.
It should now look like this:
export function getUsersPromise() {
  return fetchUsers();
}
Try running it, and you will see this:
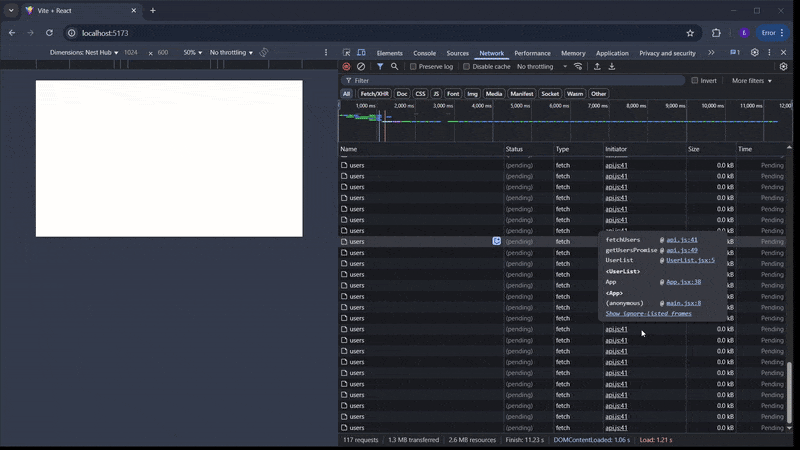
See the number of network requests?
That’s because the UserList component entered an infinite loop of rerendering because every rerender that happens when the promise resolves causes use(getUsersPromise()) to be called again. This creates a new promise, which then causes the component to suspend again.
While it is possible that use can be used without Suspense and Error Boundaries, it is recommended to use it with Suspense and Error Boundaries. They provide a user-friendly experience when handling asynchronous data and potential errors.
TL;DR: The use() API is a major step forward for React, replacing many useContext use cases—especially in server‑first apps—with a more versatile, async‑friendly approach.
In this tutorial, you saw use() in action: unwrapping promises, working seamlessly with Suspense and error boundaries, and powering a theme toggle without the boilerplate of traditional hooks.
With use(), state management and data fetching become cleaner, faster, and more intuitive—so you can ship modern React apps with less friction and more control.
This post walks through a complete six-step image optimization strategy for React apps, demonstrating how the right combination of compression, CDN delivery, modern formats, and caching can slash LCP from 8.8 seconds to just 1.22 seconds.

Learn what vinext is, how Cloudflare rebuilt Next.js on Vite, and whether this experimental framework is worth watching.

Memory leaks in React don’t crash your app instantly, they quietly slow it down. Learn how to spot them, what causes them, and how to fix them before they impact performance.

Build agent-ready websites with Google Web MCP. Learn how to expose reliable site actions for AI agents with HTML and JavaScript.
Hey there, want to help make our blog better?
Join LogRocket’s Content Advisory Board. You’ll help inform the type of content we create and get access to exclusive meetups, social accreditation, and swag.
Sign up now

