Editor’s note: This post was last updated on 30 December 2021 to include information about React Router v6.

In May of 2019, Ryan Florence, co-creator of React Router and Reach Router, announced the impending release of a new version of React Router that takes advantage of React’s Hooks API. He also stated that React Router would be the surviving project, while Reach Router will continue to receive support in the form of bug fixes.
Fast-forward to September 2019, and React Router v5.1 was eventually released; this version is an introduction to the new Hooks-based API and comes with some amazing features. The new Hooks also make routing easier.
In this article, I’ll talk about the newest features in React Router, compare Reach Router and React Router to the new Hooks-based API, and briefly discuss how to migrate to this API. Let’s get started!
useHistory HookuseNavigate HookuseLocation HookuseParams HookuseRouteMatch HookLink and NavLink componentsuseHistory HookThe useHistory Hook gives you access to the history instance from the history package, one of React Router’s major dependencies. The history object allows for programmatic navigation between routes in your React apps.
To access the history object in React Router v4, you had to use the history prop. Let’s say we wanted to programmatically navigate to a route called home using a button. With React Router v4, our code would look similar to the following:
function HomeButton({history}) {
  function handleClick() {
    history.push("/home");
  }
  return (
    <button type="button" onClick={handleClick}>
      Go home
    </button>
  );
}
However, with the introduction of the useHistory Hook, we can easily access the history object and use it as follows:
import { useHistory } from "react-router-dom";

function HomeButton() {
  const history = useHistory();
  function handleClick() {
    history.push("/home");
  }
  return (
    <button type="button" onClick={handleClick}>
      Go home
    </button>
  );
}
If the user clicks on the button, the home entry will be pushed onto the history stack, rendering the homepage.
useNavigate HookAlternately, you can use the useNavigate Hook. Like useHistory, the useNavigate Hook allows the developer to navigate through the app via code. Check out the simple example below:
import { useNavigate } from "react-router";

function About() {
  //create an instance of useNavigate
  //this allows us to access this hook's functions
  let navigate = useNavigate();
  function goToPhonePage() {
    //when executed, direct the user to the /phone page.
    navigate("/phone");
  }
  return (
    <div>
      <p> At about page</p>
      {/*When clicked, run the goToPhonePage method */}
      <button onClick={goToPhonePage}> Check out our new phone</button>
    </div>
  );
}
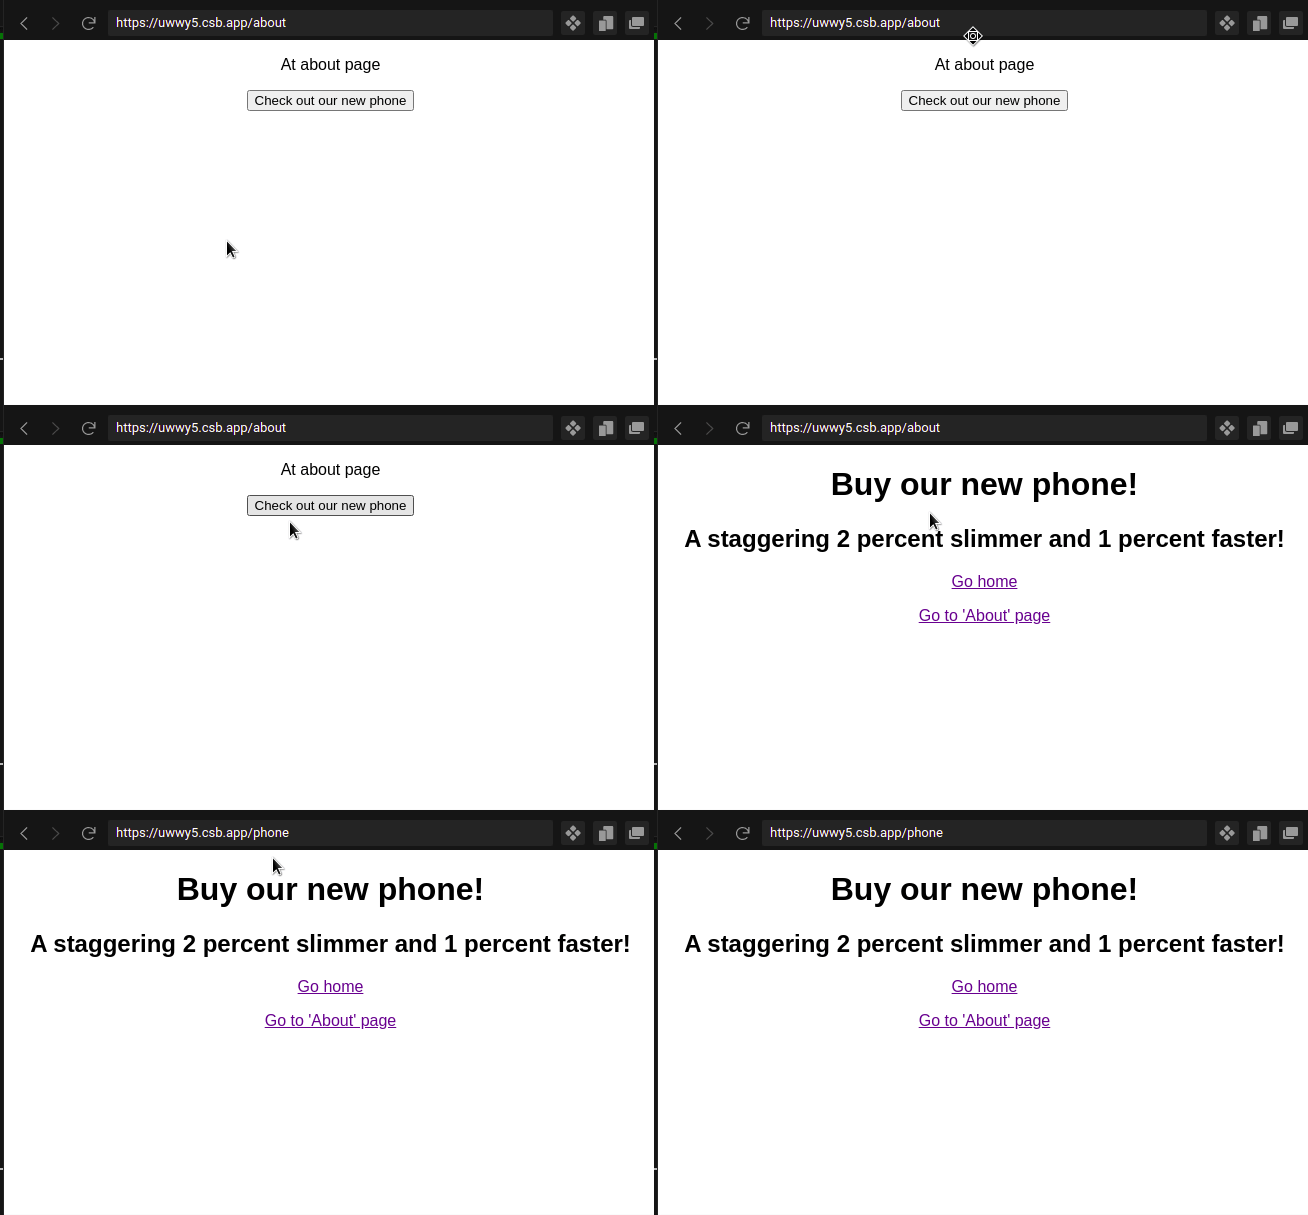
The output of the code above looks like the following:

useLocation HookThe useLocation Hook returns the location object, which represents the current URL. The location object can also be used to access data sent from another route using the location object’s state property.
To gain access to the location object in React Router v4 and Reach Router, you had to use props or a Location component, respectively. The code snippet below demonstrates how you would access the location object with React Router v4:
function RandomRoute({ location }) {
  return <h1>Current pathname: {location.pathname}</h1>;
}
The code snippet below demonstrates how you would access the location object in Reach Router:
function RandomRoute() {
  return (
    <Location>
      {({ location }) => <h1>Current pathname: {location.pathname}</h1>}
    </Location>
  );
}
With the new useLocation Hook, you can access the location object more conveniently:
function RandomRoute() {
  const location = useLocation();
  return <h1>Current pathname: {location.pathname}</h1>;
}
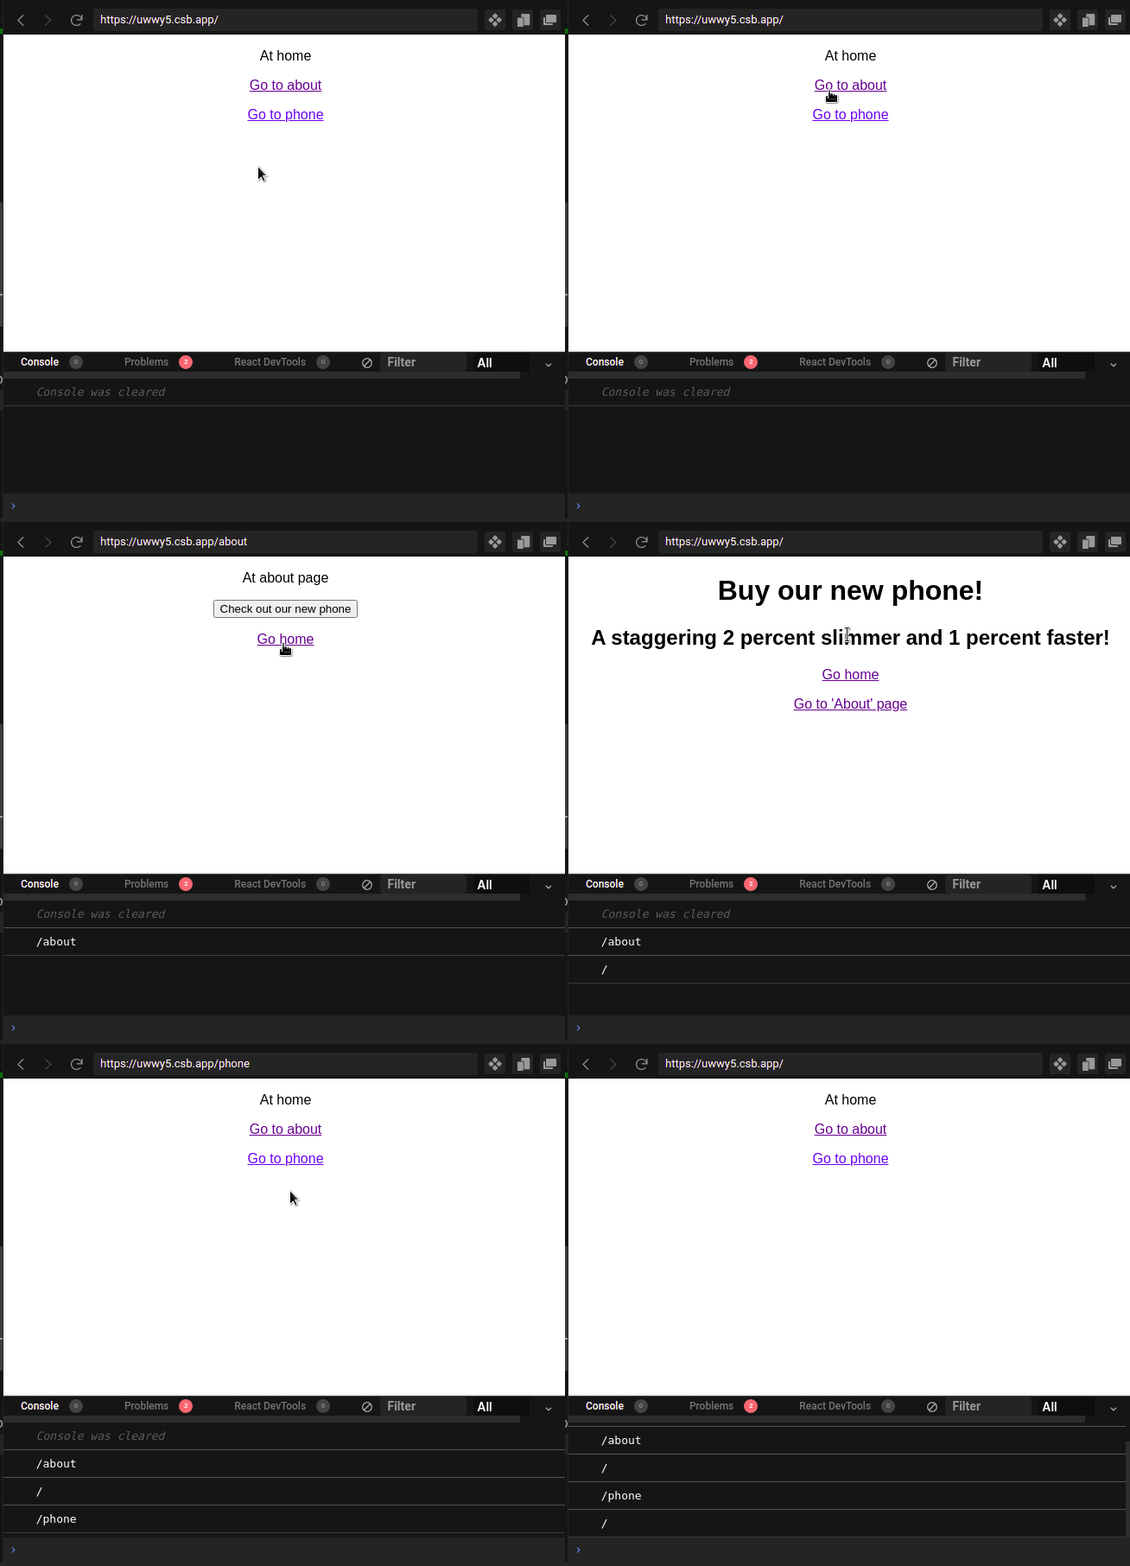
One critical use case for useLocation would be to help developers during the debugging process. The snippet below logs out the user’s current page each time they click on a link:
import { useLocation } from "react-router-dom";

export default function App() {
  const location = useLocation();
  useEffect(() => {
    console.log(location.pathname);
  }, []);
  //location is dependency, this means that this useEffect will run
  //everytime the value of 'location' changes
  return (
    <Switch>
      <Route exact path="/">
        <Home />
      </Route>
      <Route path="/about">
        <About />
      </Route>
      <Route path="/phone">
        <Phone />
      </Route>
    </Switch>
  );
}
In the code above, we first created a variable called location, which will be an instance of the useLocation Hook. This gives us access to the pathname object, which contains the user’s current location. We have also used the useEffect function to log out the user’s current path:

useParams HookReact Router v5.1 also gives us the new useParams Hook, which returns an object of key-value pairs of URL parameters. URL parameters, commonly used among React Router and Reach Router users, allow us to conveniently pass information about a click event through a URL.
In Reach Router and earlier versions of React Router, the only way to access URL parameters was through props and, in the case of Reach Router, the Match component. With React Router v4, our code would look like the following:
import {
  BrowserRouter as Router,
  Switch,
  Route,
  Link
} from "react-router-dom";
function App() {
  return (
    <Router>
      <header>
        <nav>
          <Link to="/">Home</Link>
          <Link to = "/page/2">Page 2</Link>
        </nav>
      </header>
      <Switch>
        <Route path = "/page/:pageNumber" component = {Page}>
        <Route path="/" render={() => <h1>Home</h1>} />
      </Switch>
    </Router>
  );
}
function Page({match}) {
  const {pageNumber} = match.params;
  return <h1>Page Number:{pageNumber}</h1>;
}
In the case of Reach Router:
import { Router, Link } from "@reach/router";
function App() {
  return (
    <>
      <header>
        <nav>
          <Link to="/">Home</Link>
          <Link to="/page/2">Page 2</Link>
        </nav>
      </header>
      <Router>
        <Home path="/" />
        <Page path="/page/:pageNumber" />
      </Router>
    </>
  );
}
const Home = () => <h1>Home</h1>;
function Page(props) {
  return <h1>Page Number:{props.pageNumber}</h1>;
}
Although the methods above work fine for most use cases, if you’re trying to pass URL parameters down to child components, you would have to pass them as props, making your code messy. You can use the Context API to alleviate this problem, however, doing so could introduce unnecessary complexity in your code.
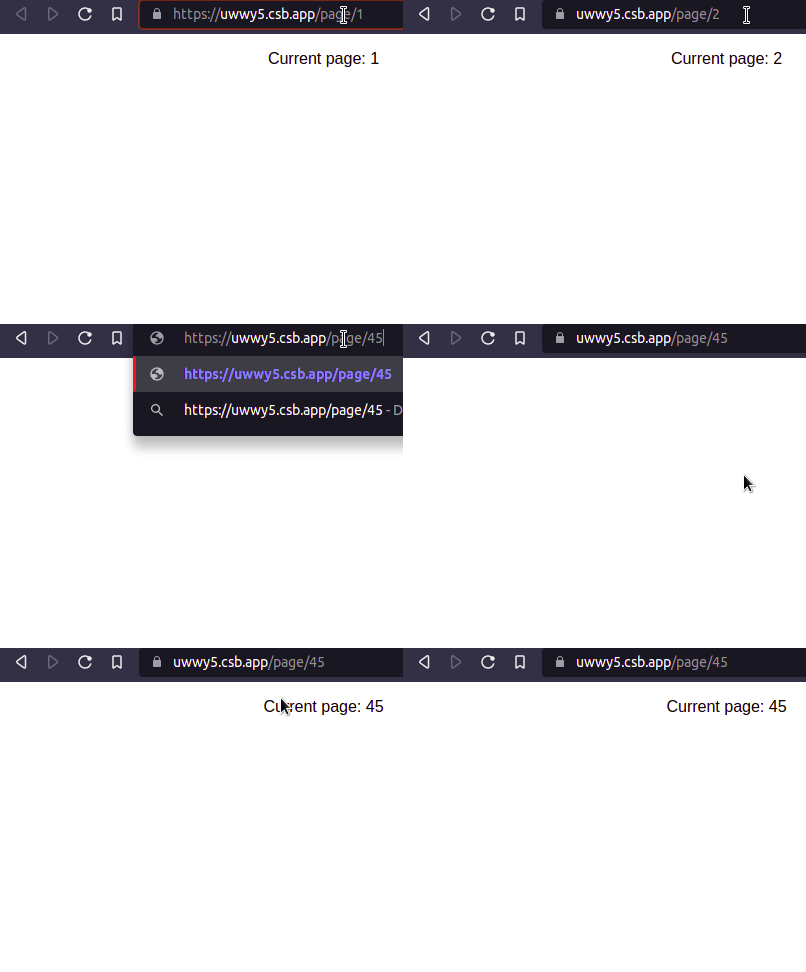
With the new Hooks API, you can easily call the useParams Hook in any child component to get the URL parameters. If we were to rewrite our code to use Hooks, it would look something like this:
import { useParams } from "react-router-dom";

export default function App() {
  return (
    <Router>
      <div>
        <Switch>
          <Route path="/page/:pageNumber" children={<Page />} />
        </Switch>
      </div>
    </Router>
  );
}

function Page() {
//extract the pageNumber parameter.
  const { pageNumber } = useParams();
  return (
    <div>
      <p> Current page: {pageNumber}</p>
    </div>
  );
}

useRouteMatch HookLastly, we have the useRouteMatch Hook. In Reach Router, to access the match object of a Route, you’d have to use the Match component. If you were using an earlier version of React Router, you’d have to use the route’s props or render props. With the useRouteMatch Hook, it’s easier and more convenient to access the match object.
The useRouteMatch Hook takes in a path as an argument and returns a corresponding match object. When there is no argument passed, the Hook returns a match object based on the closest matching <Route> in the tree.
The former way of accessing a match object in React Router is below:
//option 1
function ARoute() {
  return (
    <Route
      path="/randomroute/:randomrouteid"
      render={({ match }) => {
        return (
          ...
        );
      }}
    />
  );
}

//option 2
function ARoute(props){
  const match = props.match;
  return (
    ...
  );
}
To get the match object in Reach Router, we’d have to use the provided Match component:
function AnotherRandomRoute(){
    return(
        <Match path = "/randomroute/:randomrouteid">
            {
                ({match}) => ...
            }
        </Match>
    );
}
The code blocks above work fine, but we can make our code shorter and cleaner with the useRouteMatch Hook:
function AnotherRandomRoute(){
    const match = useRouteMatch("/randomroute/:randomrouteid");
    return(
        ...
    );
}
With useRouteMatch, you can also implement nested routing using the url and path properties of the match object. Here’s an example of how you might handle nested routing in React Router with the useRouteMatch Hook:
function Topics() {
  const { path, url } = useRouteMatch();
  return (
    <div>
      <div>
        <Link to={`${url}/1`}>Topic 1</Link>
        <Link to={`${url}/2`}>Topic 2</Link>
        <Switch>
          <Route exact path={path} render={() => <h1>Select a topic</h1>} />
          <Route path={`${path}/:topic`}>
            <Topic />
          </Route>
        </Switch>
      </div>
    </div>
  );
}
function Topic() {
  const { topic } = useParams();
  return (
    <div>
      <h1>Topic: {topic}</h1>
    </div>
  );
}
useRouteMatchis also helpful any time you would use a Route component outside of aSwitchcomponent.
Link and NavLink componentsReact Router v5.1 also added some updates to the Link and NavLink components, one of which is the ability to pass in functions to these components’ to props. The current location is passed as an argument to the function, and this function must return a location representation in the form of an object or a string.
At the time of updating this article, the React Router team has released v6, which includes the following features:
The current size of the new package is roughly 6kB. According to a tweet by Michael Jackson, the co-creator of React Router, they were able to achieve this by dropping support for any features earlier than IE11. This included dropping support for React <16.8, using Google Closure Compiler, and using updated code. With a smaller bundle size, your app has a smaller memory footprint and is faster than before.
<Route> ranking with the new <Routes> API<Routes> will replace <Switch>, meaning that developers no longer need to painstakingly assign the exact prop to all of their routes.
Building complex routing systems now requires less boilerplate code to get started, thus allowing for a smaller codebase, much like React Router v3 and Reach Router.
navigate API, leading to a more optimized, responsive web appuseRoutes and matchRoutes for using the object-based routing APIuseNavigate, which returns a function for programmatic routing and navigationFurthermore, with more new Hooks on the horizon, React Router promises ease of use and minimal amounts of bloat. For more information on what’s new in this release, check out the docs.
If you are planning to migrate from Reach Router, it’s easier to migrate to React Router v6 because they look similar at the surface level. You can easily migrate by following these steps:
Install React Router v6:
npm install react-router-dom@6
Replace <Location> and <Match> with the useLocation and useMatch Hooks:
const {useMatch, location} from "react-router-dom";
const match = useMatch(); //identical to useRouteMatch
const location = useLocation(); //same as to that of version 5
Use useParams to access URL parameters:
import {useParams} from "react-router-dom";
//usage is similar to that of v5:
const {pageNumber}  = useParams();
console.log(pageNumber):
Put a <BrowserRouter> on top:
//file: index.js
import {BrowserRouter} from "react-router-dom";
ReactDOM.render(
  <BrowserRouter>
    <App />
  </BrowserRouter>,
  document.getElementById("root")
);
Replace <Router> with <Routes> , then define your routes using <Route>:
import {Routes} from "react-router-dom";
<Route path="/" element={<Home />} />
<Route path="about" element={<About />} />
Here is a basic example using React Router v6:
import { Routes, Route } from "react-router-dom";

export default function App() {
  return (
    <div className="App">
      <Routes>
        {/*when user goes to /, render Home */}
        <Route path="/" element={<Home />} />
        {/*when user goes to /about, render About */}
        <Route path="about" element={<About />} />
      </Routes>
    </div>
  );
}
function Home() {
  return (
    <div>
      <p>At home </p>
    </div>
  );
}
function About() {
  return <div> About</div>;
}
As you can see, the amount of boilerplate has significantly decreased, allowing for less complex and more readable code.
So far, React Router v6 is very promising. The new features and Hooks will definitely encourage cleaner code, and I think it was a great decision on the part of the React Router team to move towards building a Hooks-based API. I hope you enjoyed this article!
Install LogRocket via npm or script tag. LogRocket.init() must be called client-side, not
server-side
$ npm i --save logrocket

// Code:

import LogRocket from 'logrocket';
LogRocket.init('app/id');
// Add to your HTML:

<script src="https://cdn.lr-ingest.com/LogRocket.min.js"></script>
<script>window.LogRocket && window.LogRocket.init('app/id');</script>
Hey there, want to help make our blog better?
Join LogRocket’s Content Advisory Board. You’ll help inform the type of content we create and get access to exclusive meetups, social accreditation, and swag.
Sign up now
Not sure if low-code is right for your next project? This guide breaks down when to use it, when to avoid it, and how to make the right call.

Compare Firebase Studio, Lovable, and Replit for AI-powered app building. Find the best tool for your project needs.

Discover how to use Gemini CLI, Google’s new open-source AI agent that brings Gemini directly to your terminal.

This article explores several proven patterns for writing safer, cleaner, and more readable code in React and TypeScript.